![]()
![]()

STAs, use the HTML editor in the body of your Cascade site editing page to create advanced features, such as displaying information within a table.
This exercise is designed to prepare you teach a client how to make 3 different kinds of tables or grids, for specific information to display on a Cascade page. Make a table displaying information or content, relative to the theme of your own site.
Have fun with the table you design for your Cascade test site! Please create a new page where you will insert your practice tables. Do not place it on your homepage!
All tables must have at least 3 columns and 2 rows minimum! Make sure to give each table a title as well.
Accessing the HTML Editor:
To create a table in Cascade you have to use the HTML Editor rather than the wysiwyg editor. To access this, click on the <> in the content editor.
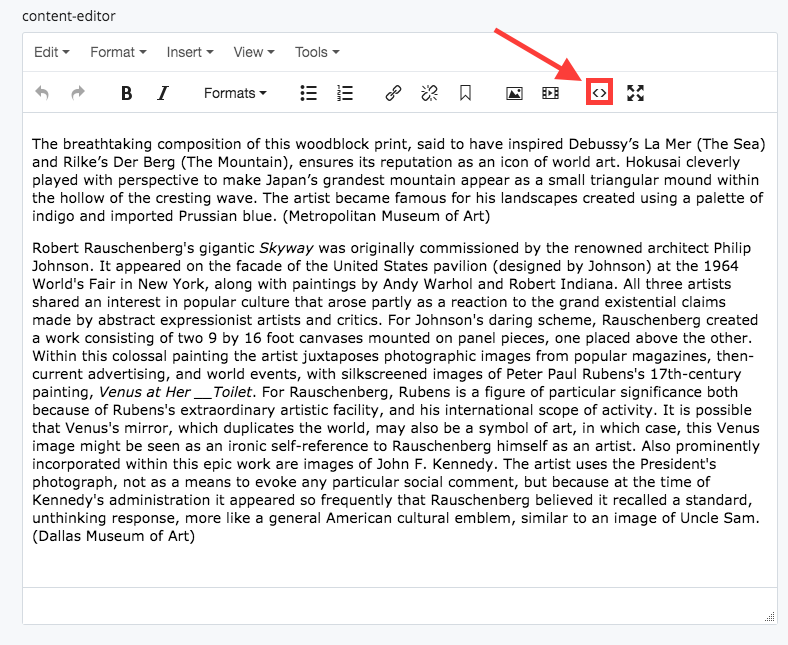
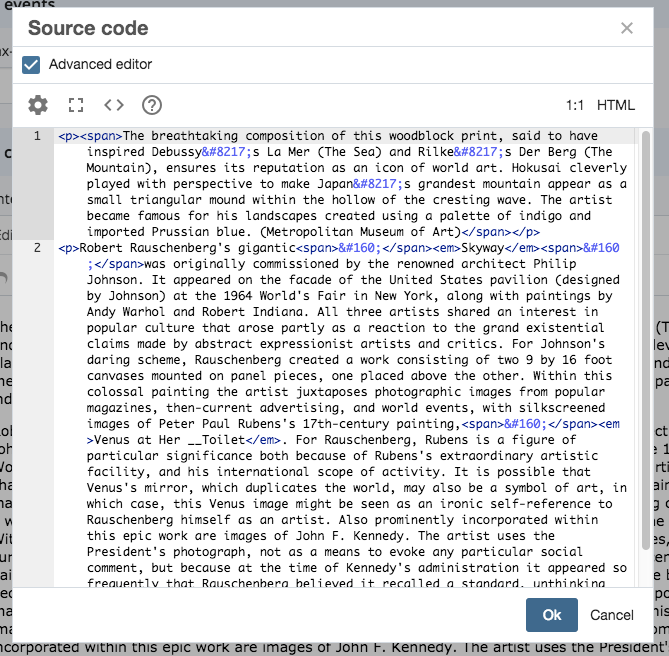
Once you click on this, the source code editor will pop up. This is where you will enter in all of your code.
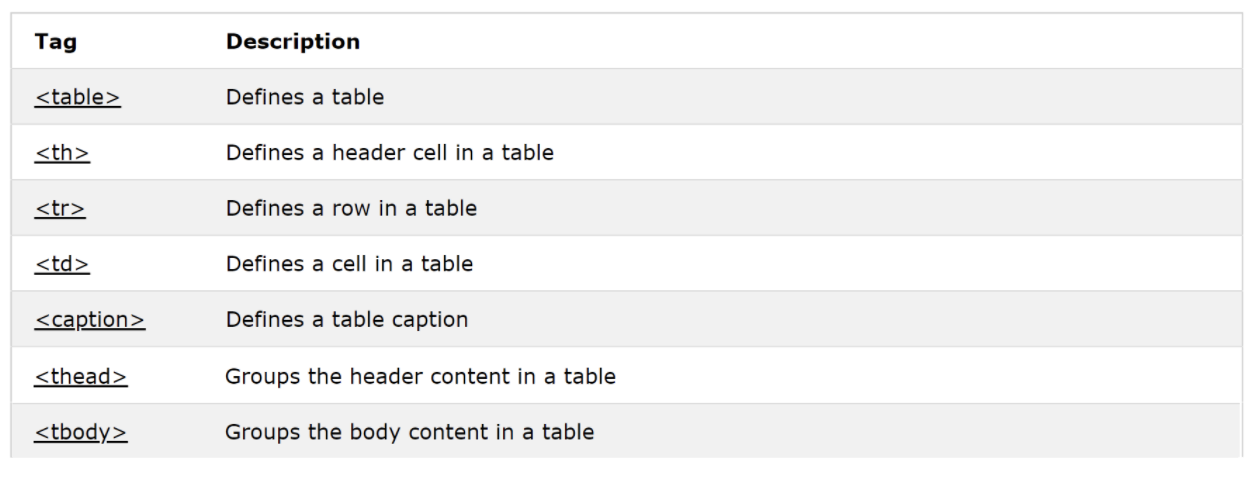
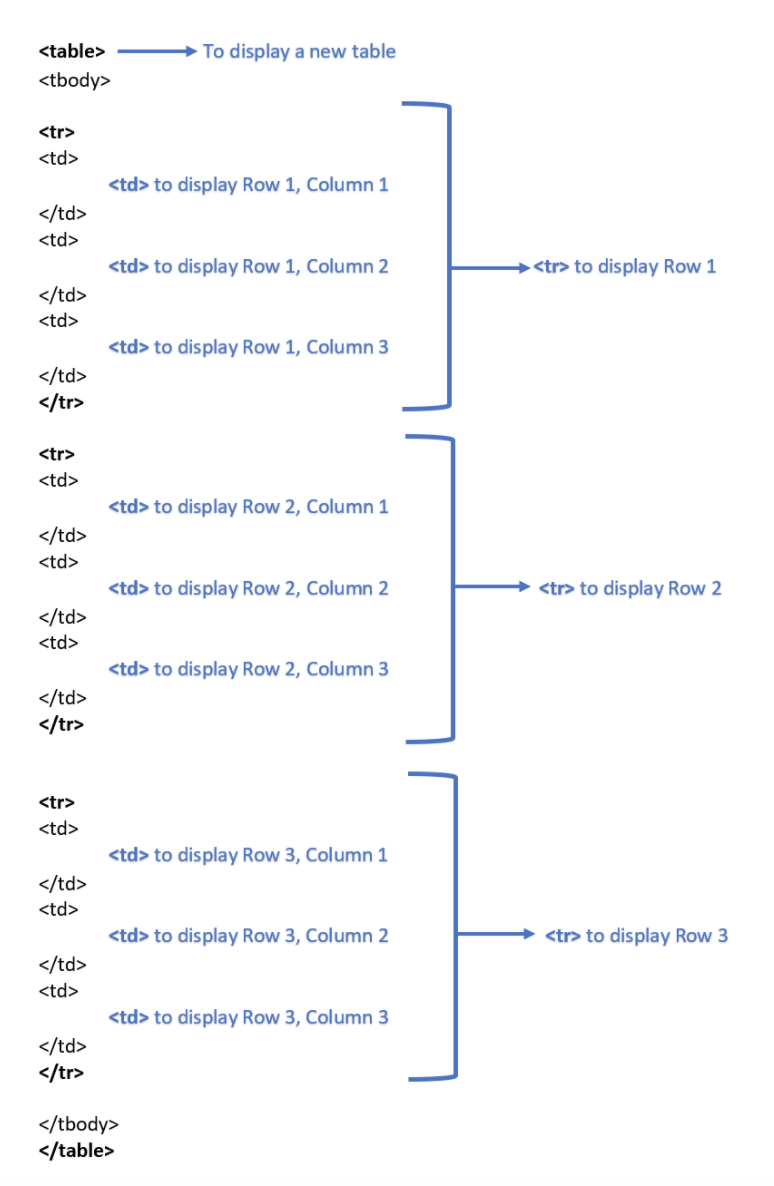
Creating a Table:
Below is an image explaining what each of the elements of the code does to create the table and an example of the basic structure of a table:
If you need more details, refer to the following page: https://liberalarts.utexas.edu/web-admin-help/how-to-use-cascade/advanced-topics/addedit-a-table.php
Style I: Displaying content through cells in a table. These cells contain external links.
Example:
Code: Begin your html code with:
<style type="text/css"><!--
p.p1 {margin: 0.0px 0.0px 0.0px 0.0px; font: 11.0px Helvetica}
span.s1 {font-kerning: none}
--></style>
To create a table, begin by declaring:
<table border="0">
<tbody>
<tr>
<td>
To have a table with a word/sentence with an external link, copy the following code:
<tr>
<td>
<div><span><a href="https://www.youtube.com/watch?v=C3af0cEMfXY">In
this episode, second year Acting Major Miles Agee describes being a
person of color in Hollywood.</a></span></div>
<div><span></span></div>
</td>
<td>
<div><span><a href="https://www.youtube.com/watch?v=IiIv0ytINxc">In
this episode second, year AADS Major Octavian Moten talks about his
focus on Community Programs, Public Policy and the School to Prison
Pipeline.</a></span></div>
<div><span></span></div>
</td>
</tr>
To make this output look closer to the example, you may shorten the length of the text to just a single world. Additionally, to change the hyperlink, just change the link in the href attribute!
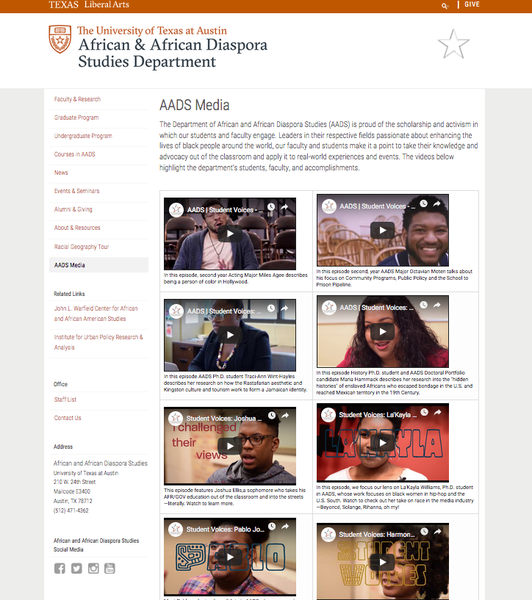
Style II: Displaying content through cells in a table. These cells either contain embedded images/video.
Example:
Code: Begin your html code with:
<style type="text/css"><!--
p.p1 {margin: 0.0px 0.0px 0.0px 0.0px; font: 11.0px Helvetica}
span.s1 {font-kerning: none}
--></style>
To create a table, begin by declaring:
<table border="0">
<tbody>
<tr>
<td>
This will allow you to begin to fill in content for two side by side cells in one row. As an example, copy the previous & following content to code two side by side cells with embedded video, as after the model of the AADS website.
The code below creates two divs in the table row. To adapt the following code to your own content, change the src code to your own link. Within the <div><span>, change the text to your caption for the media.
<div><iframe width="360" height="198" allowfullscreen="allowfullscre
en"src="//www.youtube.com/embed/C3af0cEMfXY"></iframe></div>
<div><span>In this episode, second year Acting Major Miles Agee
describes being a person of color in Hollywood.</span></div>
<div><span></span></div>
</td>
<td>
<div><iframe width="360" height="198" allowfullscreen="allowfullscre
en" src="//www.youtube.com/embed/IiIv0ytINxc"></iframe></div>
<div><span>In this episode second, year AADS Major Octavian Moten
talks about his focus on Community Programs, Public Policy and the
School to Prison Pipeline.</span></div>
<div><span></span></div>
</td>
</tr>
To create another row with content, simply create another <tr></tr> with the same code as before.
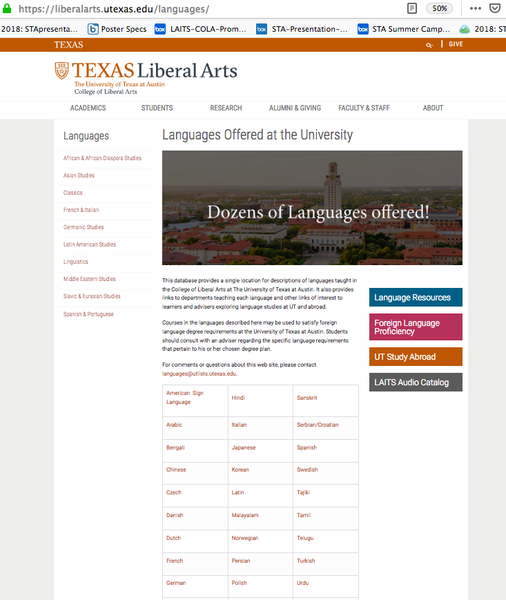
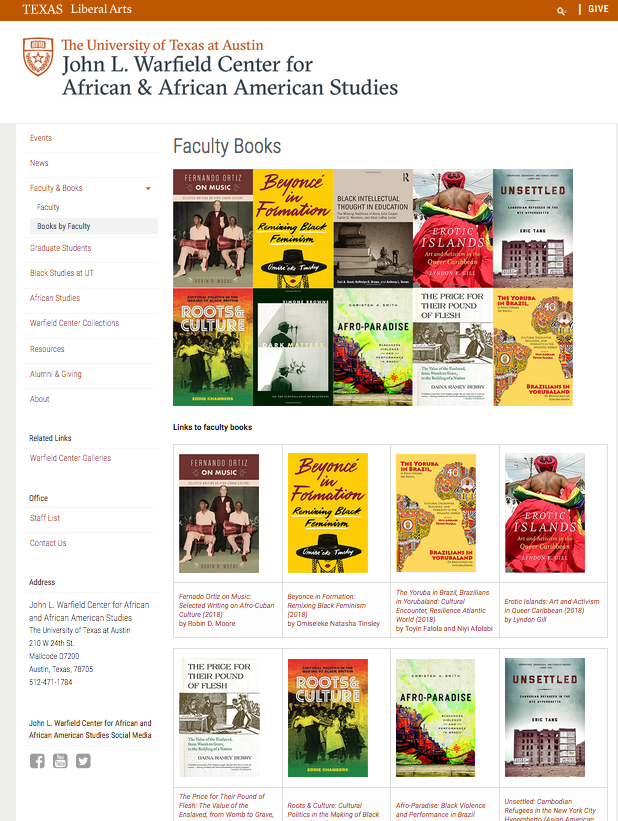
Style III: Displaying content through cells in a table. This table acts as a menu that links you to pages not included in Cascade.
Example:
Code: Begin your html code with:
<p> </p>
<table align="center" cellpadding="5" cellspacing="5" height="325"
valign="top" width="100%">
<tbody>
The example features four books per row, so the following code features four <td> cell tags. Feel free to modify this depending on your need for cells.
<tr>
<td width="25%"><a href="http://tupress.temple.edu/book/1311"
rel="noopener" target="_blank"><img alt="Ortiz" caption="false"
height="714" src="/render/file.act?path=/caaas/_files/images/
collageimages/ortizonmusic.jpg" /></a></td>
<td width="25%"><a href="https://utpress.utexas.edu/books/
tinsley-beyonce-in-formation" rel="noopener" target="_blank">
<img alt="Beyonce In Formation" caption="false" height="356"
src="/render/file.act?path=/caaas/_files/images/collageimages/beyonce
information.jpg" /></a></td>
<td width="25%"><a href="https://cap-press.com/books/isbn/97816116359
11/The-Yoruba-in-Brazil-Brazilians-in-Yorubaland"><img alt="Yoruba"
src="/render/file.act?path=/caaas/_files/images/collageimages/
yoruba.jpg" /></a></td>
<td width="25%"><a href="https://www.dukeupress.edu/erotic-islands"
rel="noopener" target="_blank"><img alt="Erotic Islands"
caption="false" height="356" src="/render/file.act?path=/caaas/_files
/images/collageimages/eroticislands.jpg" /></a></td>
</tr>
Here, the <td width> tag specifies the standard amount for each cell. The <a href> (used before to include a link) performs the same function. This time, when you click anywhere on the cell, you’re transported to the external link. Substitute in references to your image sources and websites and you’re good to go!
Creating an Accordion
Sometimes, when the text content is too long, you might want to organize them into an accordion format. With these set of instructions you will be creating an interactive accordion that the user can interact with in Cascade.
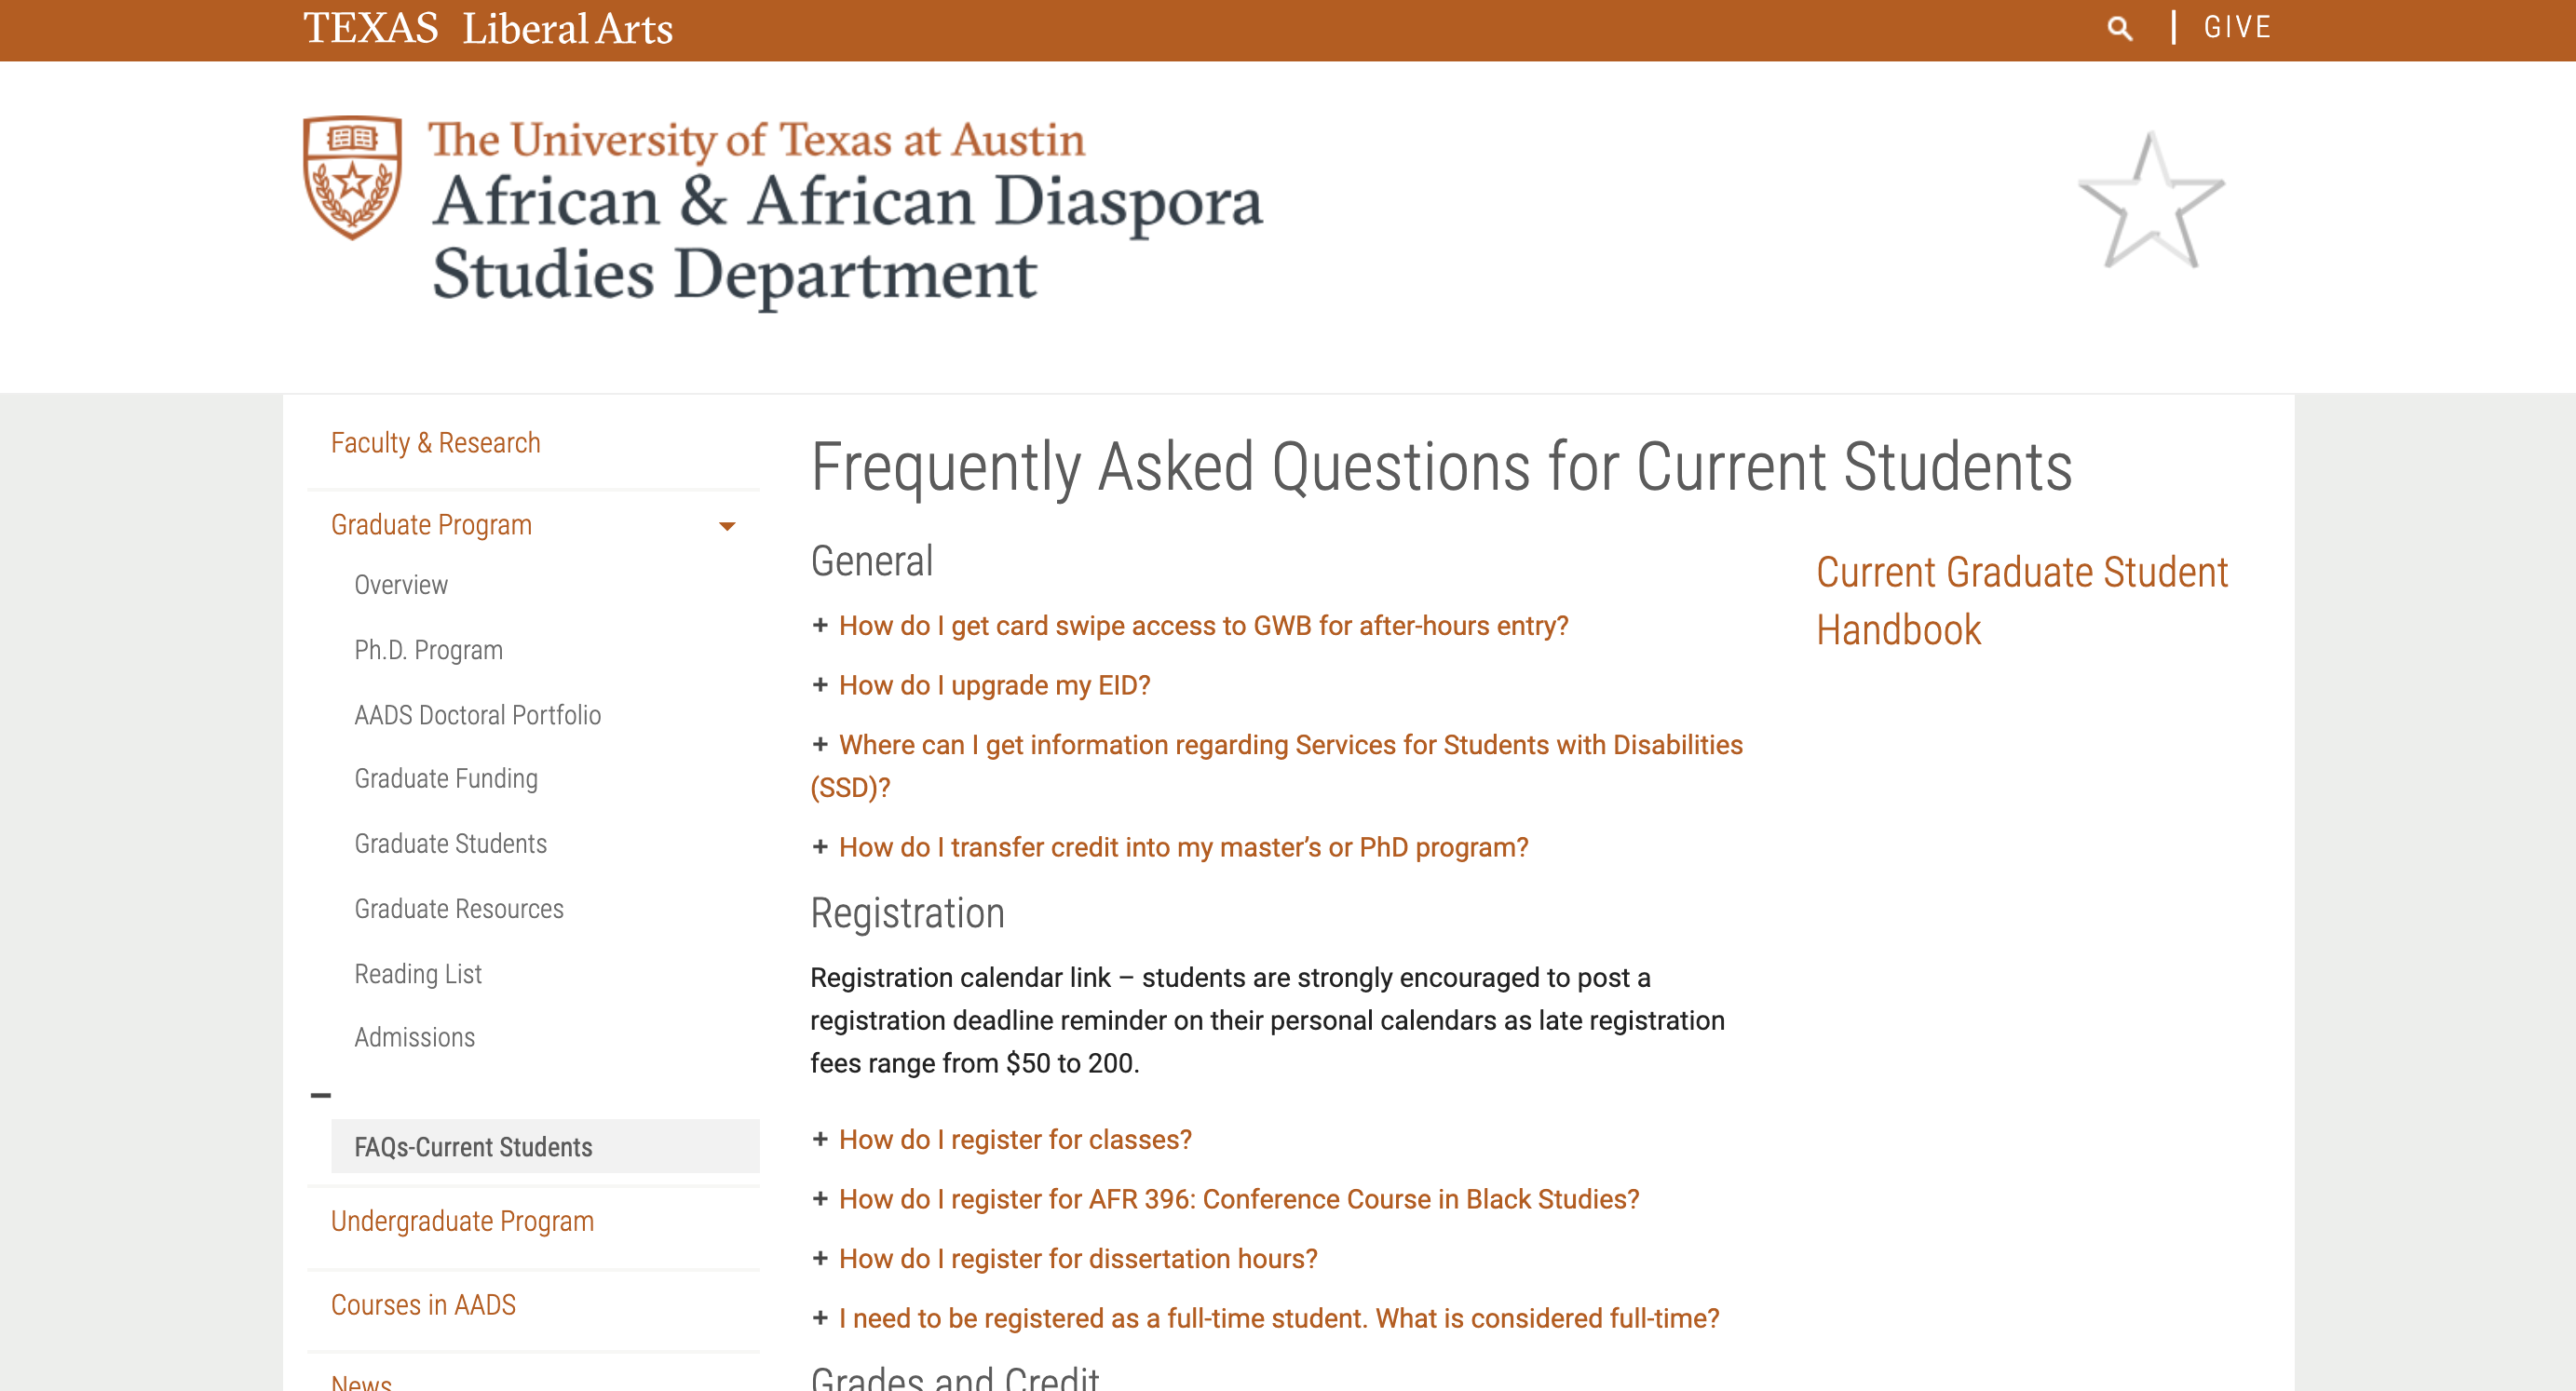
The example you will be creating can be accessed here.
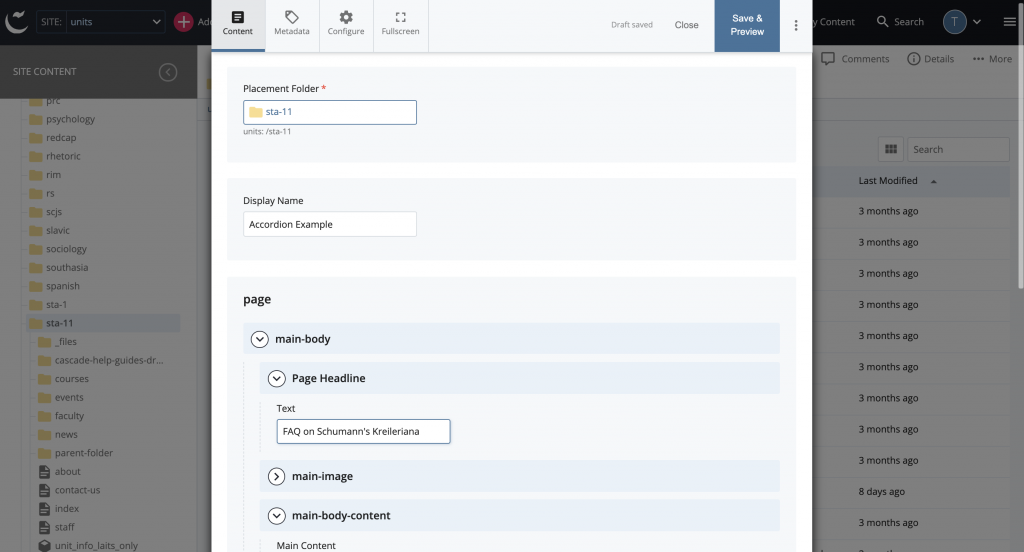
- Create a new page within your Cascade folder. Give it Navigation Title and a Page Headline.
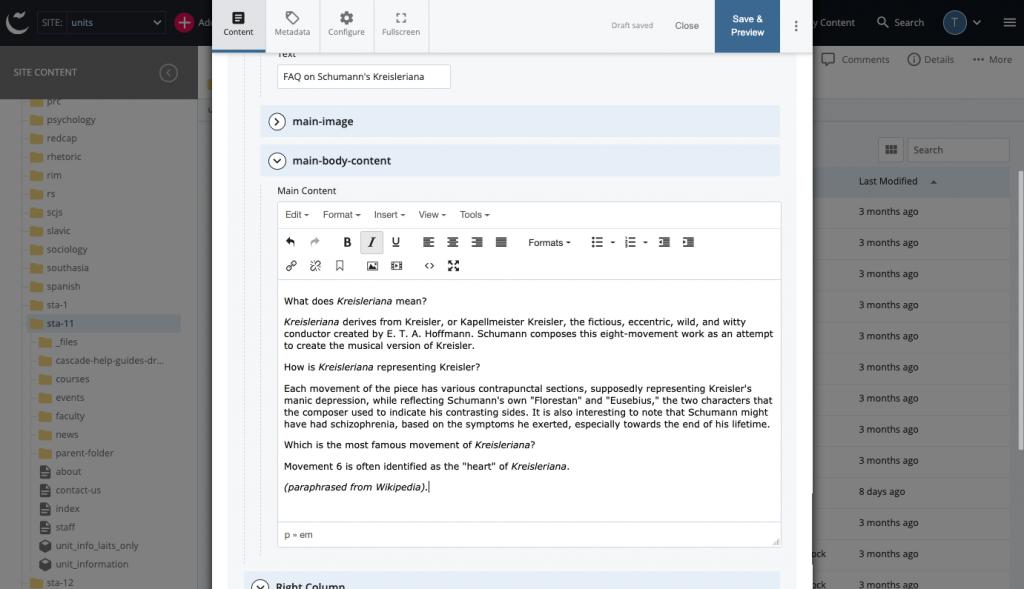
- In the main content, type in your text content. You will follow this format:
-
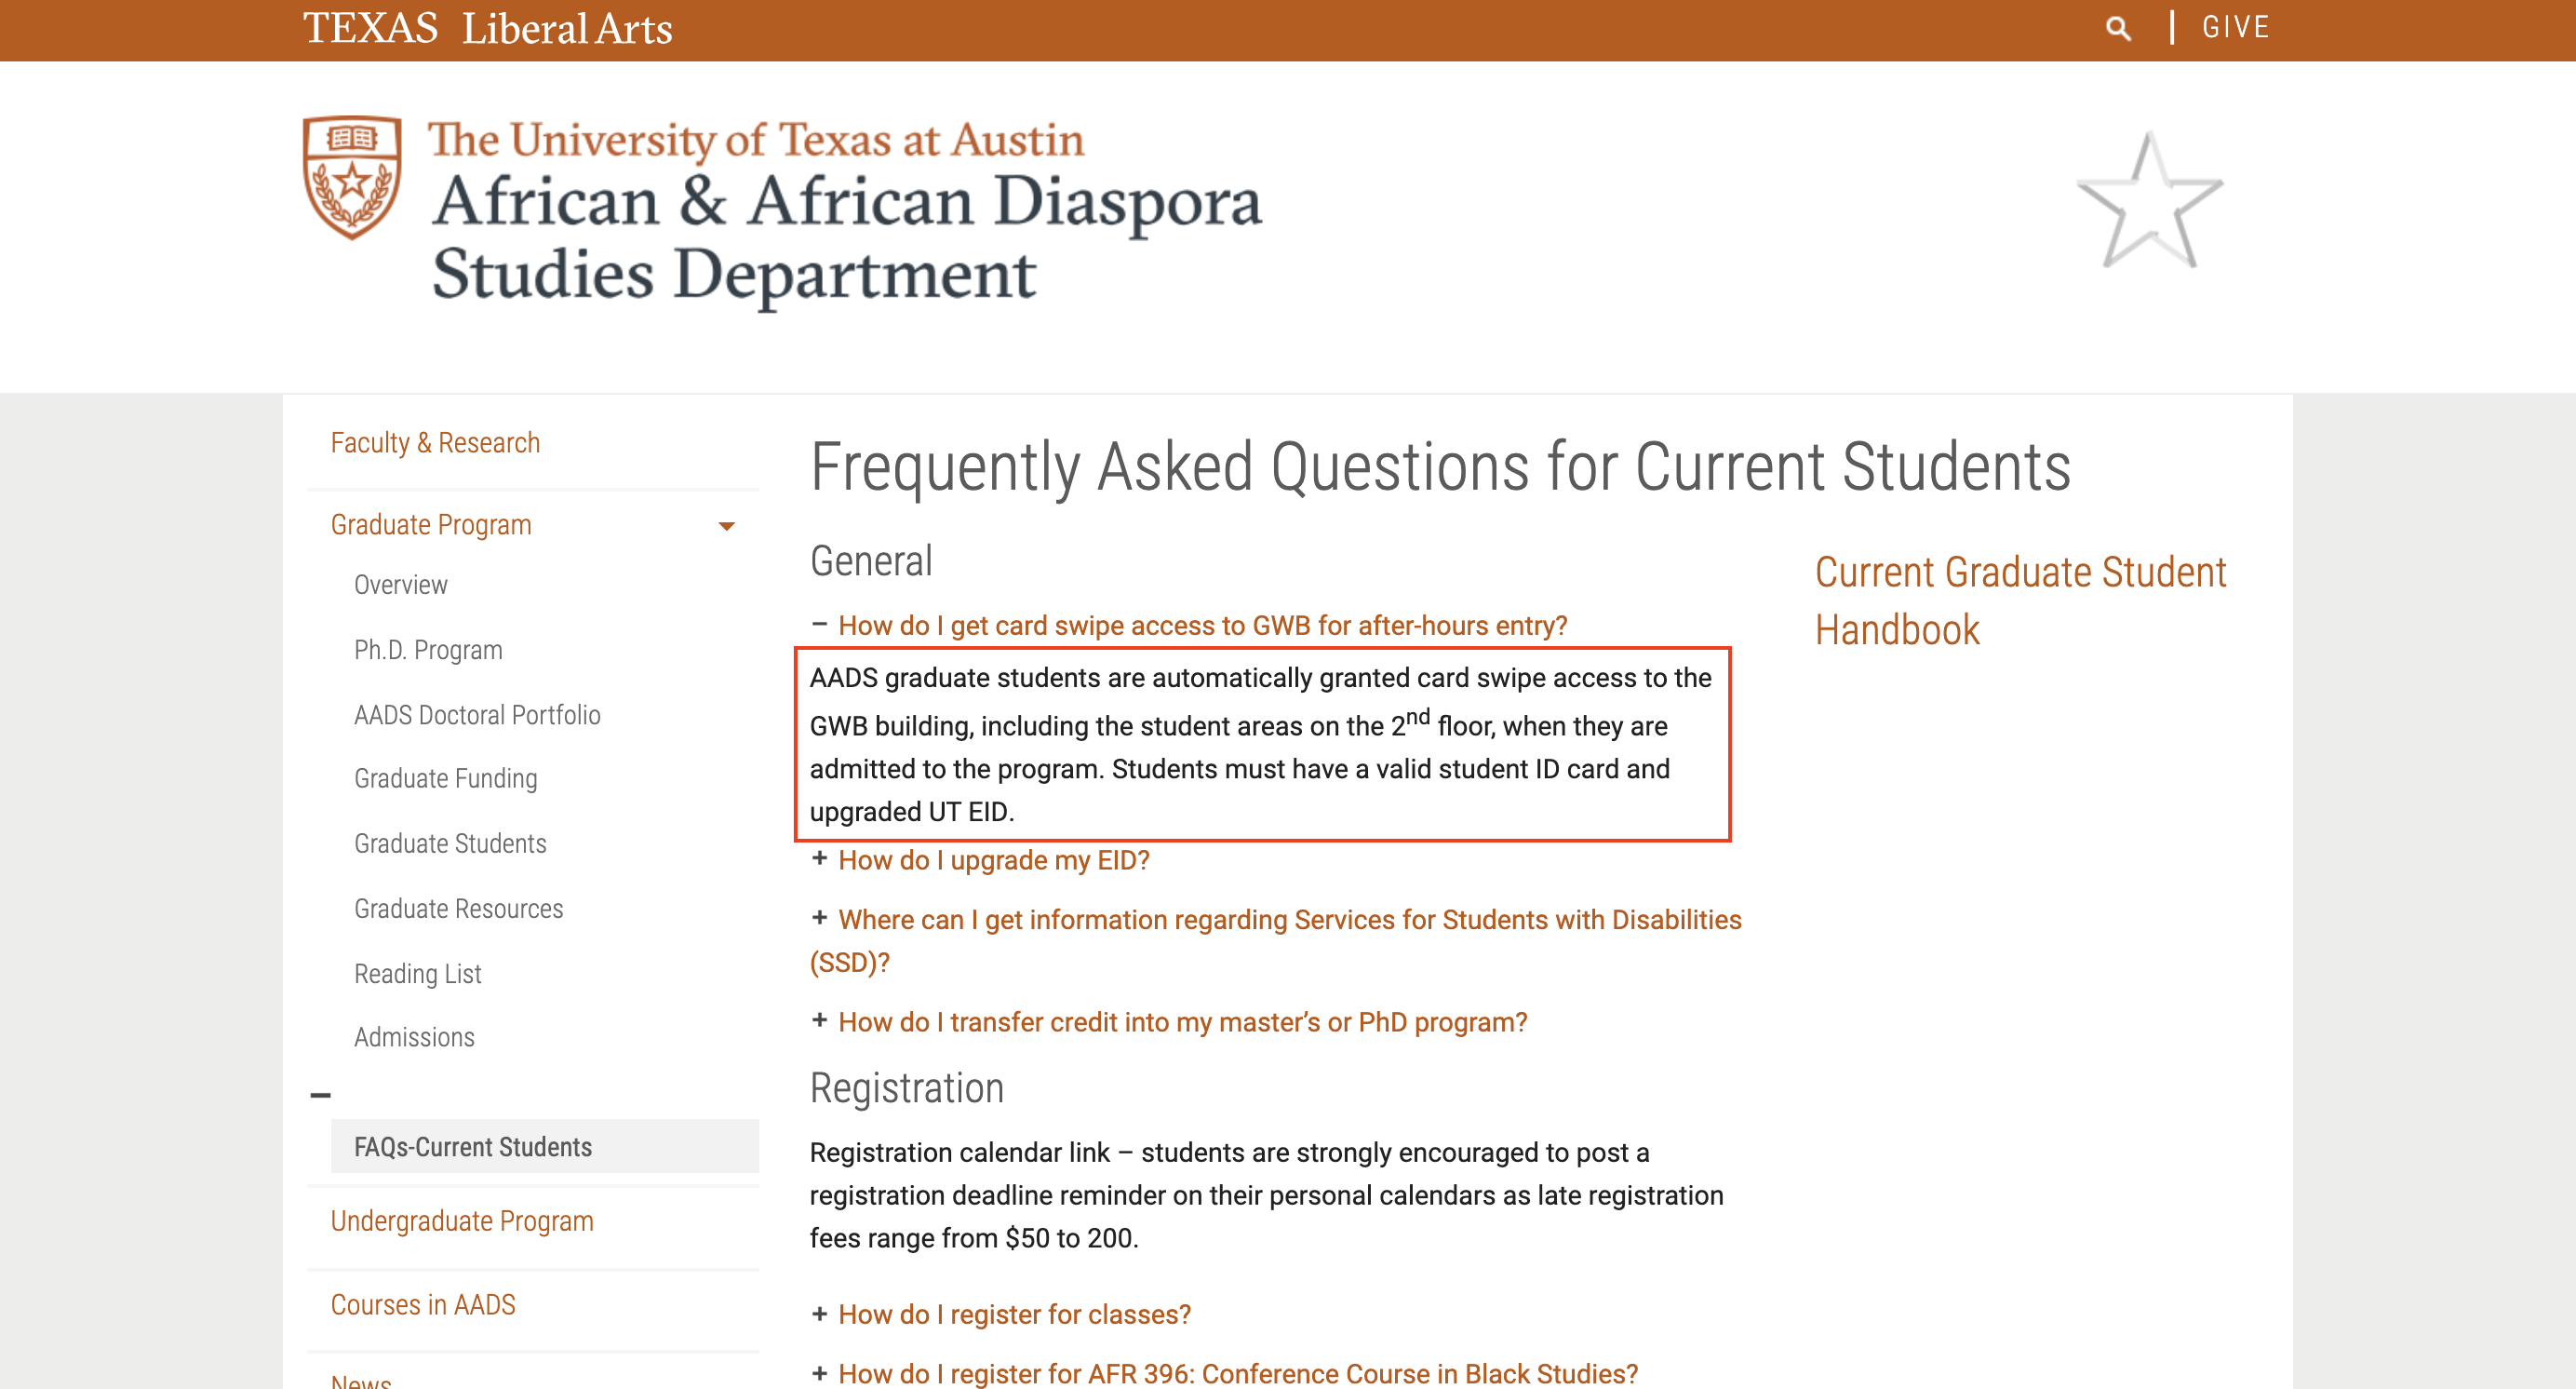
Some clickable text.
Some hidden text. When clicked on the clickable text above,
this text will appear.

Some more clickable text.
Some more hidden text. When clicked on the clickable text
above, this text will appear.

. . .
- Your text should look something like this.
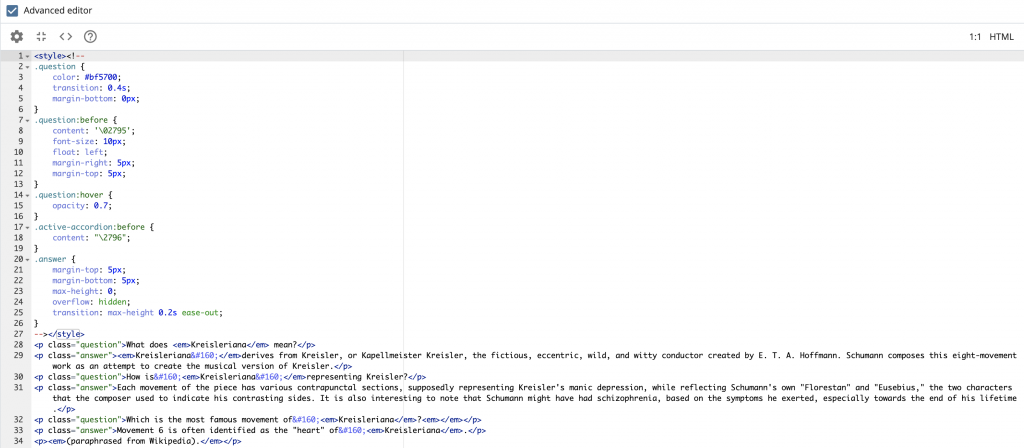
- Navigate to the page’s Source Code view.
- Next, paste this CSS code below at the top of the HTML.
-
<style> .question { color: #bf5700; /* burnt orange */ transition: 0.4s; margin-bottom: 0px; } .question:before { content: '\02795'; font-size: 10px; float: left; margin-right: 5px; margin-top: 5px; } .question:hover { opacity: 0.7; } .active-accordion:before { content: "\2796"; } .answer { margin-top: 5px; margin-bottom: 5px; max-height: 0; overflow: hidden; transition: max-height 0.2s ease-out; } </style> - Here are some explanations on the code above:
- .question: elements that are clickable (and will reveal the answer) will be given this class.
- color: we want to give it the burnt orange color to indicate that this item is clickable. You may change it to another color of your choice.
- transition: this indicates the speed of the “sliding” animation to reveal the answer.
- margin-bottom: by default, Cascade gives a padding to each paragraph. We want to get rid of this to make the question not too far off from the answer.
- .question:before: this means “anything in here will be rendered and appended before any thing that has a class of ‘question’.”
- content: this is where we add the plus (+). ‘\02795’ is the unicode for the plus sign, which is the default.
- font-size: indicate the font of this sign.
- float: aligns the sign left.
- margin-right: gives it a little bit of breathing room between itself and the text.
- margin-top: offsetting it a little so that it aligns with the text on a straight line.
- .question:hover: stylings in this will only apply to elements with the class “question” on the condition that it is hovered on.
- opacity: slightly lower the opacity of the question, further indicating that it is clickable.
- .active-accordion:before: this means “anything in here will be rendered and appended before any thing that has a class of ‘active-accordion’.”
- content: this is where we add the minus (-). ‘\02796’ is the unicode for the minus sign, which only appears when the answer paragraph is “active,” meaning that it is shown.
- .answer: items that are hidden and will be revealed on click of “question” will be given this class.
- margin-top: give if a little bit of breathing room between itself and the question (since we got rid of the margin at the bottom of the question).
- margin-bottom: give it a little bit of breathing room between itself and the next question.
- max-height: when first rendered, it is hidden, so this max-height defaults to 0.
- overflow: hide this element’s part that overflows out of the max-height, since it’s height will exceed the max-height of 0.
- transition: indicates that the animation will affect the max-height as well as identifying the speed.
- .question: elements that are clickable (and will reveal the answer) will be given this class.
- Your Source Code view will look something like this.
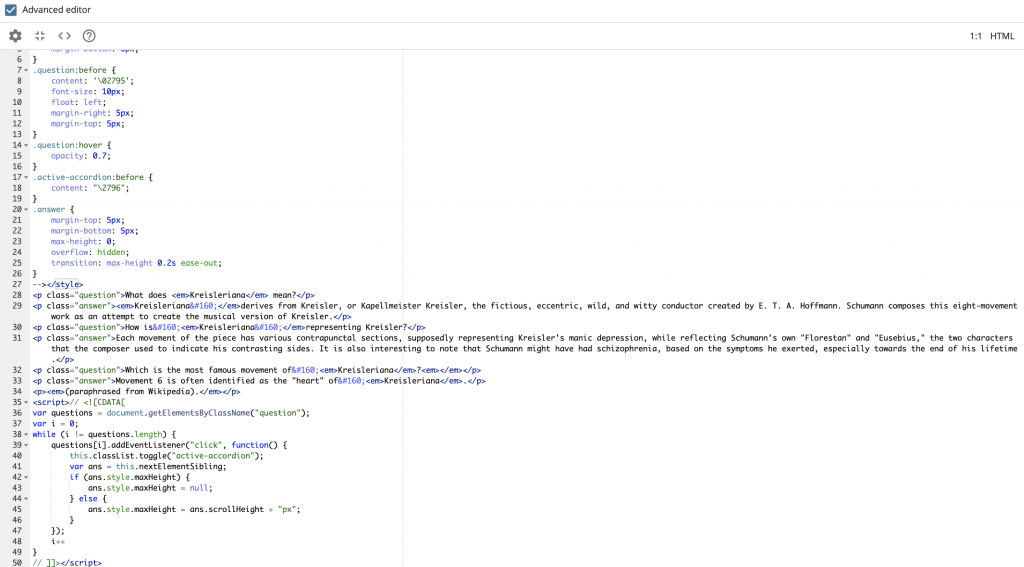
- Next, paste this JavaScript below at the end of the HTML.
-
<script> var questions = document.getElementsByClassName("question"); var i = 0; while (i != questions.length) { questions[i].addEventListener("click", function() { this.classList.toggle("active-accordion"); var ans = this.nextElementSibling; if (ans.style.maxHeight) { ans.style.maxHeight = null; } else { ans.style.maxHeight = ans.scrollHeight + "px"; } }); i++ } </script> - Here’s the explanation of the code.
- First, we identify all elements that has the class name of “question.
- Then, we enter a while loop, looping through all of these elements we’ve identified.
- With each element, we add an event listener that is triggered when the user “click” on the element. If clicked, the element is toggled another class called “active-accordion” (which triggers / un-triggers the .active-accordion stylings we’ve identified in the CSS, thus changing the plus sign to minus). Then, it’s sibling (which is the answer, in this case) is identified, and this sibling element’s maxHeight will be altered based on whether it is currently active or not. If it is currently active, then make the maxHeight null (hiding it), otherwise gives it the appropriate height it needs.
- Your Source Code view will look like this.
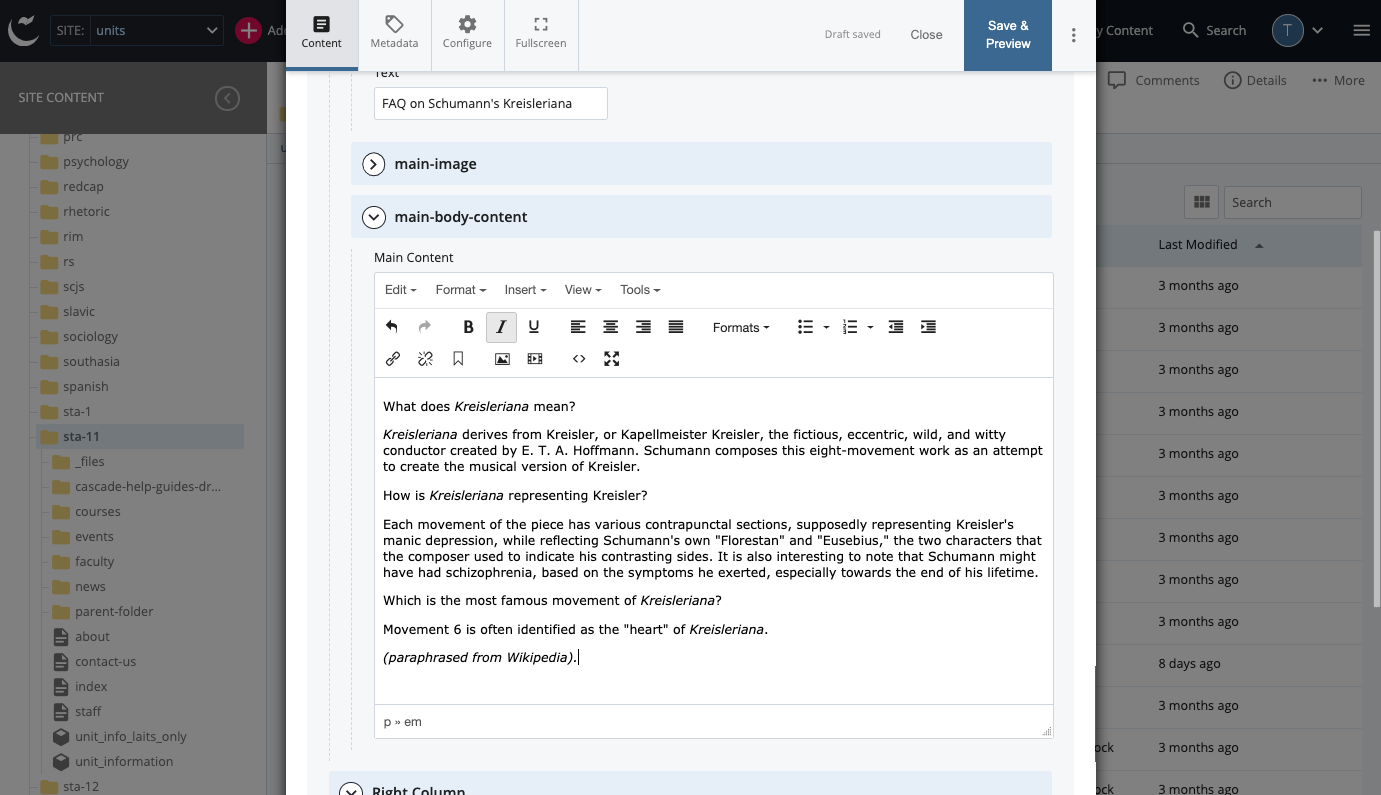
- Lastly, add the appropriate class names to the text elements. Add these class names to all of your questions and answers. Follow the syntax class=”question” or class=”answer”. For example:
-
<p class="question">What does <em>Kreisleriana</em> mean?</p>
<p class="answer"><em>Kreisleriana </em>derives from
Kreisler, or Kapellmeister Kreisler, the fictious, eccentric,
wild, and witty conductor created by E. T. A. Hoffmann.
Schumann composes this eight-movement work as an attempt
to create the musical version of Kreisler.</p>

<p class="question">How is <em>Kreisleriana </em>
representing Kreisler?</p>
<p class="answer">Each movement of the piece has various
contrapunctal sections, supposedly representing Kreisler's
manic depression, while reflecting Schumann's own "Florestan"
and "Eusebius," the two characters that the composer used to
indicate his contrasting sides. It is also interesting to
note that Schumann might have had schizophrenia, based on the
symptoms he exerted, especially towards the end of his
lifetime.</p>

<p class="question">Which is the most famous movement
of <em>Kreisleriana</em>?<em></em></p>
<p class="answer">Movement 6 is often identified as the
"heart" of <em>Kreisleriana</em>.</p>
- Click Ok > Save & Preview > Submit > Publish.