
Banner change is a web support service that is often requested by clients at LAITS. Sometimes you are provided with a ready-to-use banner, sometimes the client might ask you to design a new banner. This tutorial will cover how to prepare a banner and upload the banner to Cascade.
STEP 1 – Banner change request
When you receive a banner change request, make a Basecamp to-do, post all client communication on this to-do, and subscribe your project managers.
In order to start on the request, you will need the following information:
- name of the site/department that needs banner update
- Banner or preferred image/design
- department branding
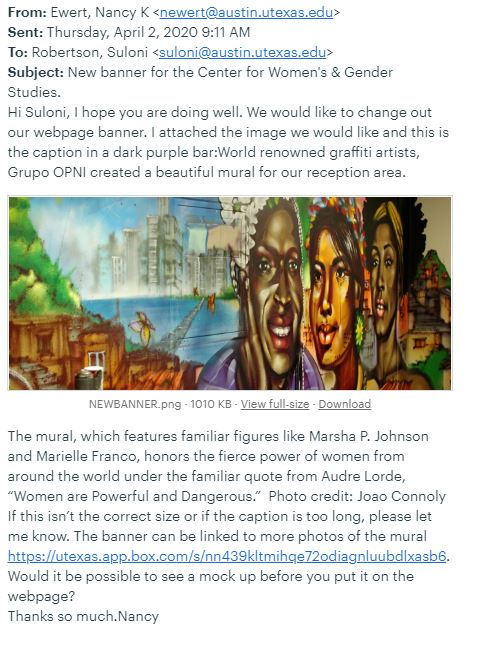
Example:

- Department: Center for Women's & Gender Studies
- Preferred image attached
- Department branding: missing
Ask your client/project manager for any missing assets

If you were asked to design a new banner, these questions can be used to gather deliverables from the client and set expectations for the project.
Will the banner consist of original illustration/photography?

- complex graphics take longer to execute/illustrate
- If a photo-shoot is needed, consider shoot logistics,
  co-ordination, art direction, photographer, subject or talent,
  and location

Time Estimation

- It can take between 2 to 4 hours to produce a simple banner
- Consider the time for client communication, idea generation,
  and passing drafts back and forth for approval
Once we have collected all required assets and information, we are ready to start preparing the banner.
STEP 2 – Prepare the banner
Create a new Photoshop file following the COLA Guidelines shown below:
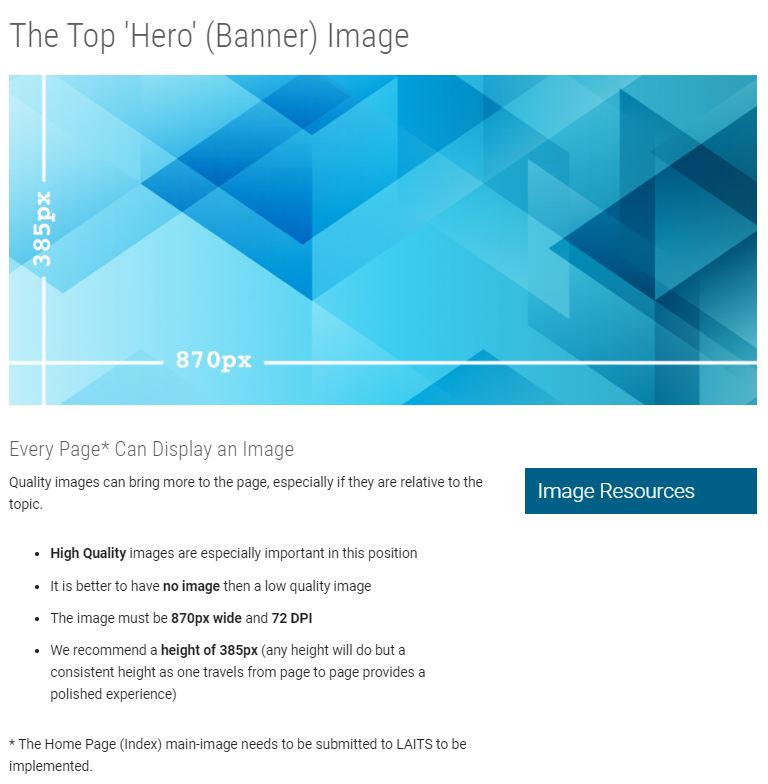
When you are designing your banner, Keep in mind that Cascade has a file size limit of 200KB.
When your design is ready,
- export your design.
- Take a screenshot of the website
- Place your design on the screenshot to create a mock up of how the website would look with the new banner
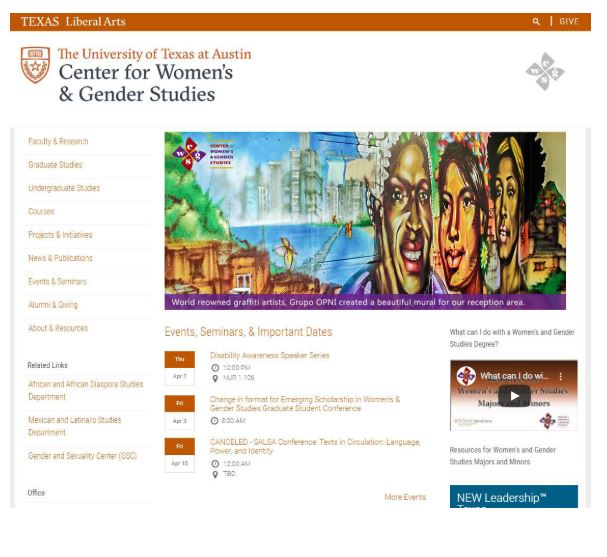
Mockup Example:
Post your mock up on Basecamp/email your client for feedback and approval.
Once you design is approved, you are ready to upload the new banner to Cascade.
STEP 3 – Upload your banner to Cascade
Login to Cascade .

Find the folder where you should upload your banner. Click on Go to a Site in the top-left of your screen and go to units.

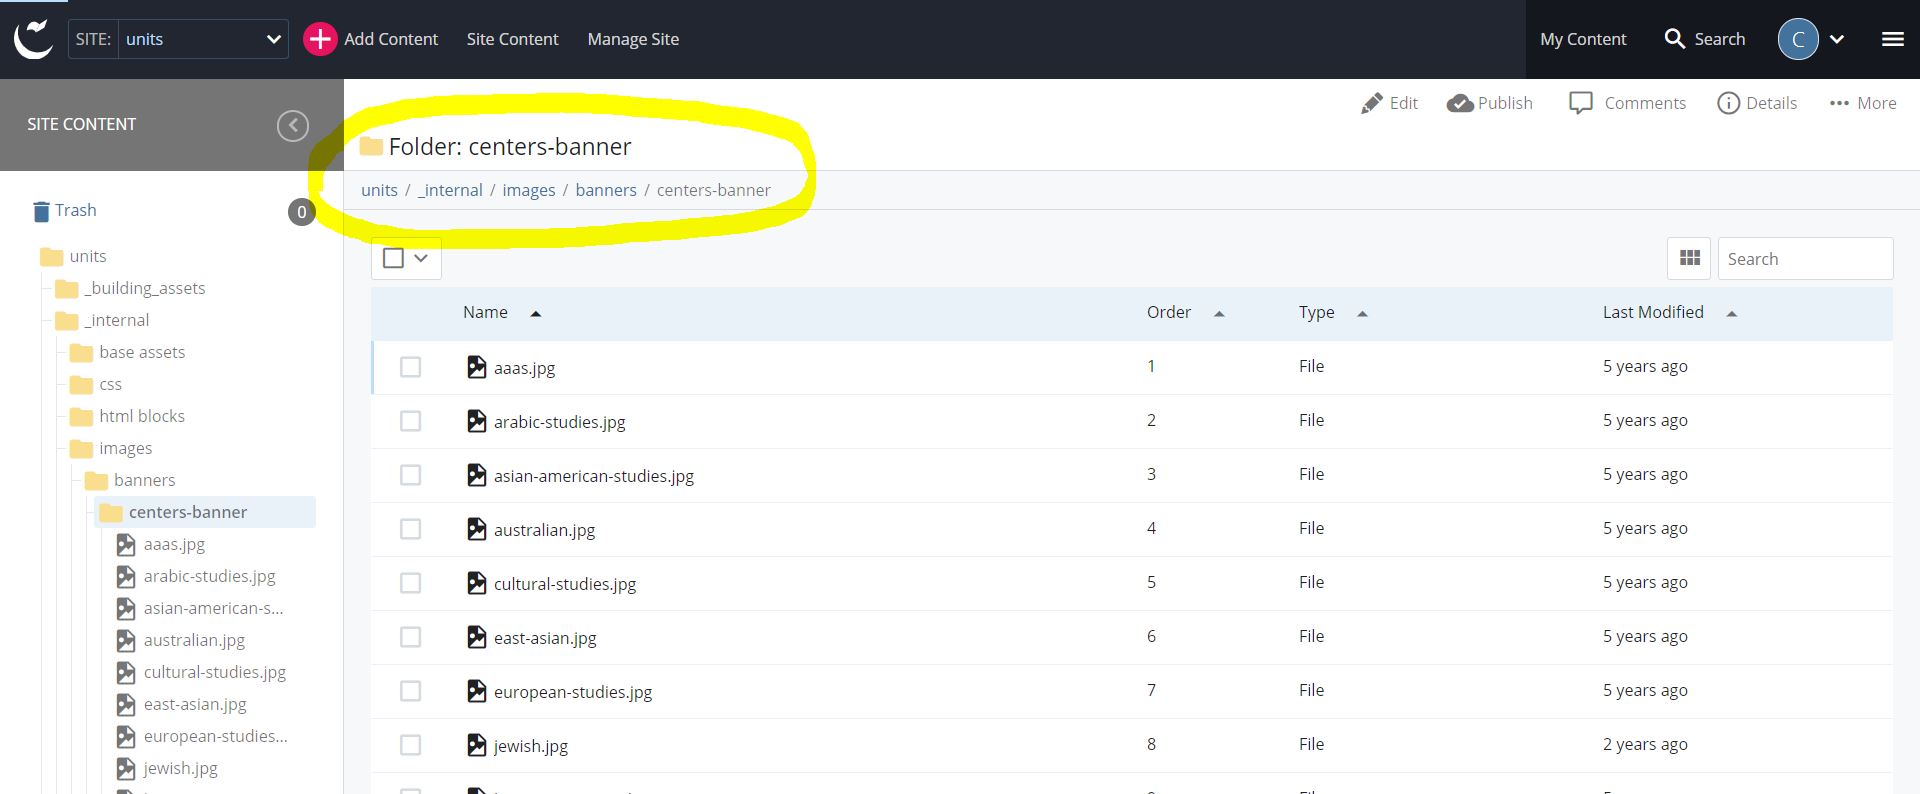
Banners are stored under units > _internal > images > banners. Go the corresponding folder for the site you’re updating.
Ex: CWGS is a center, so I would go to centers-banner.
Click on +Add Content then Upload file or image to upload your banner.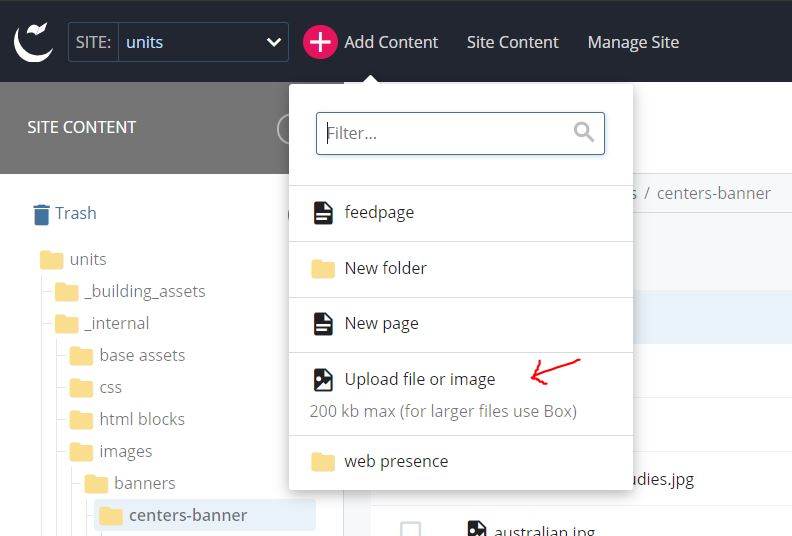
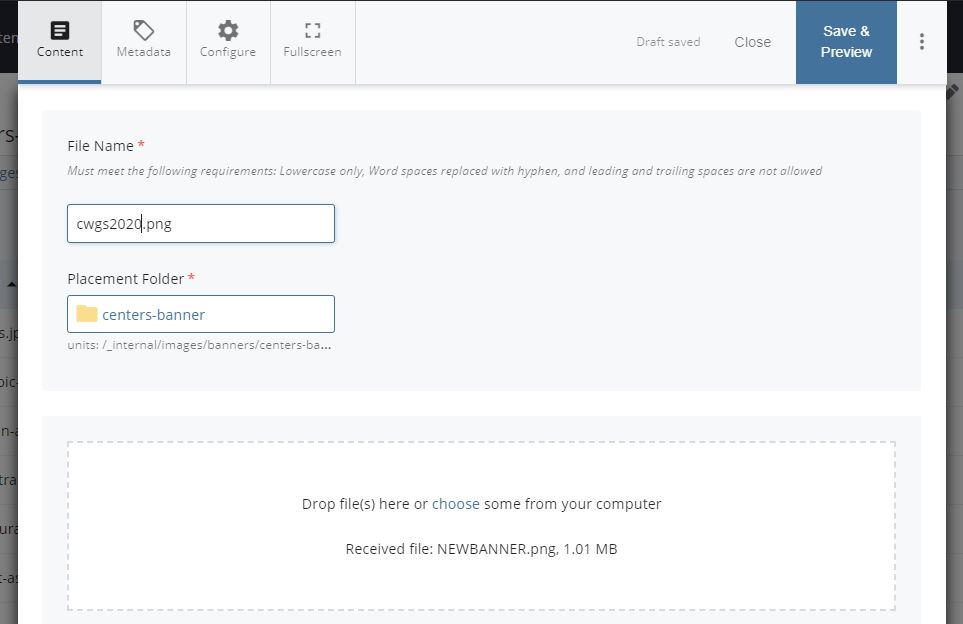
Make sure to submit your upload.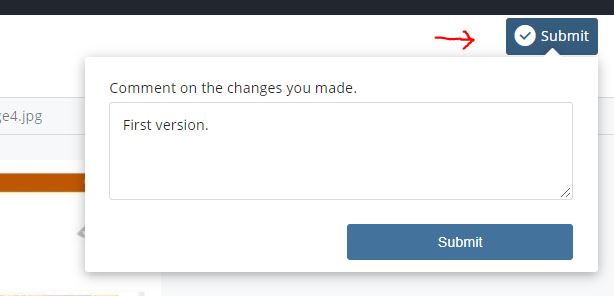
STEP 4 – Update the banner
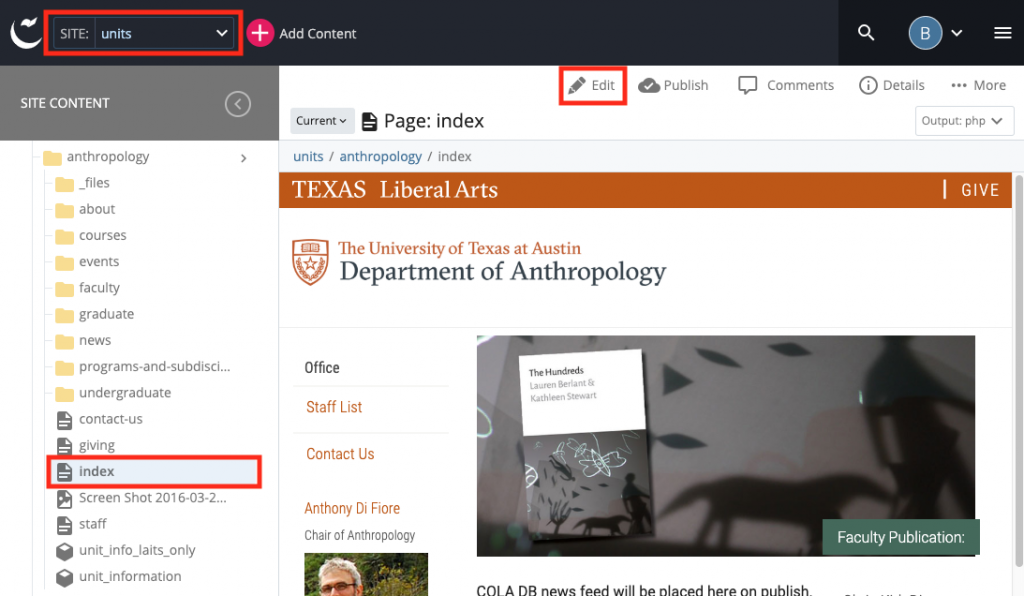
Find the site folder in Cascade. Most COLA sites will be in the units folder (e.g. site: units > anthropology). Use the site content tree (left sidebar) to search for it.
Click on the page called index under the parent folder. The index page is the landing page (homepage) of the site.
Click on the edit button to start editing the index page.
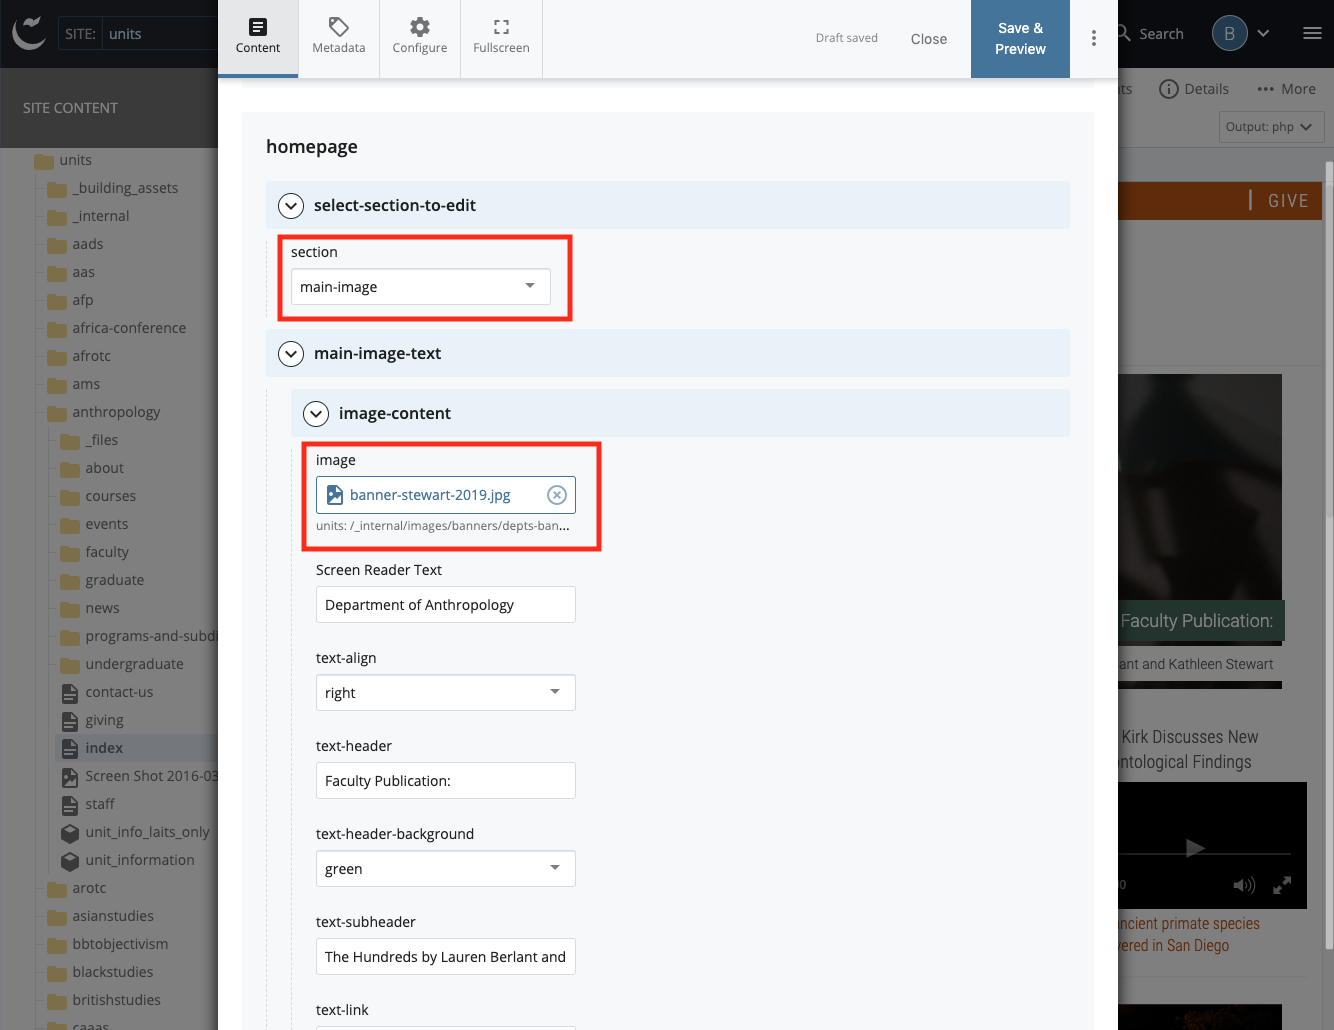
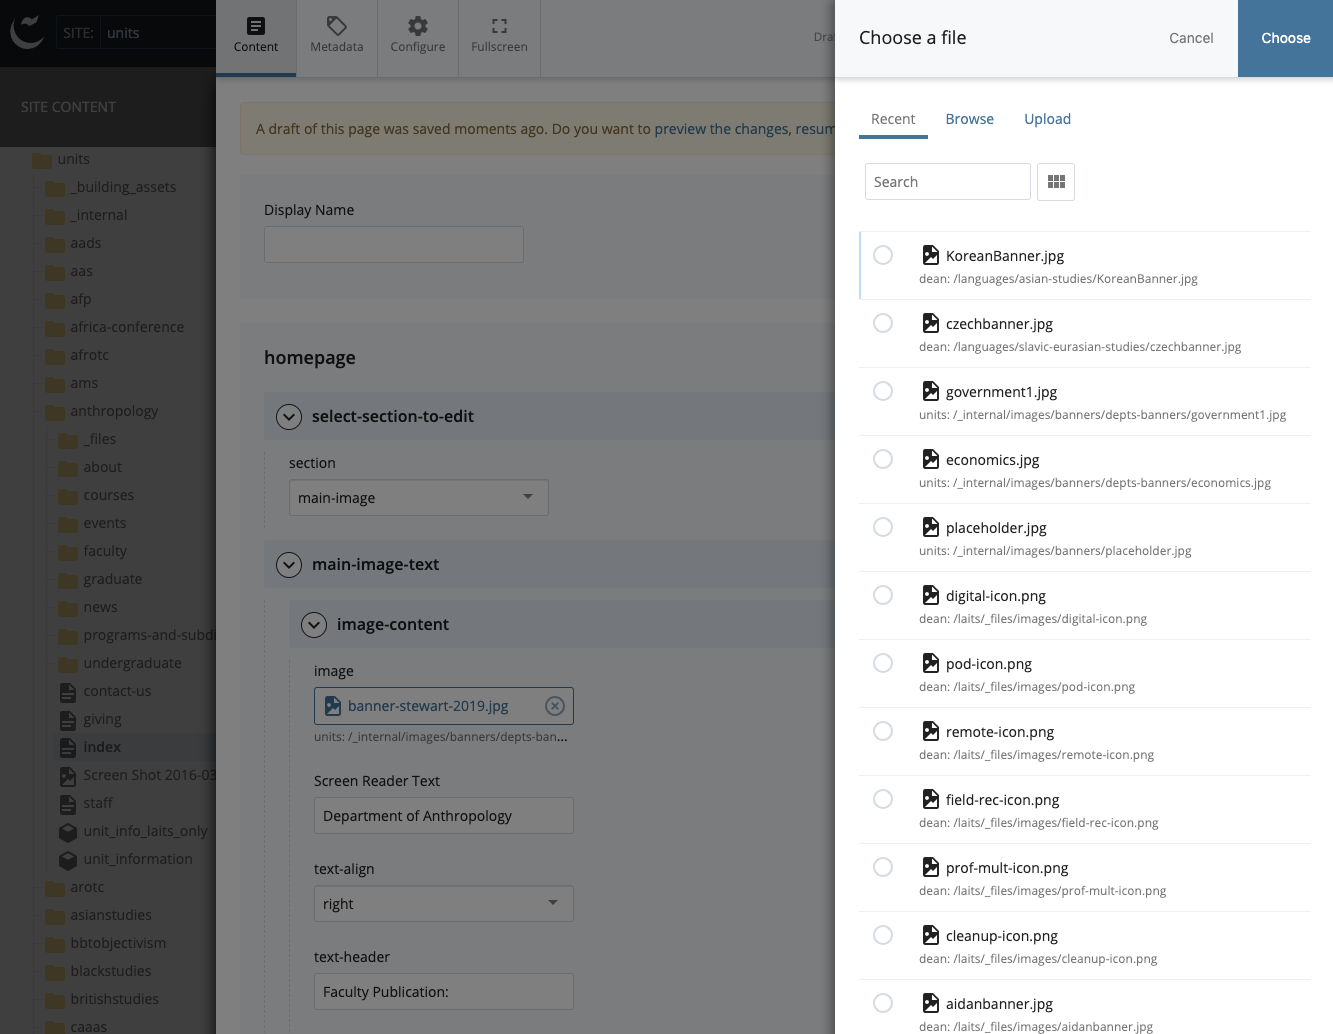
A popup window will appear. Under select-section-to-edit, select main-image. Then under image-content, replace the banner image with the file you uploaded.
Click the Save & Preview button, then Submit, then Publish to make your changes go live. (Sometimes it takes up to 24 hours for pages to update—don’t worry if there’s a lag).
Notify your client when the new banner is up on the site and update your STA blog.