In this training, you will how to design tier 1 course graphics requests.
- Homepage banner
- Canvas dashboard graphic
- Canvas buttons
- Title and individual lecture segment slides
- Powerpoint templates
- Ipad Overlay
Preparation: Choosing a style
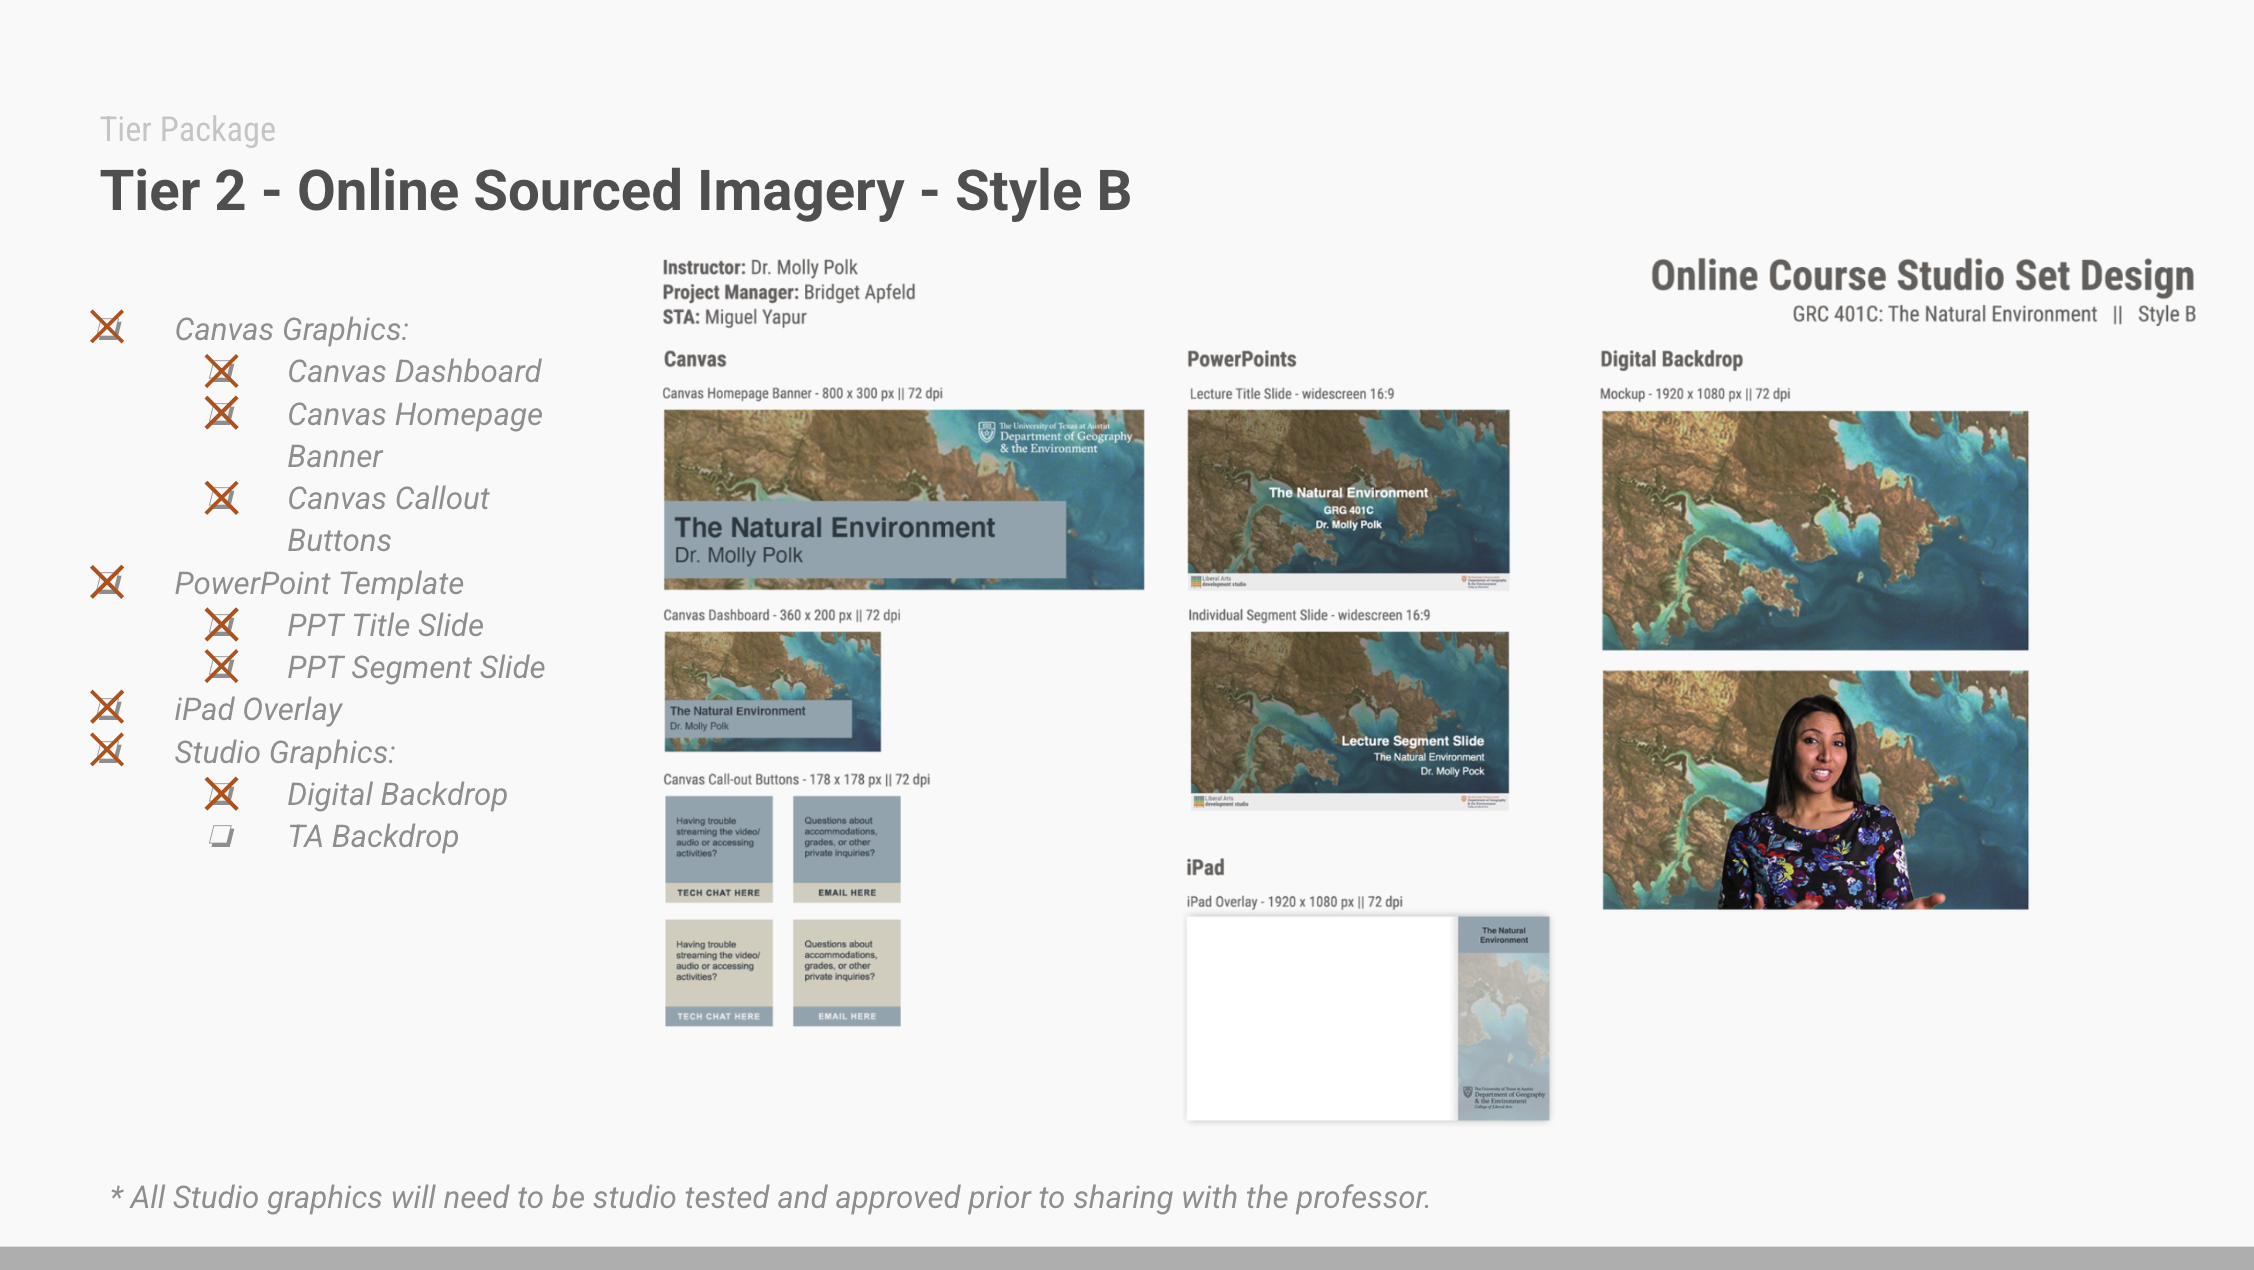
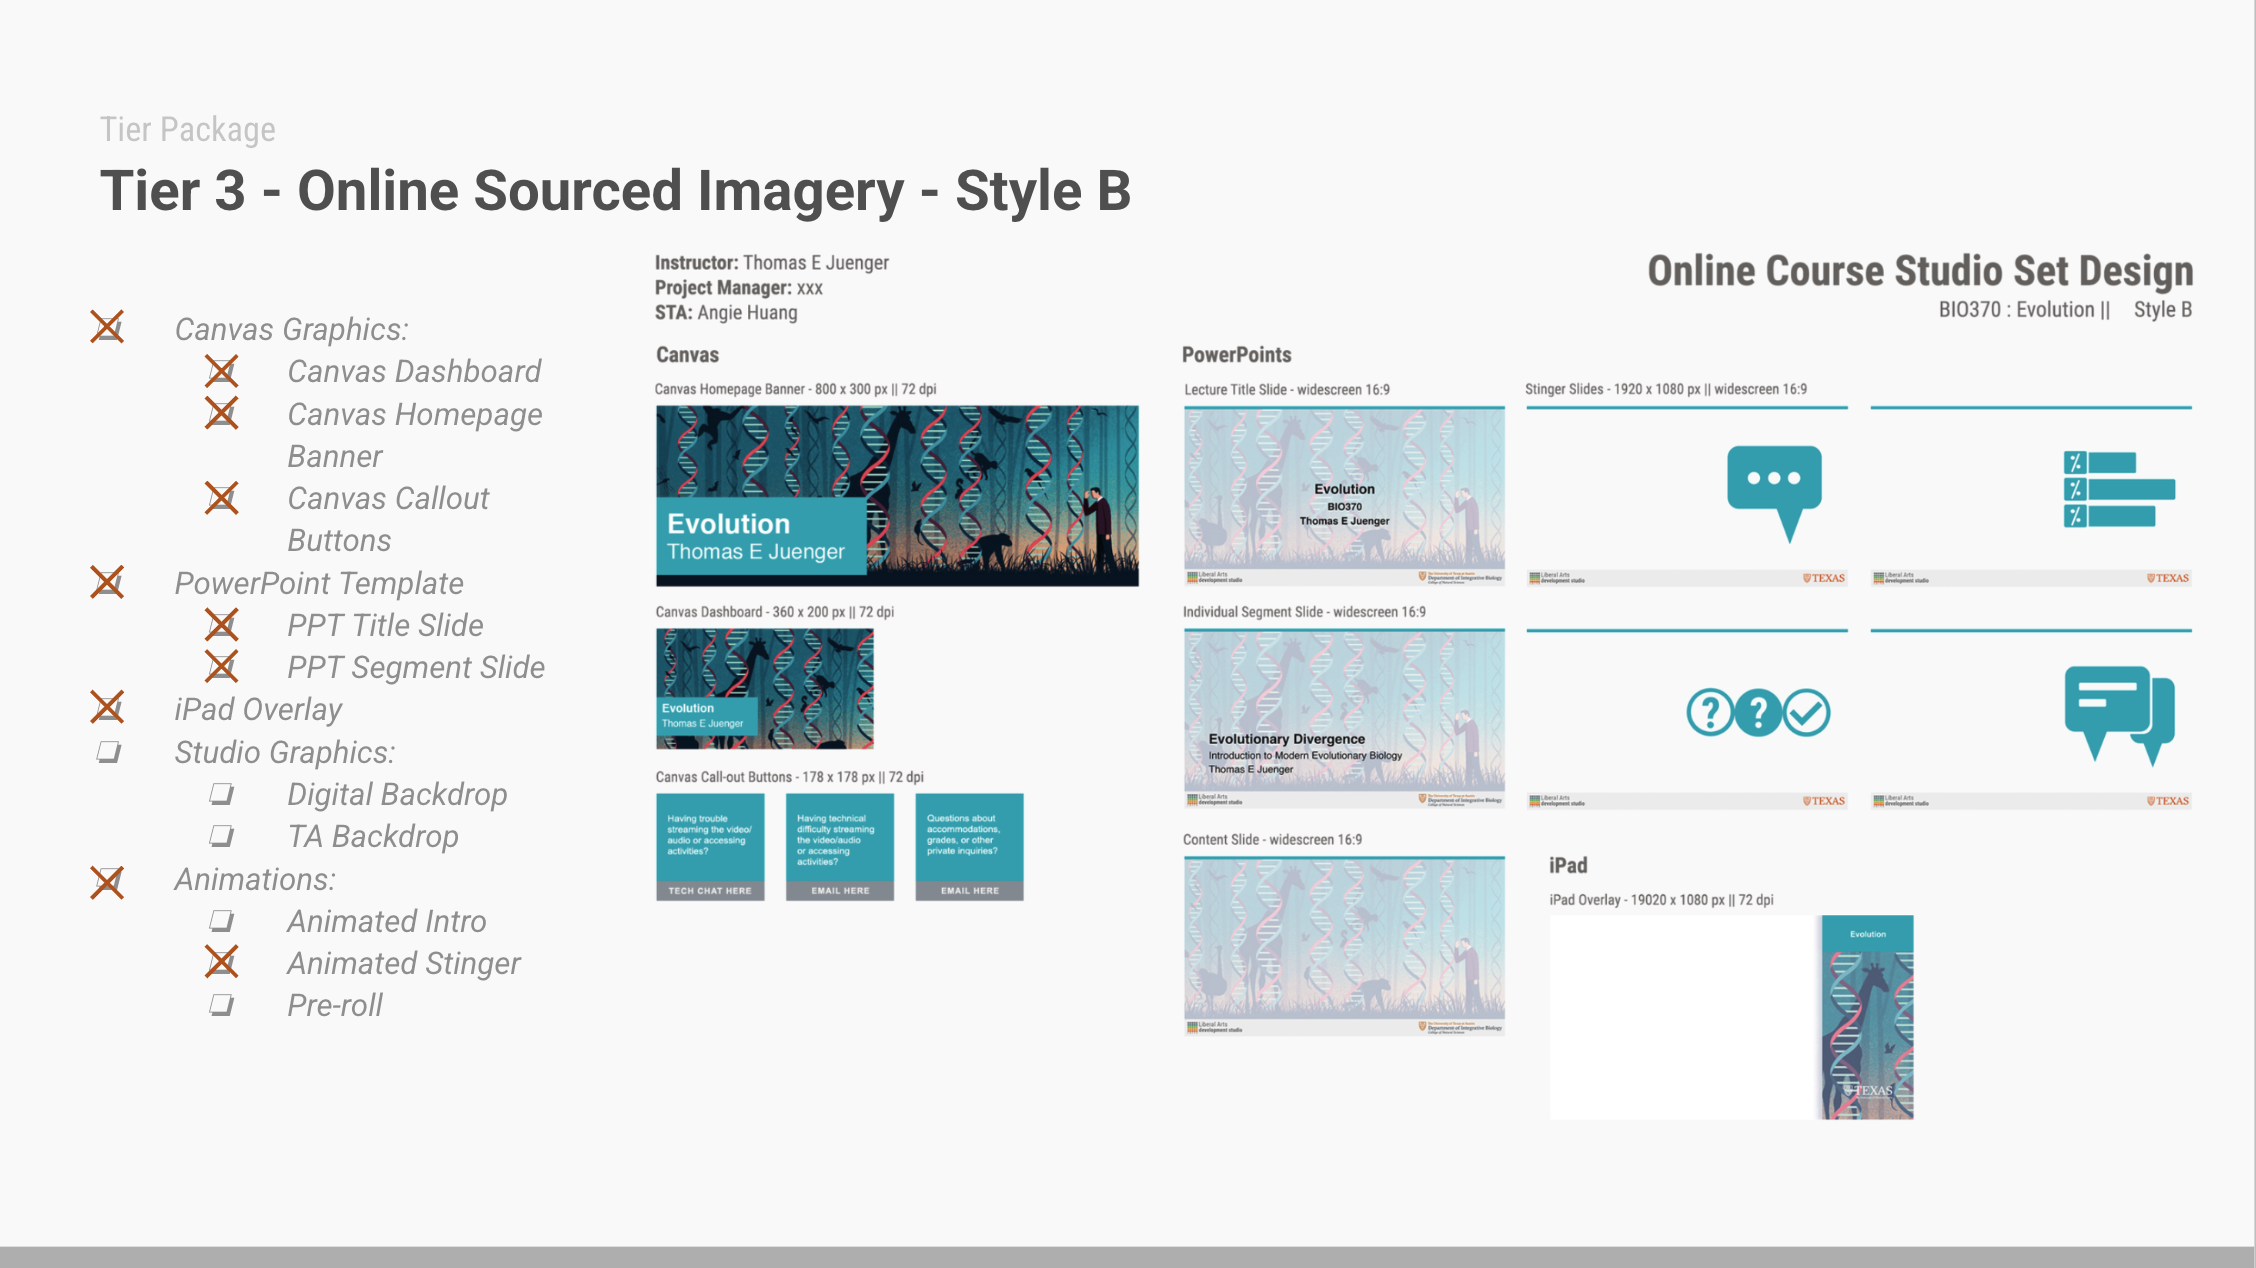
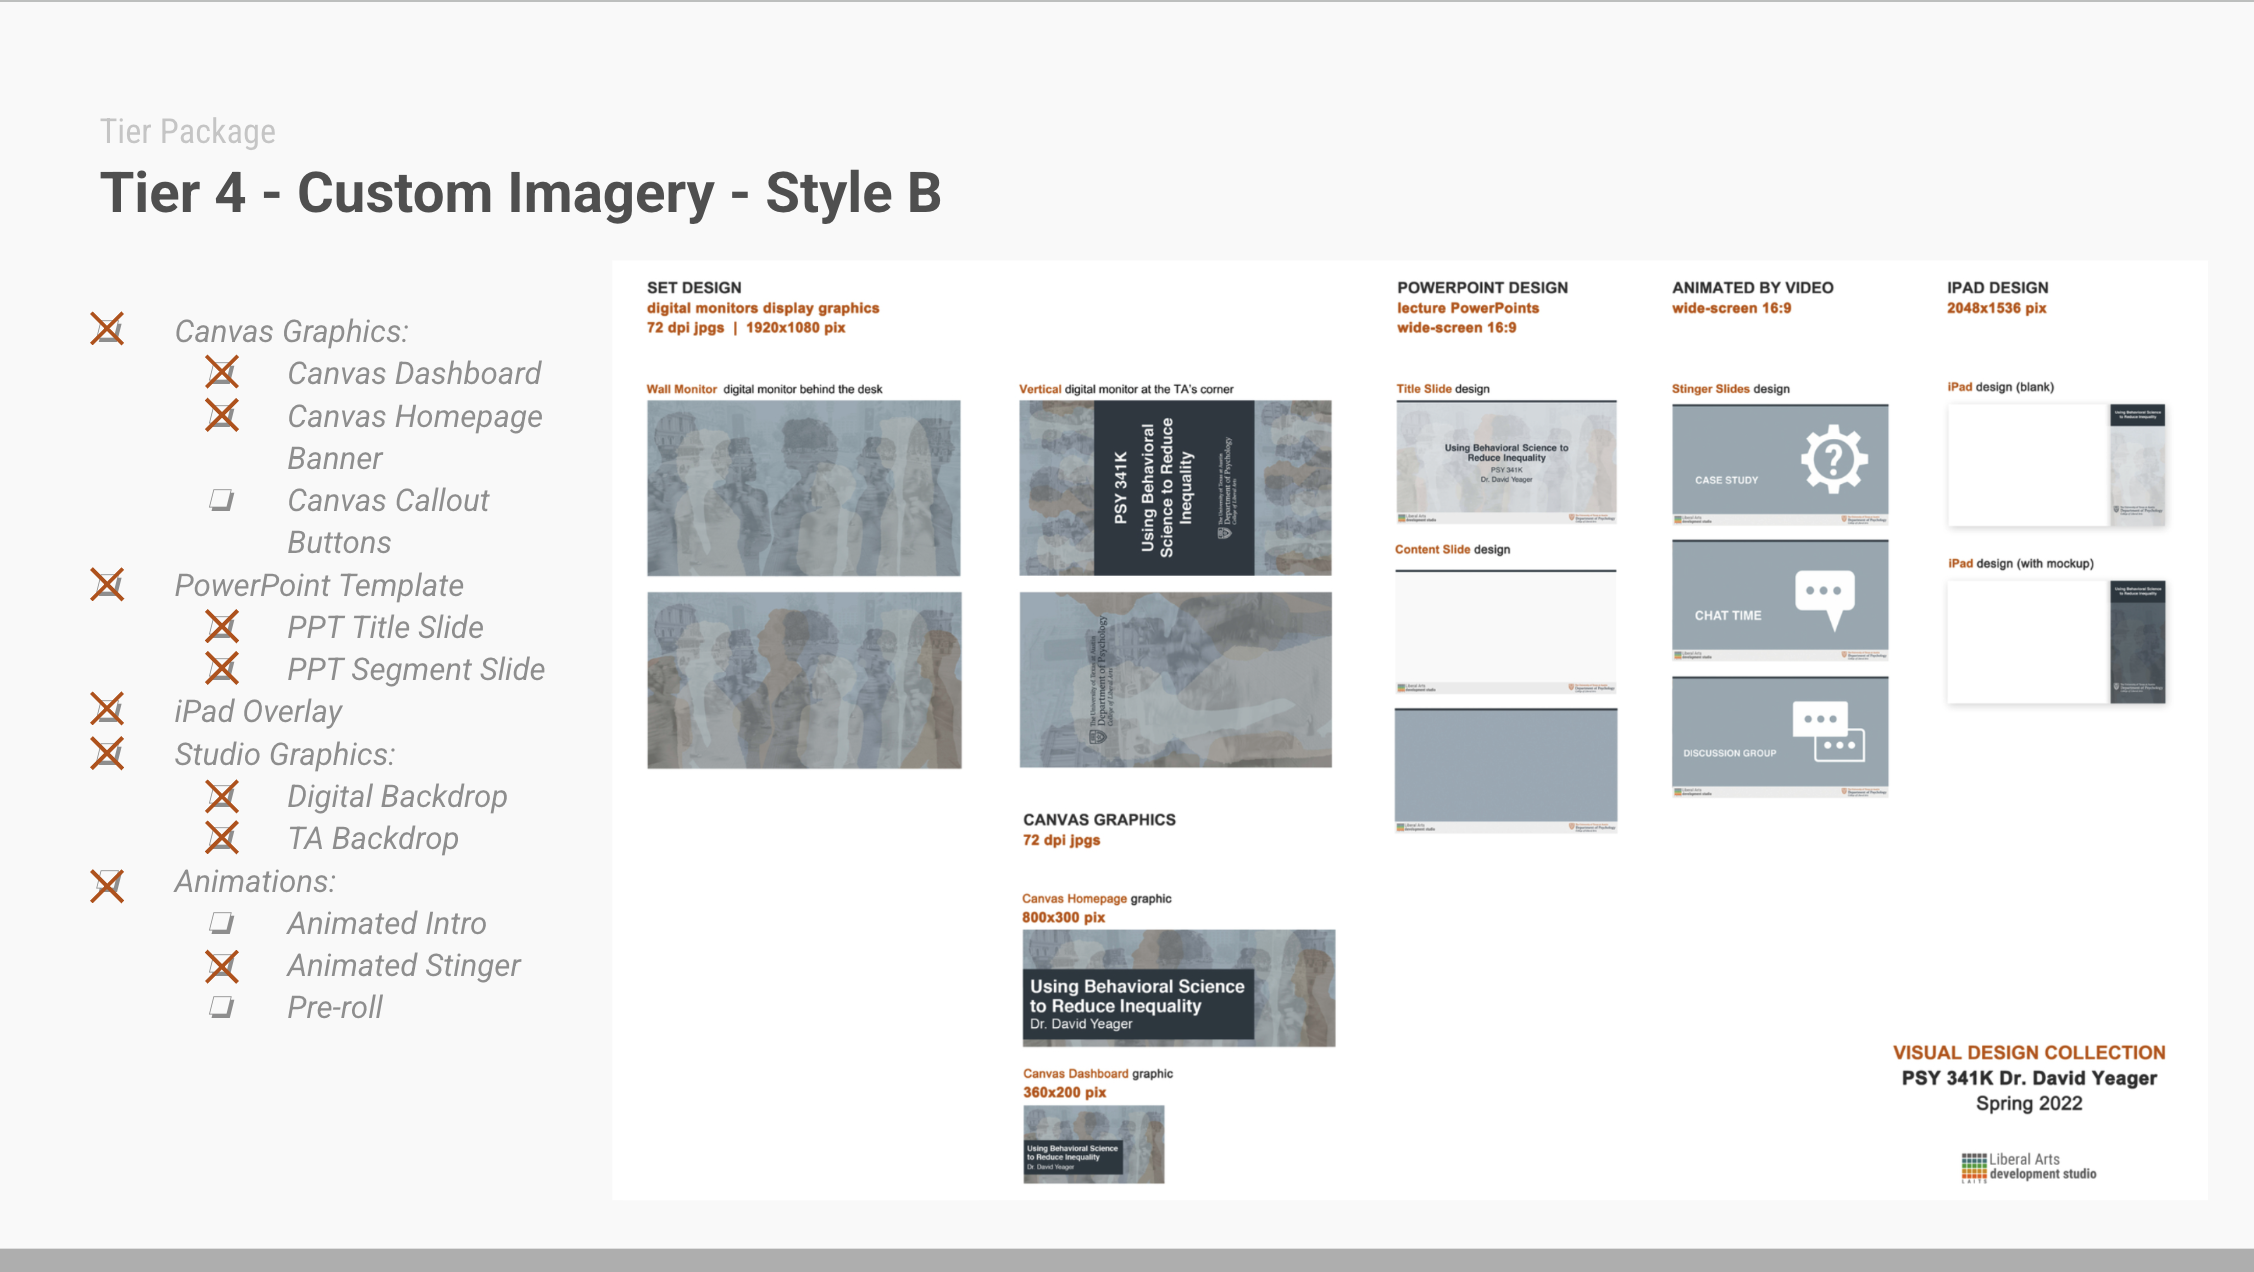
For remote online course graphics, LAITS offers 4 tiers of course graphic packages menus:
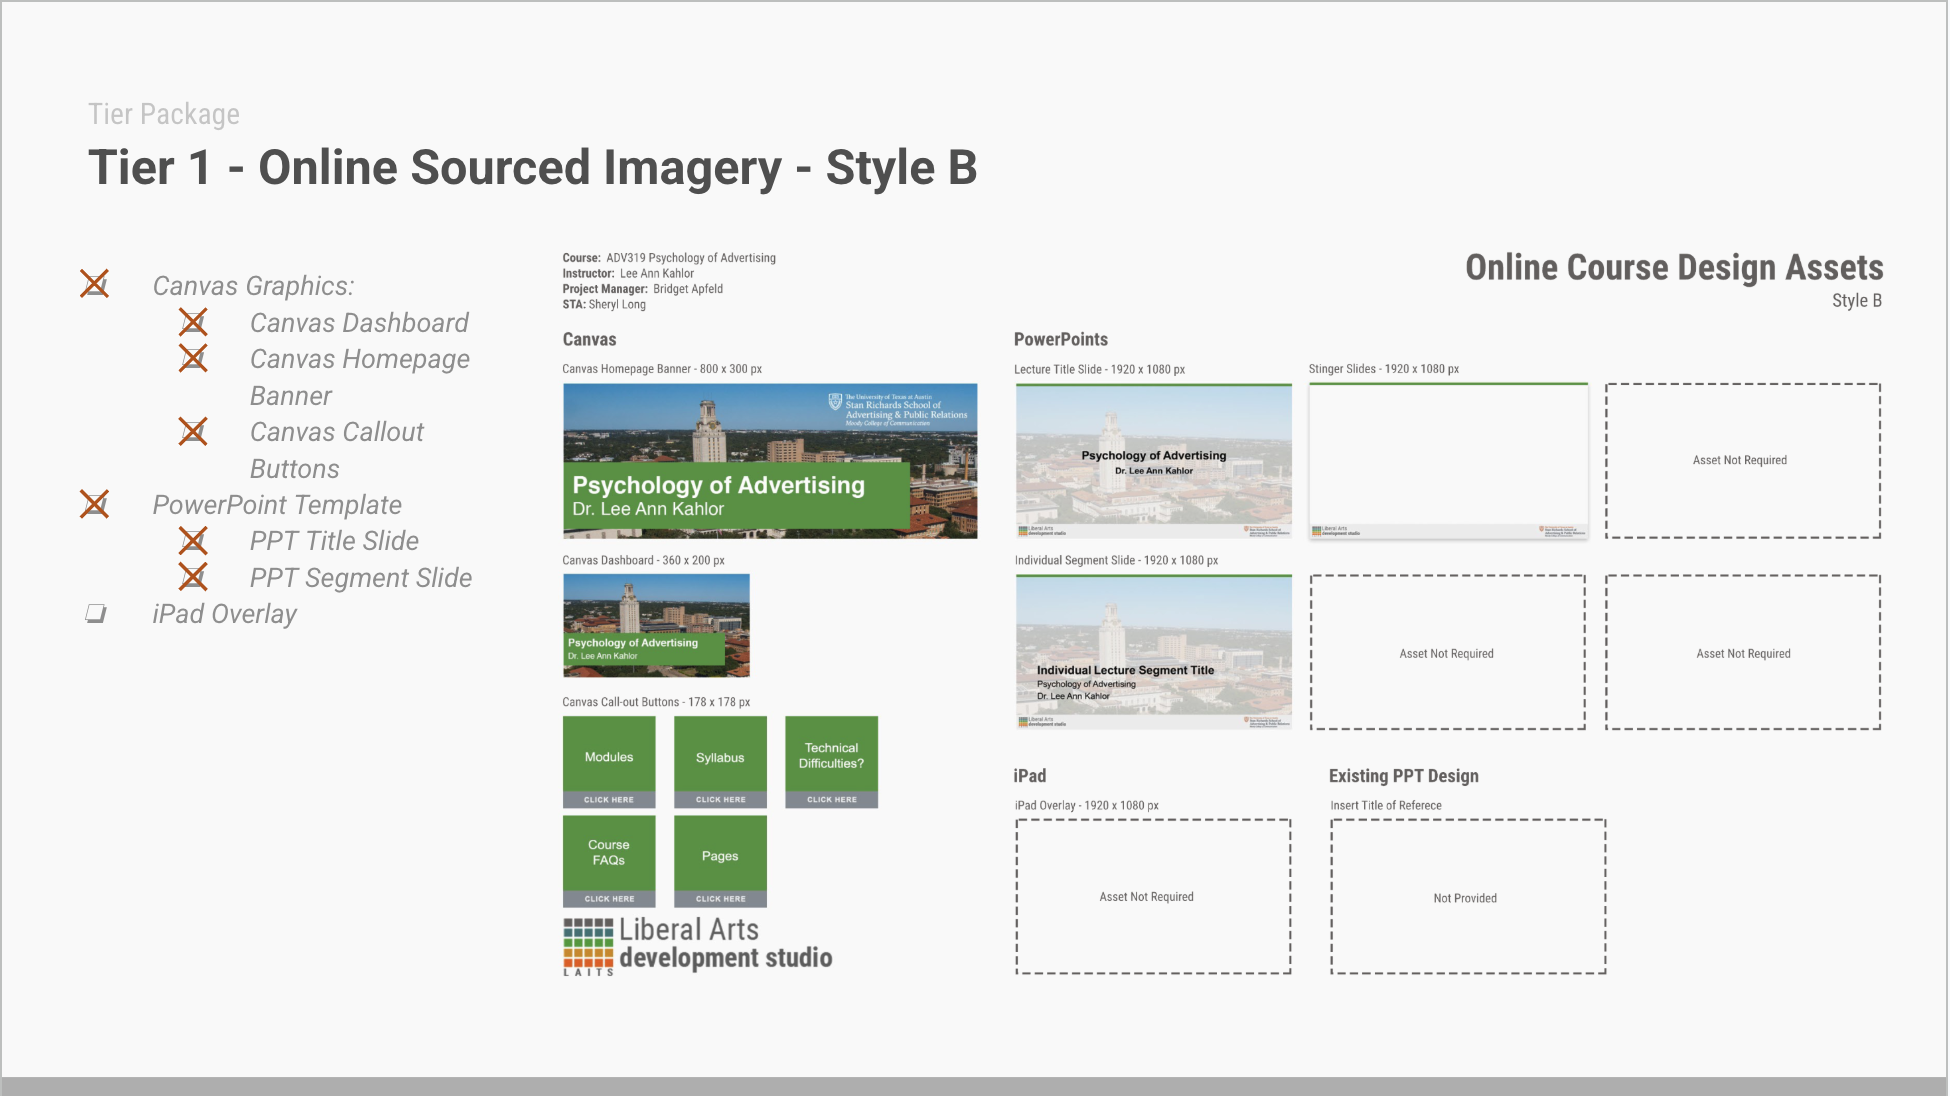
In this training you will just be doing the Tier 1 requested graphics. Each with the option to choose online sourced or custom imagery. In this training, you will be doing online sourced imagery and solid colors.
For this training, you should make a Tier 1 package of graphics for:
a) your favorite course you’ve taken at UT,
b) a course you’re excited to take in the future, or
c) your dream imaginary course.
After you have read through the packages and collected all necessary info and assets, create a folder for your course in your personal Box folder. ex: ADV319 Psychology of Advertising (For a real course, you would create the folder in this semester’s Final Designs folder, which would be linked on Basecamp).
Inside your course folder, create 3 sub folders:
- ADV319 Editable Files (upload your files to this folder)
- ADV319 Finals (upload your approved graphics to this folder)
- ADV319 Assets (upload your original assets like photos to this folder)
You’re all prepped now!
______________________________________________________________________
Canvas Graphics: Home Page Banner
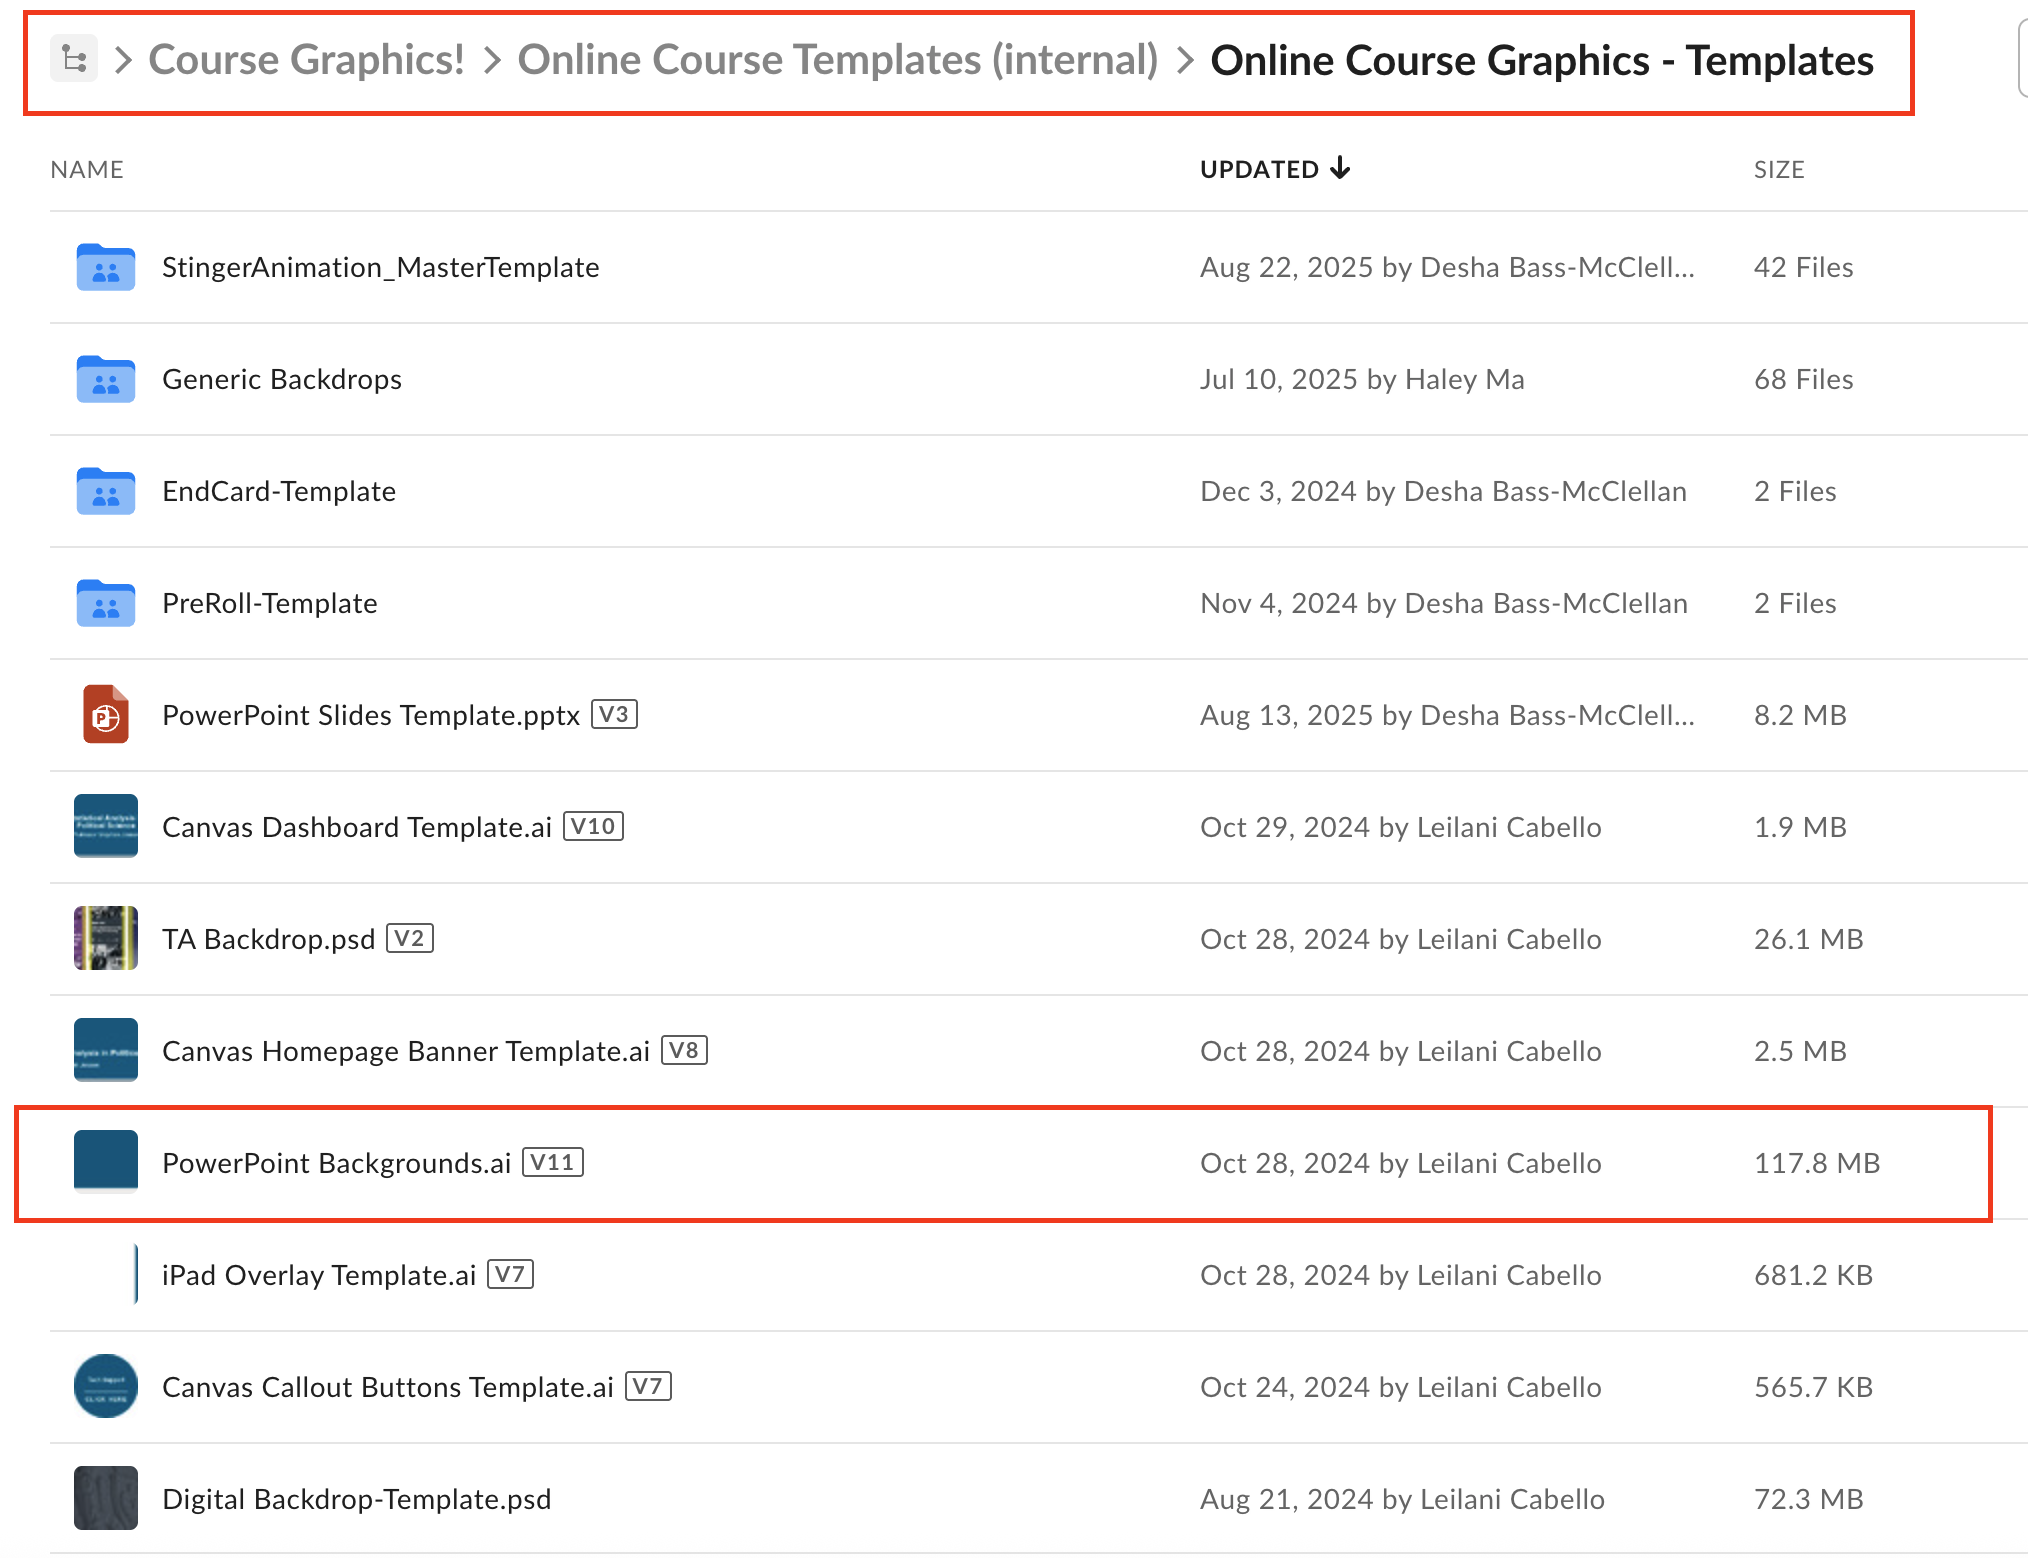
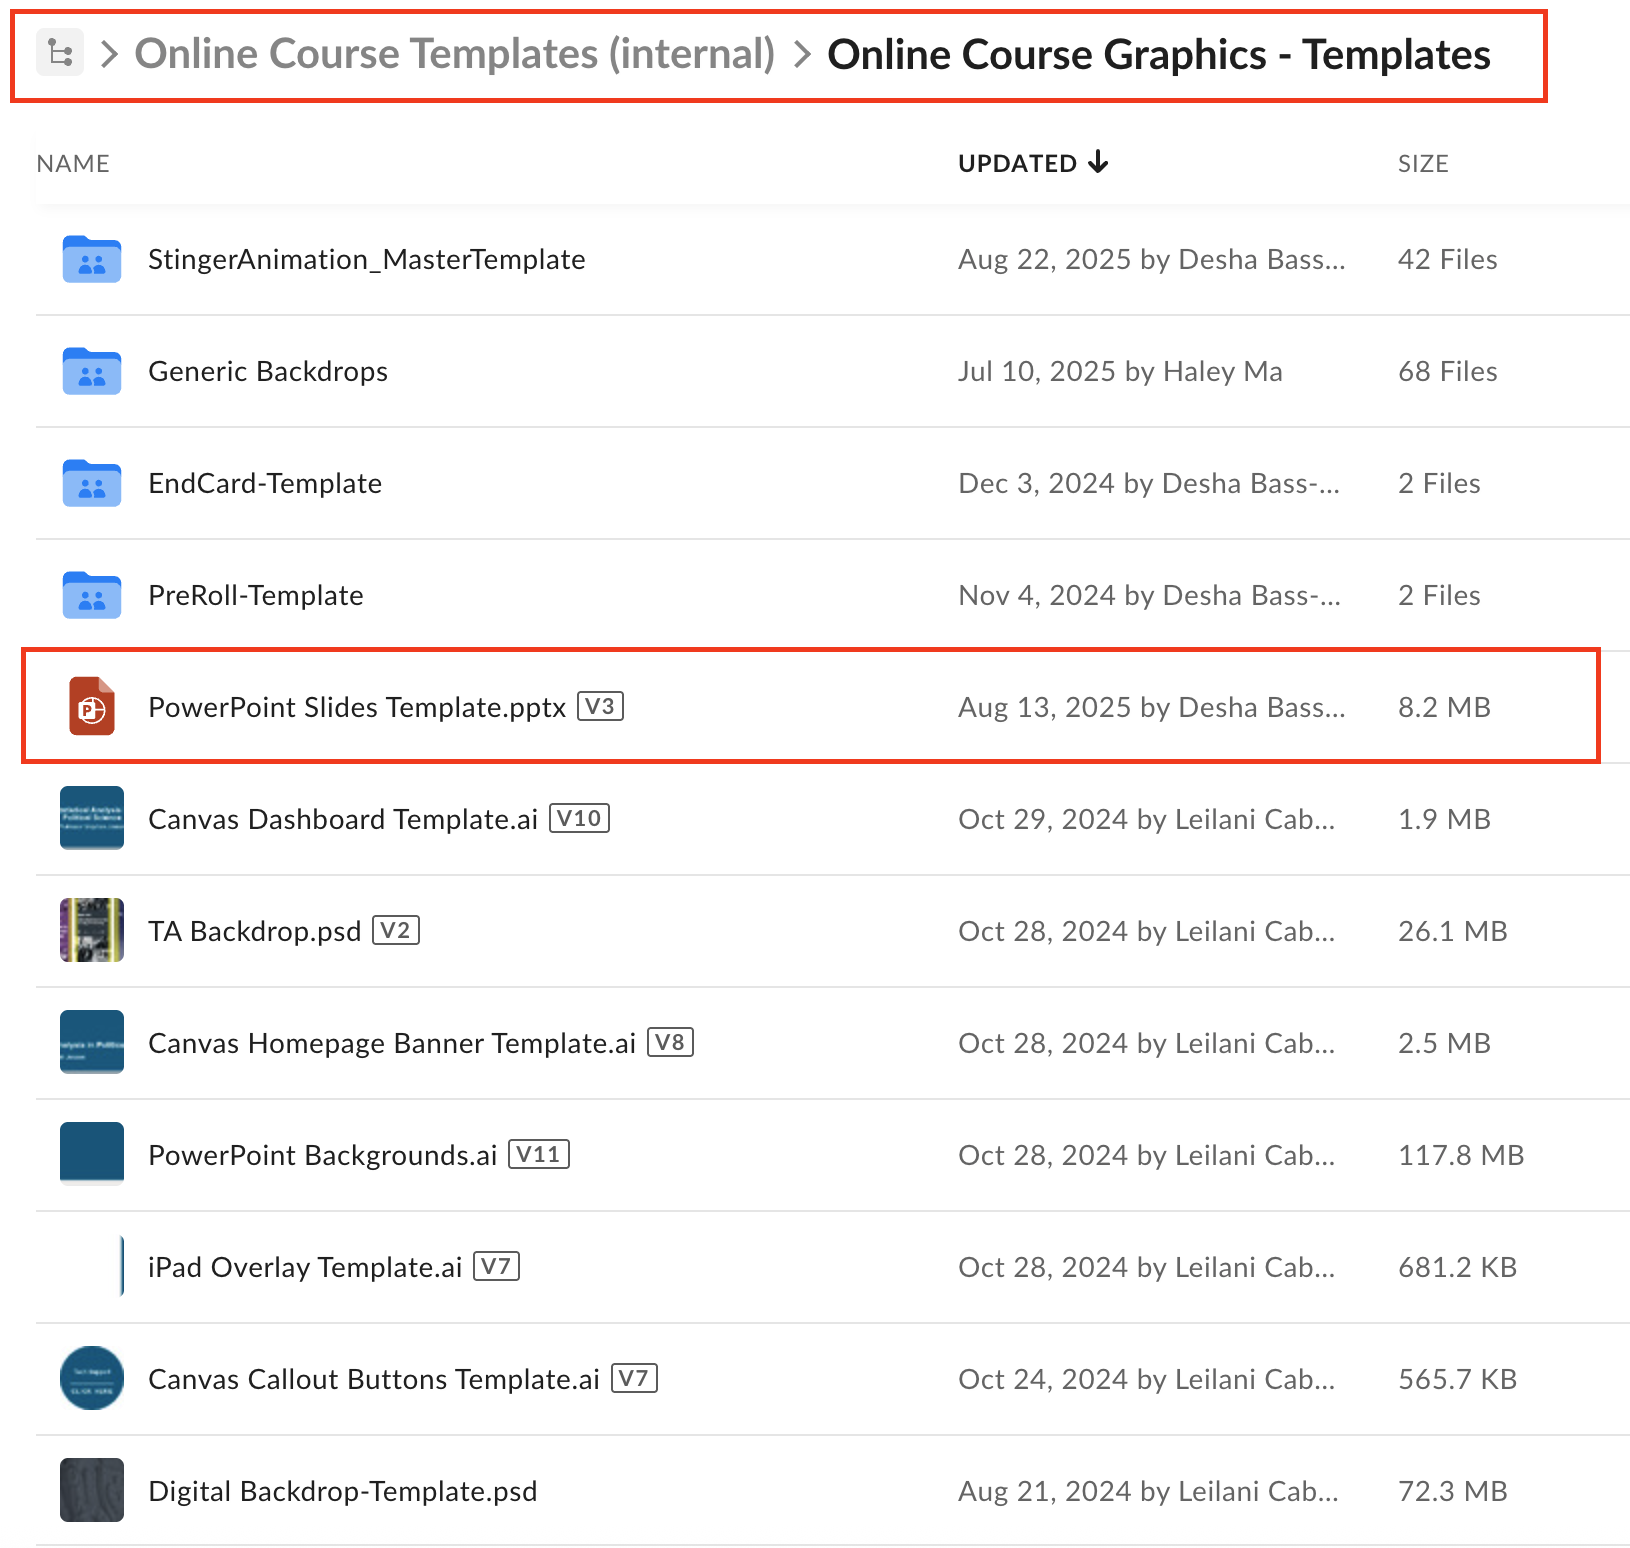
Course Graphics Templates folder
Go to the template folder and navigate to the Canvas Homepage Banner
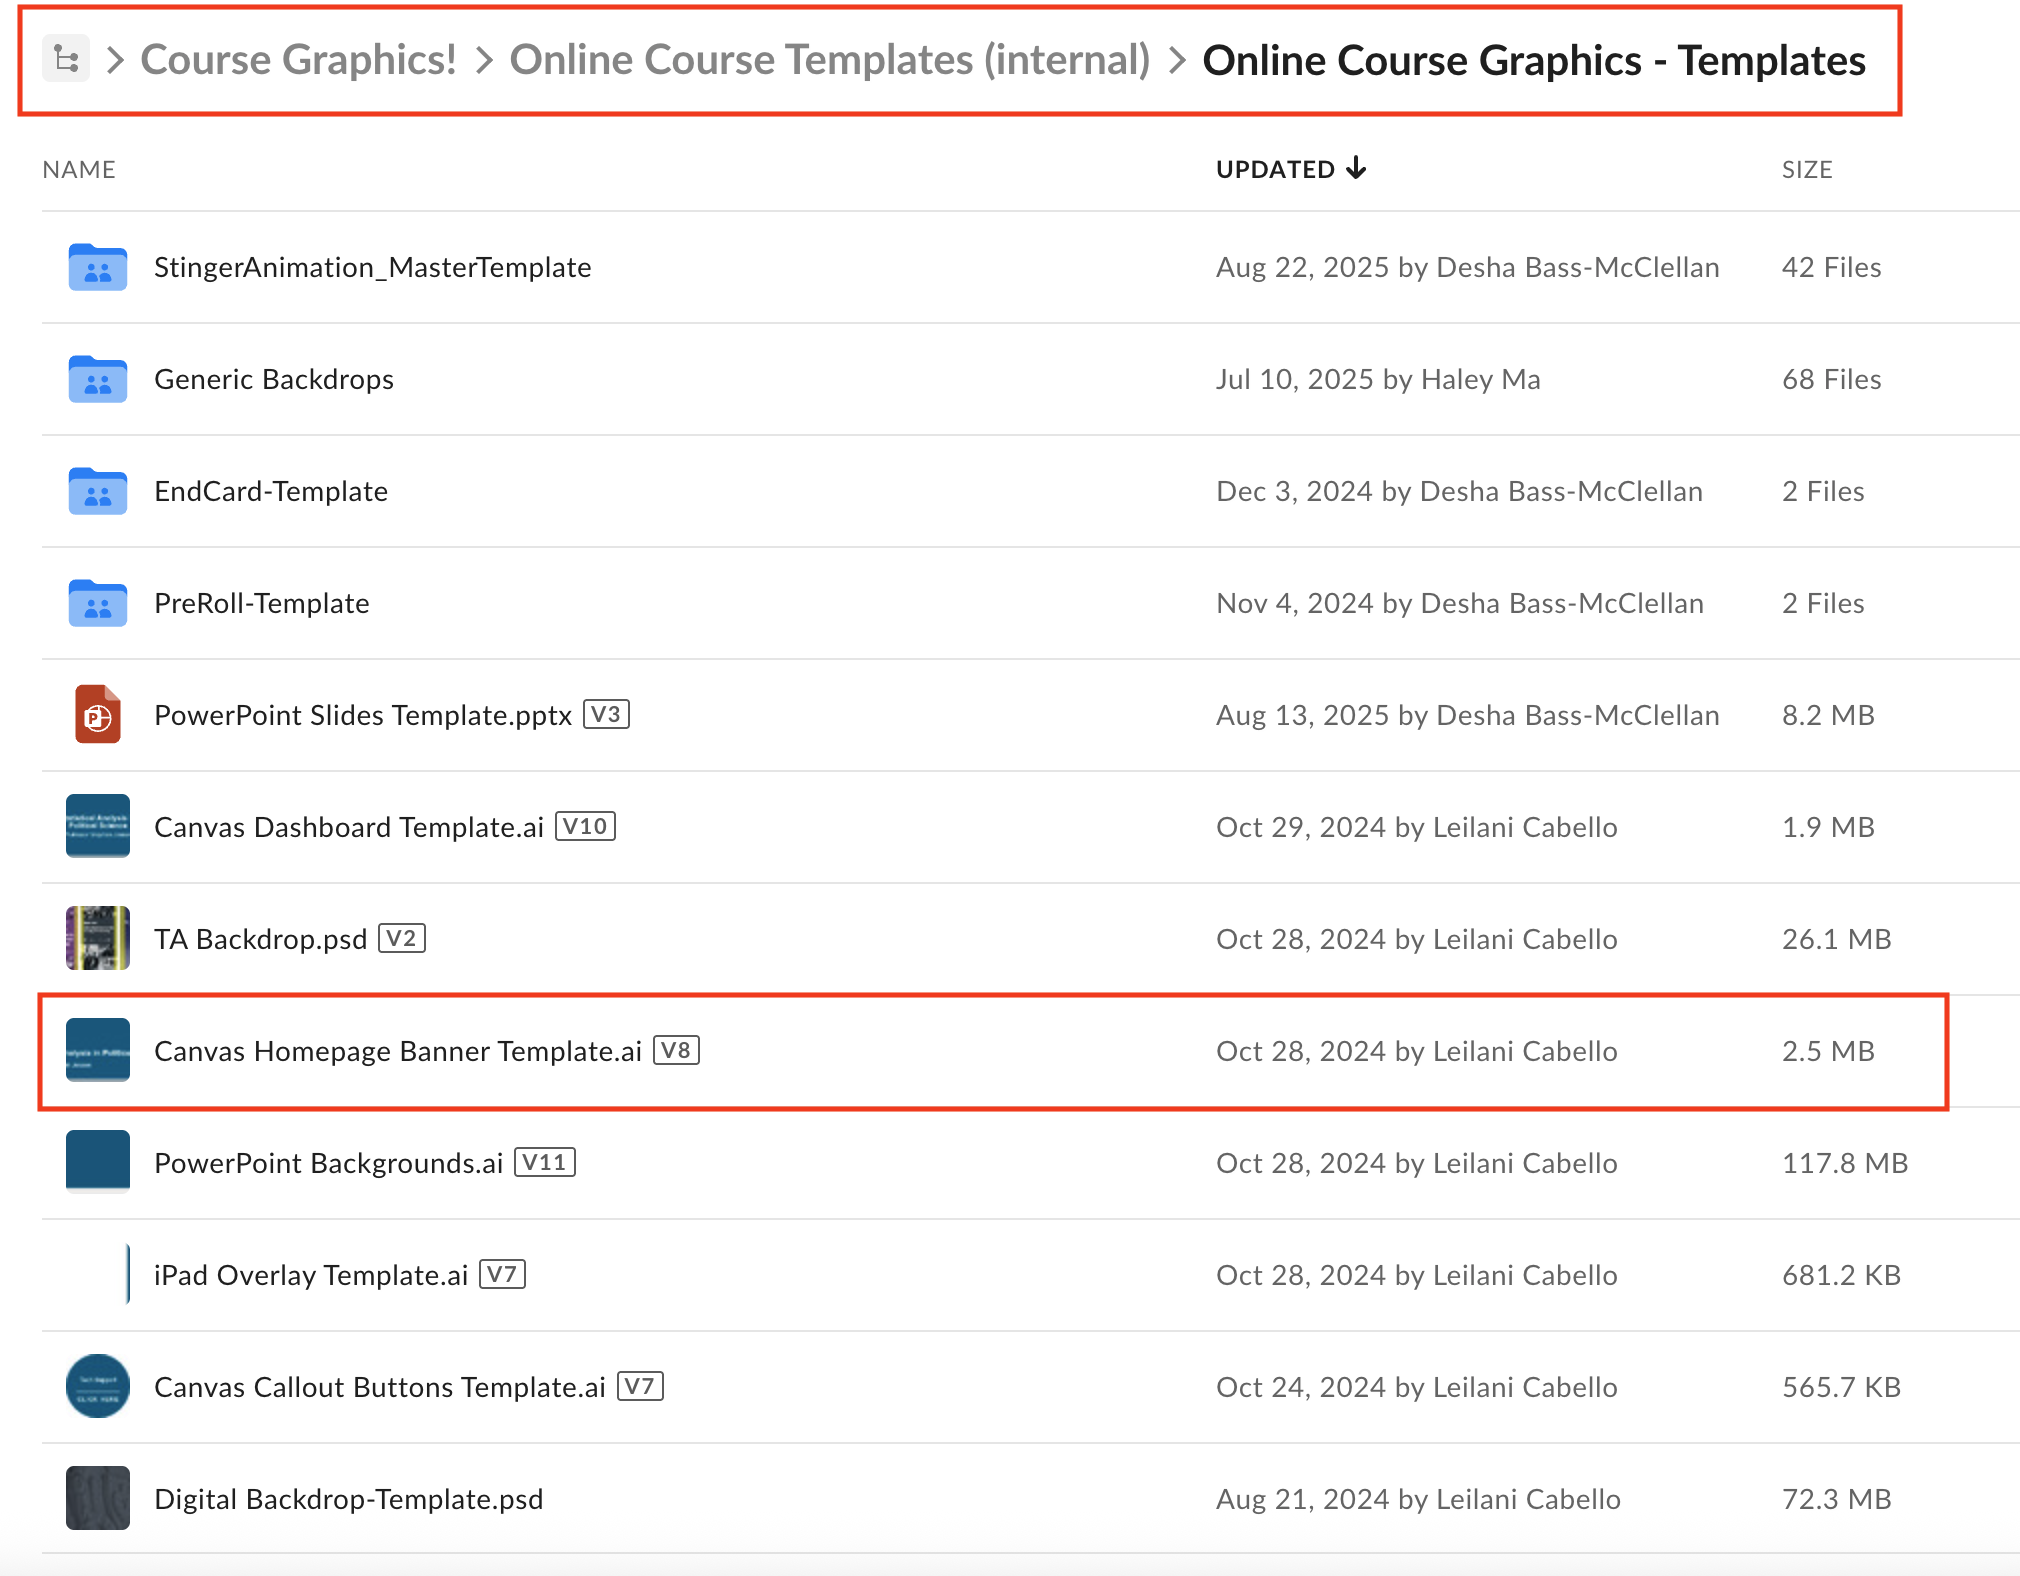
Download and open the template in Illustrator. Go to File > Save As and rename the file to your “coursename_CanvasHomepageBanner (EX: ADV319_CanvasHomepageBanner)
Step 1
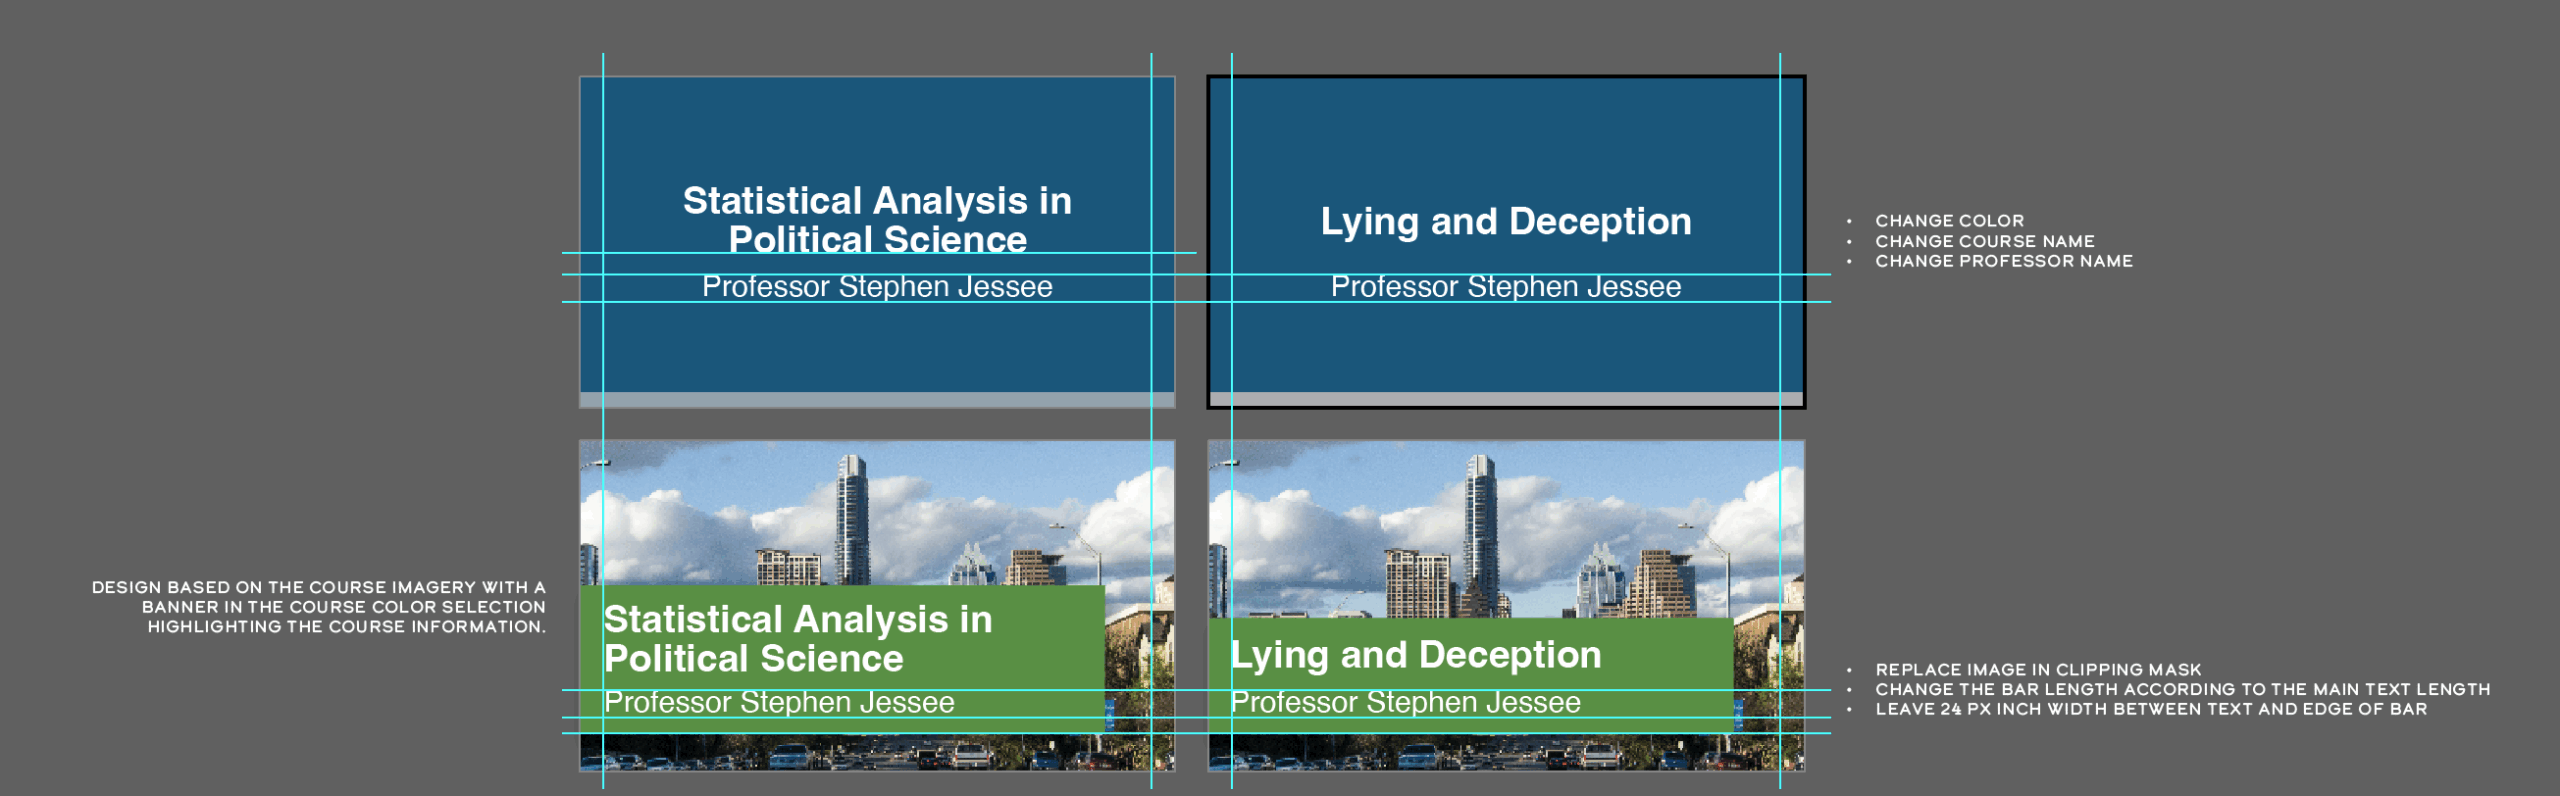
Choose a style for your banner
Solid color:
Online Imagery:

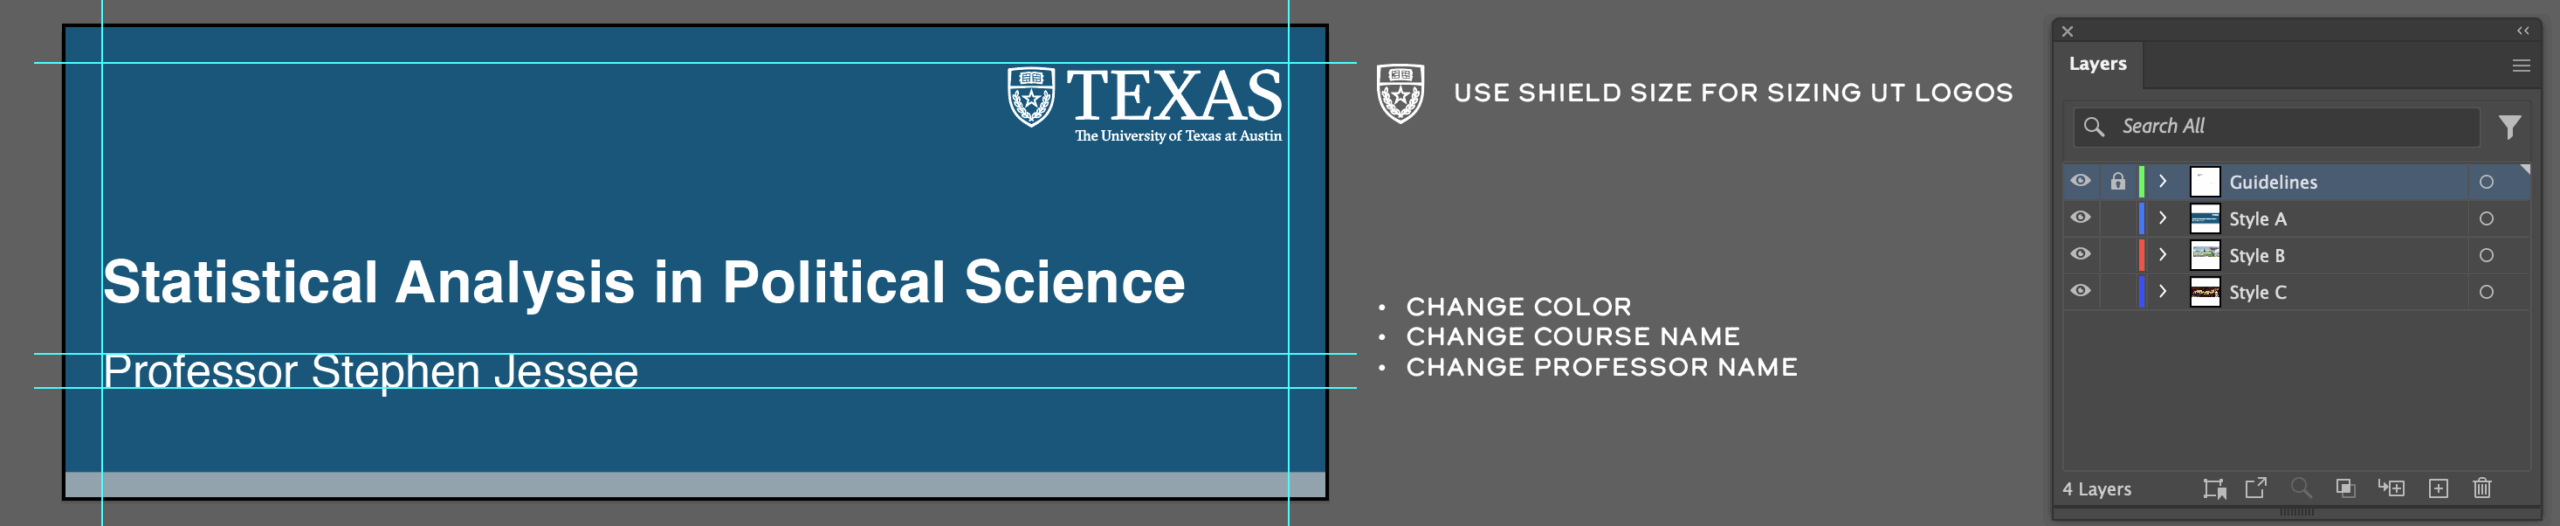
Editing the Background and Text for the Solid Color Banner
Step 2
To edit the solid color banner, select the background color and then switch the color by double-clicking the palette in the tool bar.

Step 3
Edit the text by double clicking and changing the name of the course and professor to your chosen class
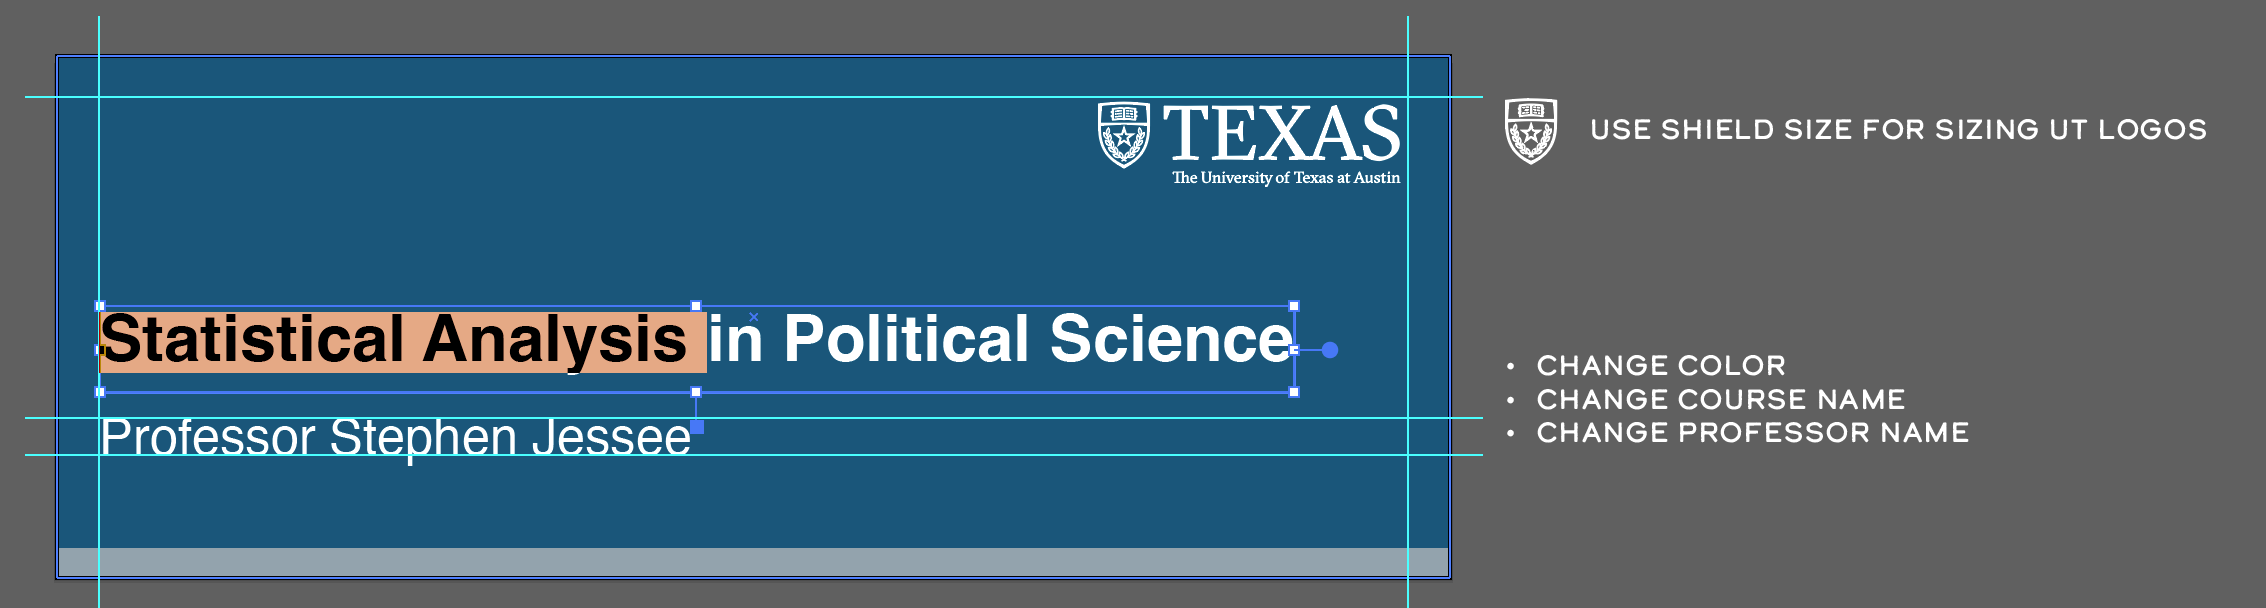
You can also select and edit the elements by going to the layers panel and unhiding the Style A layer where you’ll find the UT logo, Sub Text, Main Text, Bottom Bar (Not be to edited), and the Background color.

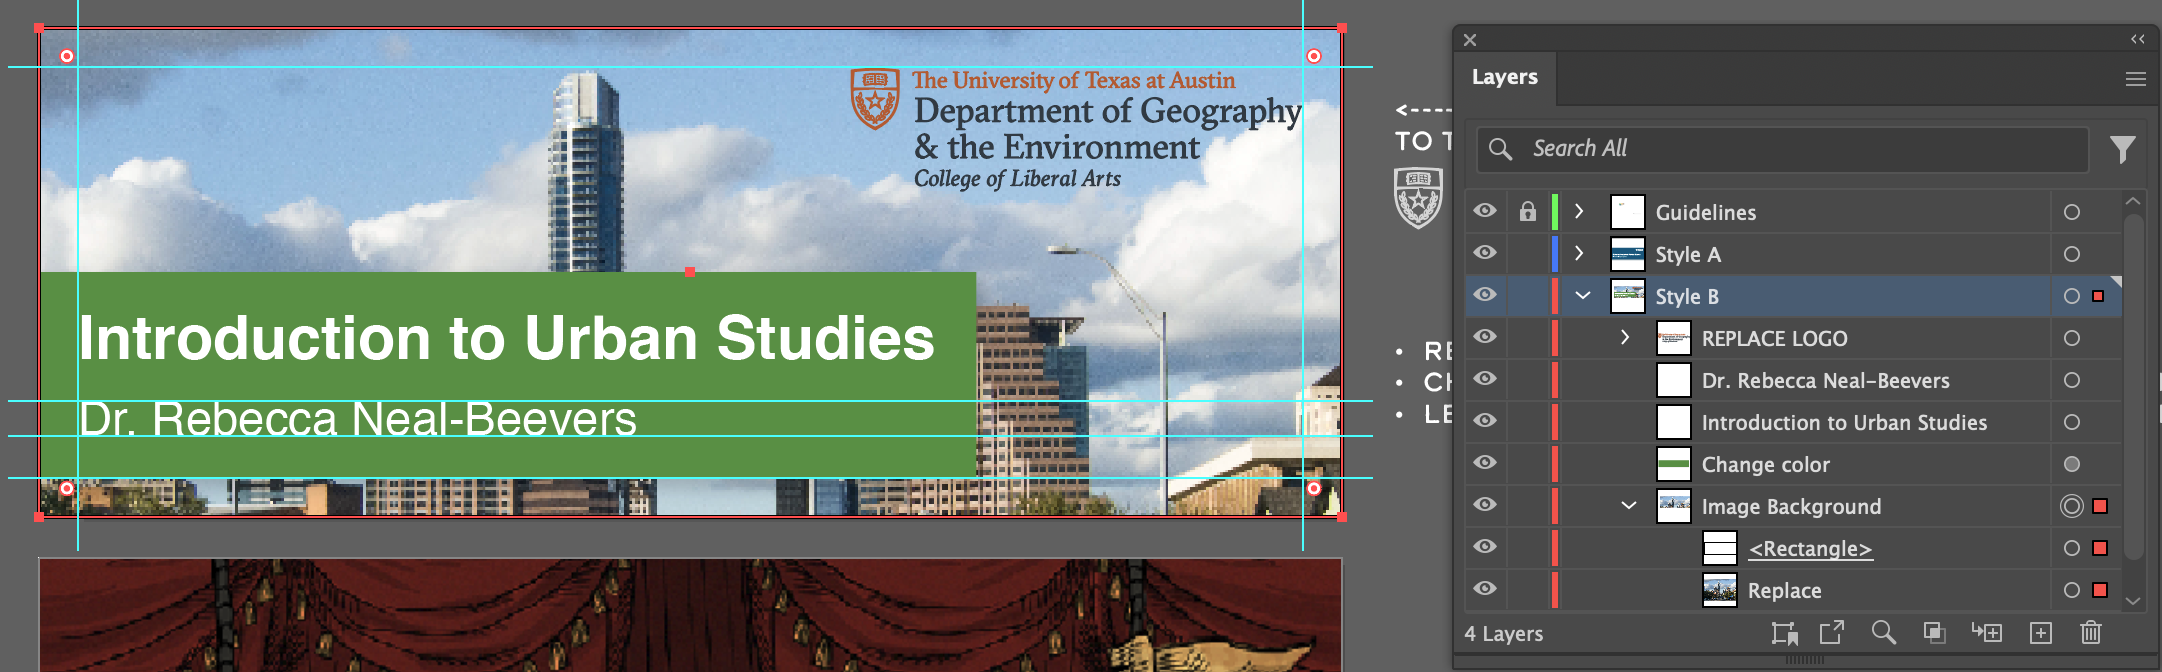
Editing the Background and Text for the Online Image Banner
Step 2
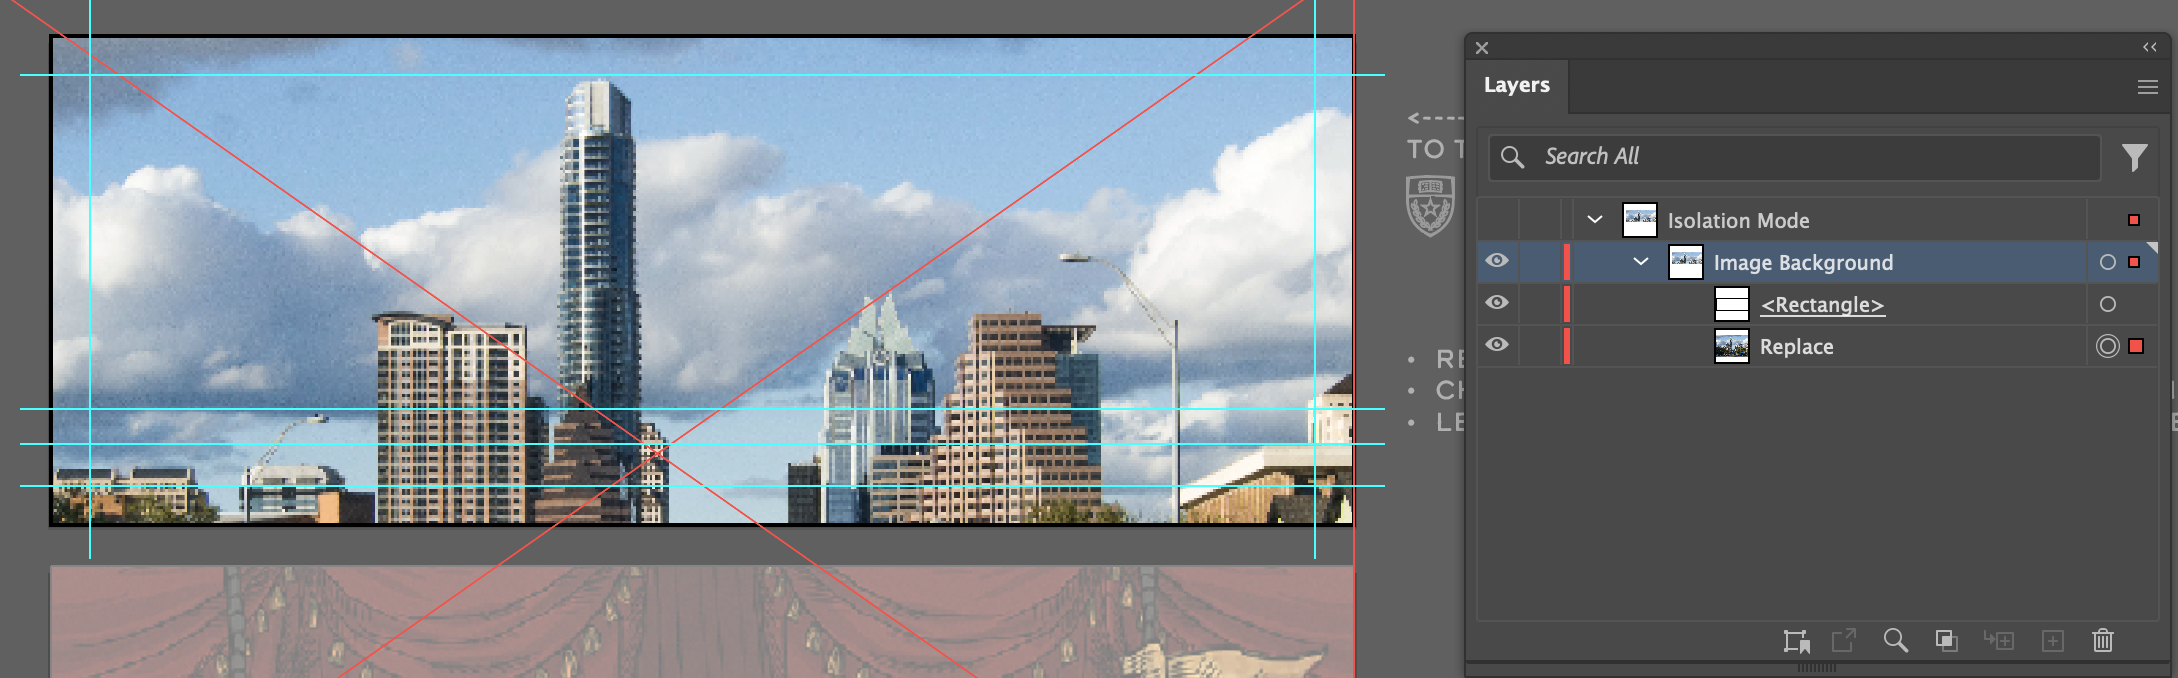
To edit the image banner, you will have to double click the background image until your layers panel shows “Isolation Mode” and the only layer is the “Replace” layer.

Step 3
Add your image by either importing from the computer or drag and dropping.
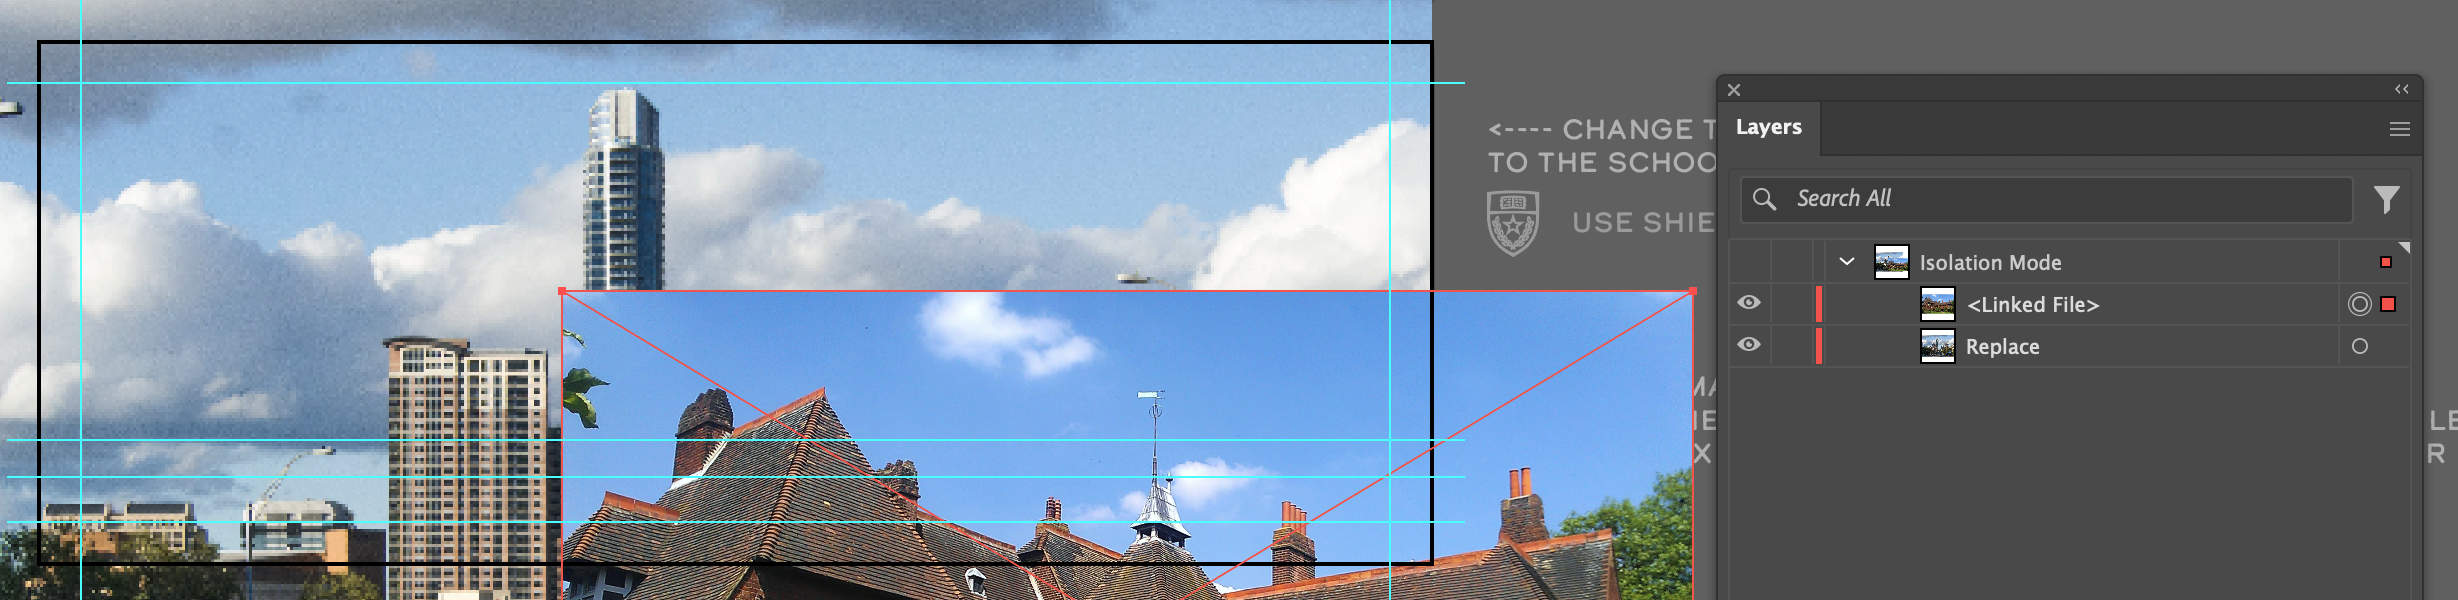
Adjust the image size and position to your liking and delete or hide the replace layer.
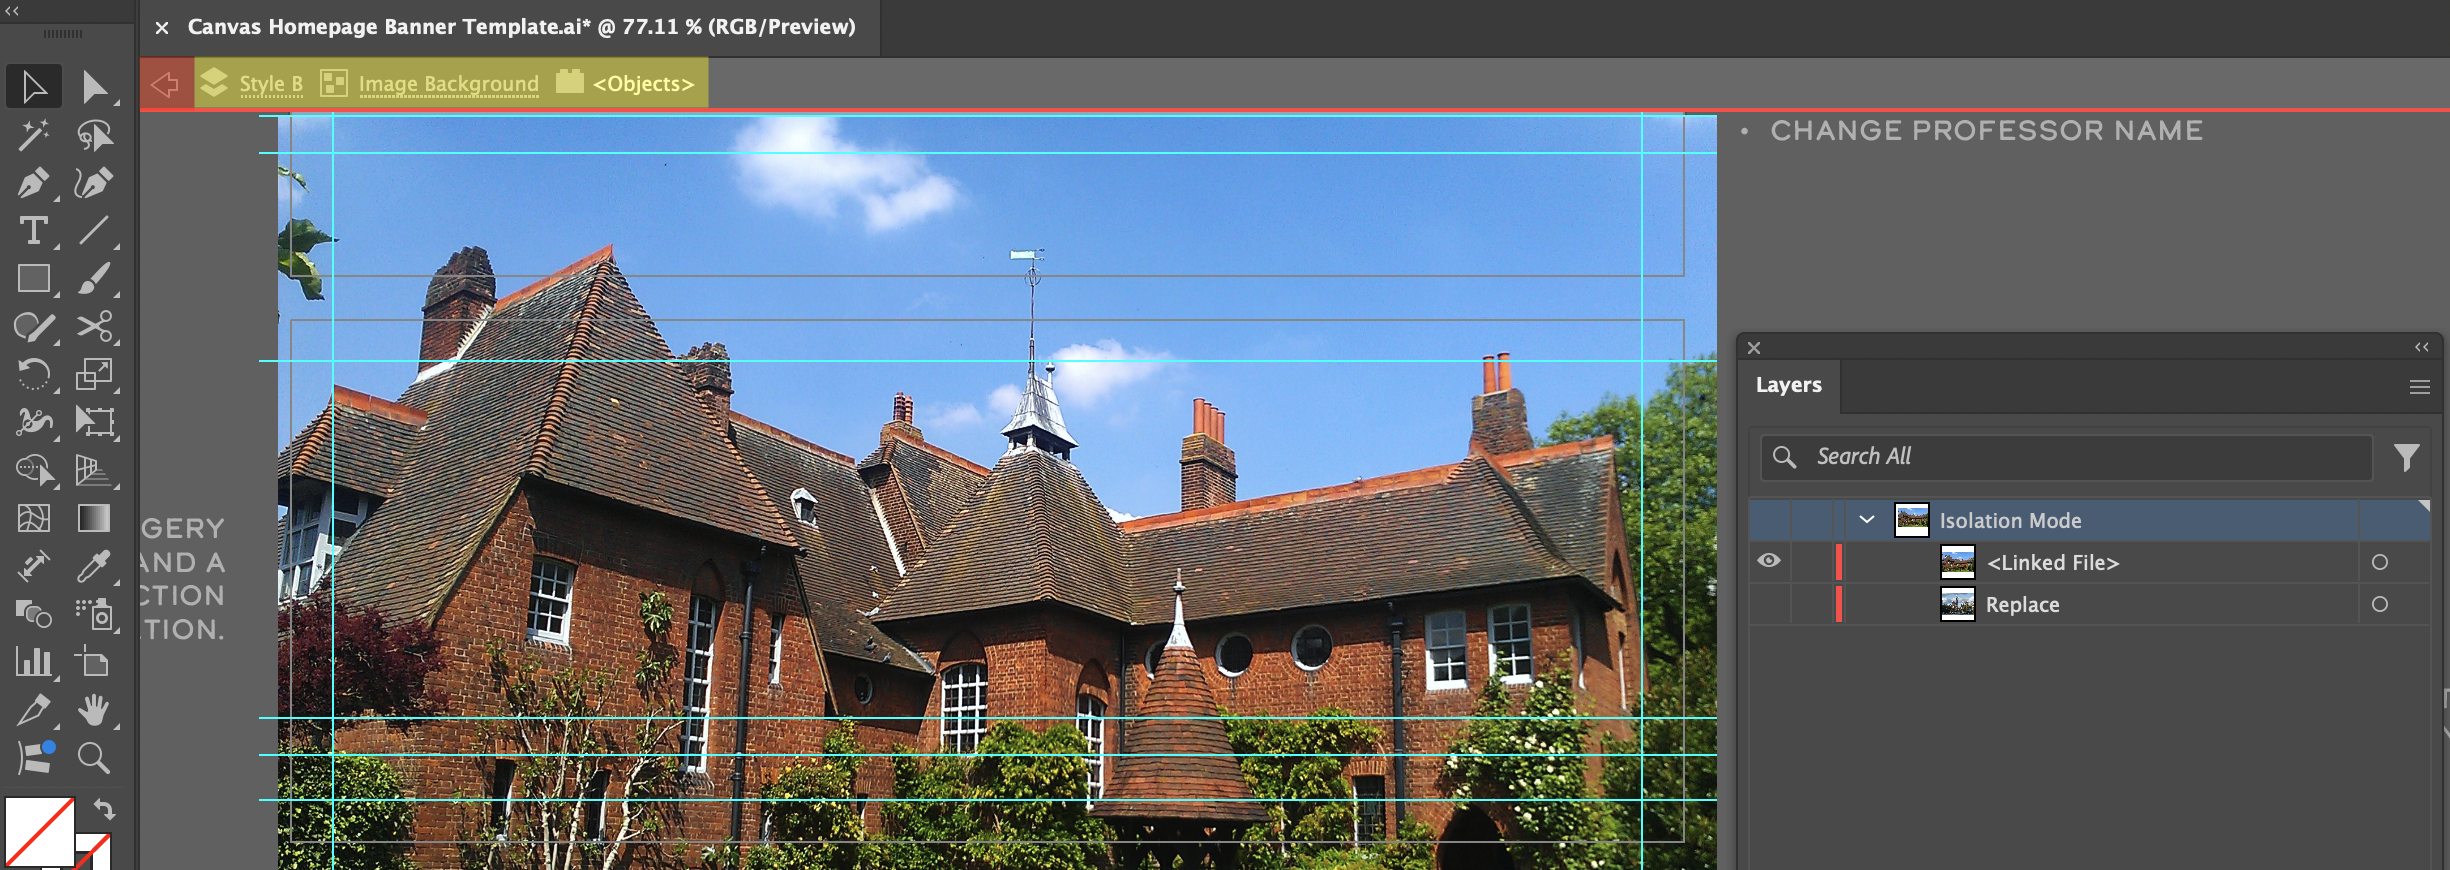
You can go back to the main layer by navigating to the arrow near the top with the layer names on the side. Click this arrow until you return to the main board.
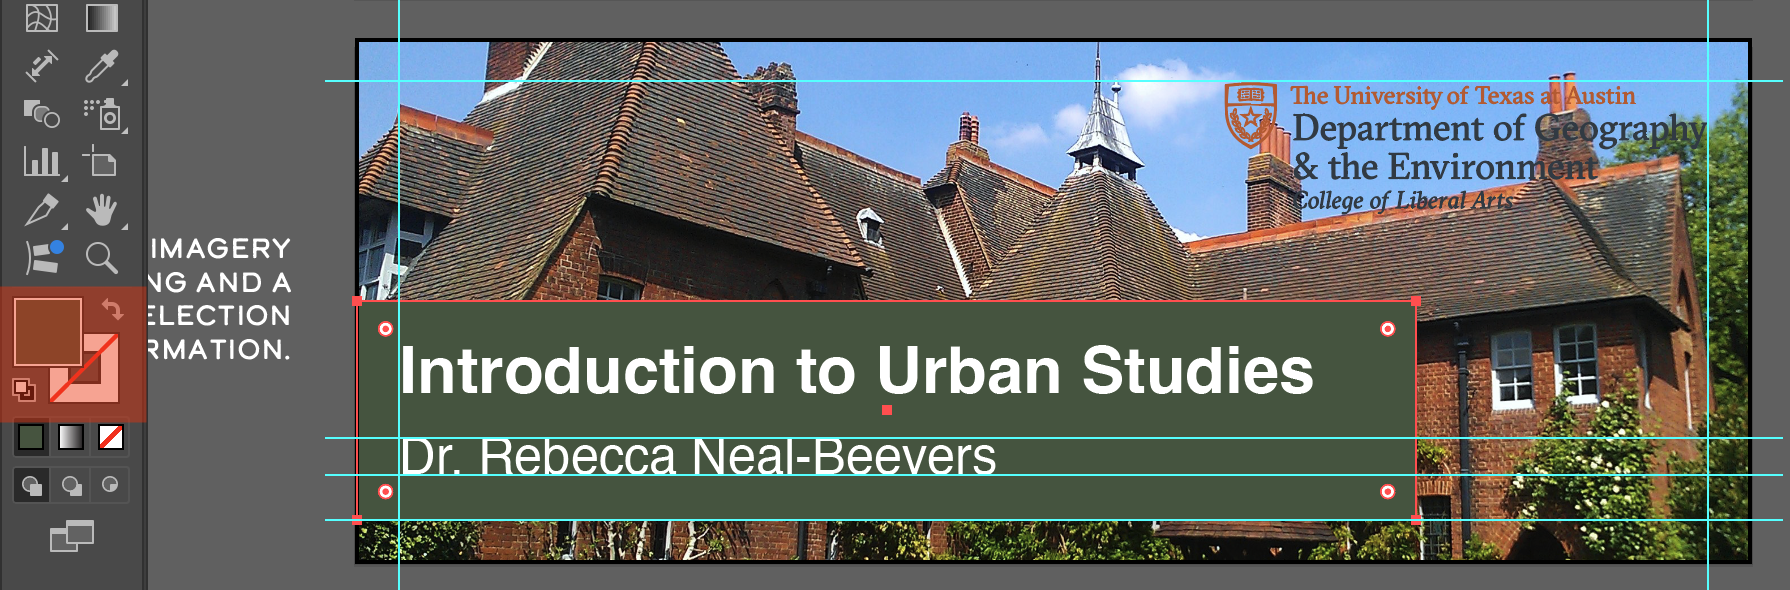
Step 4
Edit the text by double clicking and changing the name of the course and professor to your chosen class.
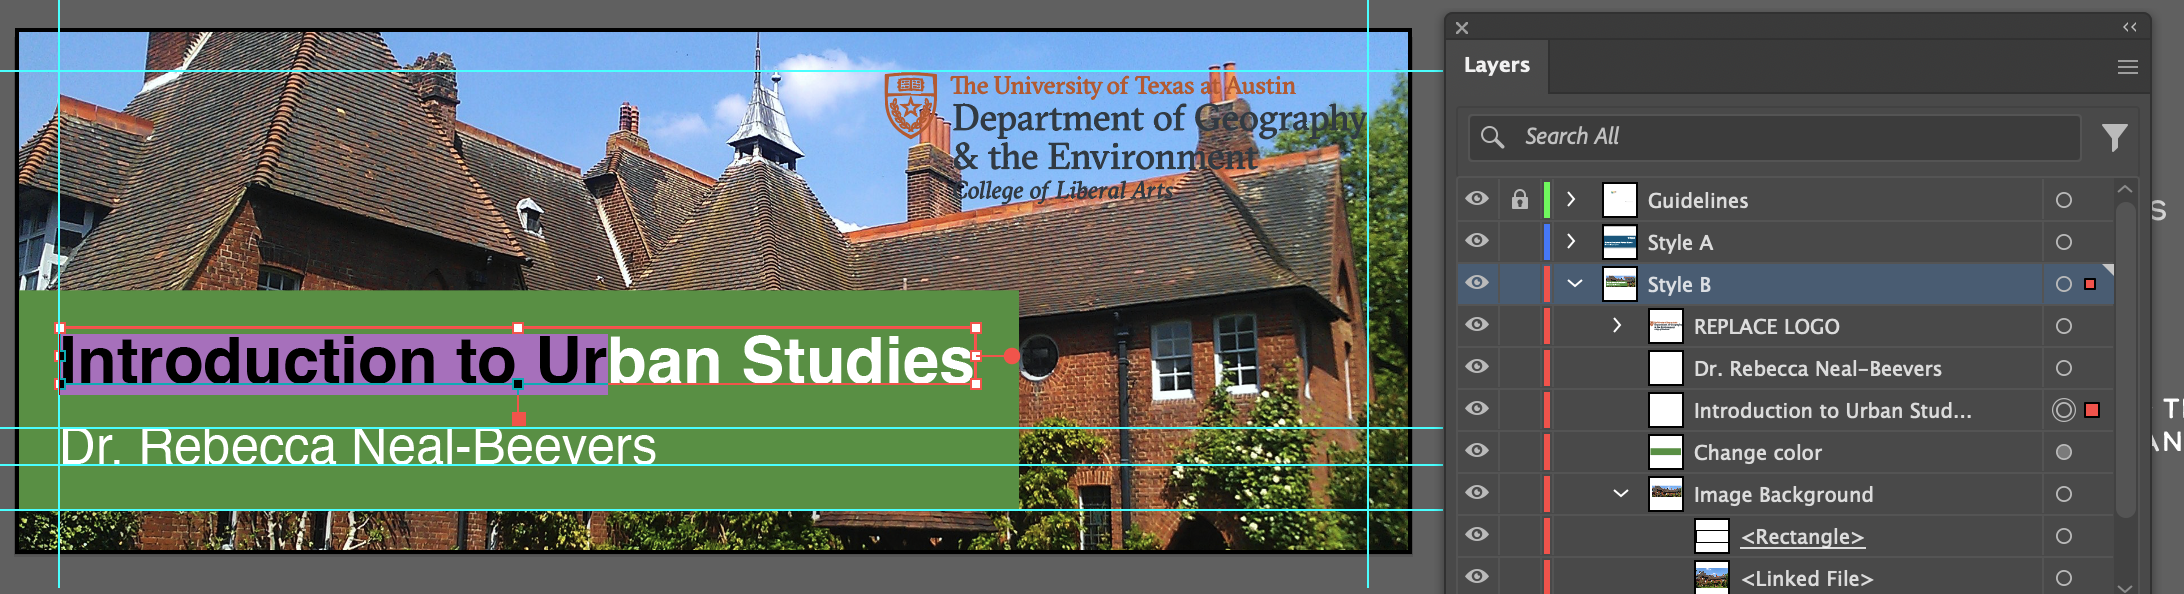
If you’re text is too long or short, you will have to adjust the colored bar to the appropriate length. Make sure your text and bar are within the blue guidelines.
Step 5
To do this, select the bar on either the Artboard or in the layers panel and adjust the length accordingly by dragging on the sides of the bar.
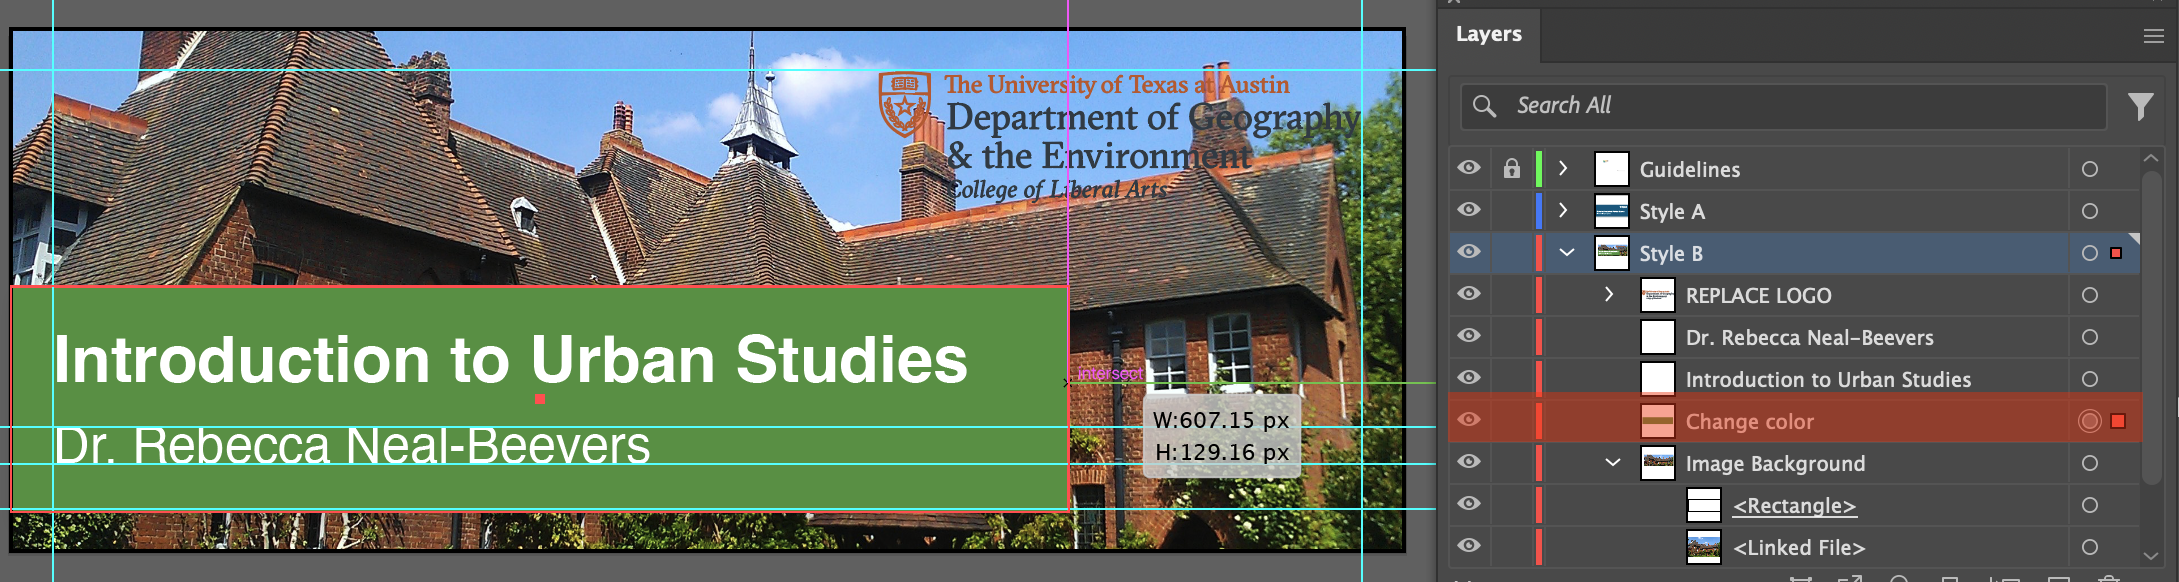
Step 6
To change the color of the bar, navigate to the color palette in the tool bar and double click the fill square.
Step 7
If you would like to change the UT branding to a different department, drag and drop a png of the logo. Size and position it in the same spot as the old logo, then delete or hide the old logo in the layers panel.
Step 8
to export, click on the Artboard with your edited banner, go to File > Export > Save For Web (Legacy). Export as a PNG-24 with Transparency on and save to your personal canvas graphics folder.
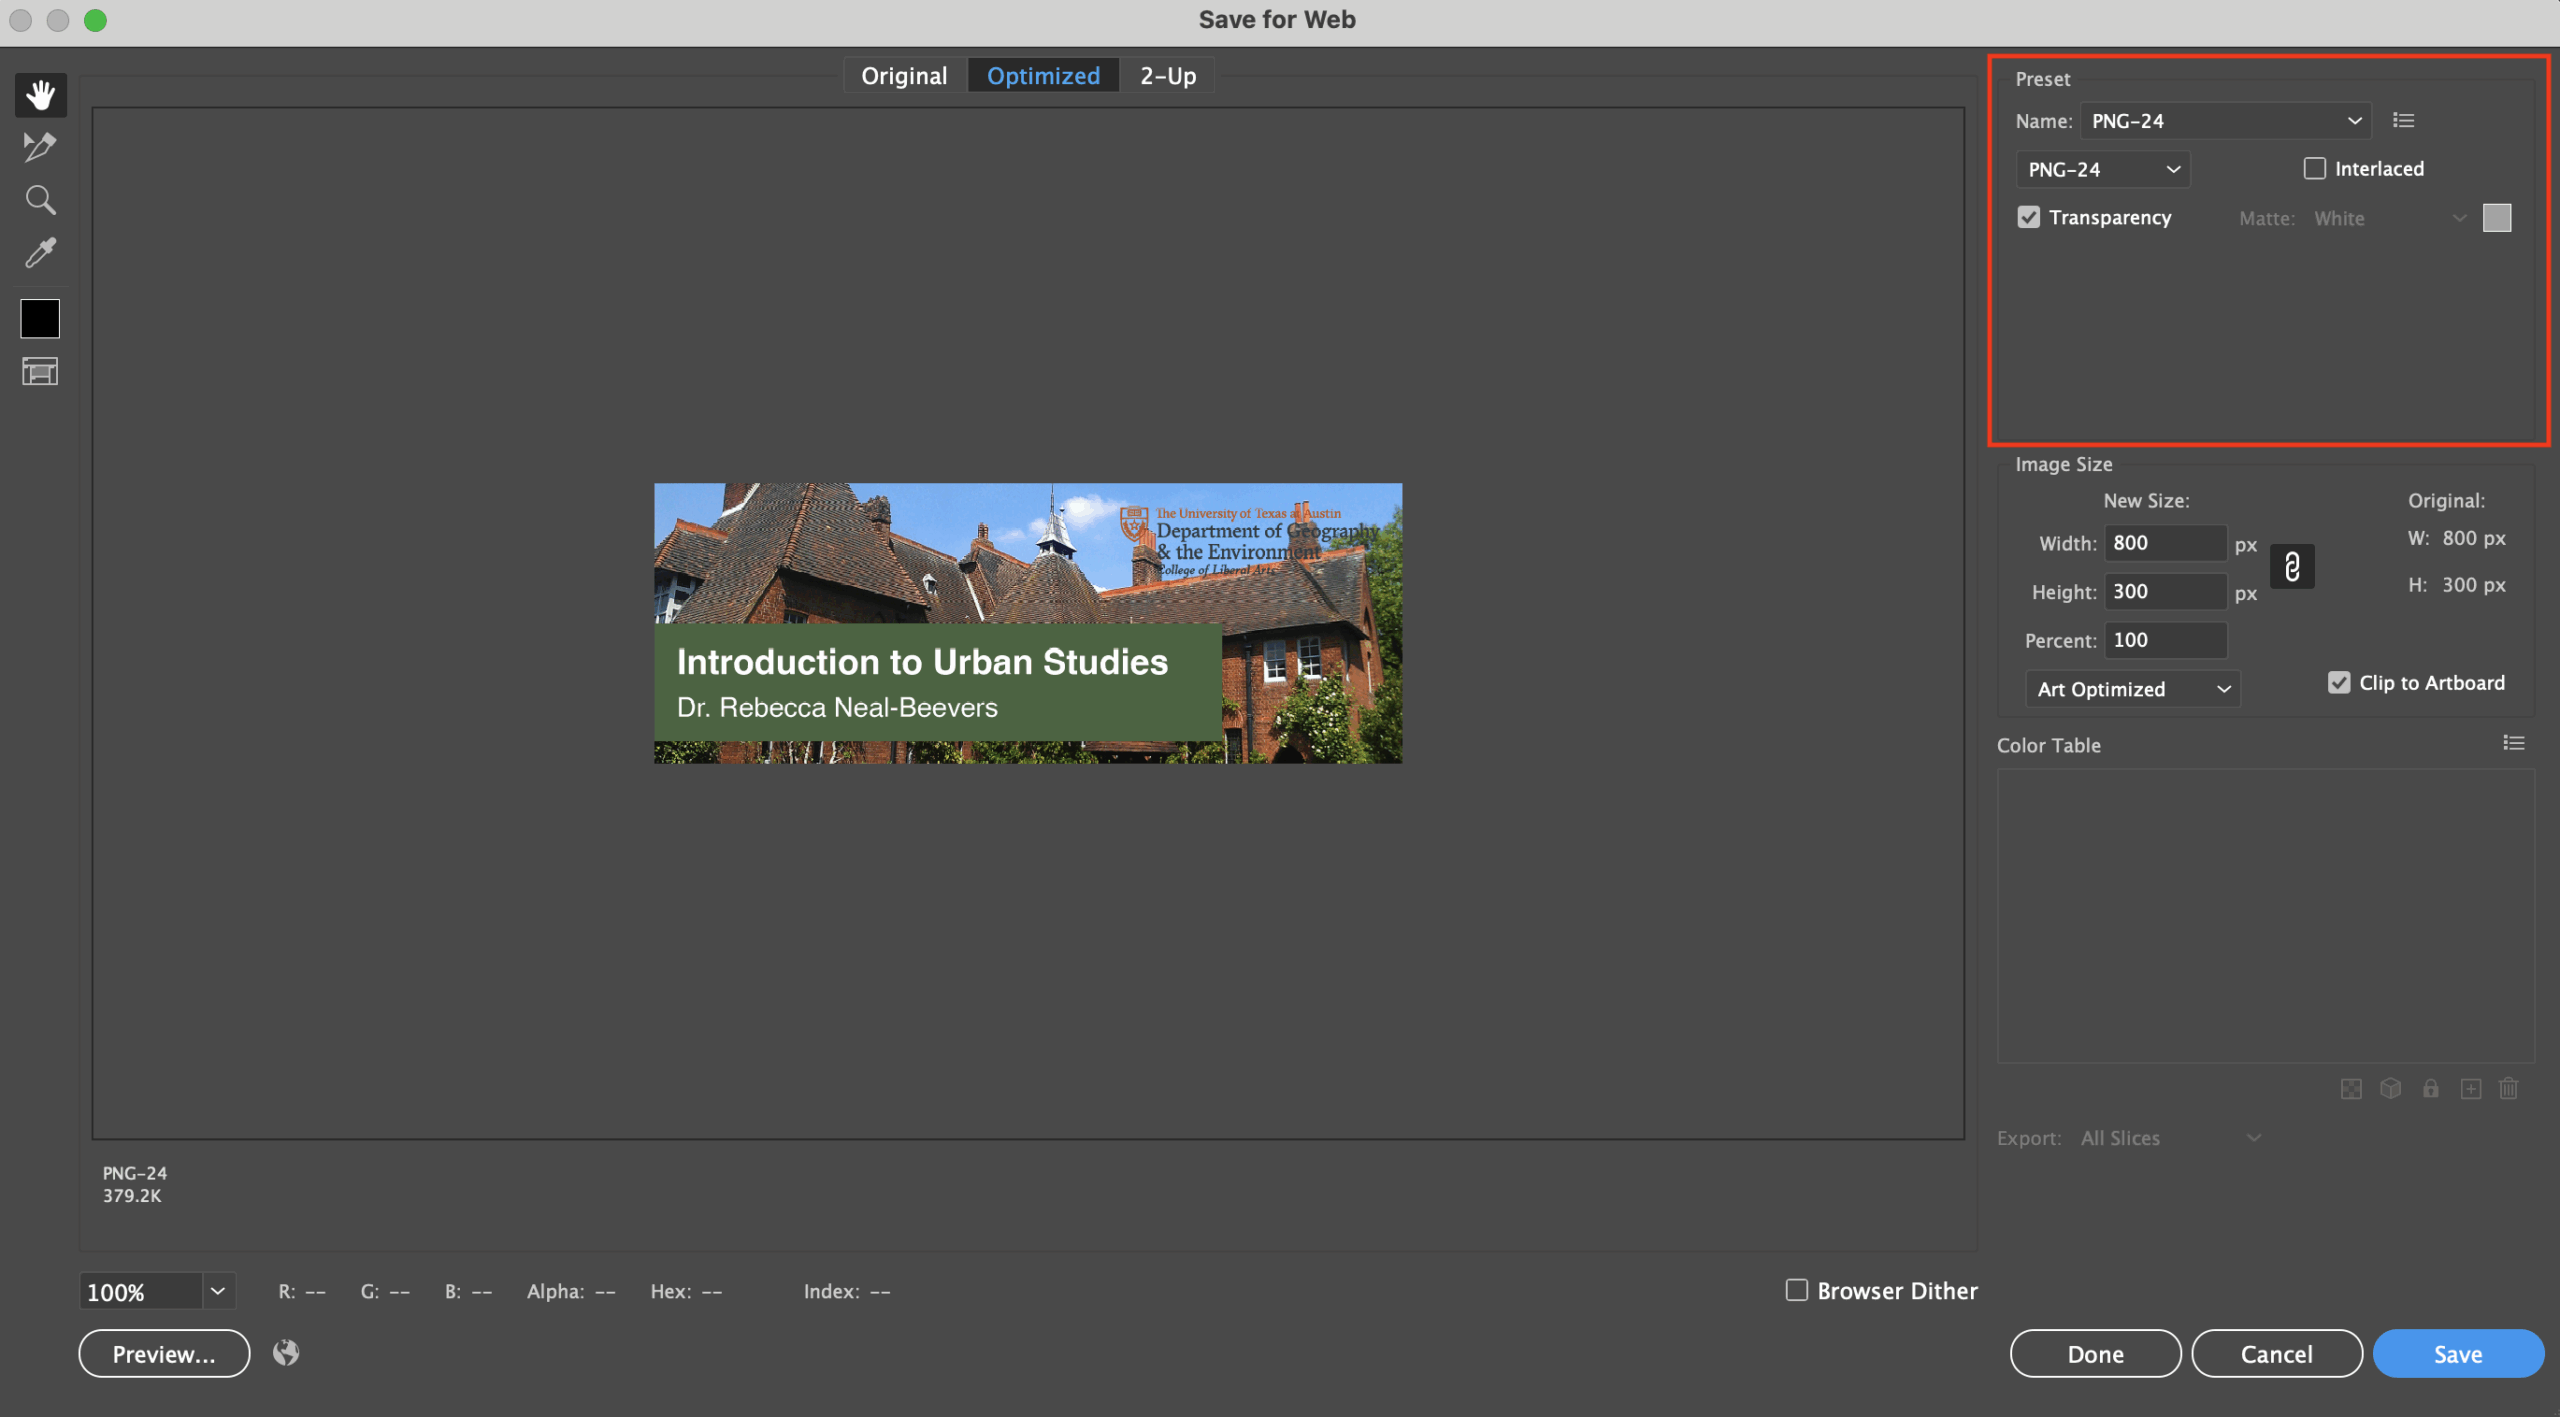
You now have edited and made your own canvas homepage banner!
Canvas Graphics: Dashboard Graphic
Course Graphics Templates folder
Go to the template folder and navigate to the Canvas Dashboard Template

Download and open the template in Illustrator. Go to File > Save As and rename the file to your “coursename_CanvasDashboard (EX: ADV319_CanvasDashboard)
Choose either solid color or online imagery based on your previous style for the Canvas banner.
Editing the background and text for the Dashboard graphics is the same process for editing the Homepage Banner graphics. The only difference is that for longer text that will take 2 lines, you will have to use the long text dashboard template.
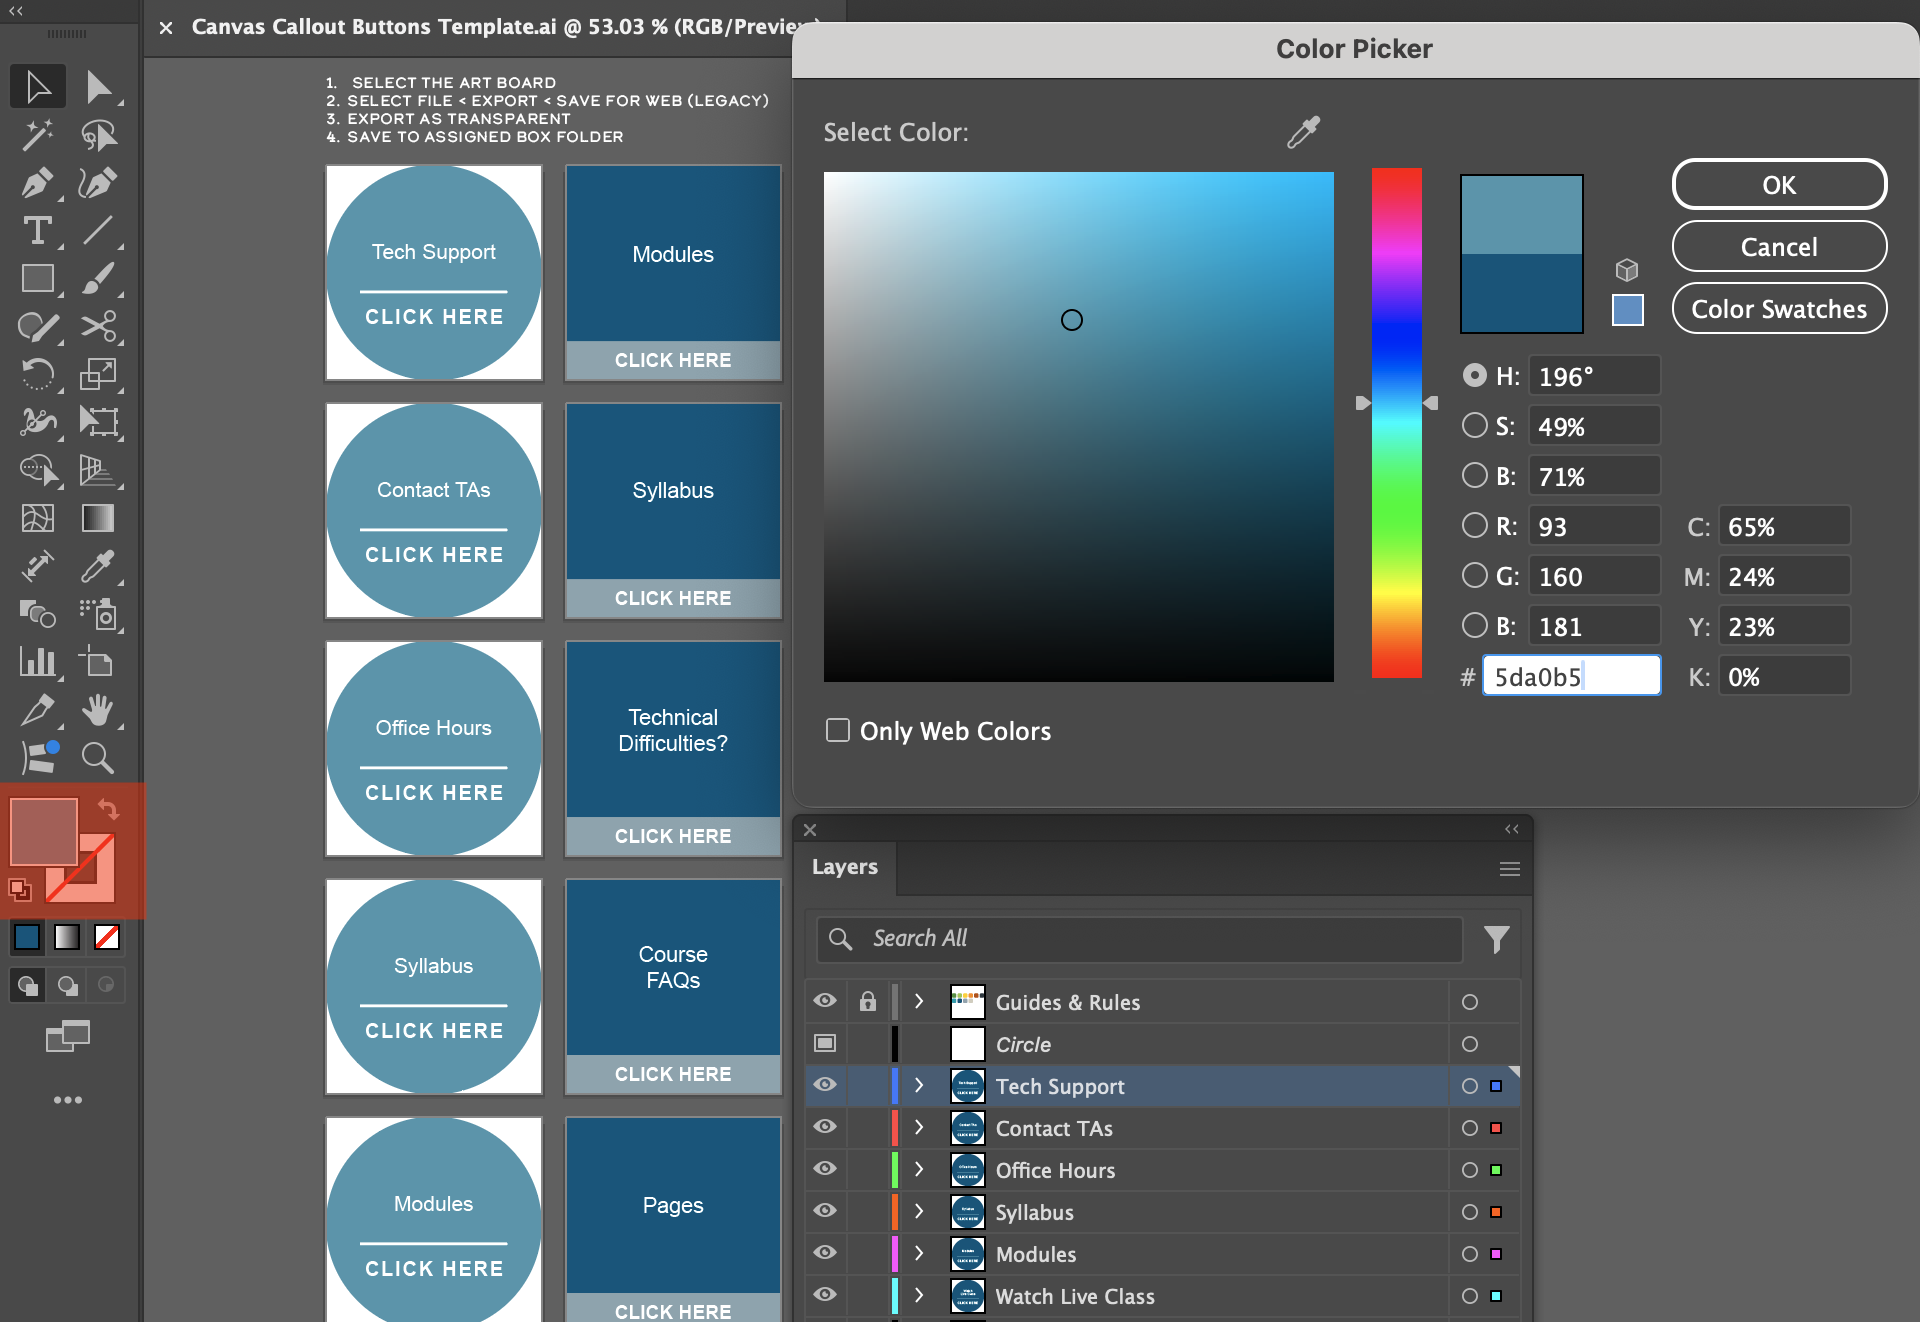
Canvas Graphics: Canvas Callout Buttons
Course Graphics Templates folder
Go to the template folder and navigate to the Canvas Callout Buttons Template

Download and open the template in Illustrator. Go to File > Save As and rename the file to your “coursename_CanvasCallout_Buttons (EX: ADV319_CanvasCallout_Buttons)
Step 1
Choose a style for your Buttons. Unlike the rest of the other graphics, the buttons can be chosen to be circular or square no matter the style of the other graphics. The color just has to remain consistent with the other graphics.
Step 2
Change the color of the buttons by selecting the shape of the button and navigate to the color palette in the tool bar and double click the fill square.
You can also select multiple shapes by holding shift and clicking each button. After selecting all the buttons, the color will change through each button you selected.
Step 3
Edit the text by double clicking the text on each of the buttons for both the main title of the buttons and the “click here” text.
Step 4
Export the buttons by going to File > Export > Export As.
This is an important step so that you export the right set of buttons you want. Make sure the format is PNG and check off “Use Artboards” and then check off “Range”
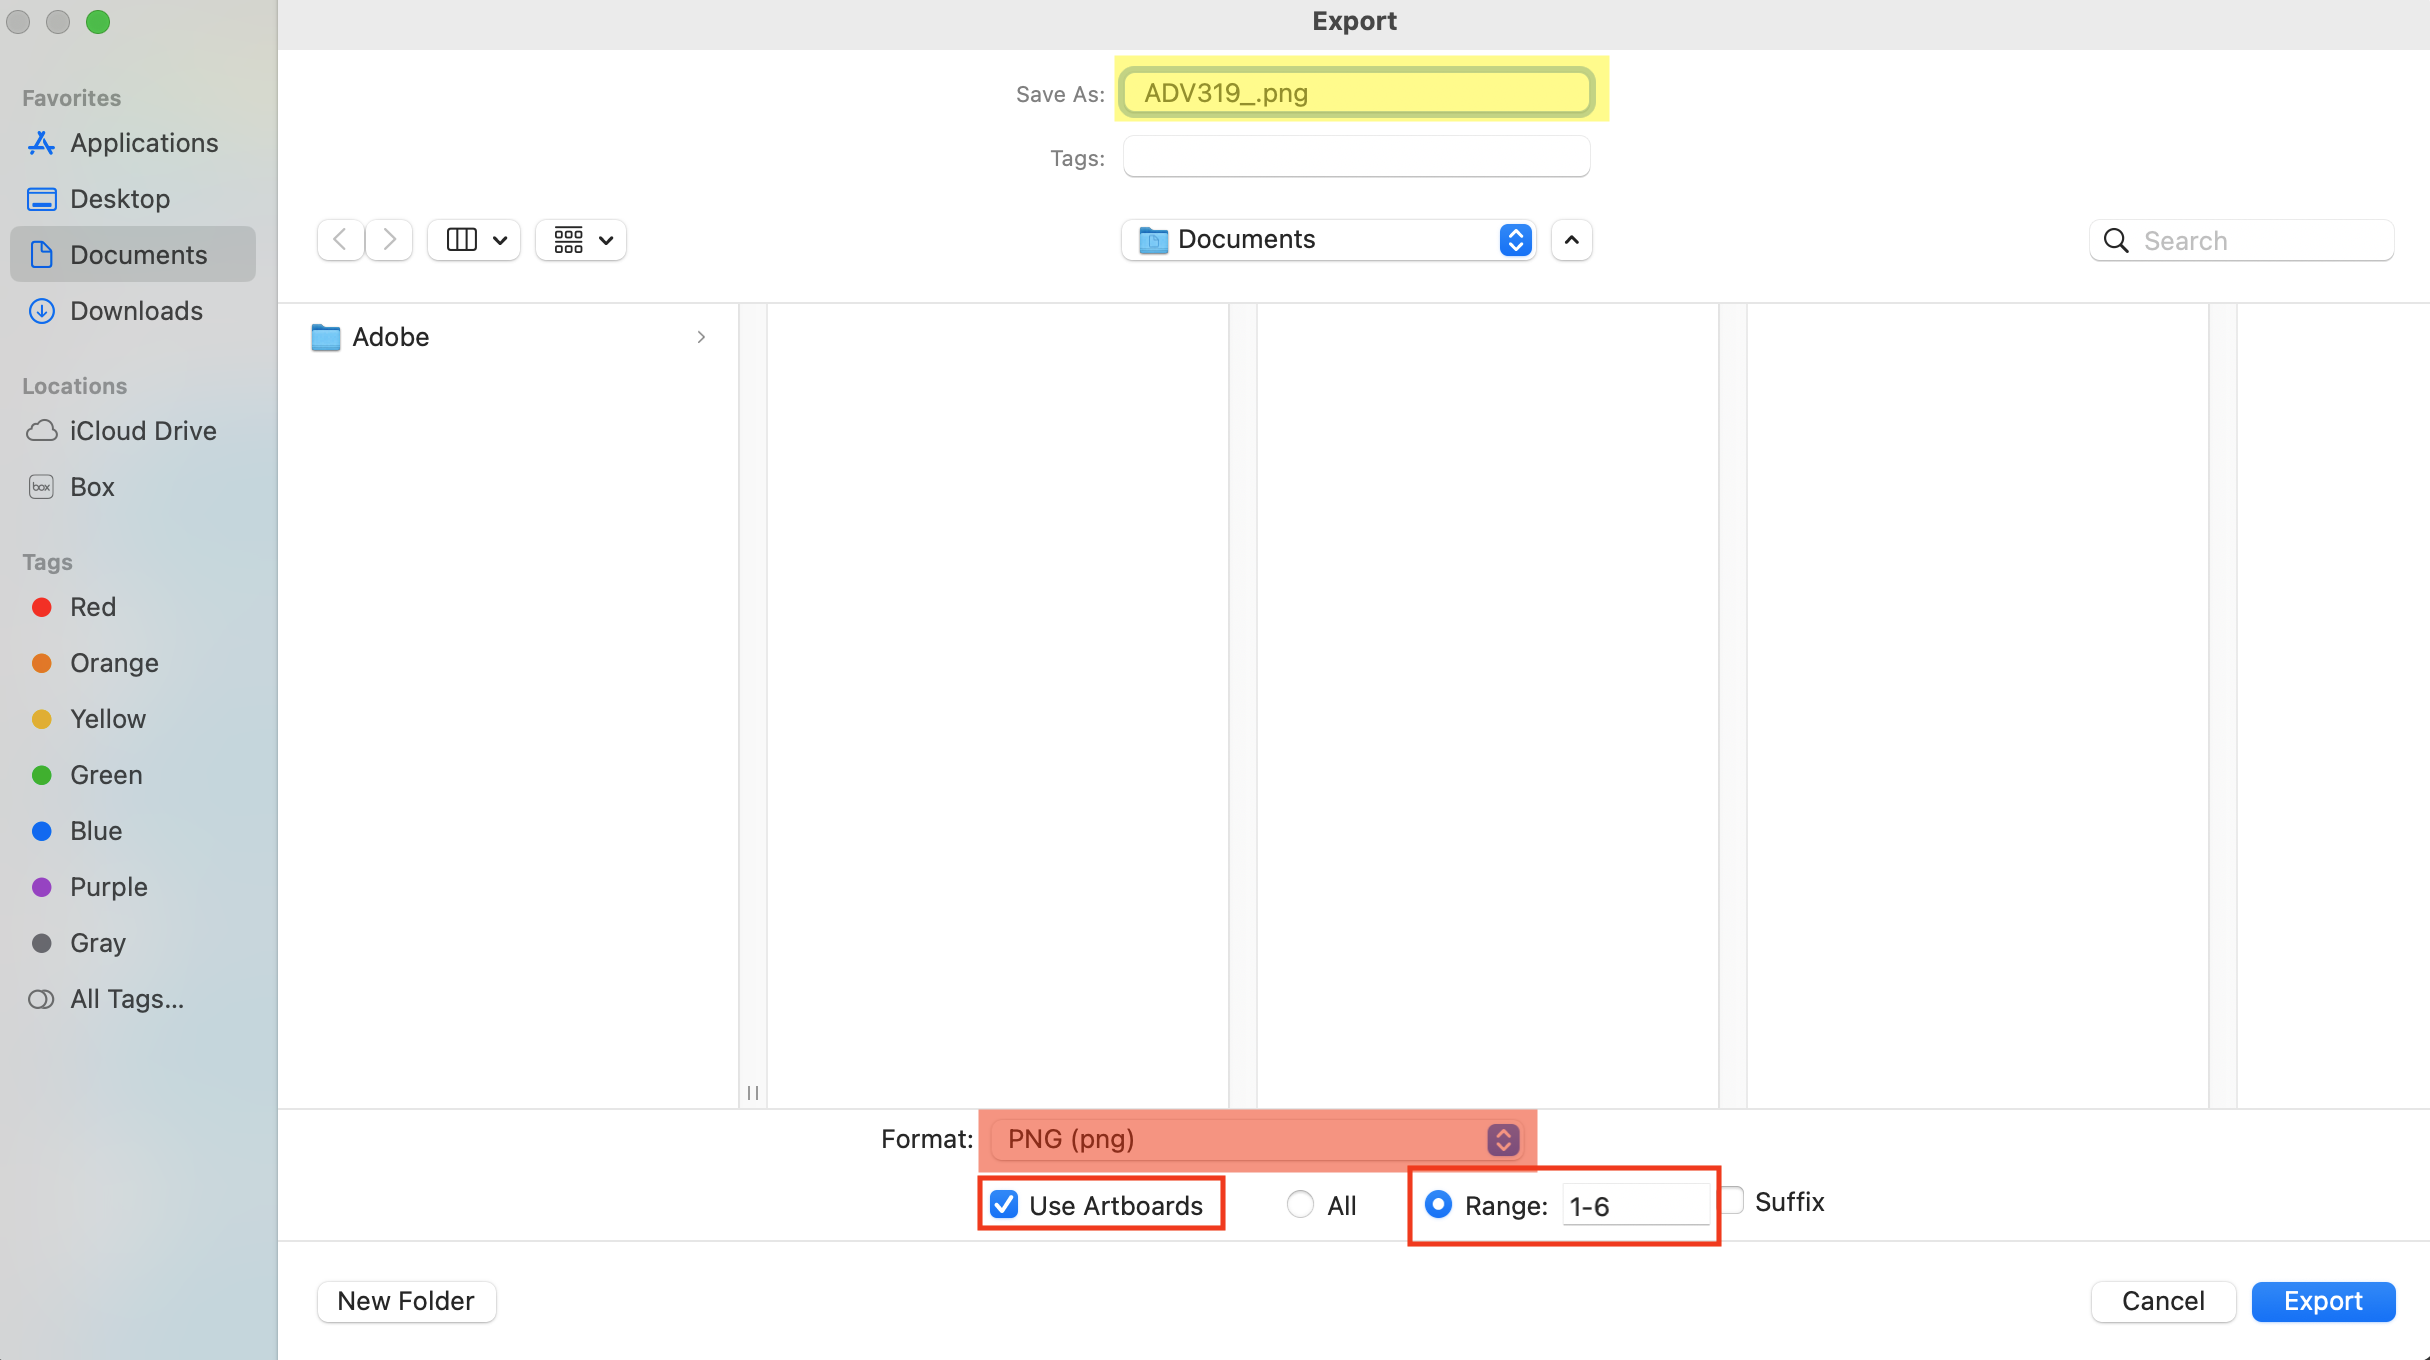
If you are using the circle buttons, type in the range text box 1 – 6
If you are using the square buttons, type in the range text box 7 – 11
To make naming easier, type in the abbreviation of your chosen course in the file naming section. This will show on all the exported buttons, but you will still have to adjust the file names to coursename_CanvasCallout_ButtonName.
Save the buttons to your personal folder.
Canvas Graphics: Powerpoint Slides
Course Graphics Templates folder
Go to the template folder and navigate to the Powerpoint Backgrounds Template
Download and open the template in Illustrator. Go to File > Save As and rename the file to your “coursename_Powerpoint_Backgrounds (EX: ADV319_Powerpoint_Backgrounds)
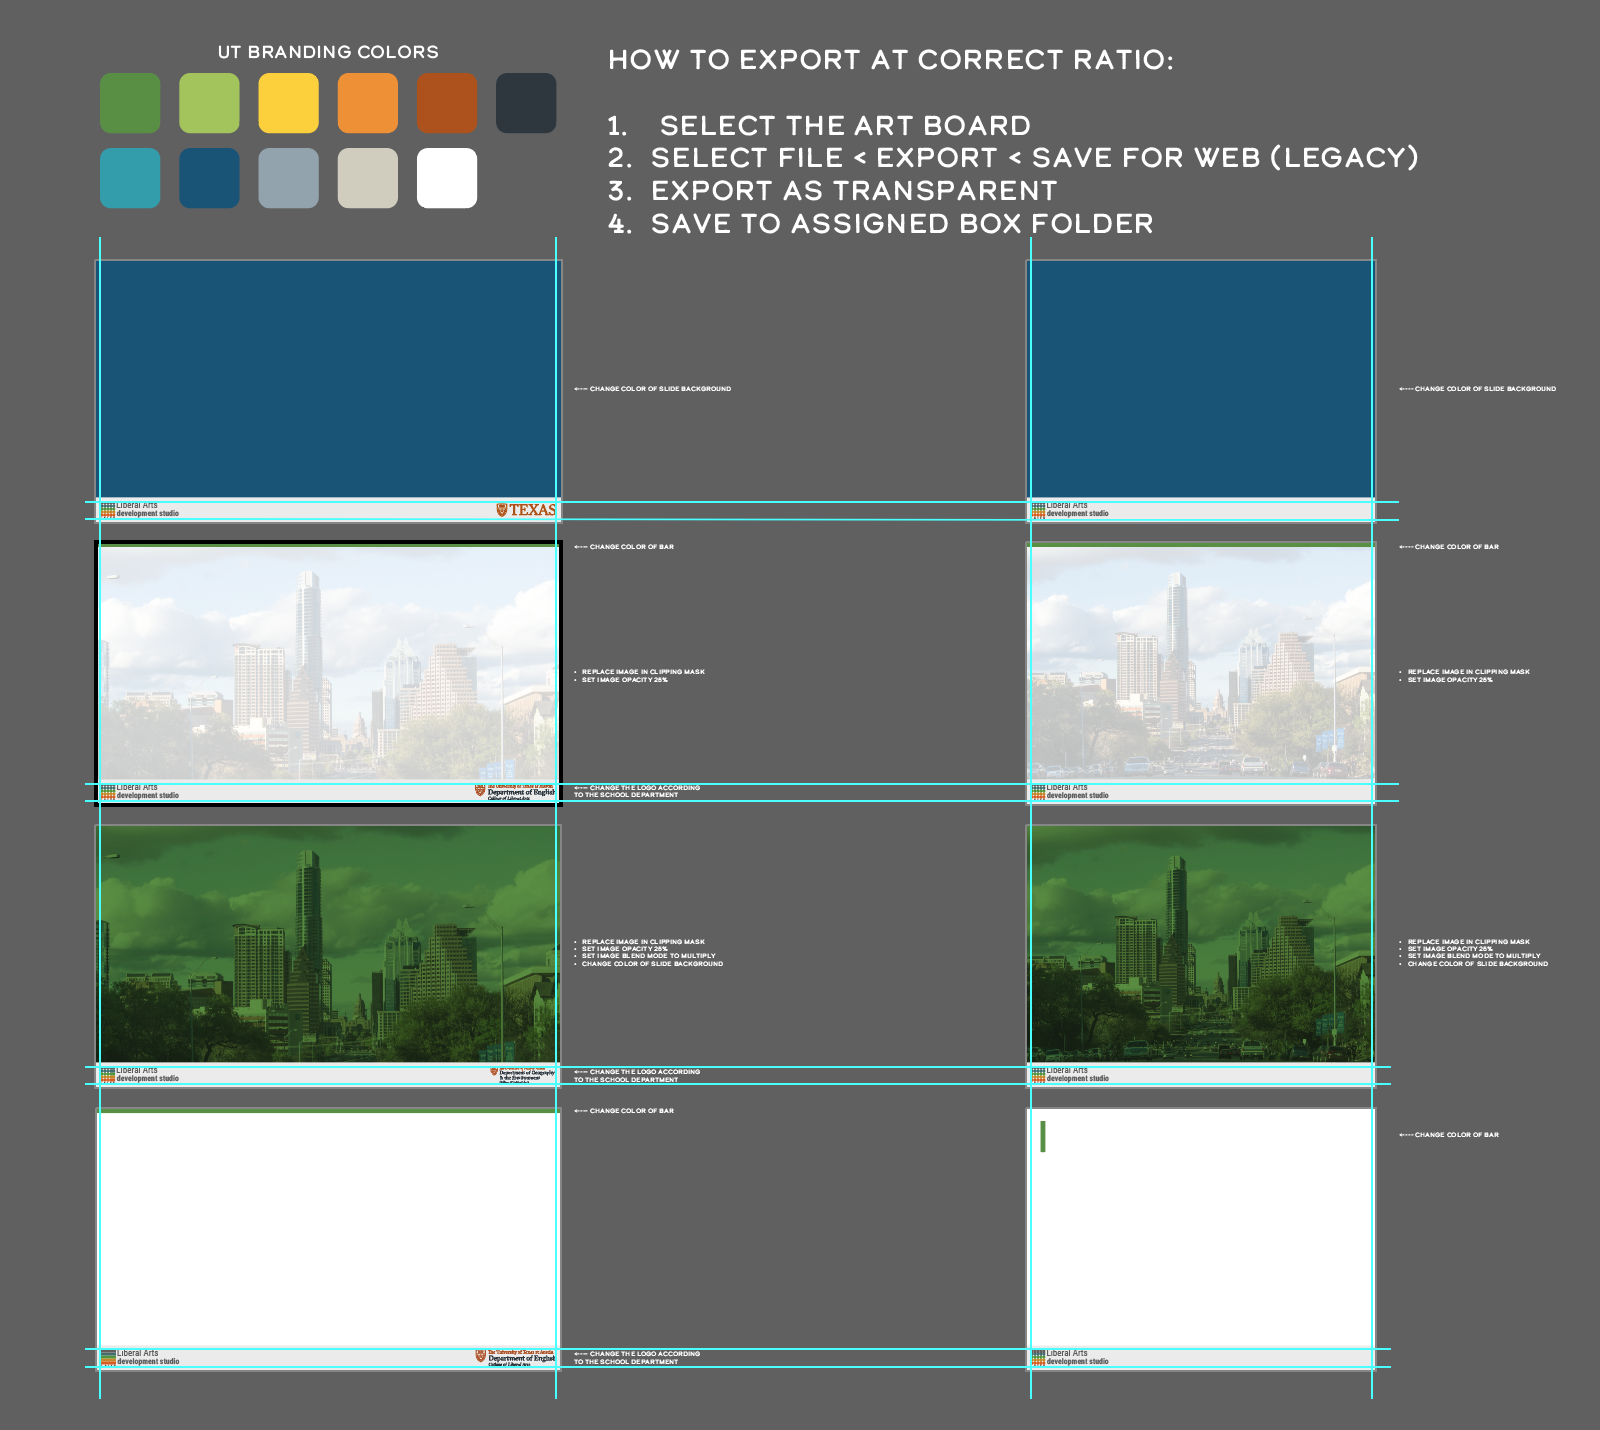
For the powerpoint backgrounds, artboards on the left are used as title slides and the ones on the right are used as general slides. A lot of edits that can be made to these are similar to the edits made to the homepage banner and dashboard banner, so we’ll be mainly going over changing the opacity of an image, blend modes, and changing the background color in the blend mode.
Step 1
After replacing your image in the clipping mask, set the opacity to 25% by going to the main artboard layer, going to the properties panel, and changing the value in the opacity setting.
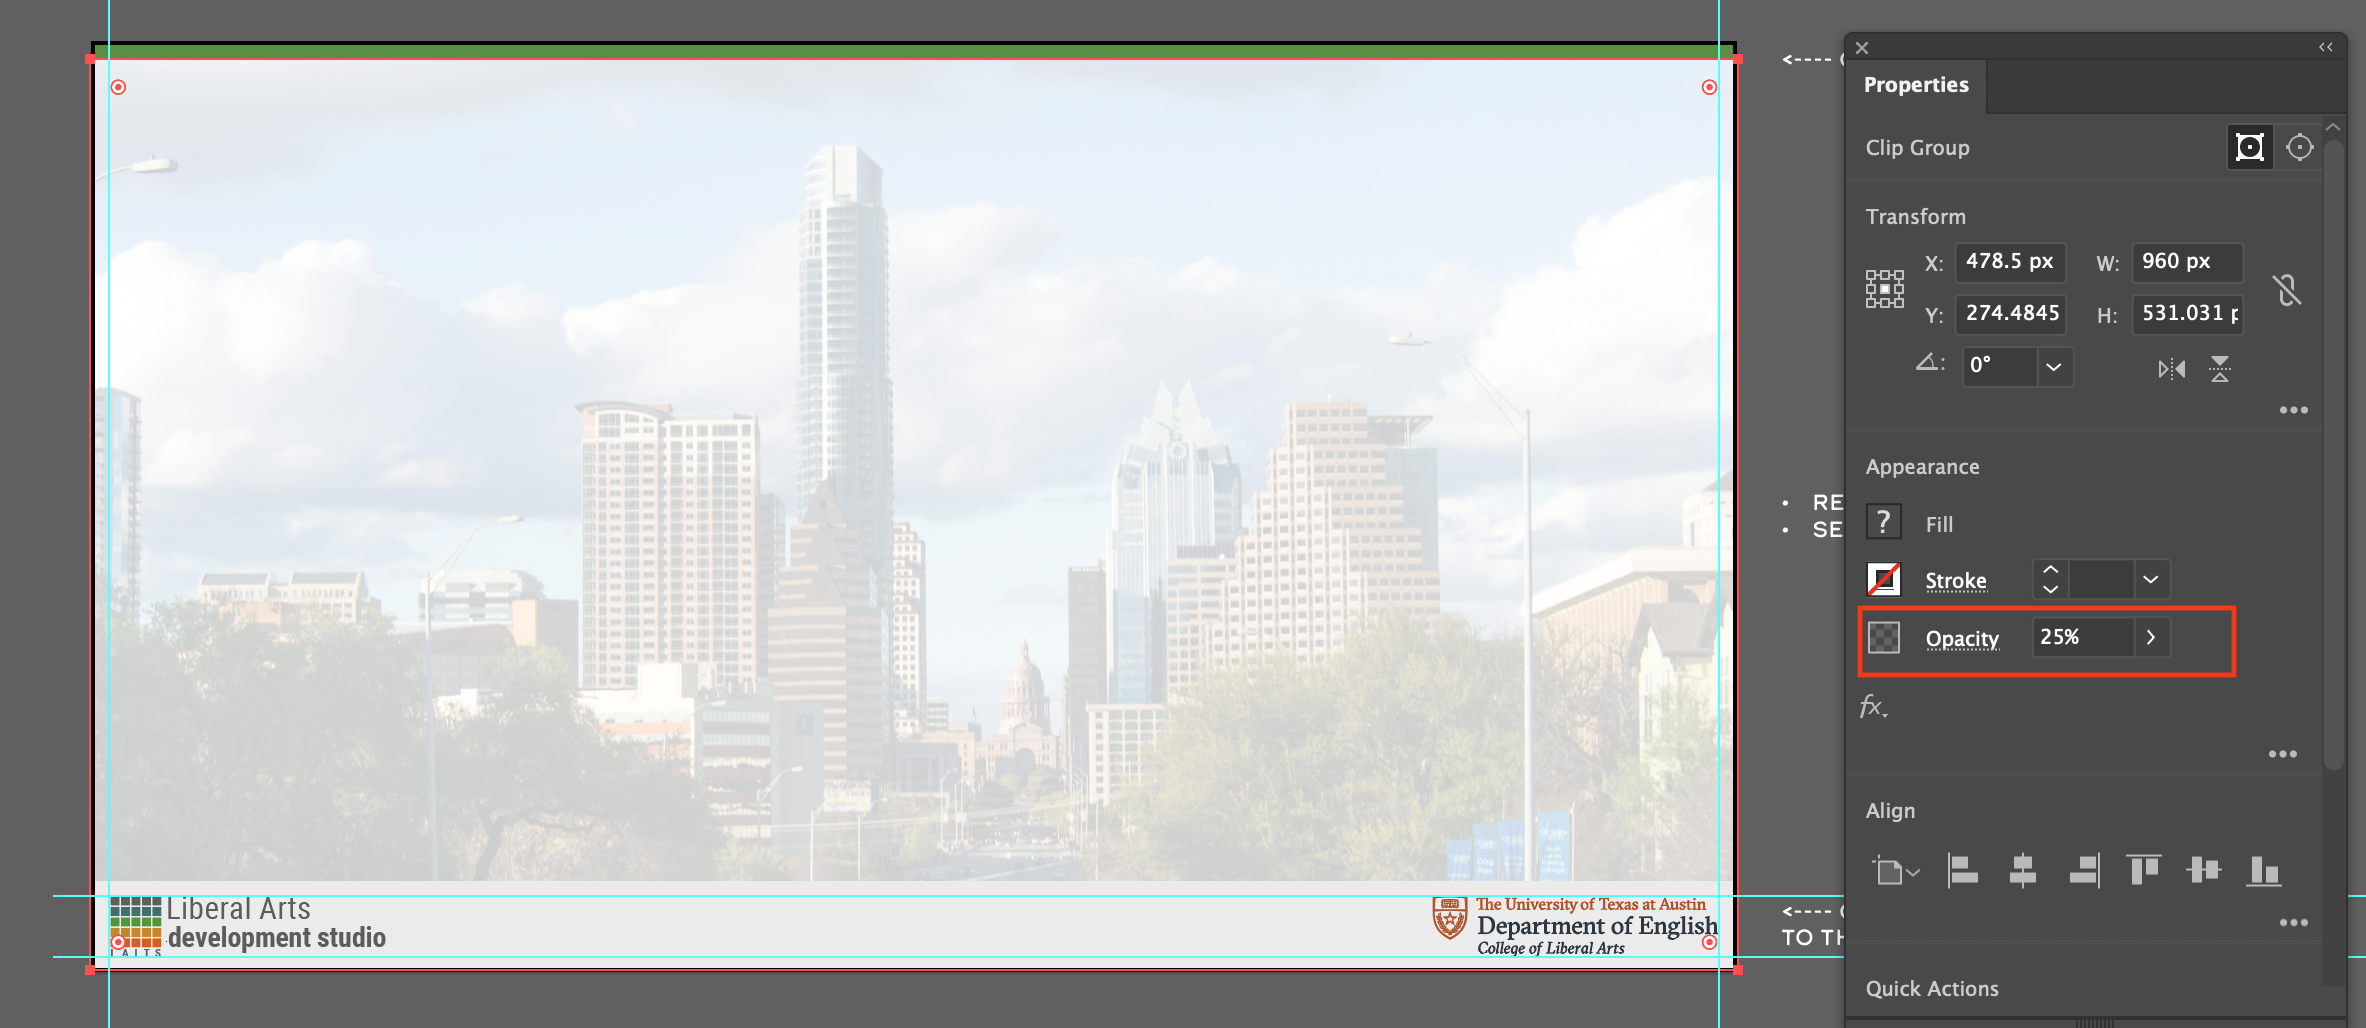
Make sure to change the colored bar at the top to the appropriate color and change the department branding if needed.
Step 2
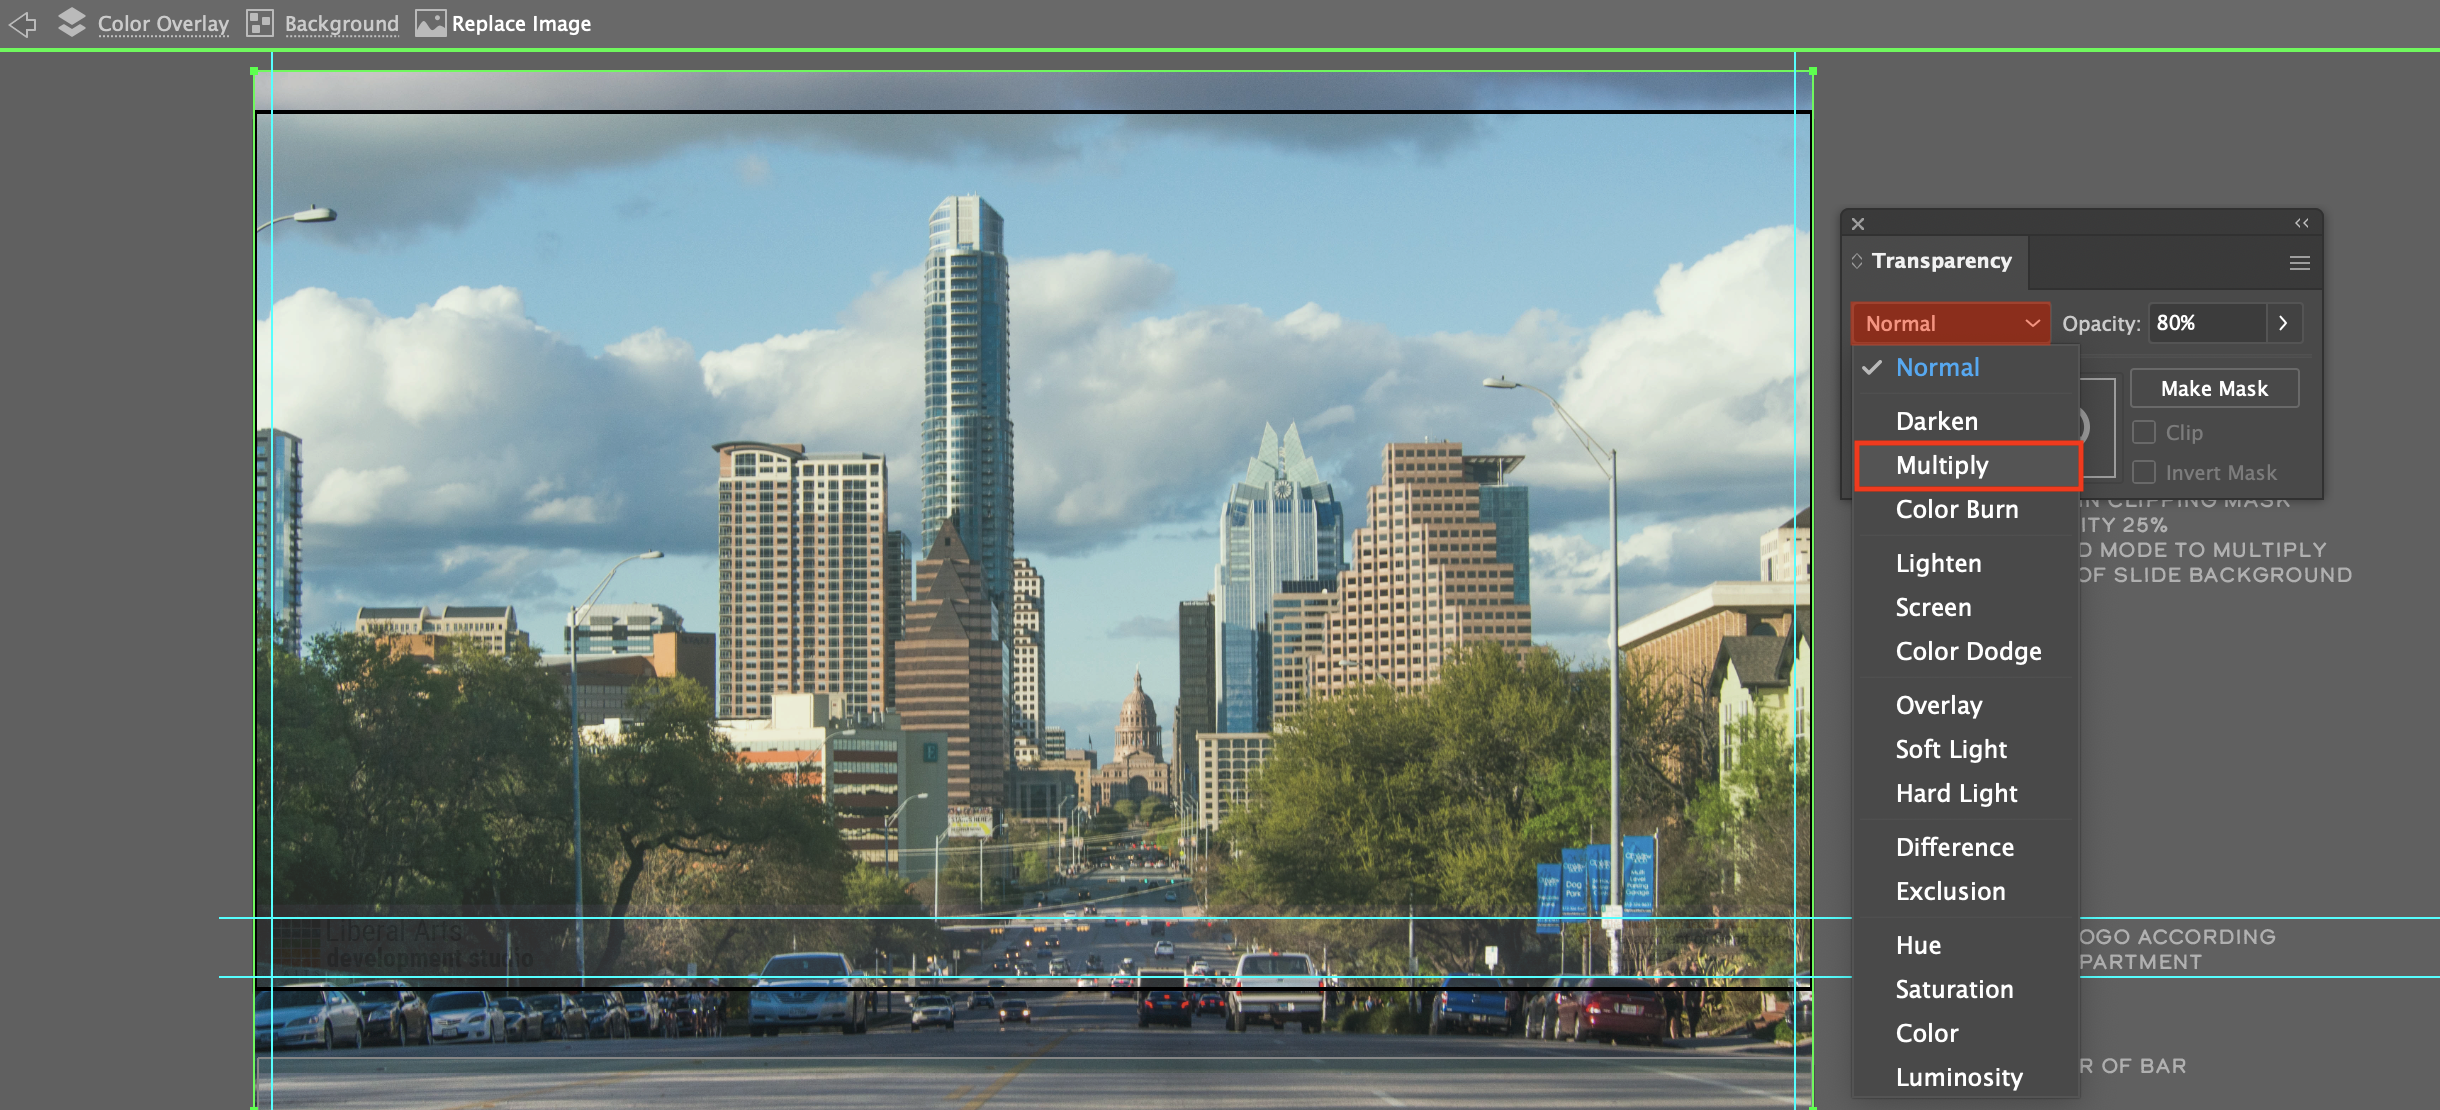
For the transparent colored background, after replacing your image and changing the opacity, you will need to edit the blend mode of the image.
Double click until you reach your image within the clipping mask. Go to Window > Transparency. This opens the Transparency panel. Select your image and then in the Transparency panel, change the blend mode from normal to multiply.
Step 3
On the main artboard layer, edit the background color to an appropriate color to your course. Change UT branding if needed.
Step 4
Export your backgrounds by selecting the ones you’d like to use, File > Save As > Save for Web Legacy. Do this with each background you want exported. Title each export ADV319_Powerpoint_Background_Description. You can then use them for the powerpoint template also provided in the Course Graphics templates folder.
Canvas Graphics: Powerpoint Slides
Course Graphics Templates Folder
Go to the template folder and navigate to the Powerpoint Slides Template
Download and open the template in Powerpoint. Go to File > Save As and rename the file to your “coursename_Powerpoint_Template (EX: ADV319_Powerpoint_Template)

Step 1
The Powerpoint template will come with provided instructions where you will be using the slide master function for making your edits. Edit the Title slides, backgrounds, general slides, and stinger slides
Step 2
When exporting the powerpoint template for a client/class, save the template after your edits and put in the finals folder. Export your slides as PNGs and post in the Basecamp for feedback.
Studio Graphics: Ipad Overlay
The Ipad Overlay is in the Tier 2 and 3 course graphic packages but it’s a rather simple graphic so you can learn how to edit them here and do the studio graphics training in another training.
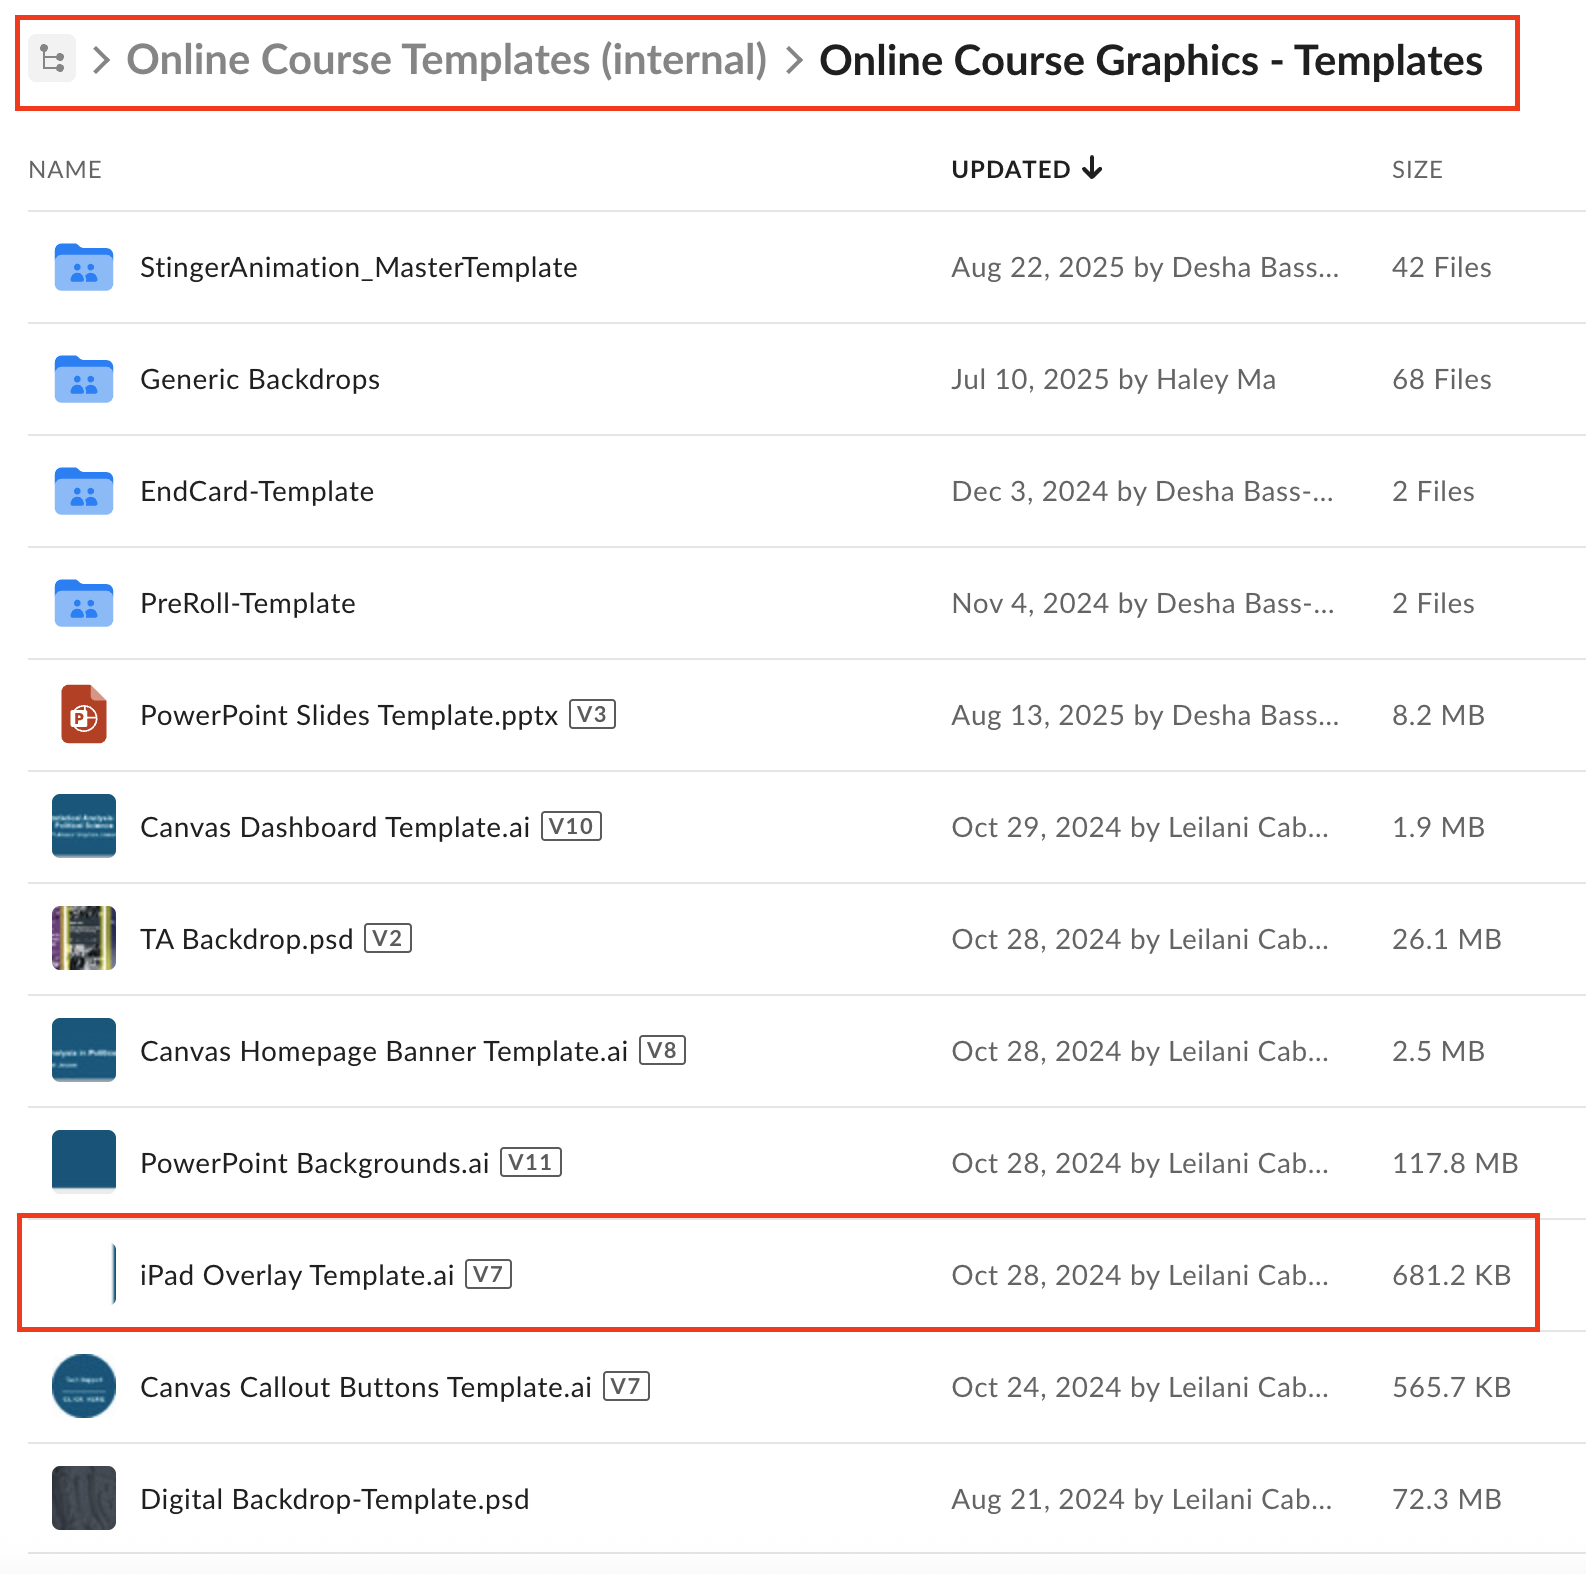
Course Graphics Templates folder
Go to the template folder and navigate to the Canvas Ipad Overlay
Download and open the template in Illustrator. Go to File > Save As and rename the file to your “coursename_CanvasIpadOverlay (EX: ADV319_CanvasIpadOverlay)
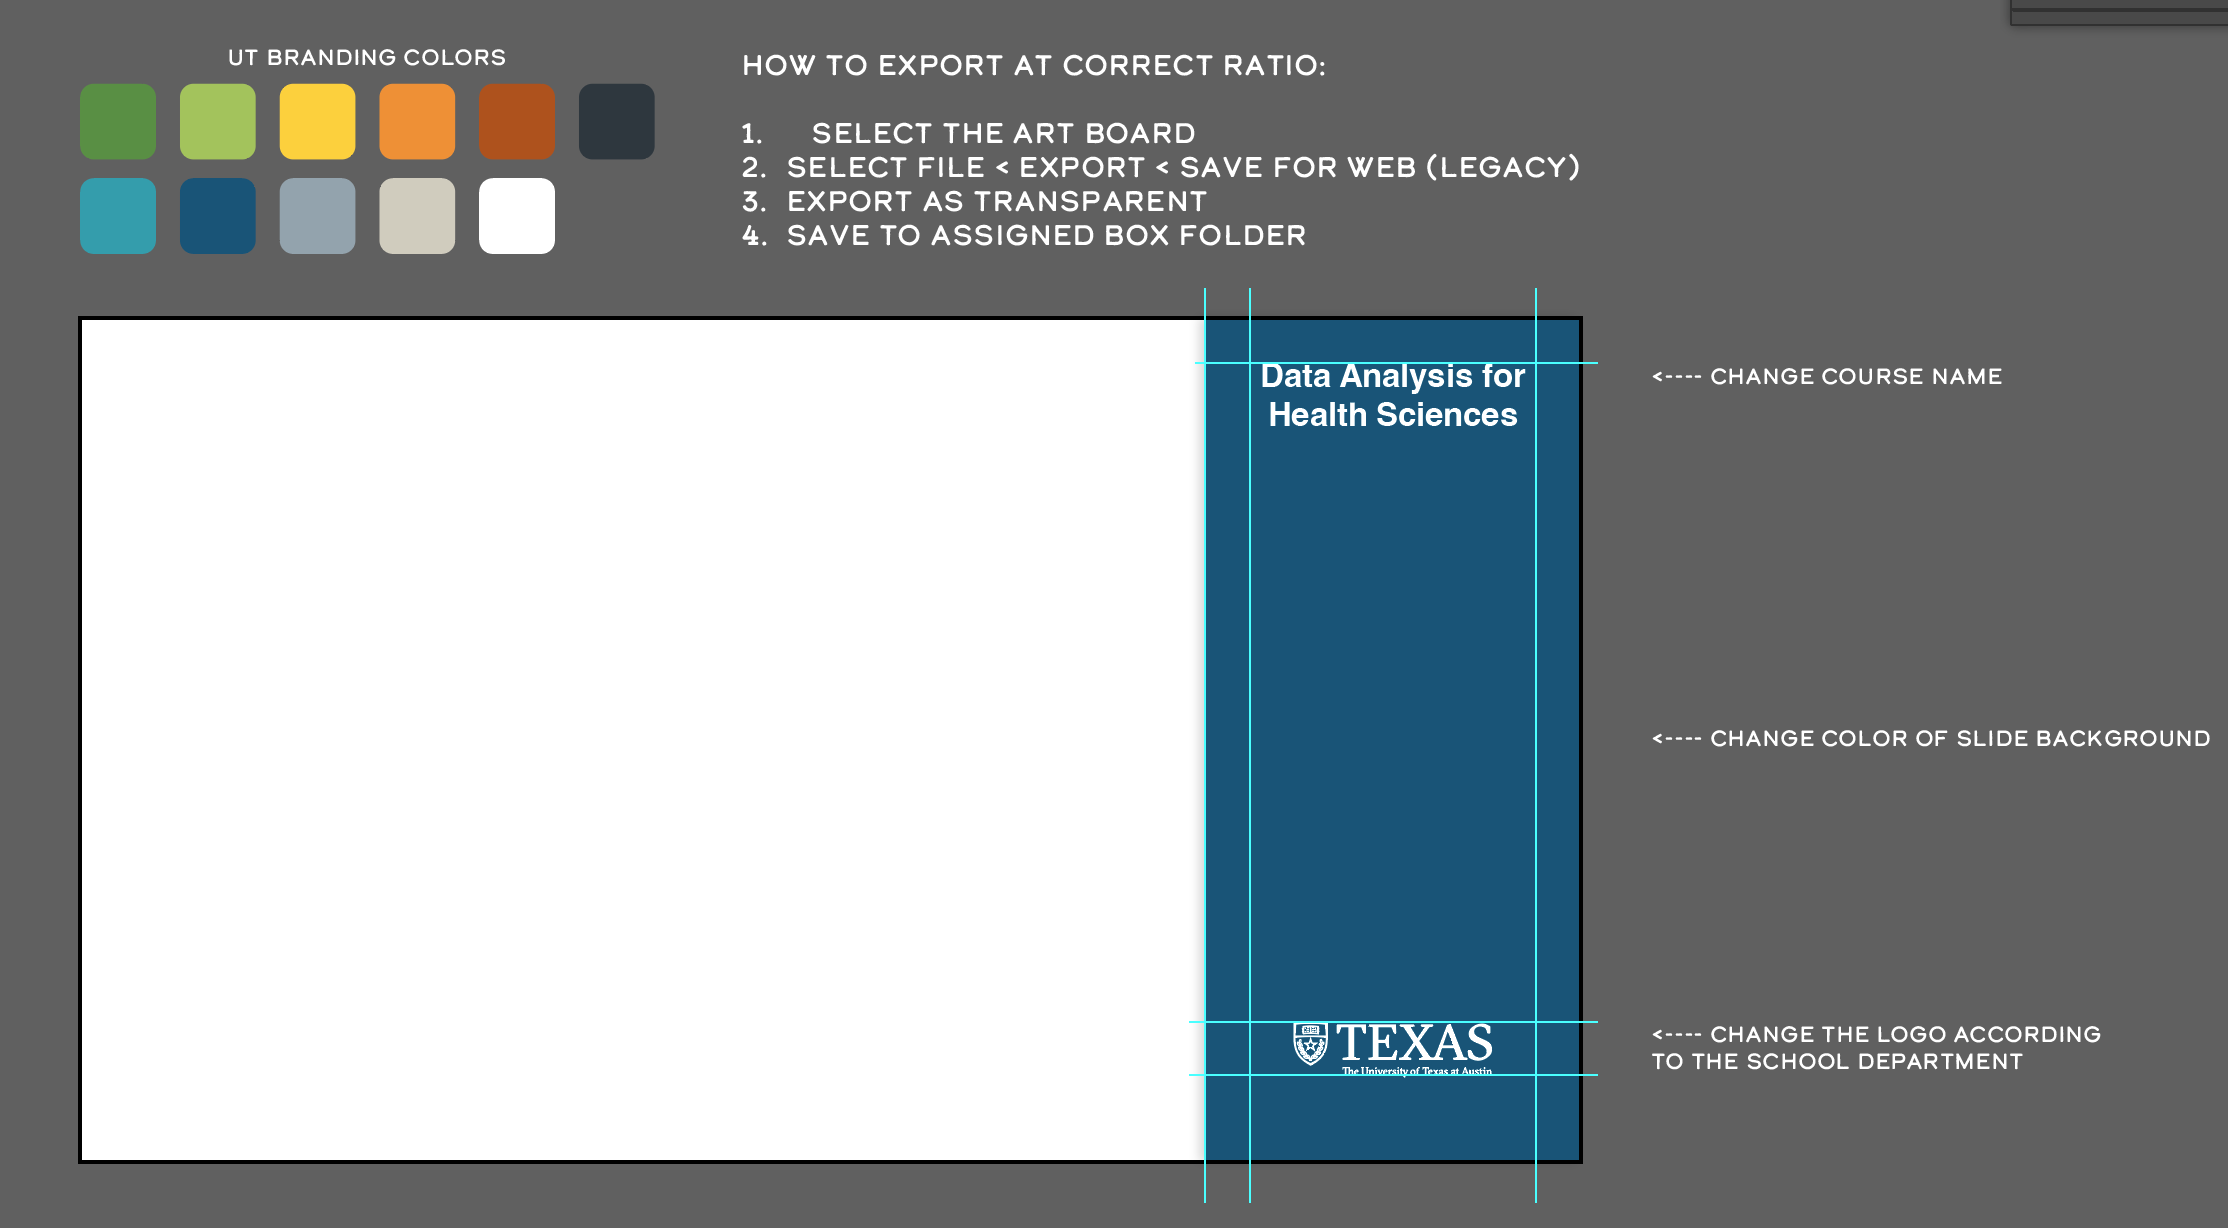
For editing the graphic in the solid color style, simply change the color of the rectangle and change the UT branding and course title to your chosen course.
Editing the Background and Text for the Online Image IPad Overlay
Example image:

Step 1
Shrink the rectangle to just fit the course title. Change the color to match your course.
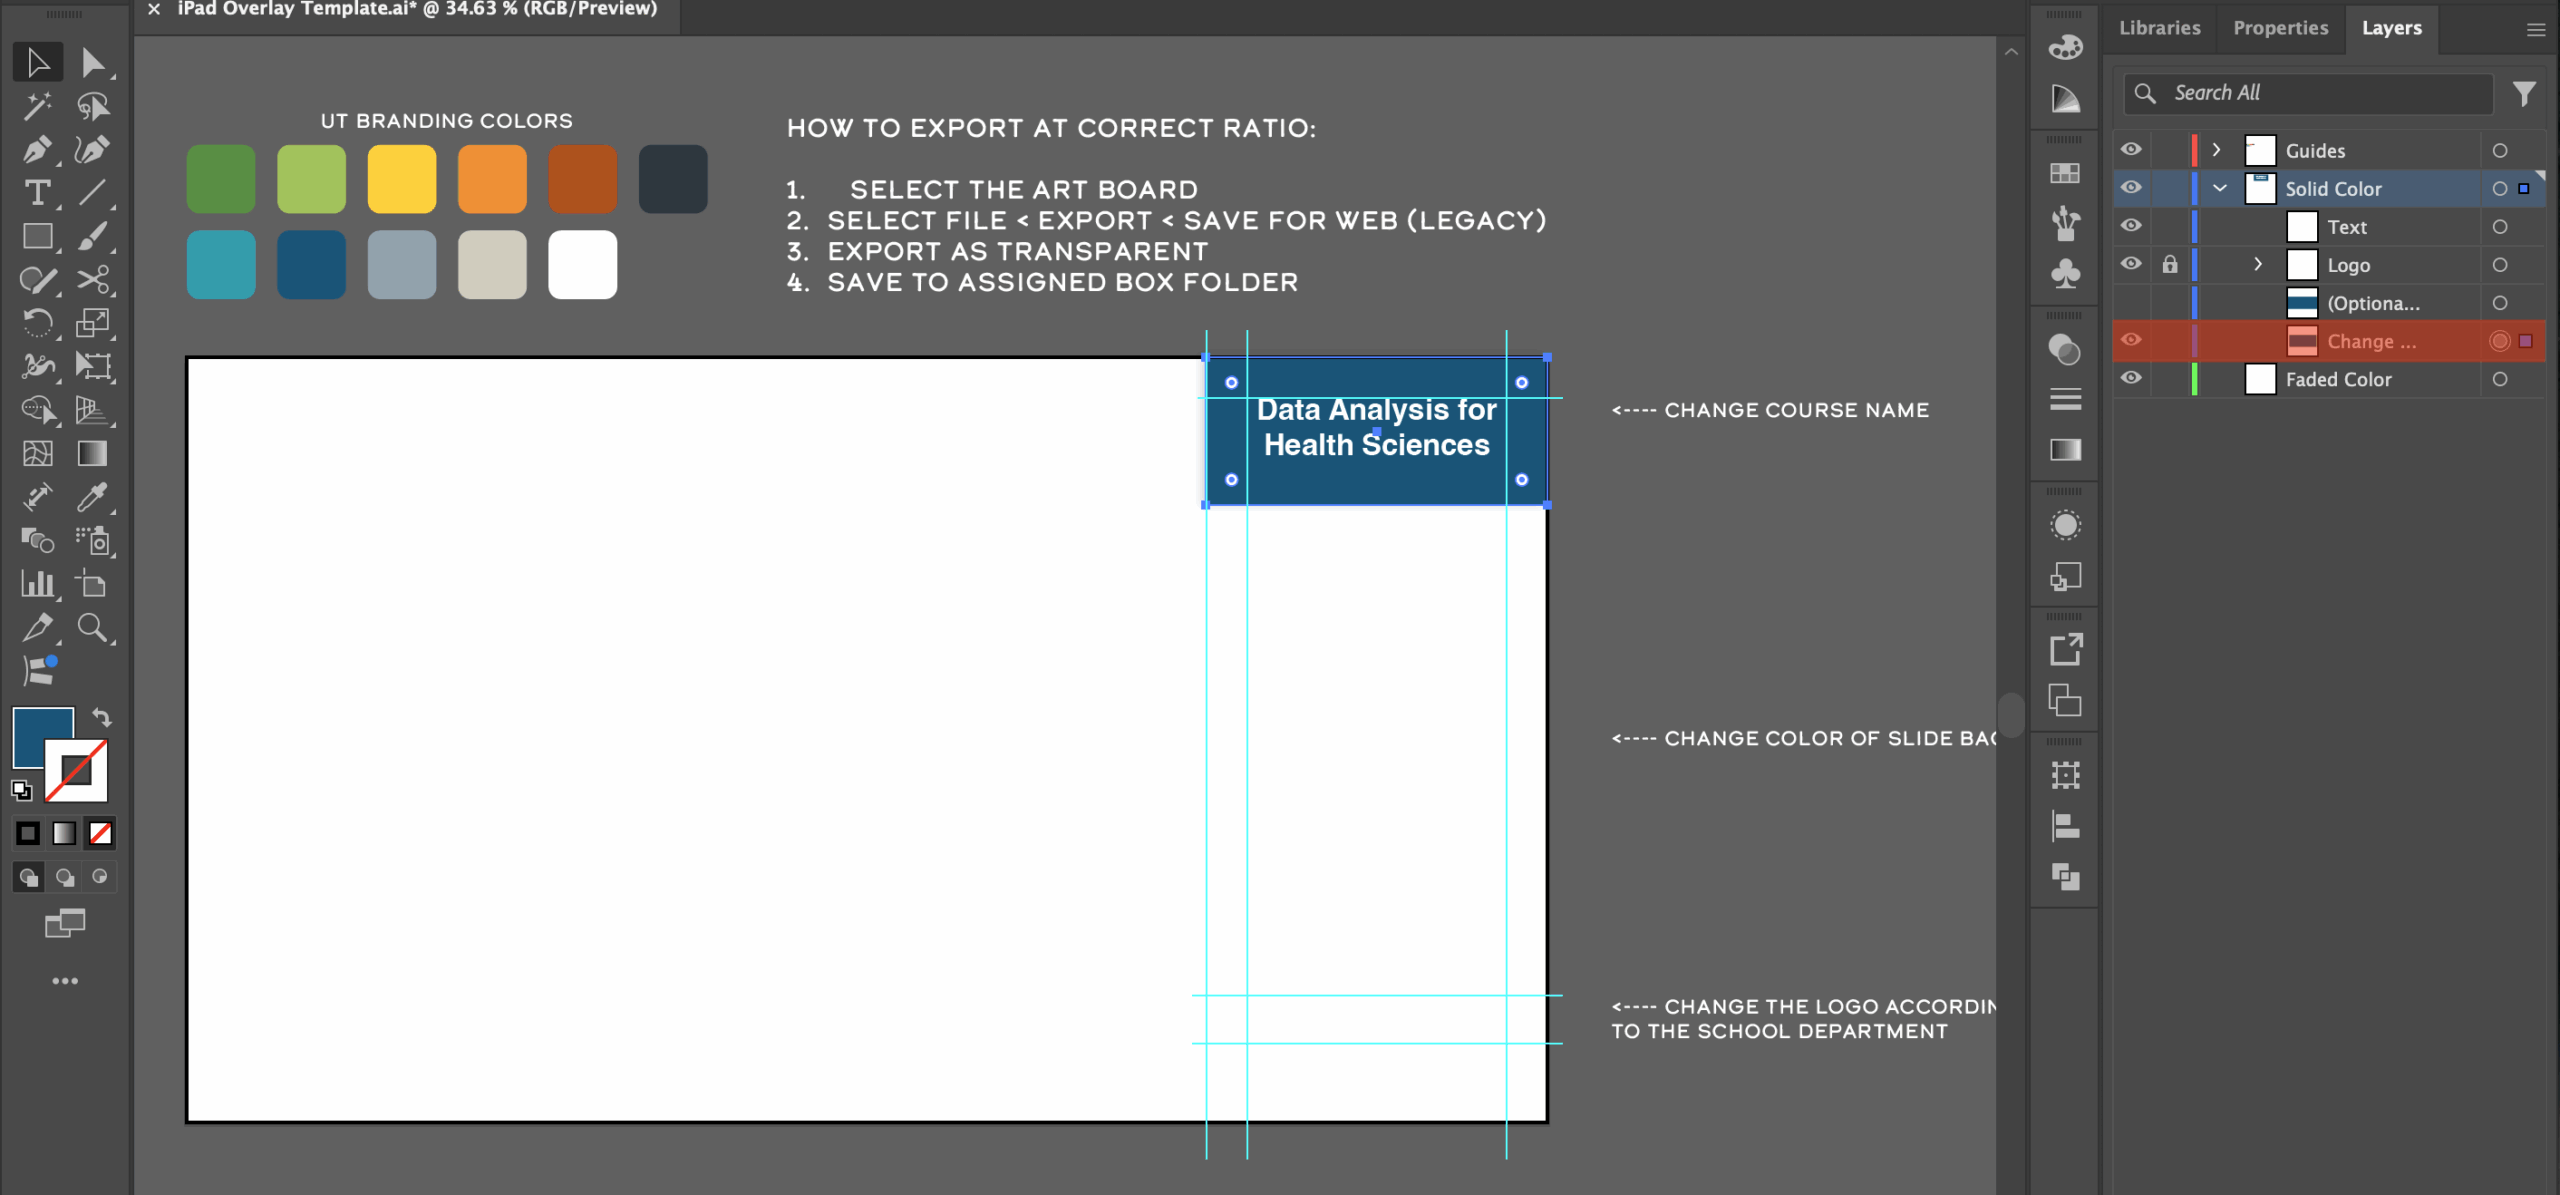
Step 2
Import your image and adjust the scale to fit the Ipad overlay bar. Make sure your image is in the “faded color” layer.
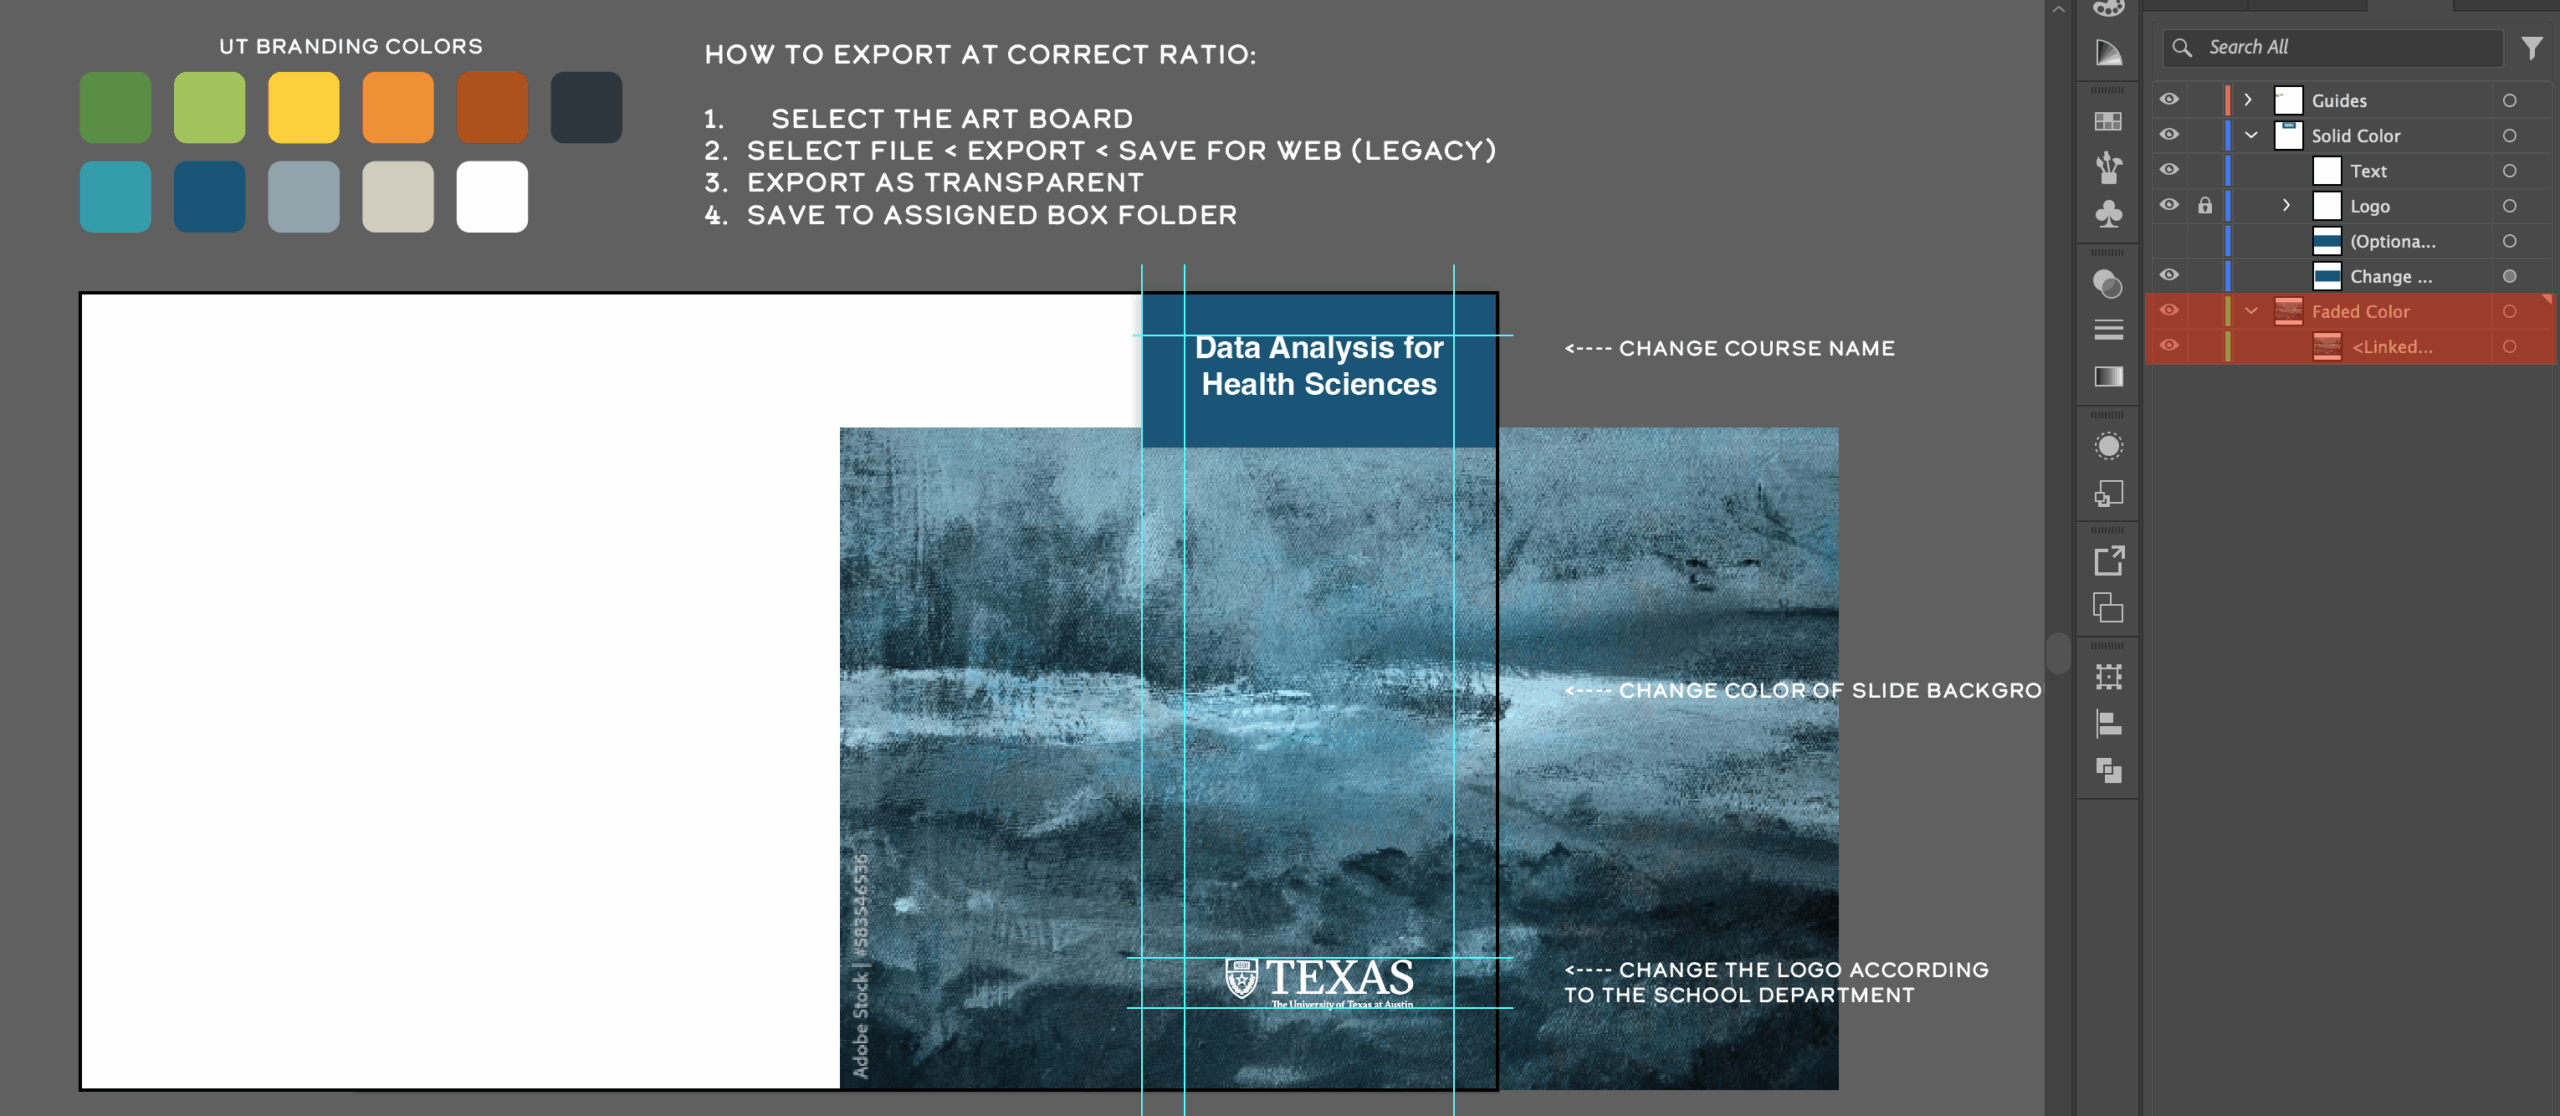
Step 3
Create another rectangle that matches the width of the top bar but is the length of the artboard. Make this rectangle a different color. Make sure the rectangle is in the “faded color” layer and is placed on top of the image layer. Put the new rectangle in this positioning.
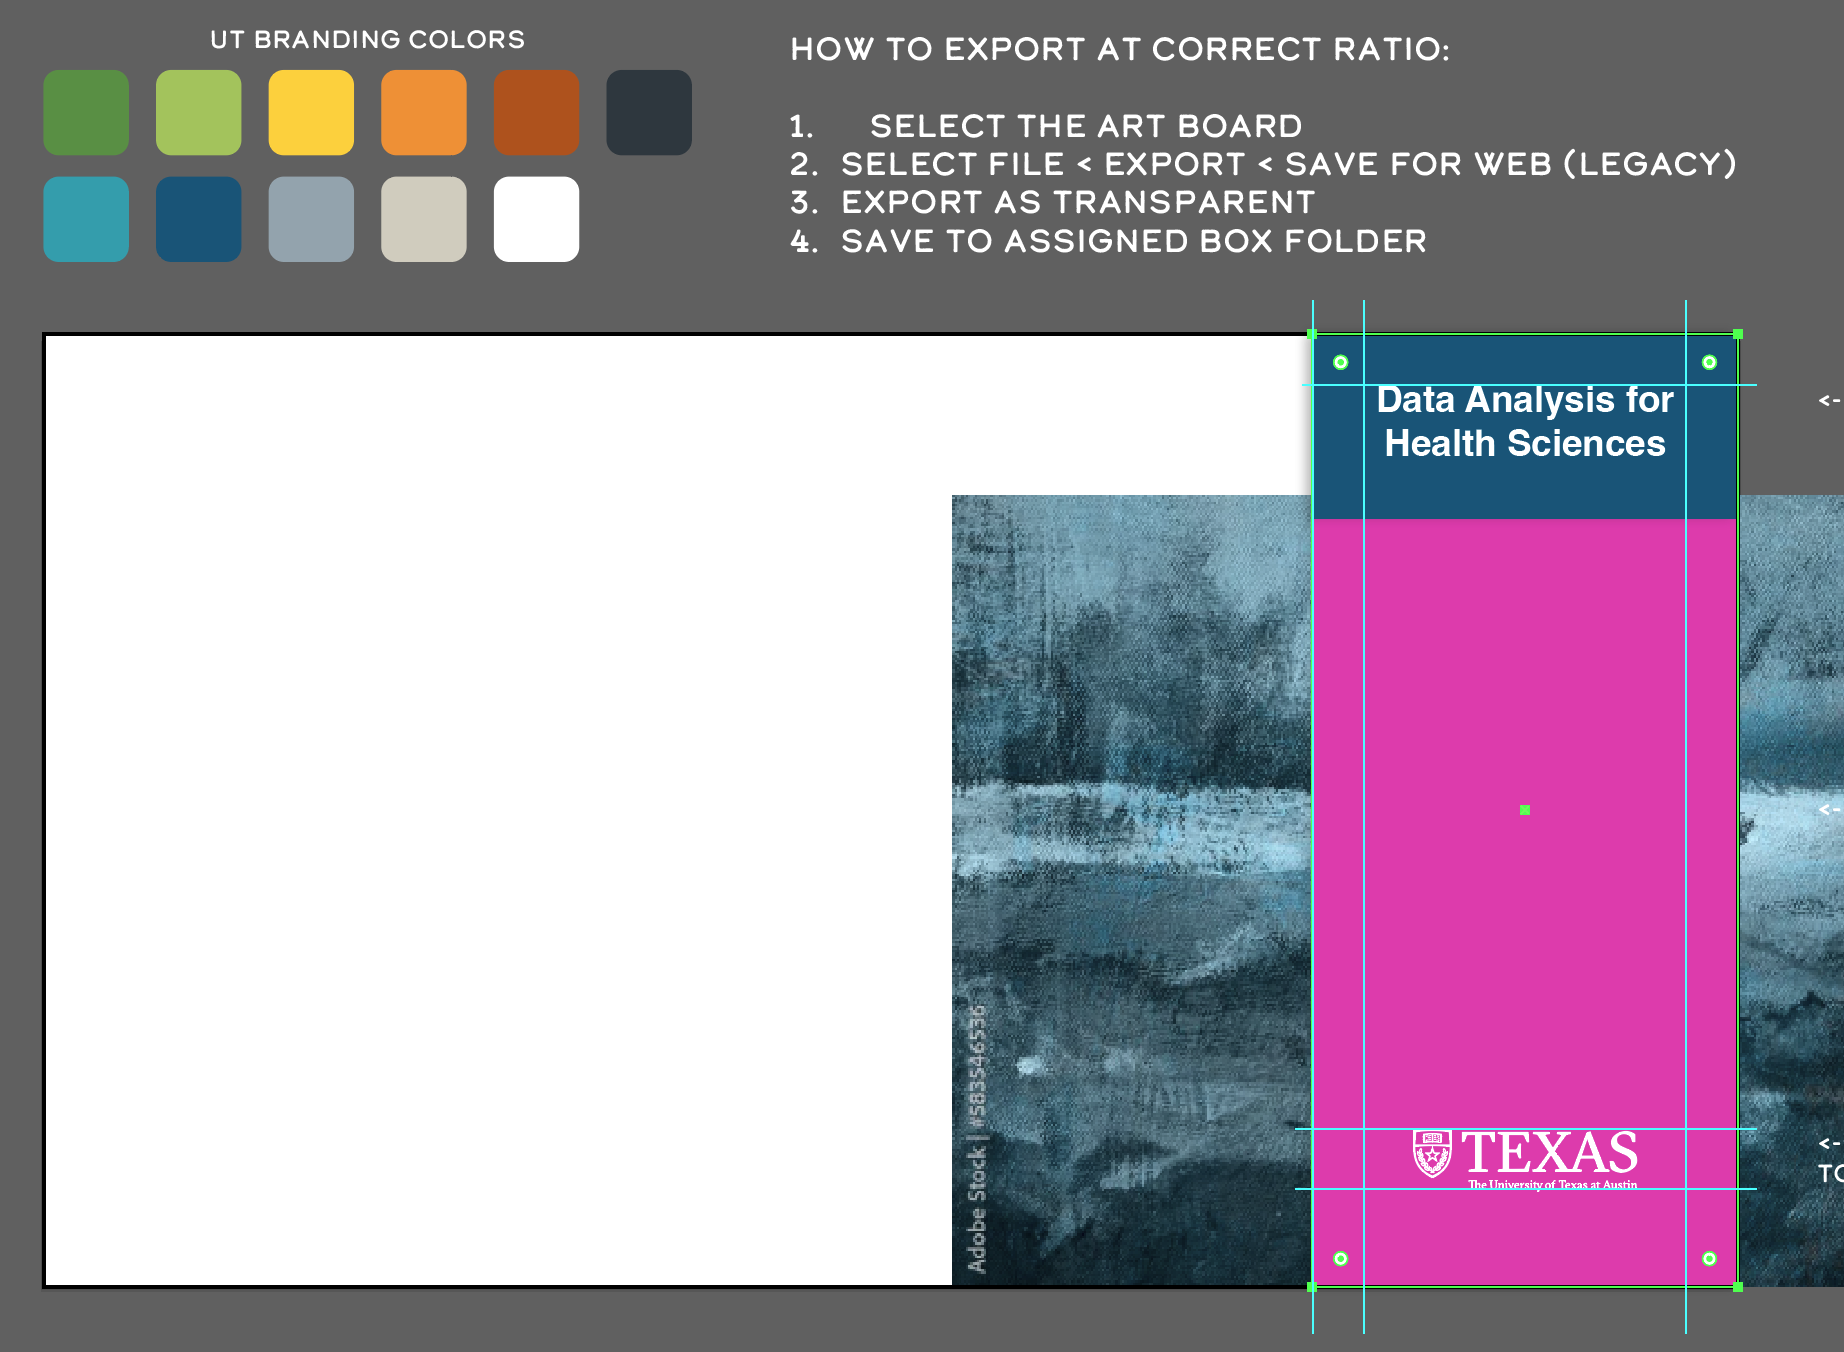
Step 4
Select both the image and the colored rectangle, right click and select “make clipping mask”.
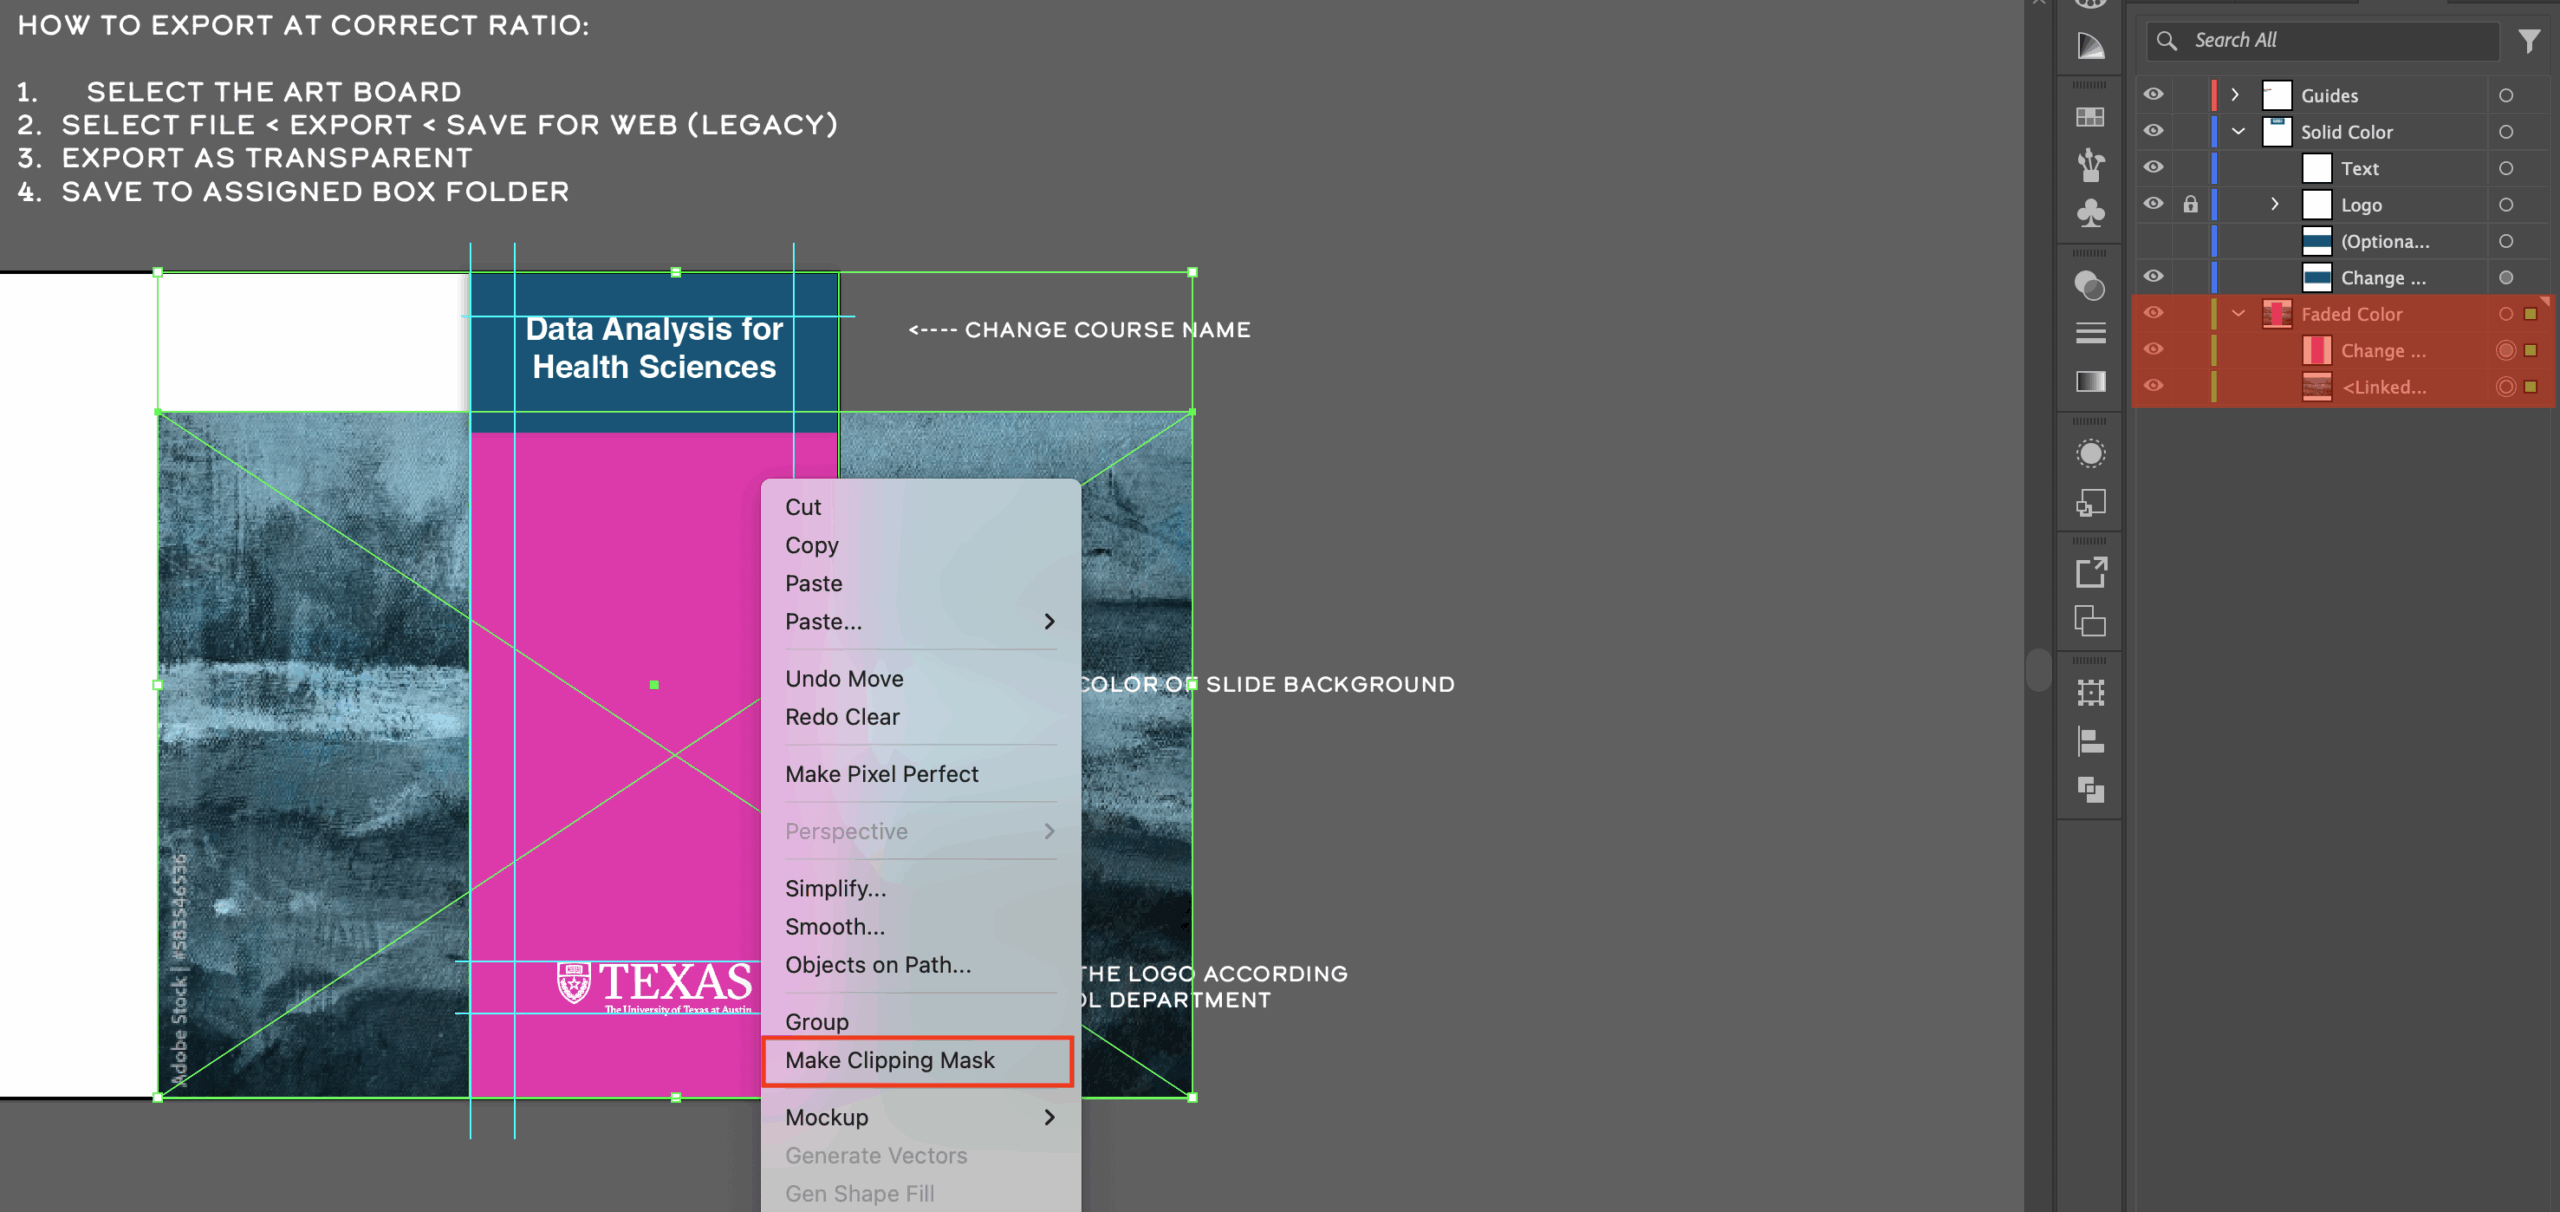
You now have a clipping mask for your image!
Step 5
To edit the effects of the image, double click the clipping mask to go into isolation mode. From here, you can add a colored background, adjust the opacity of the image, and adjust the blend mode of the image using the transparency window all within the clipping mask.
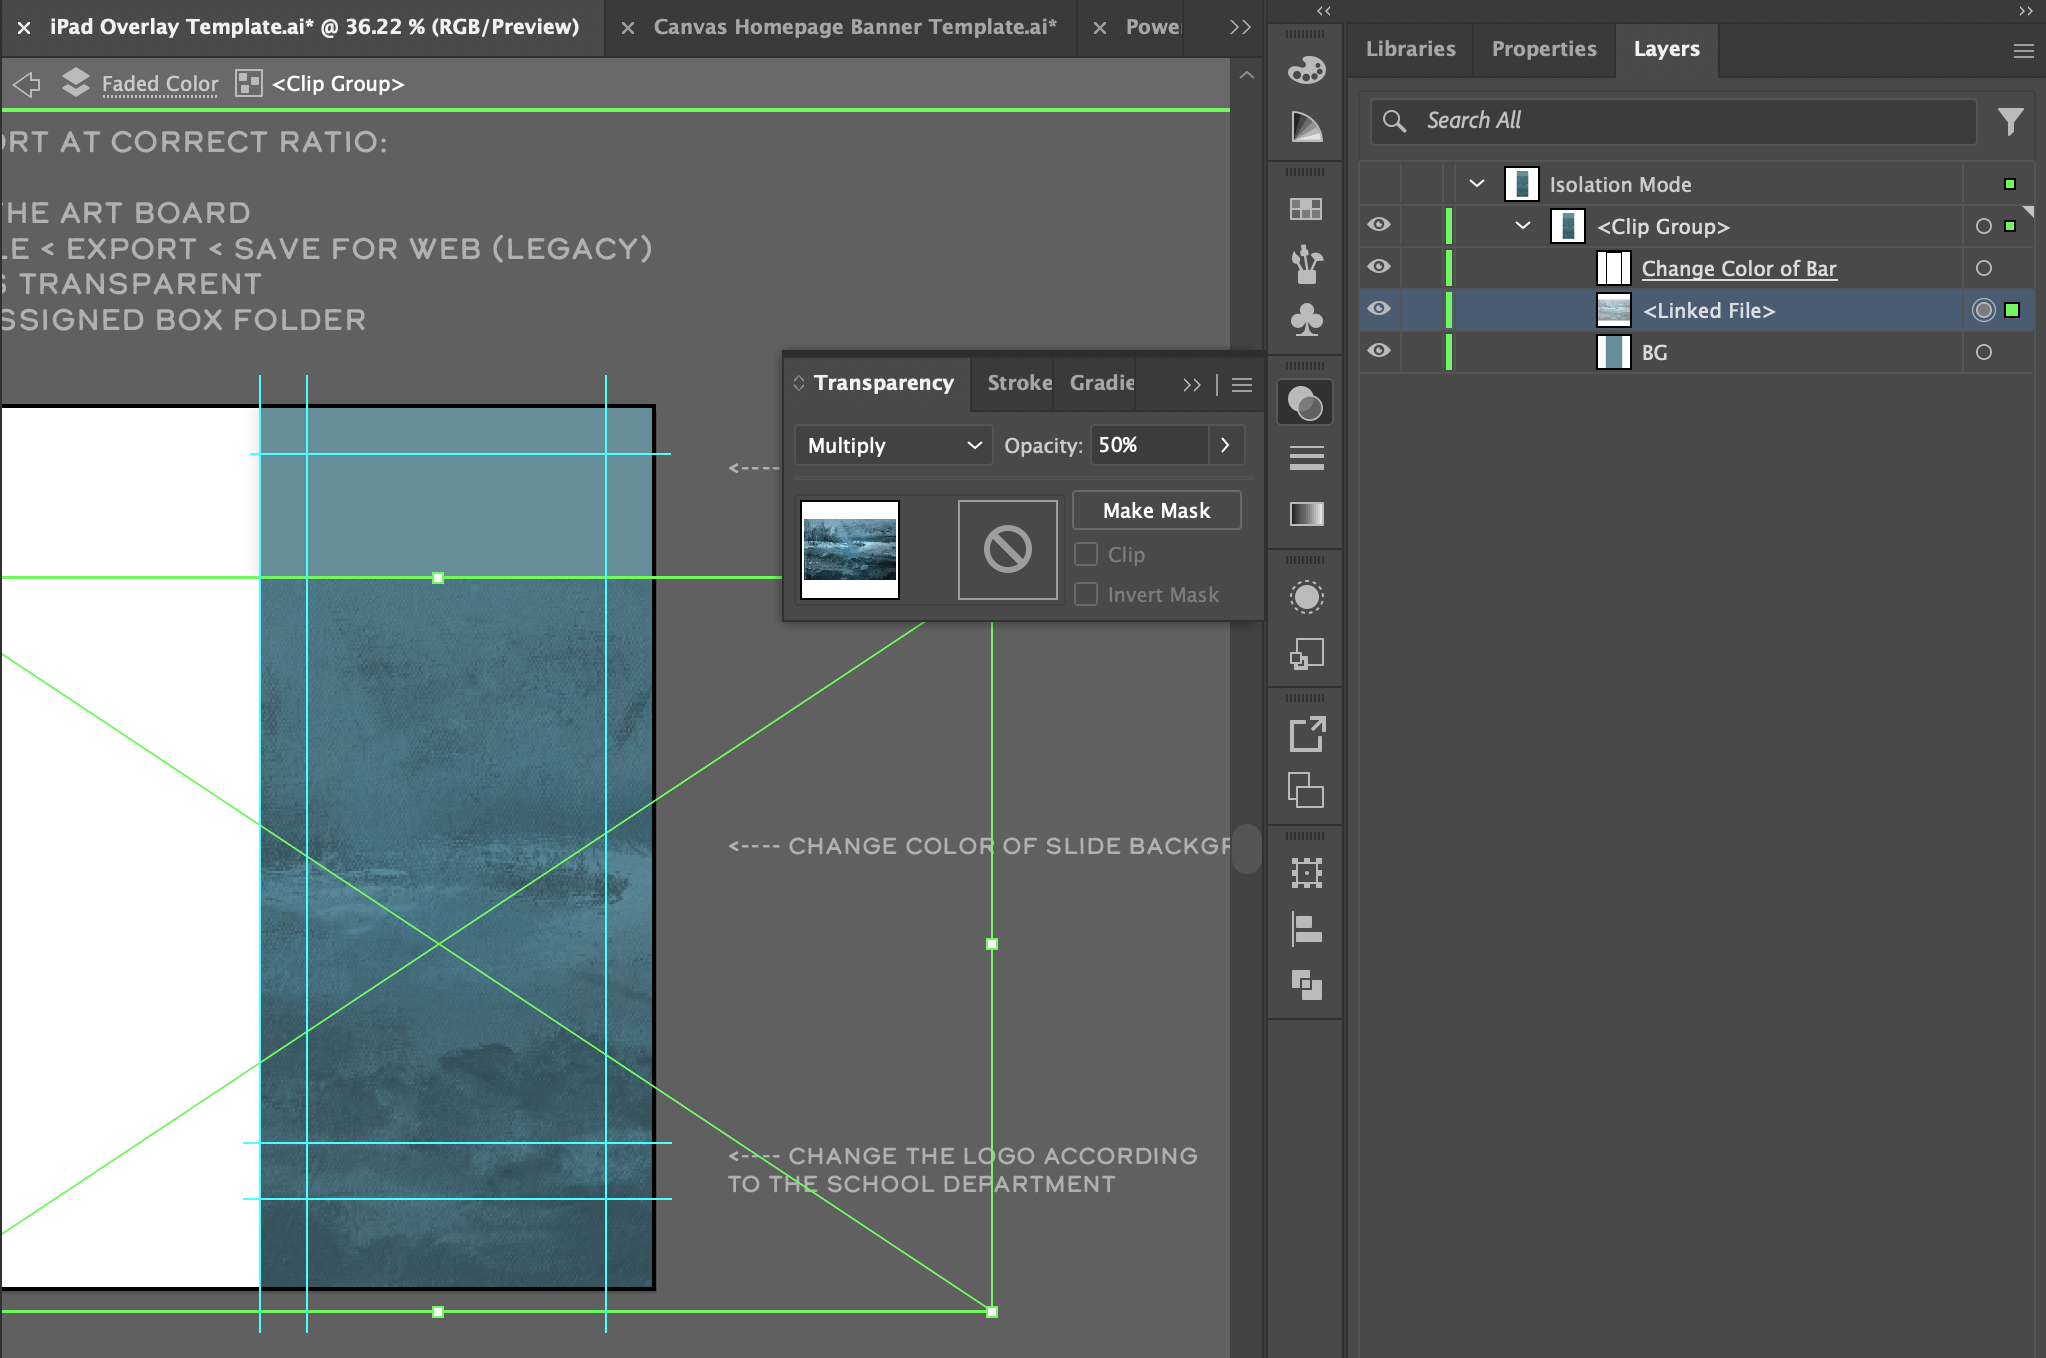
Go back to the main layer, and continue making adjustments until you like the overall look.
Step 6
to export, click on the Artboard with your edited banner, go to File > Export > Save For Web (Legacy). Export as a PNG-24 with Transparency on and save to your personal canvas graphics folder.
Putting your graphics on BaseCamp
After you’ve completed all your graphics, put all the PNGs into a comment under your course graphics training on basecamp.