![]()
STAs, learn how to populate the content in a Cascade site, and how to use the COLA Web Editor for news, events and faculty/staff photo IDs!
The purpose for this practice is to familiarize yourself with components of Cascade. This will prepare you when edits are needed for COLA departments, which you’ll be able to make now that you have administrative access to both editors. It is also a practice of systematically laying out a design with a theme and style in mind.
EDIT/DESIGN content for your own Cascade site! It will be based on a theme of your choosing or about you.
-
TRAINING RESOURCES
- Ask the Chat-bot about non-admin related Cascade & Cola Web Editor questions. Log-in to the Cola Web Editor https://webeditor.la.utexas.edu/login …give it a try, ask it a question!
- Make sure to review the on-line resources for how-to’s for Cascade and the Cola Web Editor https://liberalarts.utexas.edu/web-admin-help/index.php
BASECAMP COMMUNICATION- Ask your STA buddies for feedback on basecamp
- Ask your STA buddies for help if you cannot find the answer through the Chat-bot.
- Post links to your Basecamp To-Do from your Cascade test site each time you finish a couple of tasks.
CASCADE TEST SITE- Your test site is located at: https://liberalarts.utexas.edu/sta-#/. Remember to replace the sta number, with your assigned folder number. Ex: https://liberalarts.utexas.edu/sta-1/ (sta-2, sta-3 etc)
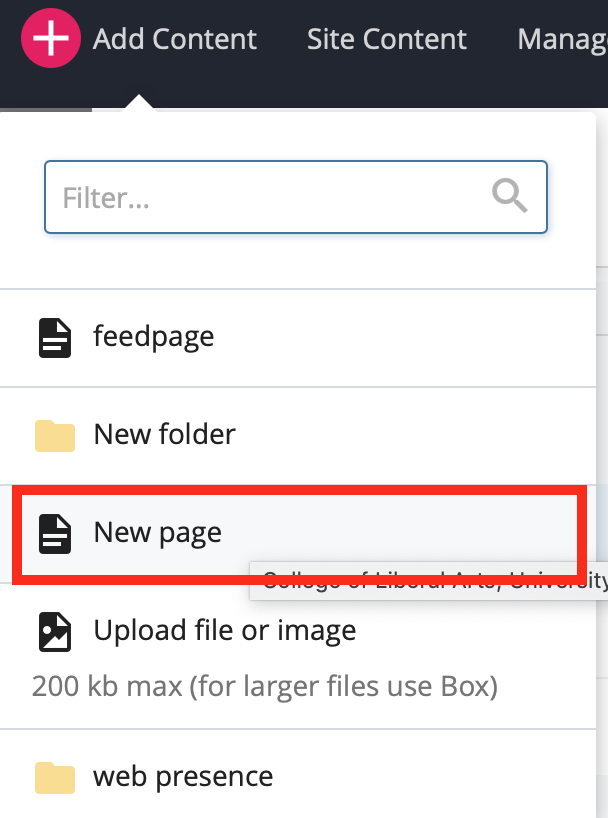
STA here is your task:

![]()
![]()

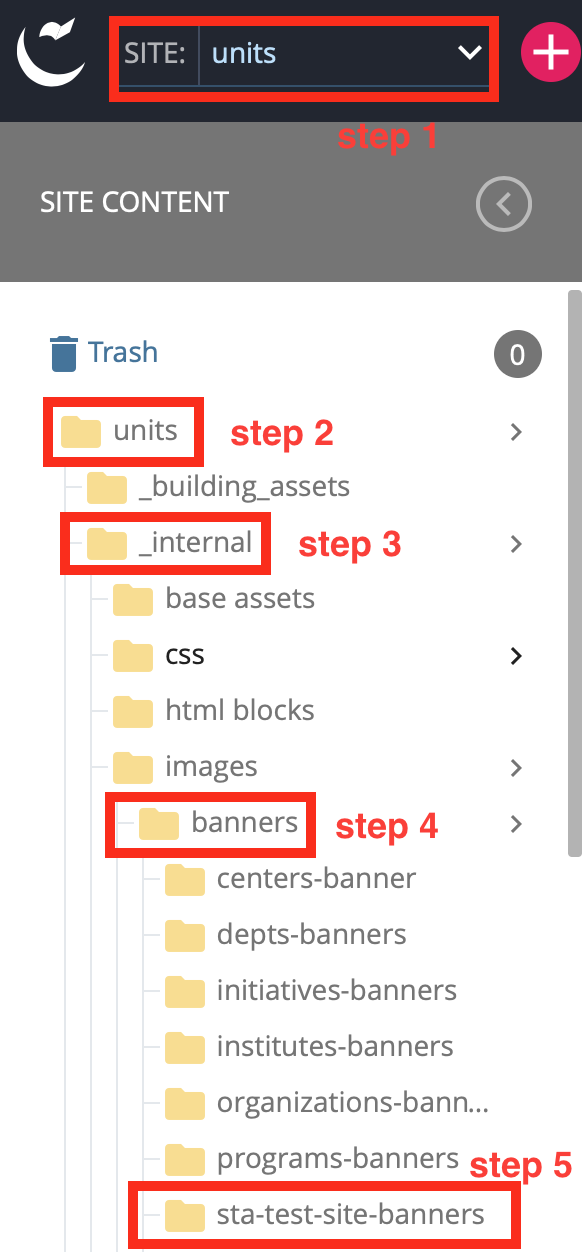
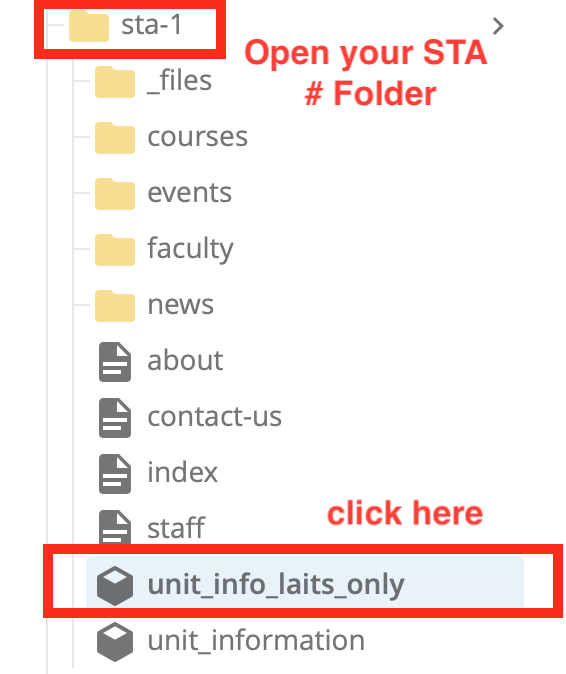
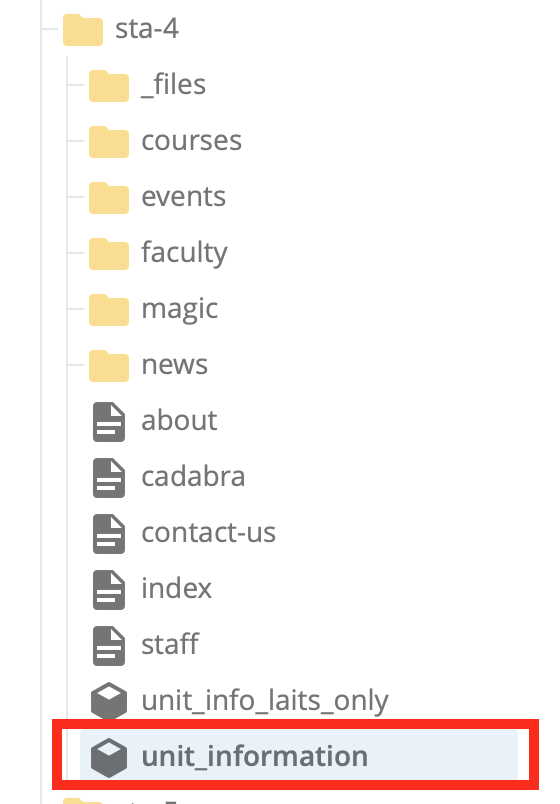
TIP: Hover over the folder you want to access. Then click on the small arrow that appears to the right of it.
OTHER TASKS:
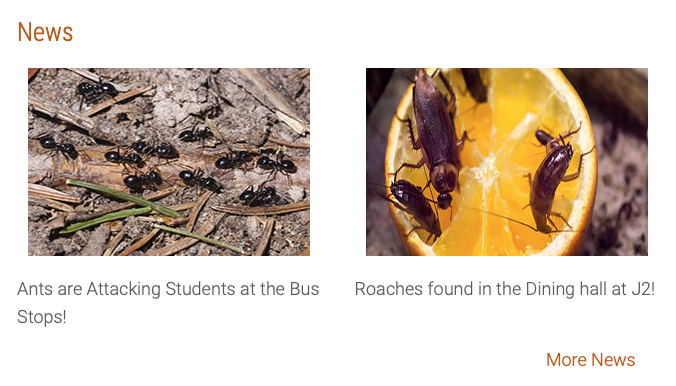
News/events won’t be displayed in the body of a website until you go to Cascade, which is also where you choose the number of news and events that will be displayed.


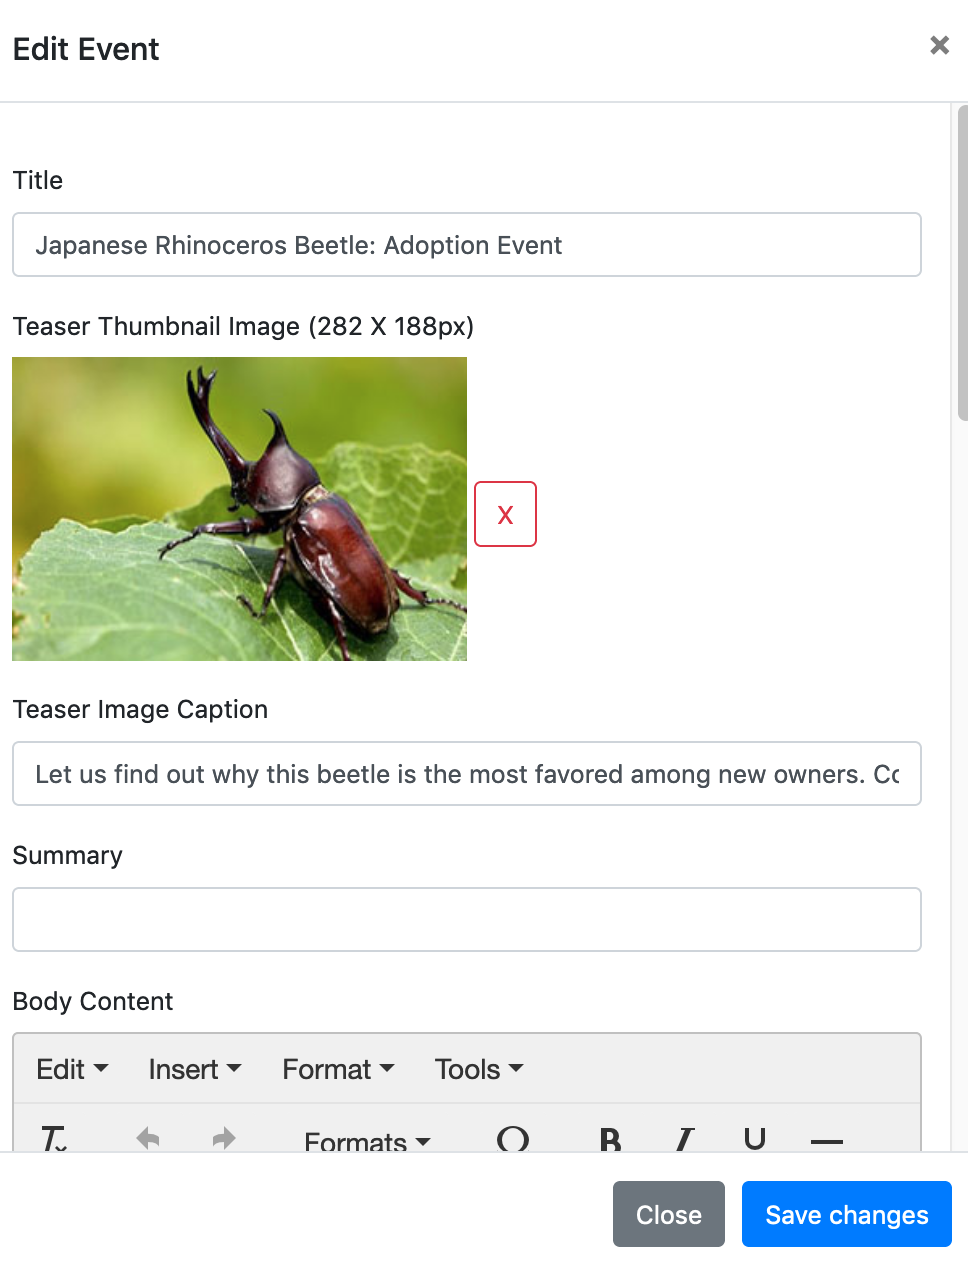
- Gather all 4 images for your events right now before starting and editing them to the dimensions of (282x188px).
- Find the section on the dashboard that corresponds with your STA-# folder in Cascade.
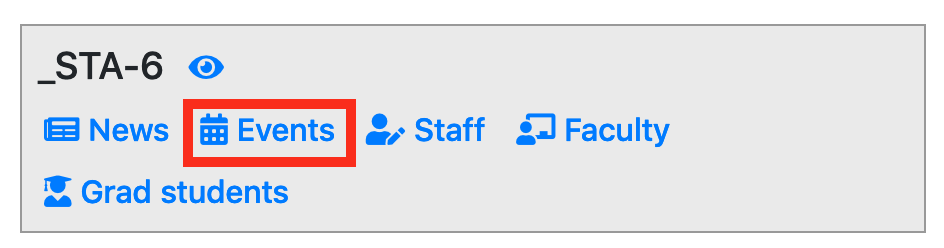
- Select ‘events’ from the bottom bar.
News/events won’t be displayed in the body of a website until you go to Cascade, which is also where you choose the number of news and events that will be displayed.
- Gather all 3 images for your events right now before starting and editing them to the dimensions of (282x188px). (optional reading: http://liberalarts.utexas.edu/web-admin-help/graphics/news-and-events.php)
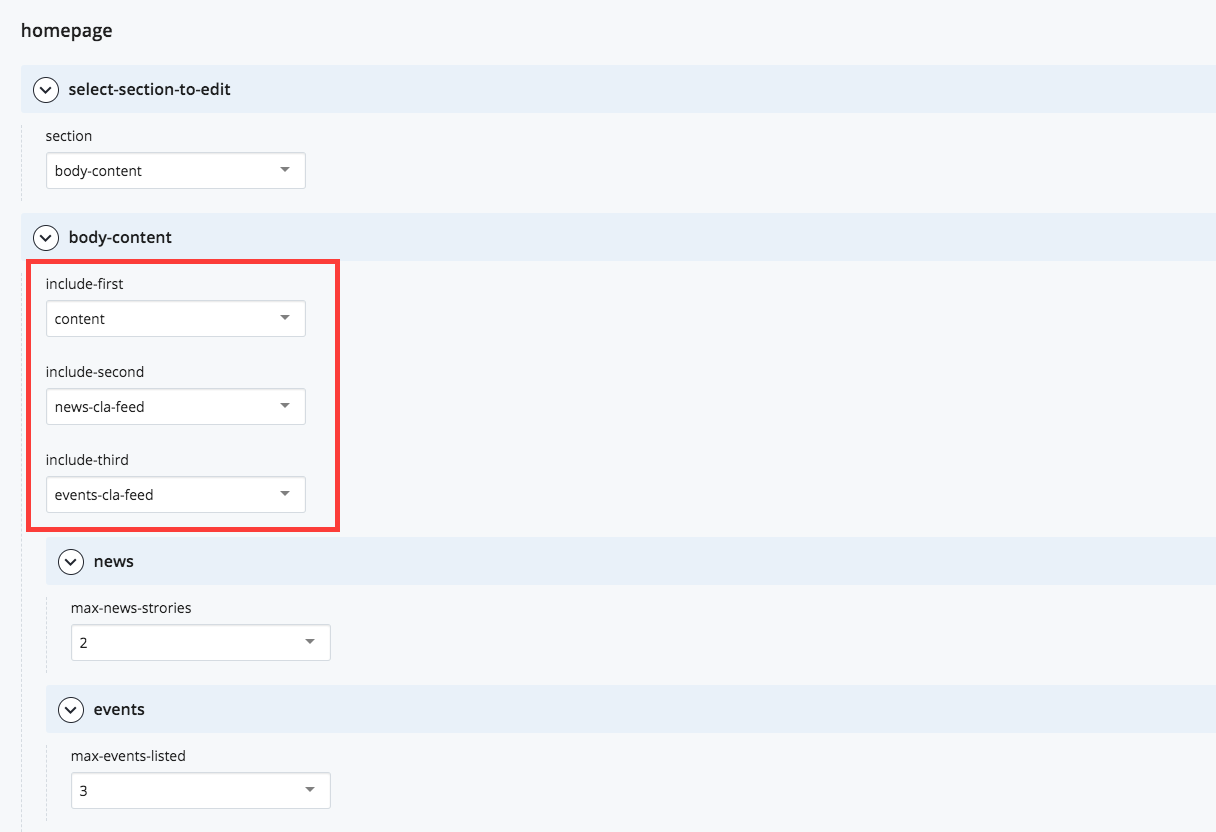
- Go to Units > sta- (your #) > index and click to edit the page. When you open the edit box, make sure your settings show both the News & Events page. (Shown in photo below)
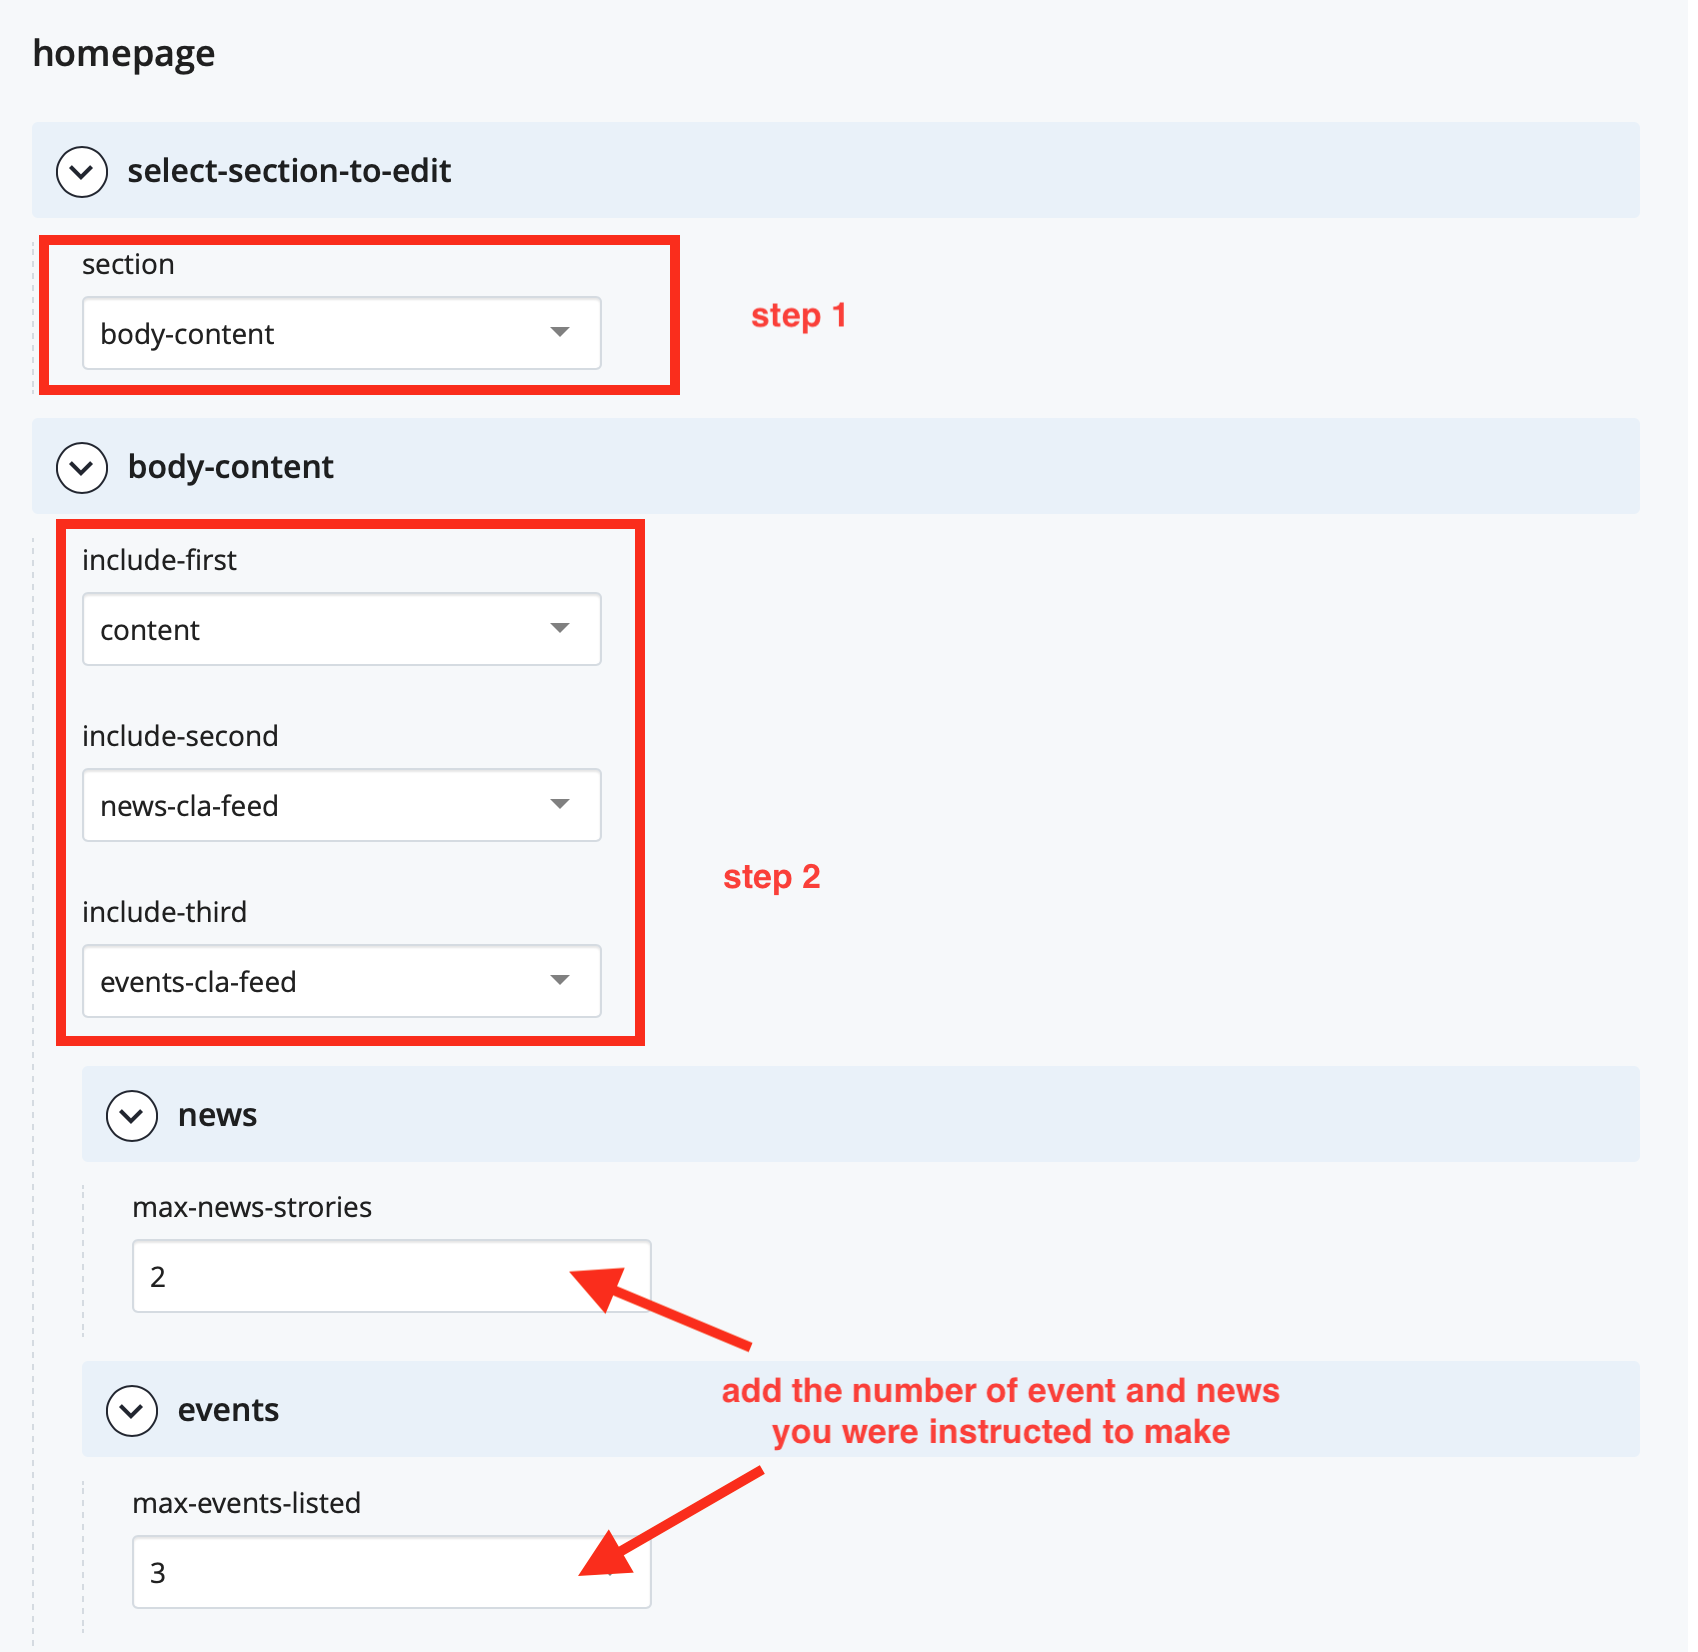
4. To make sure that your news events show up refer to Cascade. This is done by adding a max number to news and events. If you don’t do this, it won’t show up in the body when you check your Cascade site.
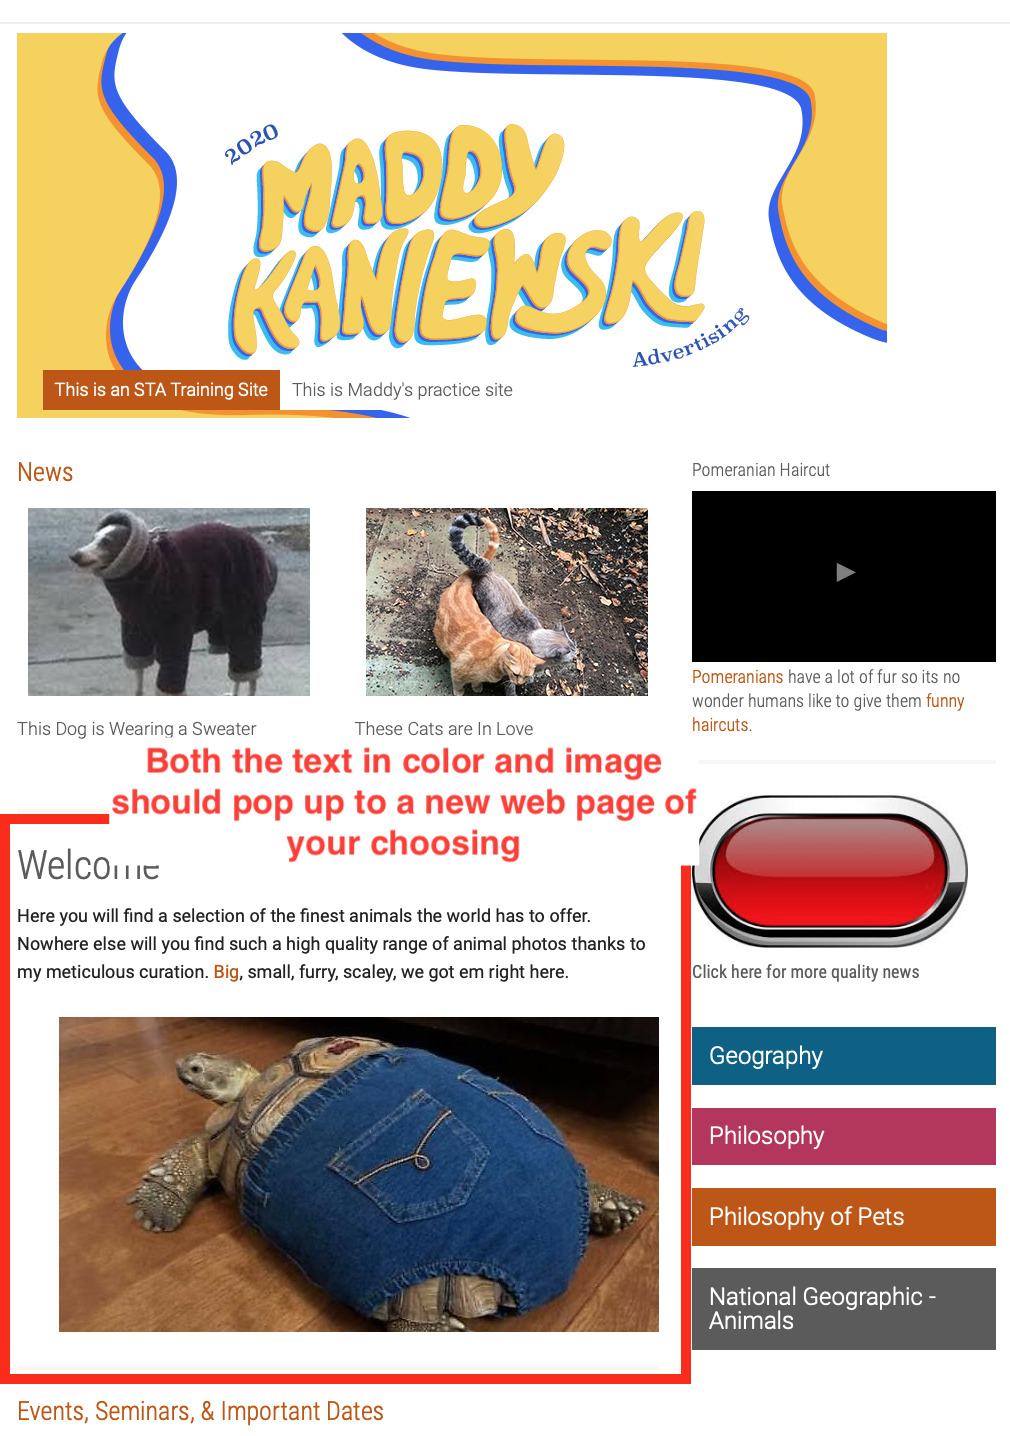
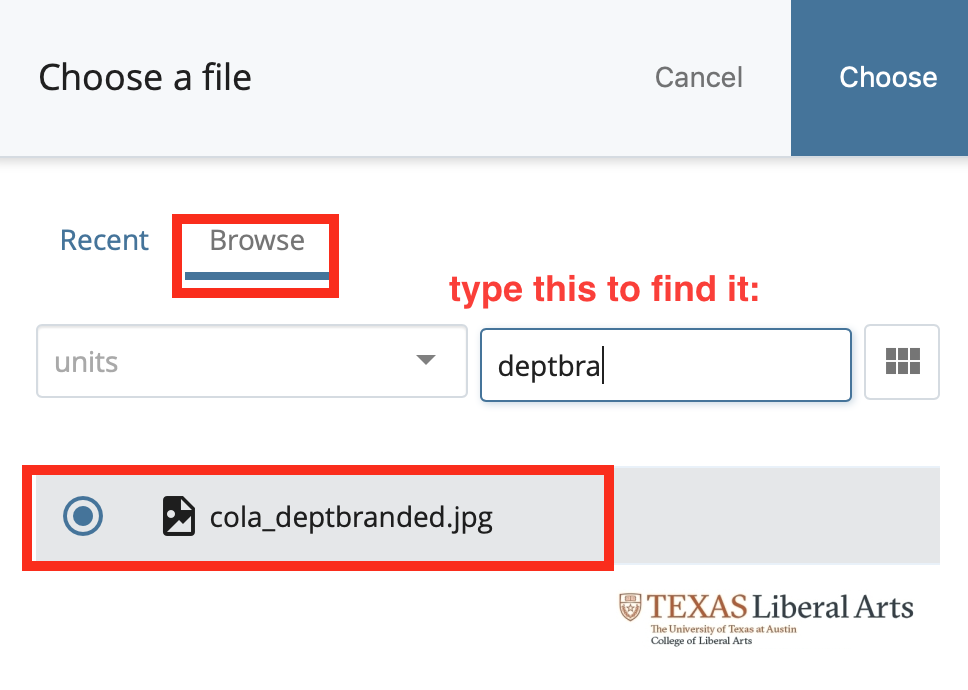
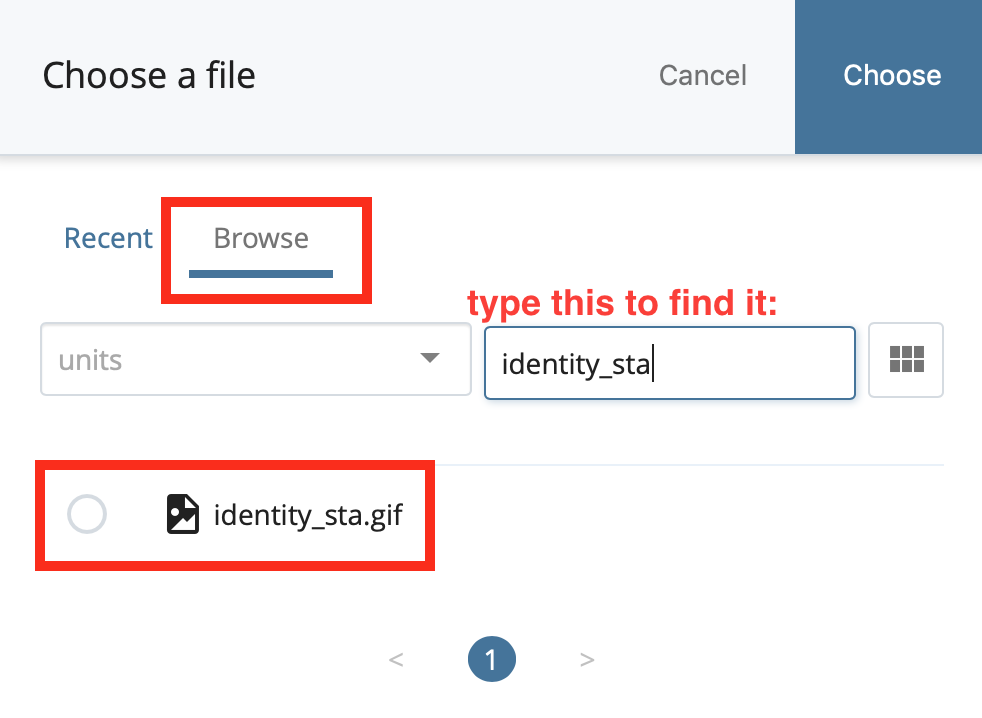
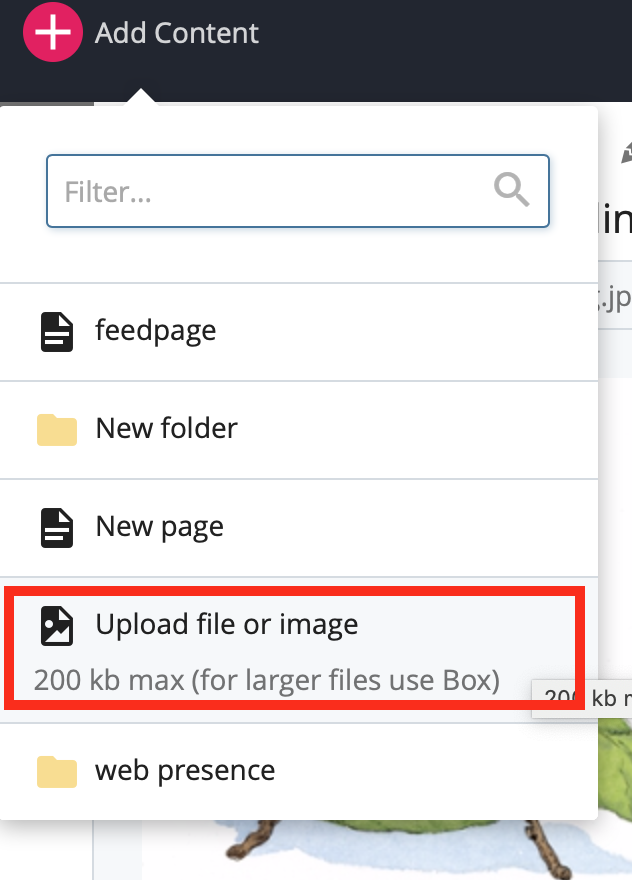
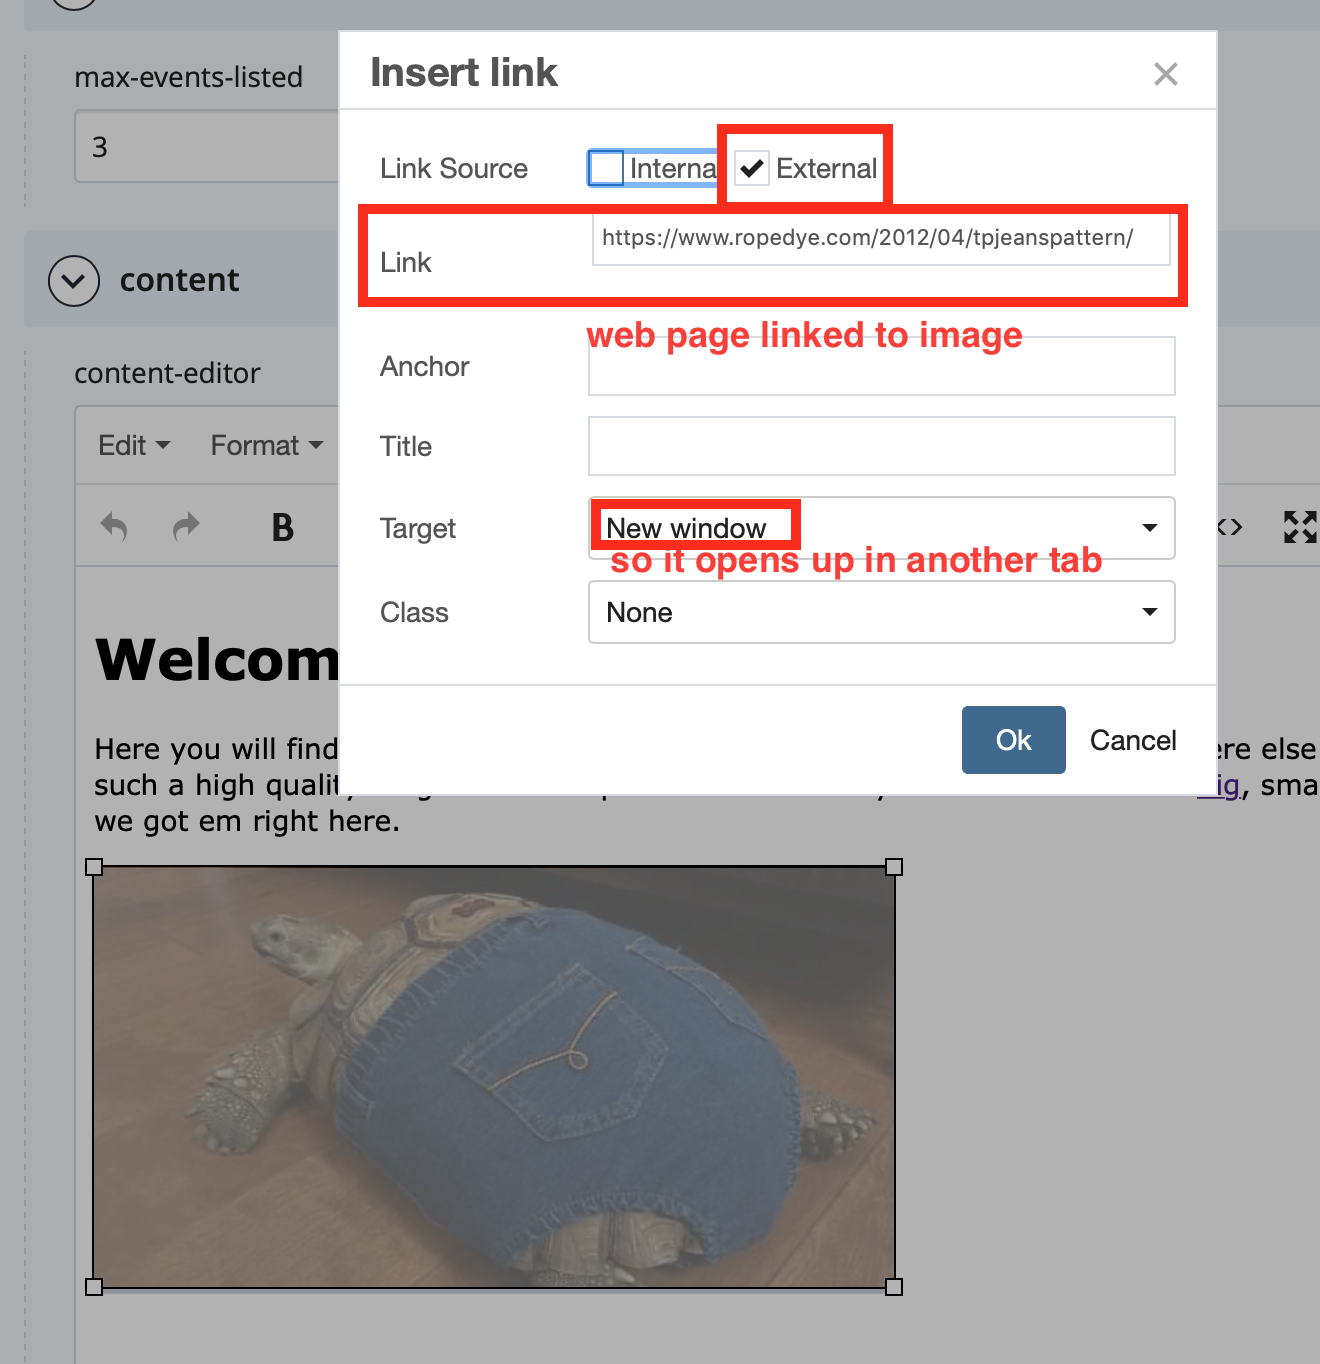
- Find an image and two webpages you want to link. Before starting the other steps open your sta folder > click on “Add Content” > “Upload file or image” > in the placement folder make sure “_files” is under the “Placement Folder”. > CLICK SUBMIT BEFORE LEAVING PAGE OR IMAGE WILL NOT SAVE!

![]()
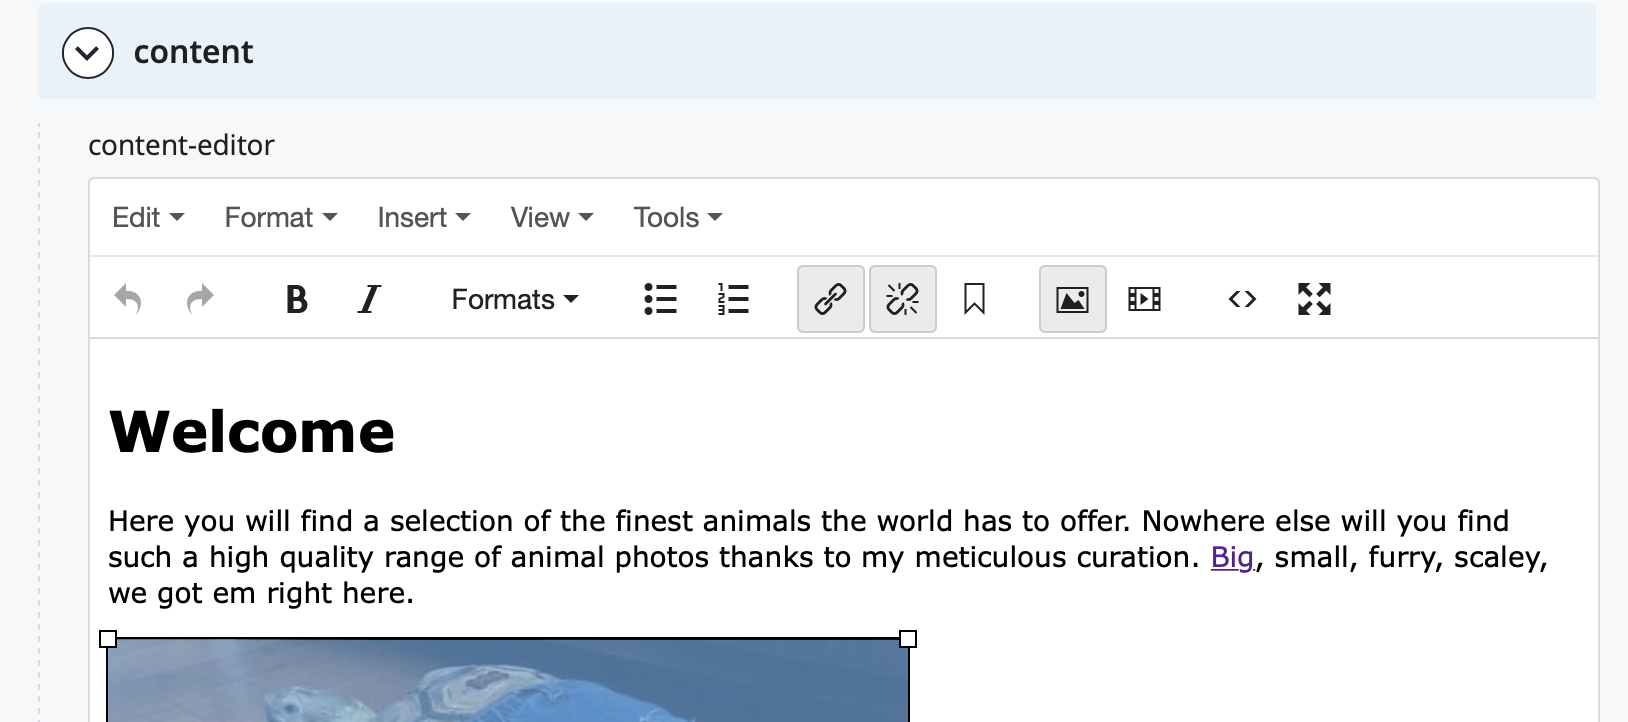
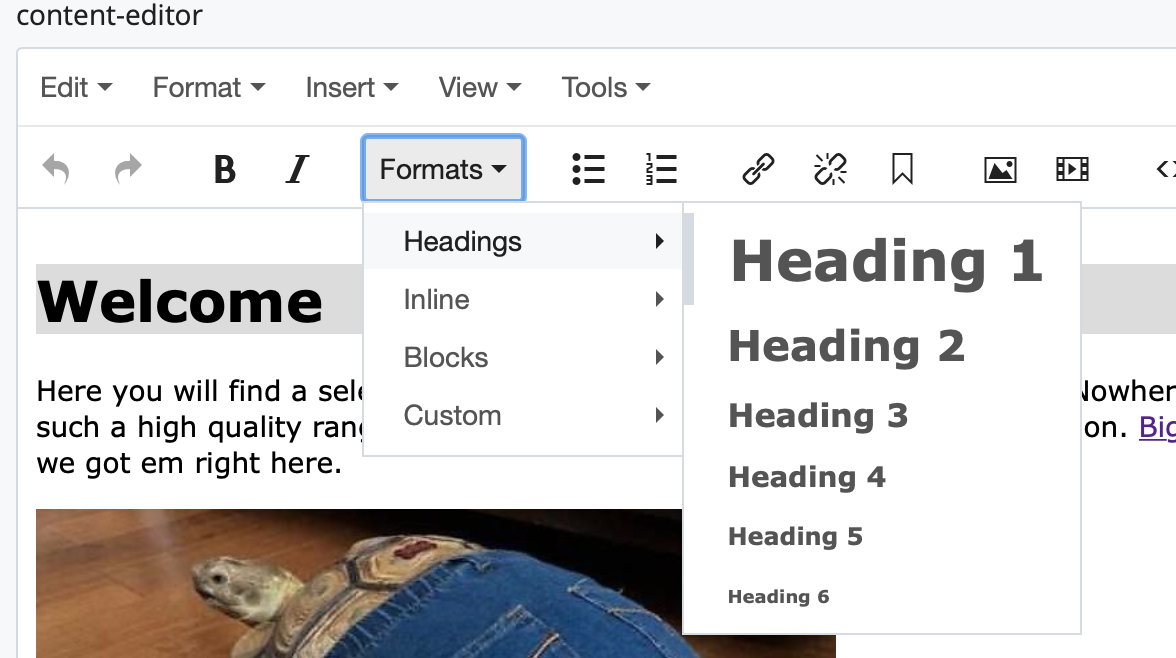
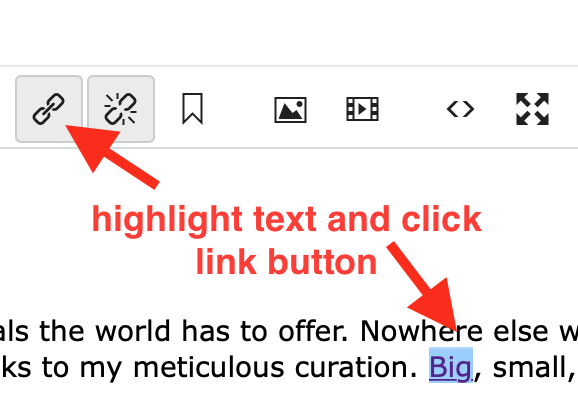
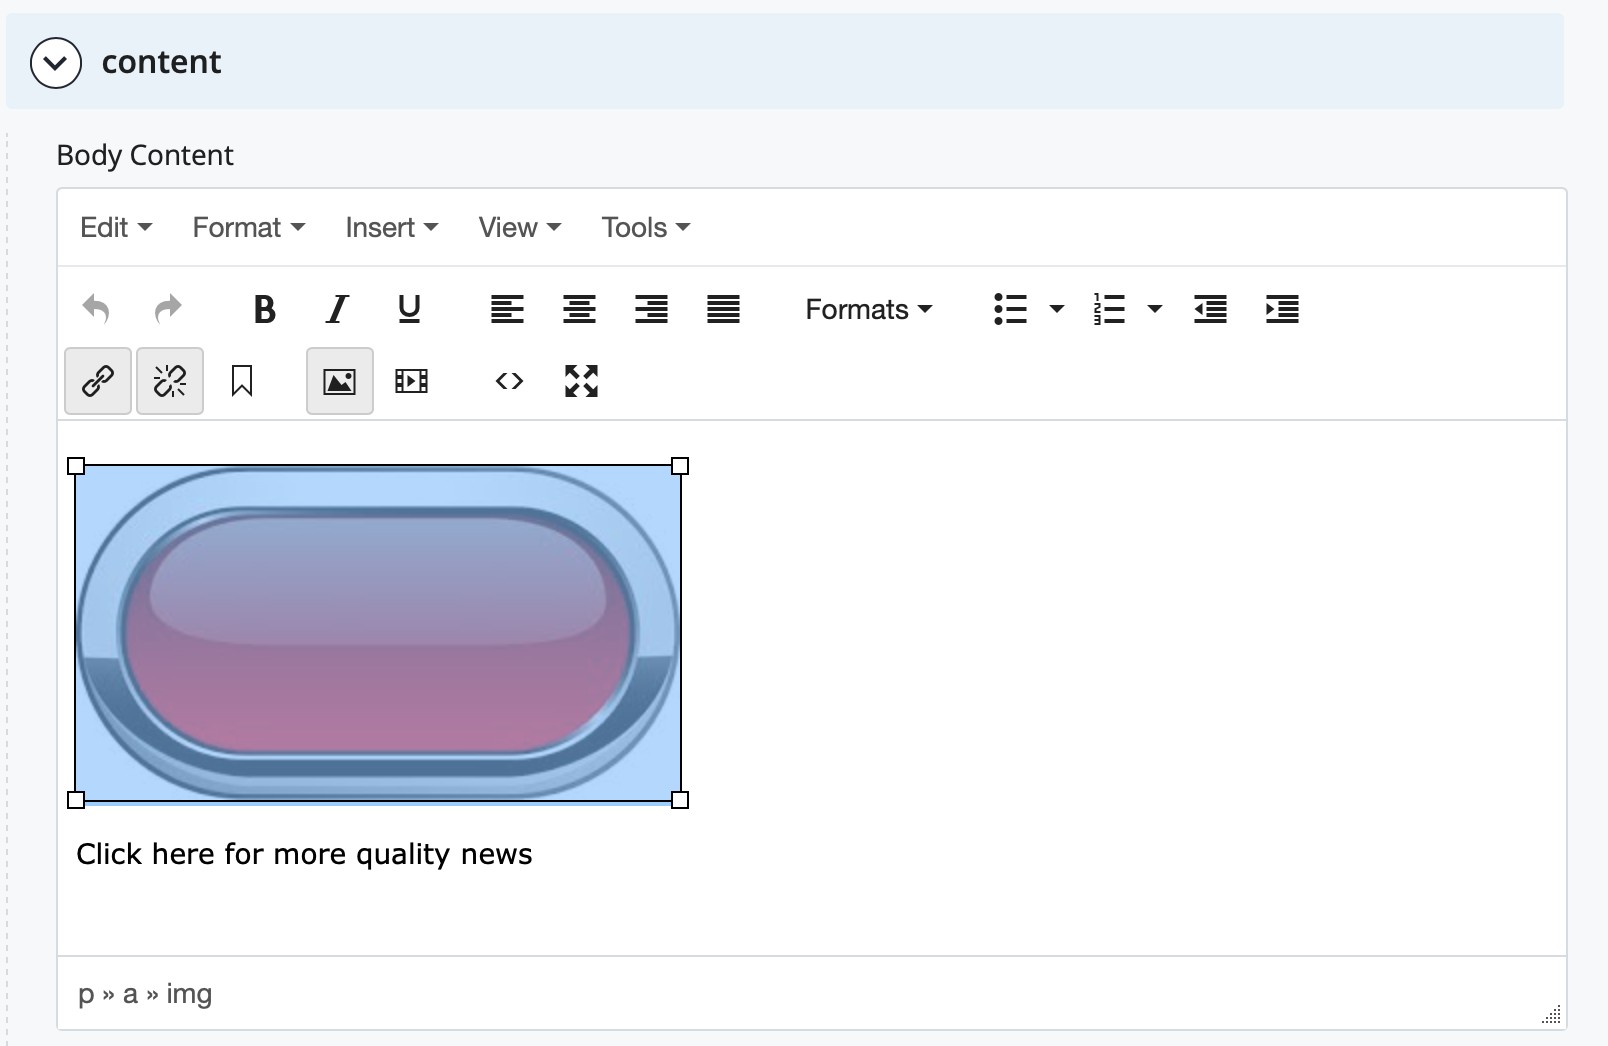
2. Go to edit on your index. Then, navigate to content > content-editor.

- Before starting you will need to place a button for one of the steps. Please find a button of your choosing off the web and save the image to Cascade the same way you did for step 1 in Body Content.

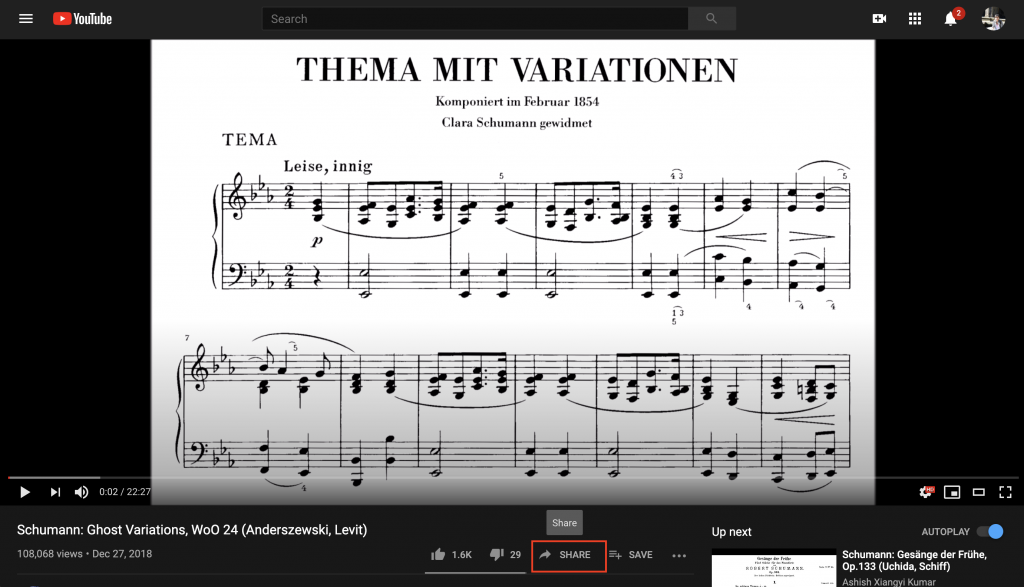
Note: if you video has an error code 102630 (“This video cannot be played”), it is likely that the player has been deprecated. You can work-around this issue by following these steps:
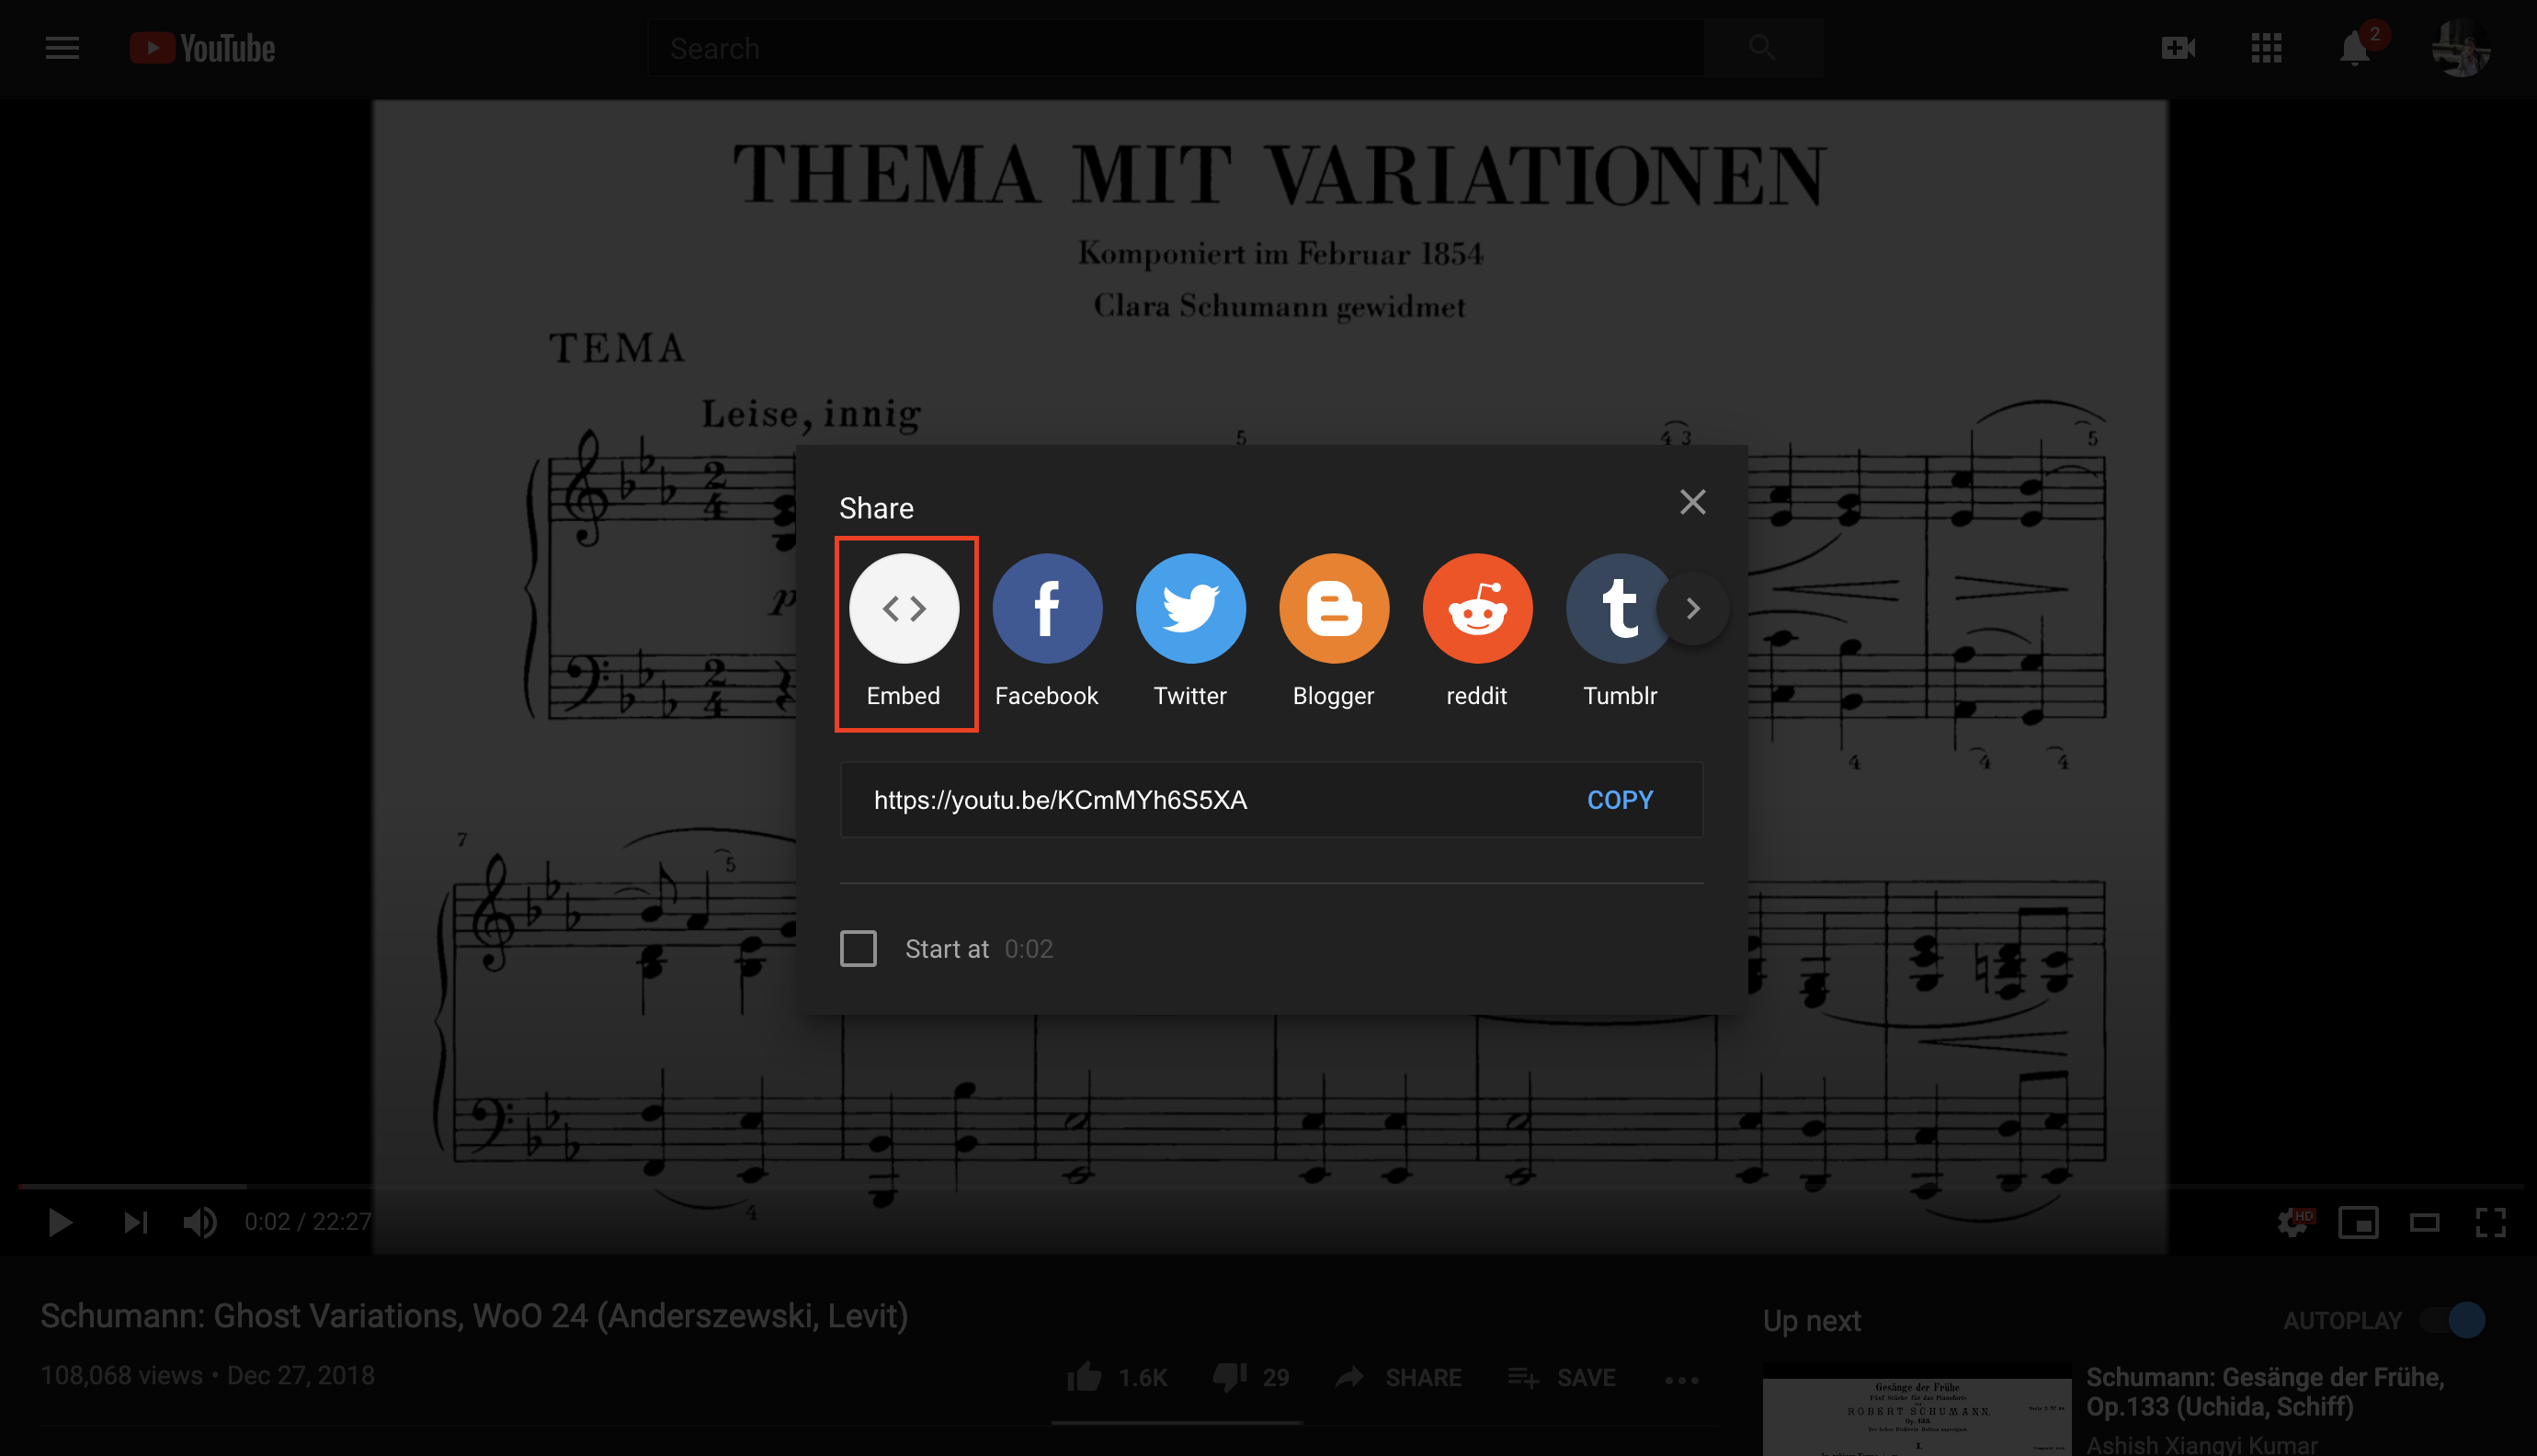
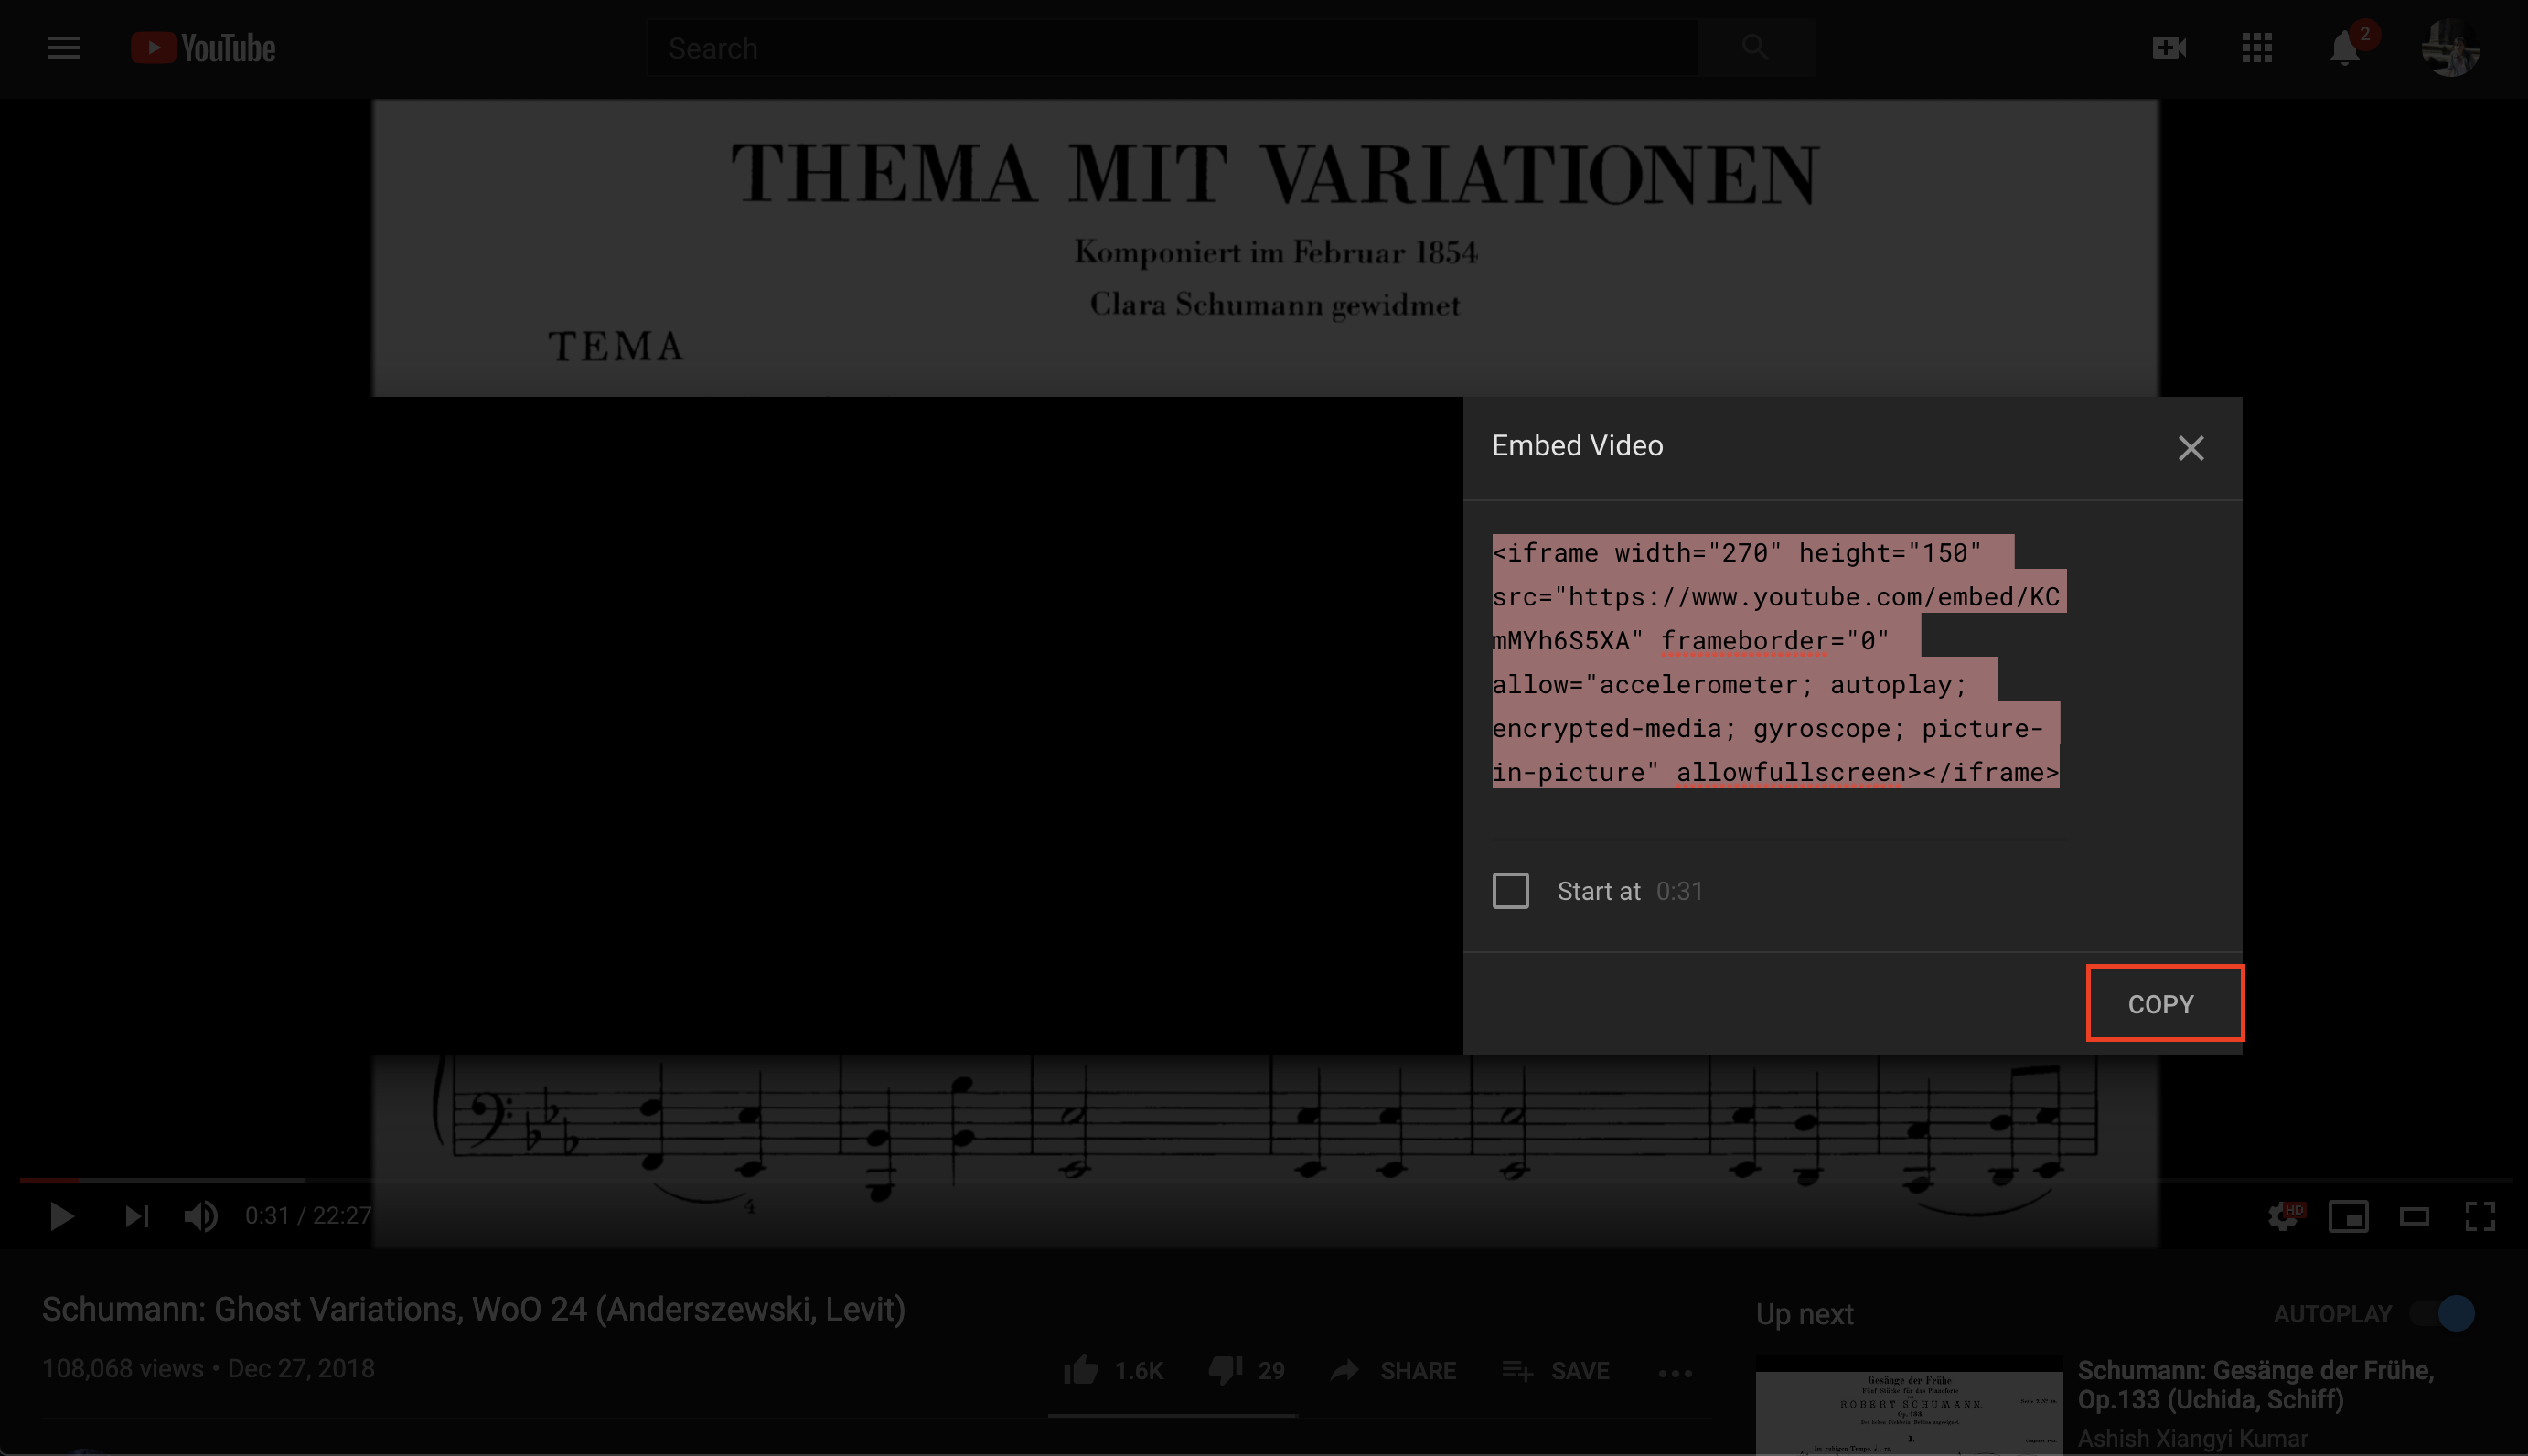
- Navigate to the YouTube video you wish to embed, and click “Share.”
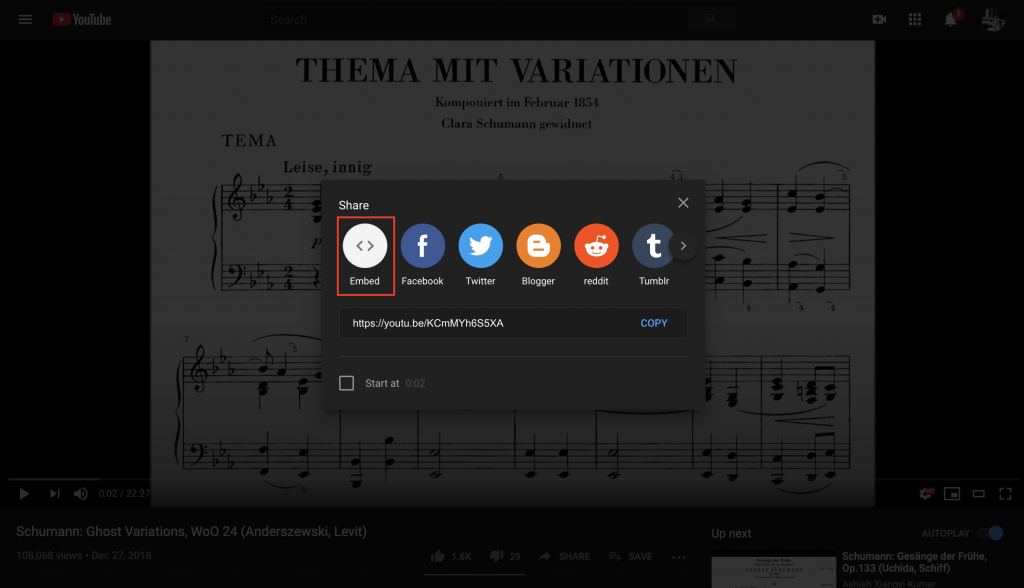
- Click “Embed.”
- This iframe HTML code will appear. Note the “width” and “height” within the code.

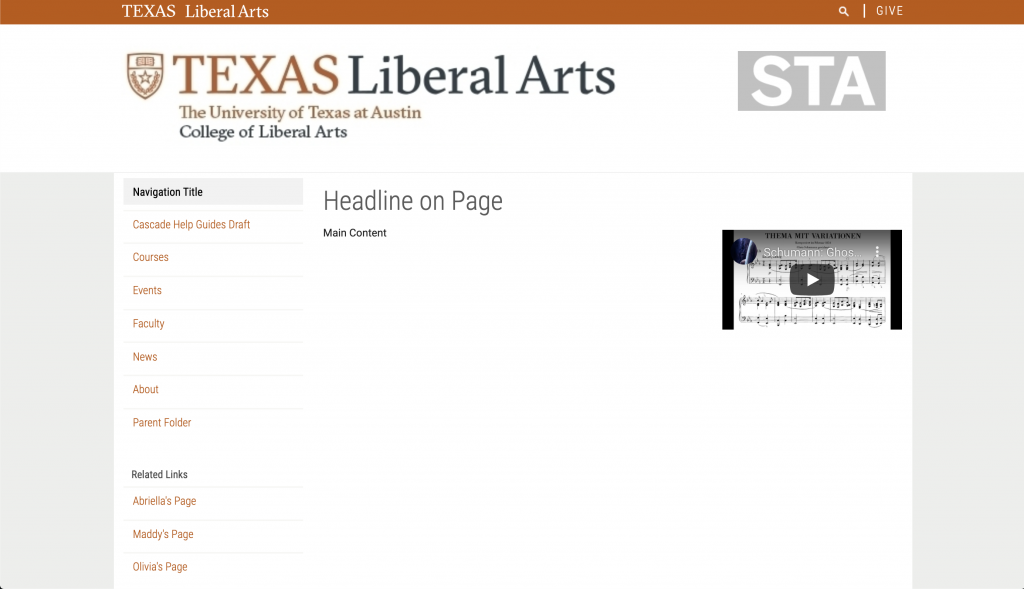
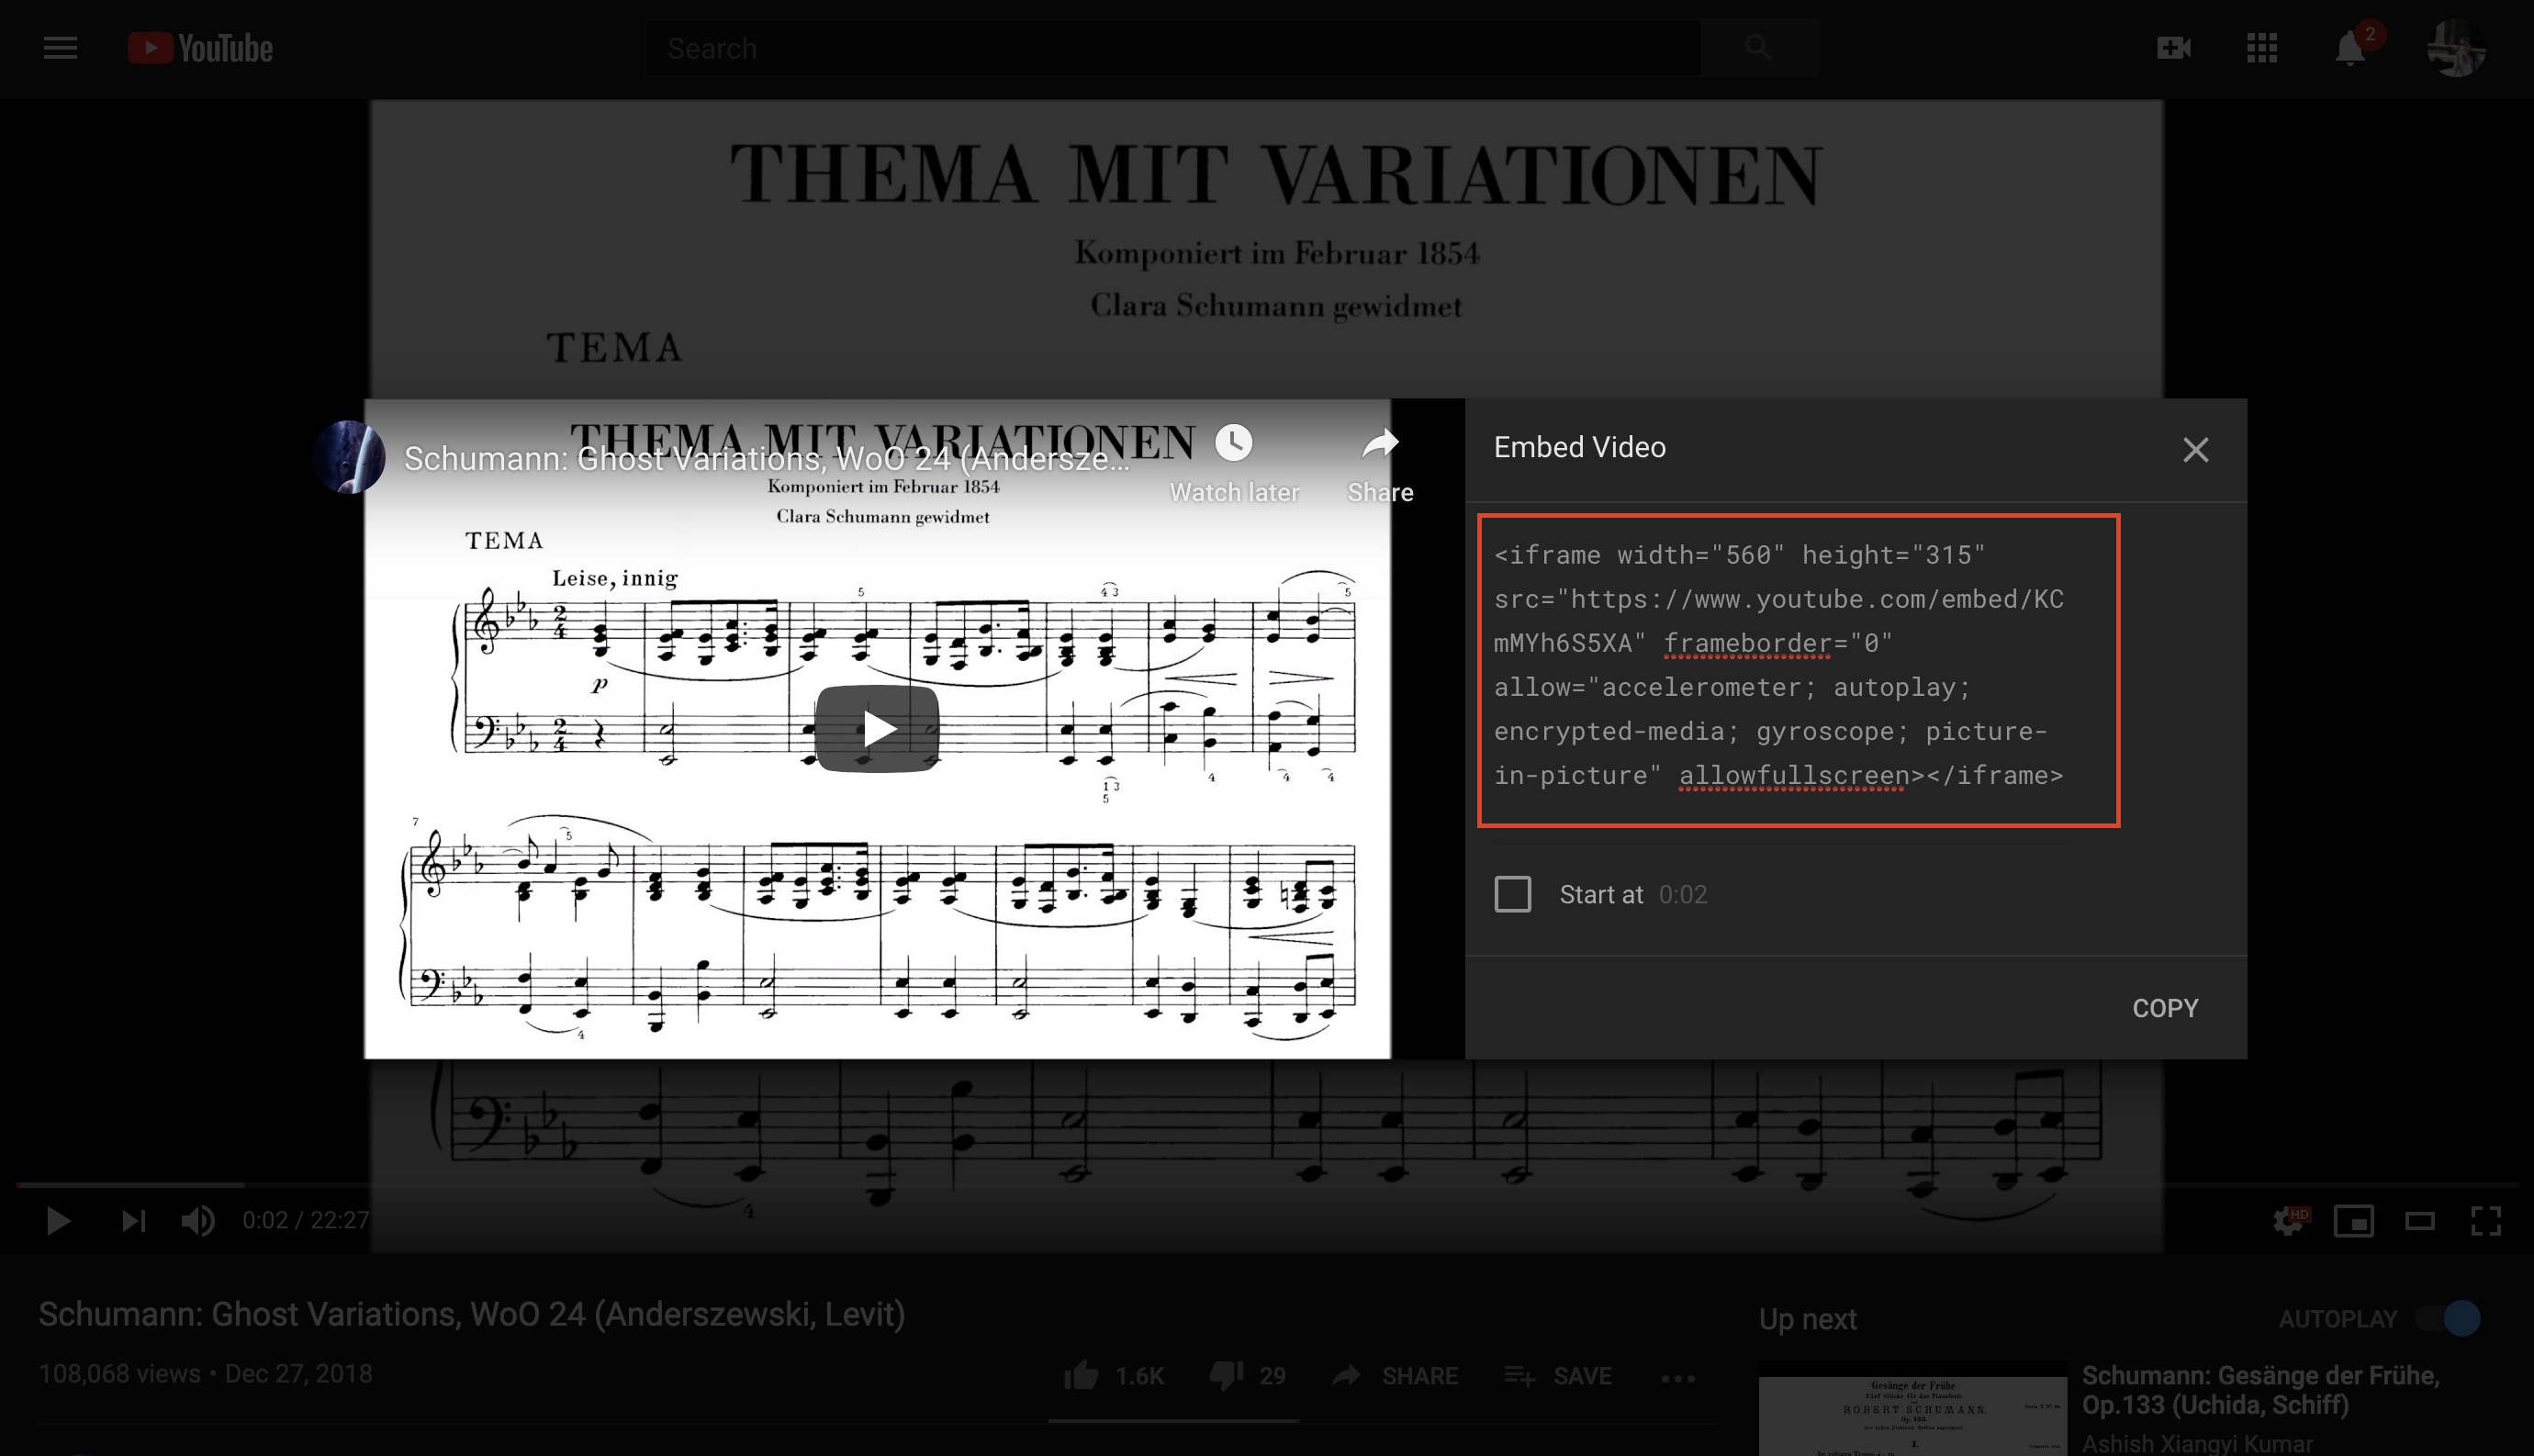
- This width will be too wide to be displayed within the right side-bar and therefore will be cut-off. Change the width to 270 and height to 150.
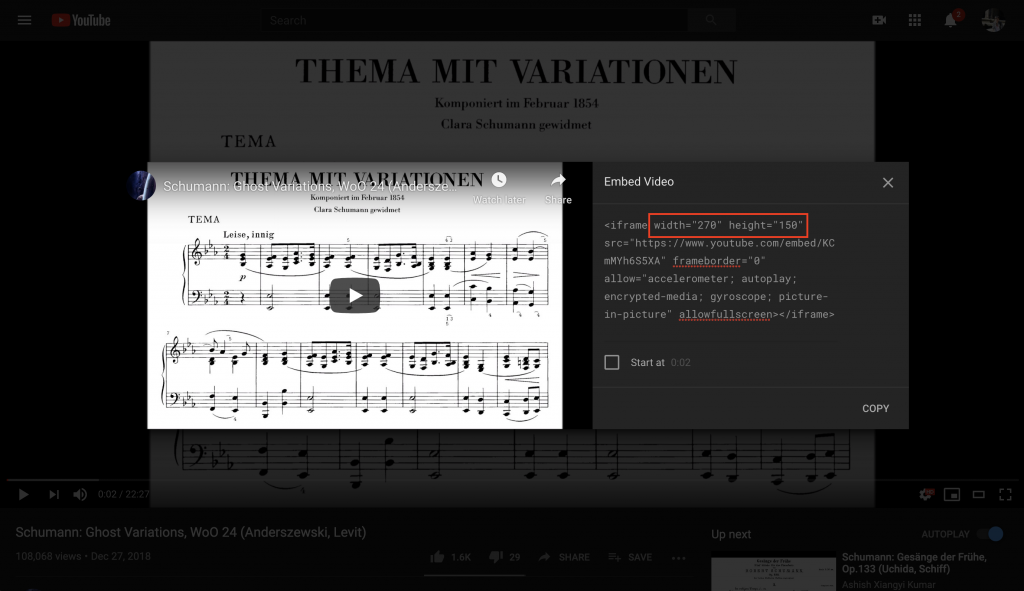
- Click “Copy.”

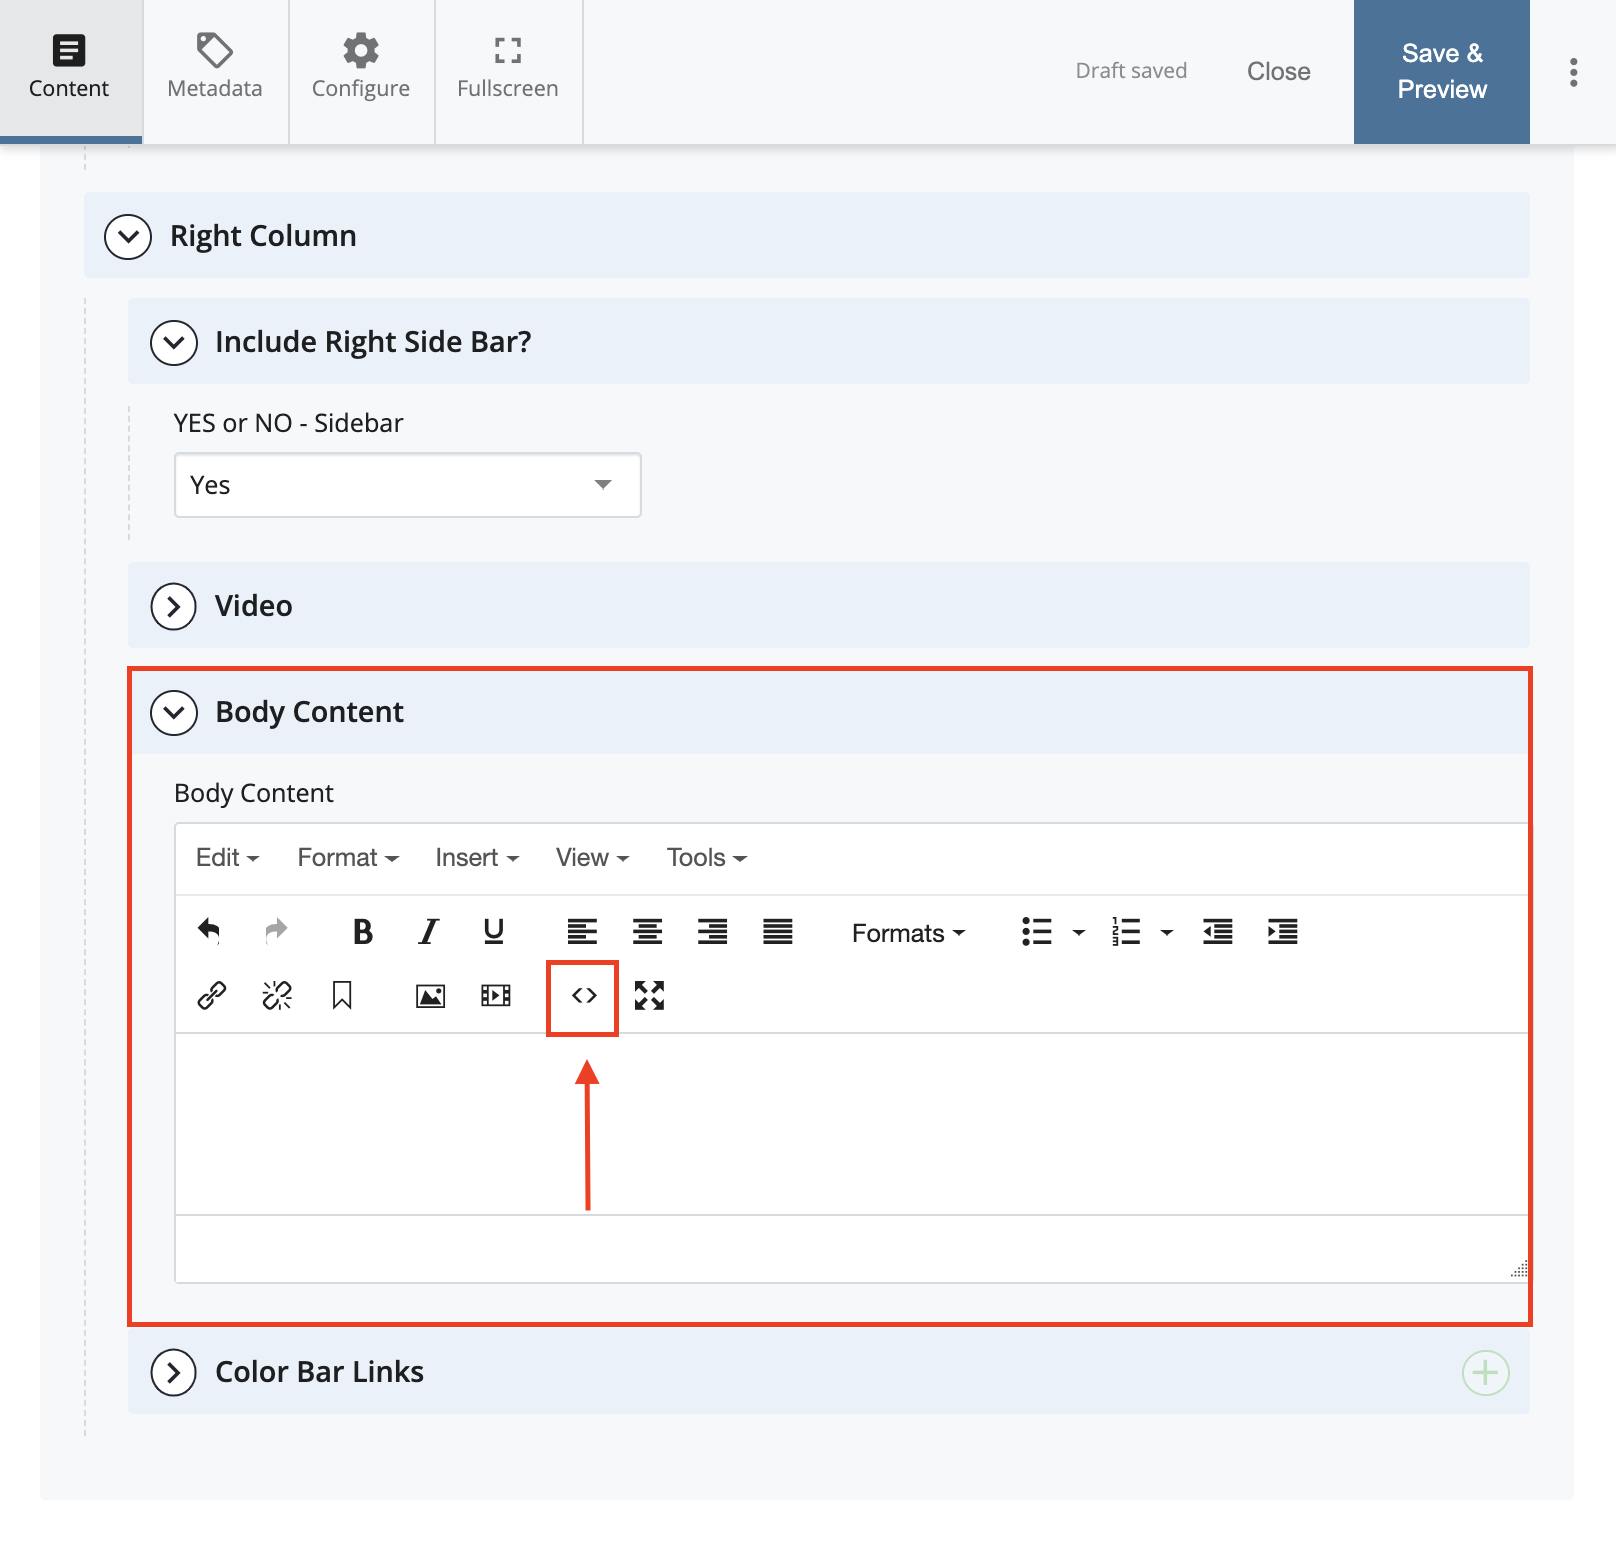
- Navigate back to your Cascade site. Click “Edit,” then scroll down to the “Right Column” section. Under “Body Content,” click “Source Code.”
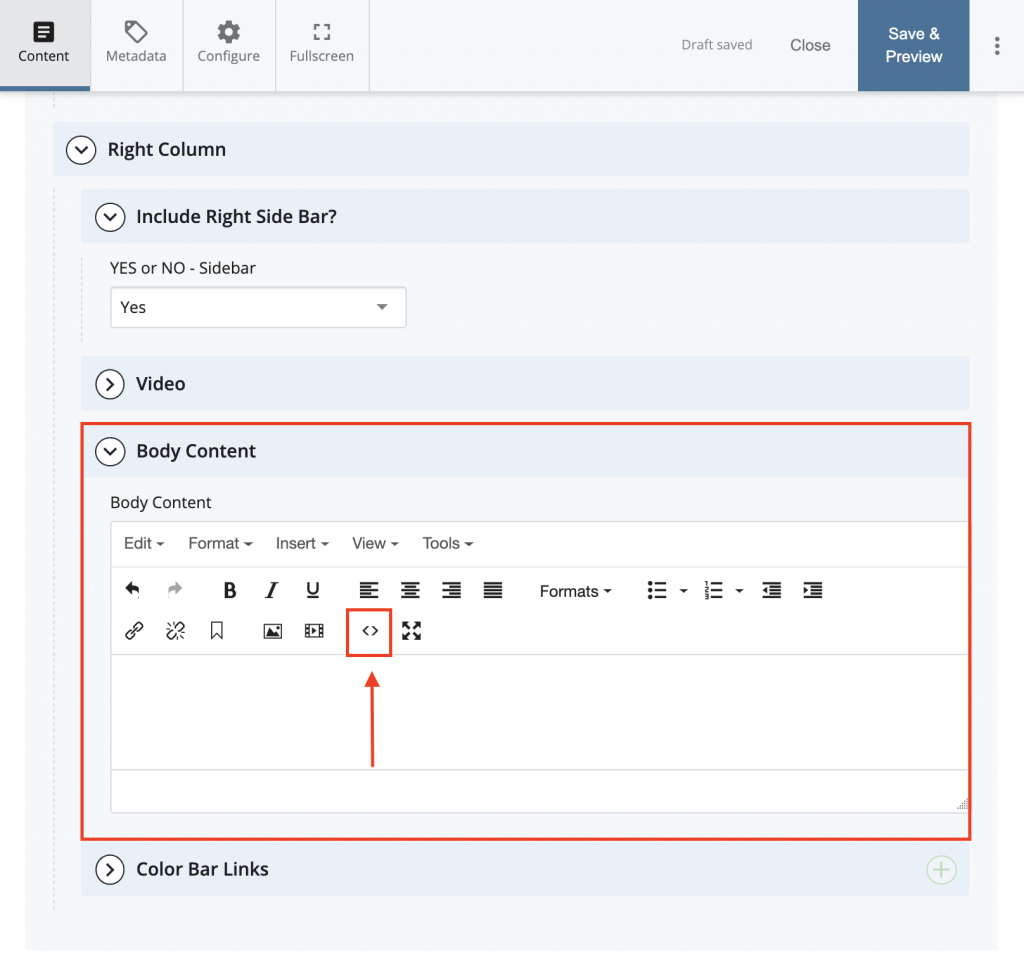
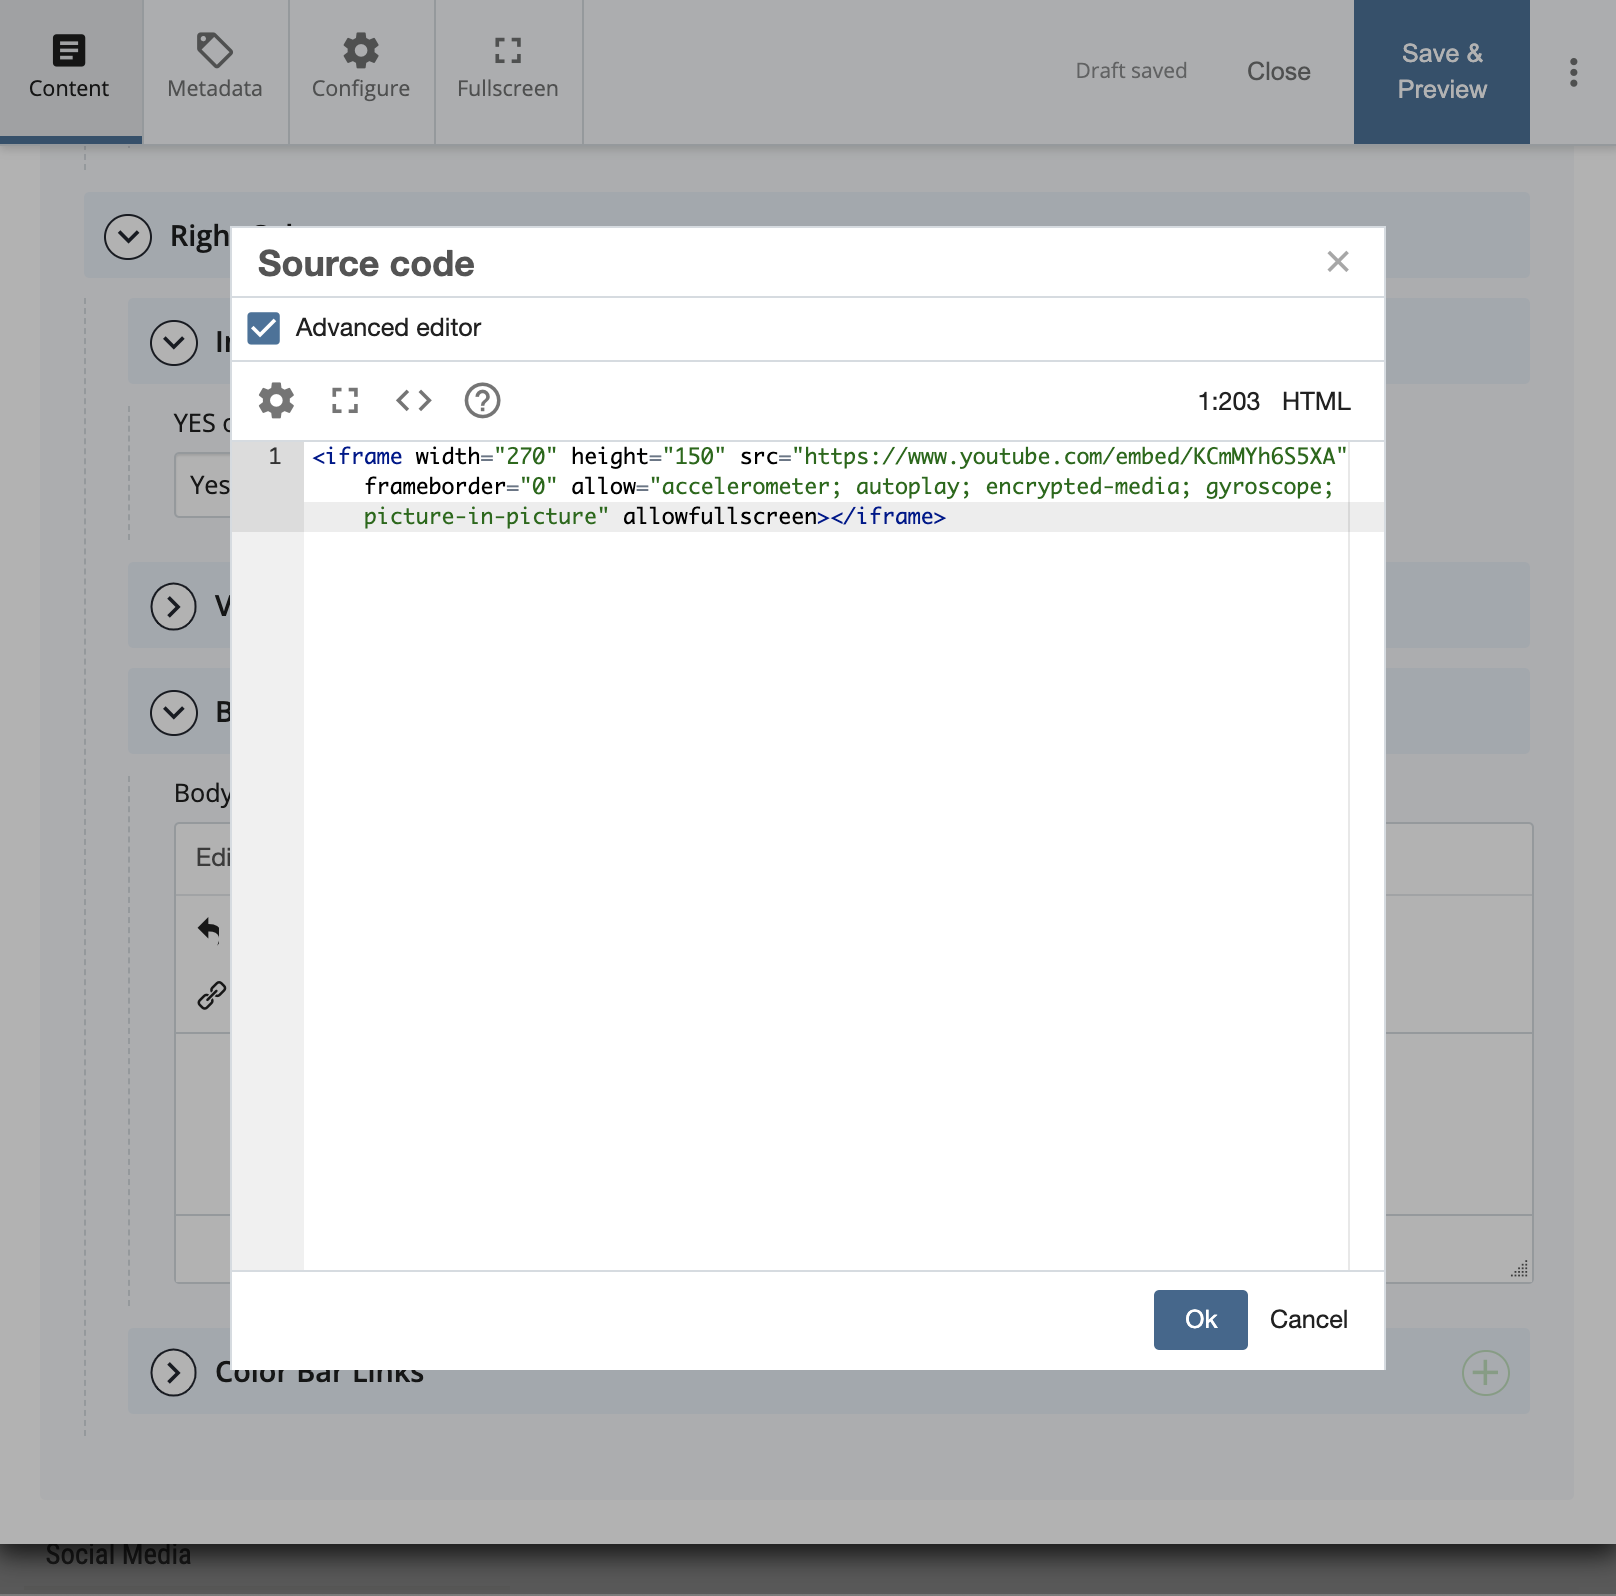
- Paste the copied code snippet and click “Ok.”

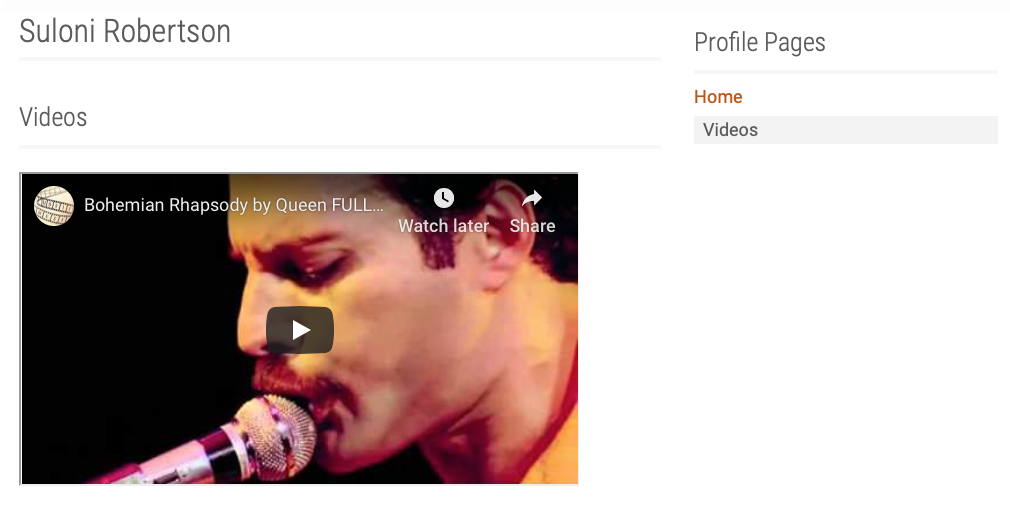
- Save > Submit > Publish. Your video should look like this. Feel free to add text description underneath the video in the Text Editor as well.


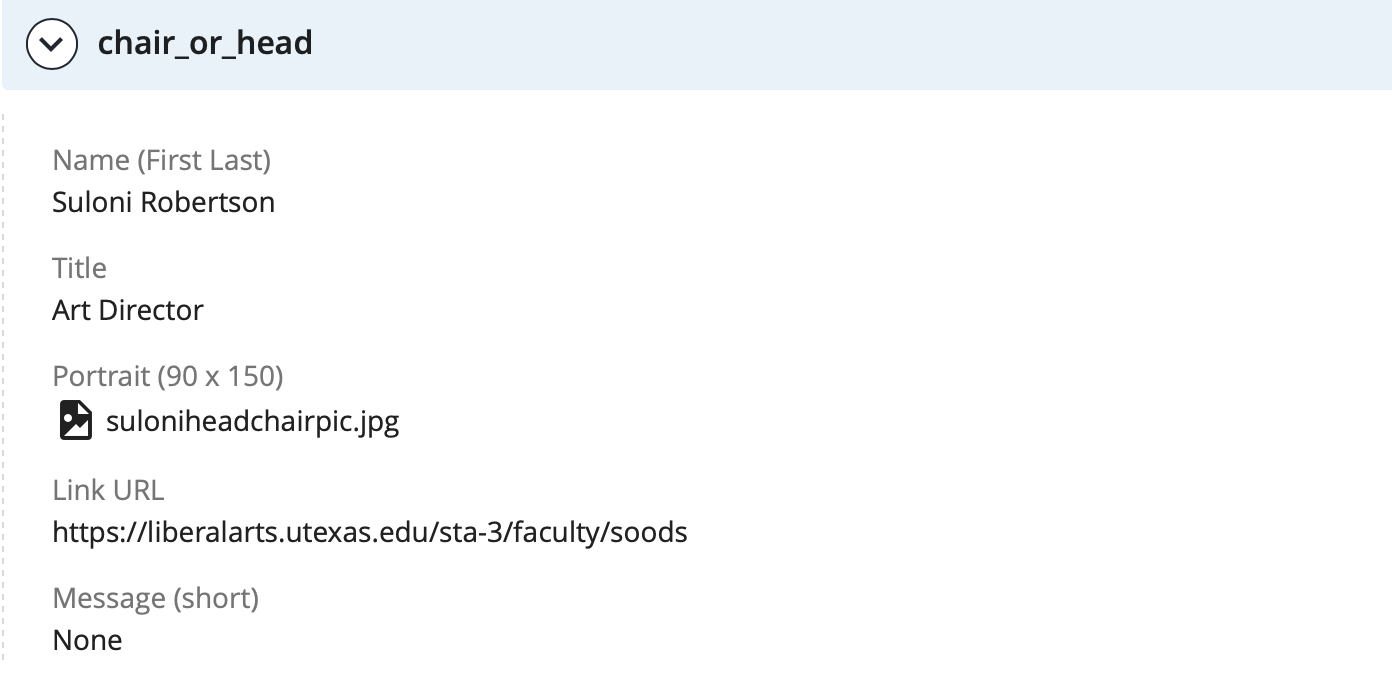
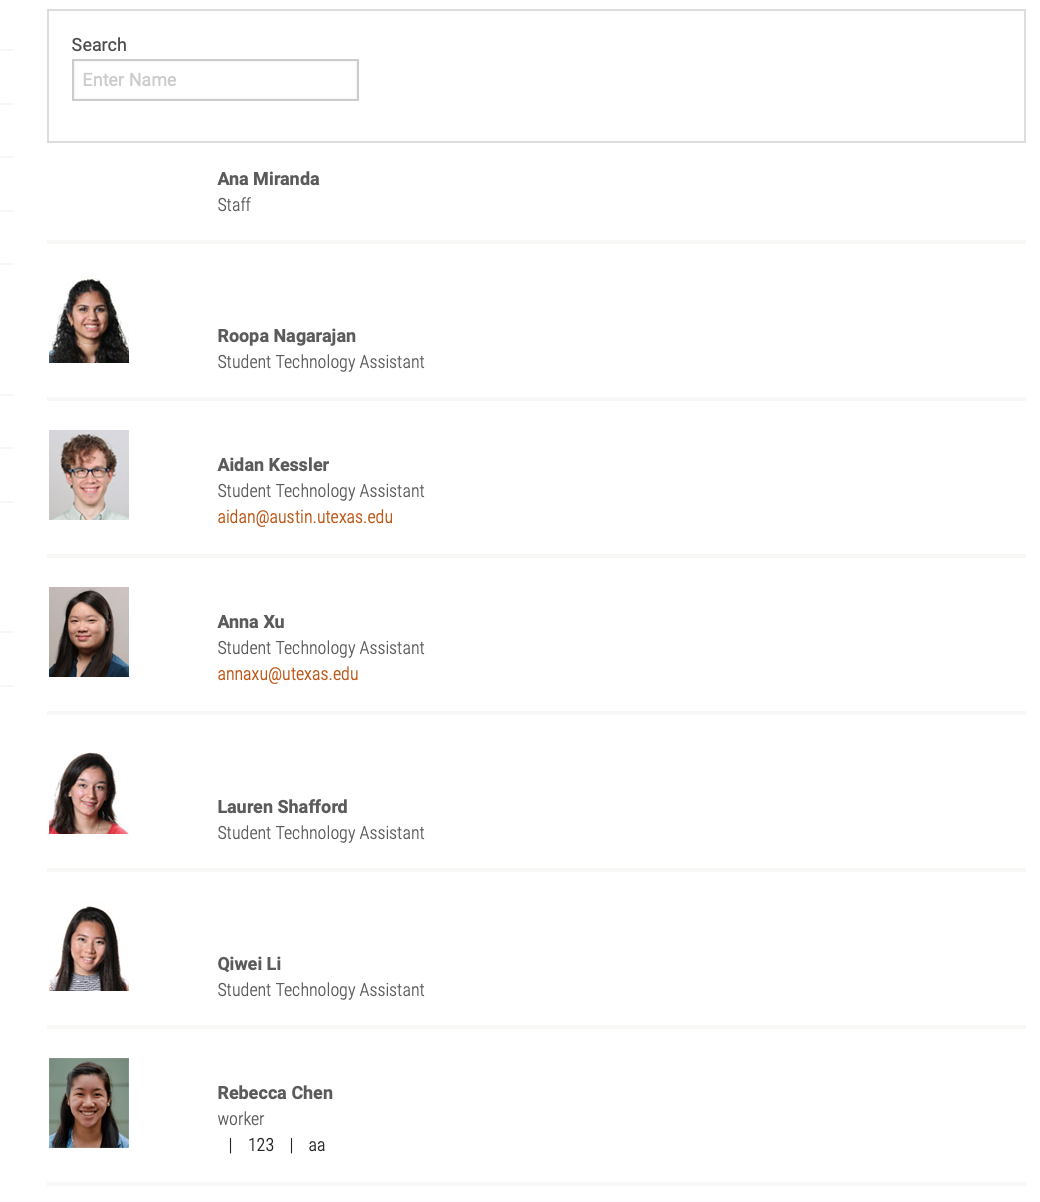
- Before you begin you will need to upload of photo of Suloni for one of the steps. Go to the box where you find photo IDs and download her picture. Resize it to 90×50
-
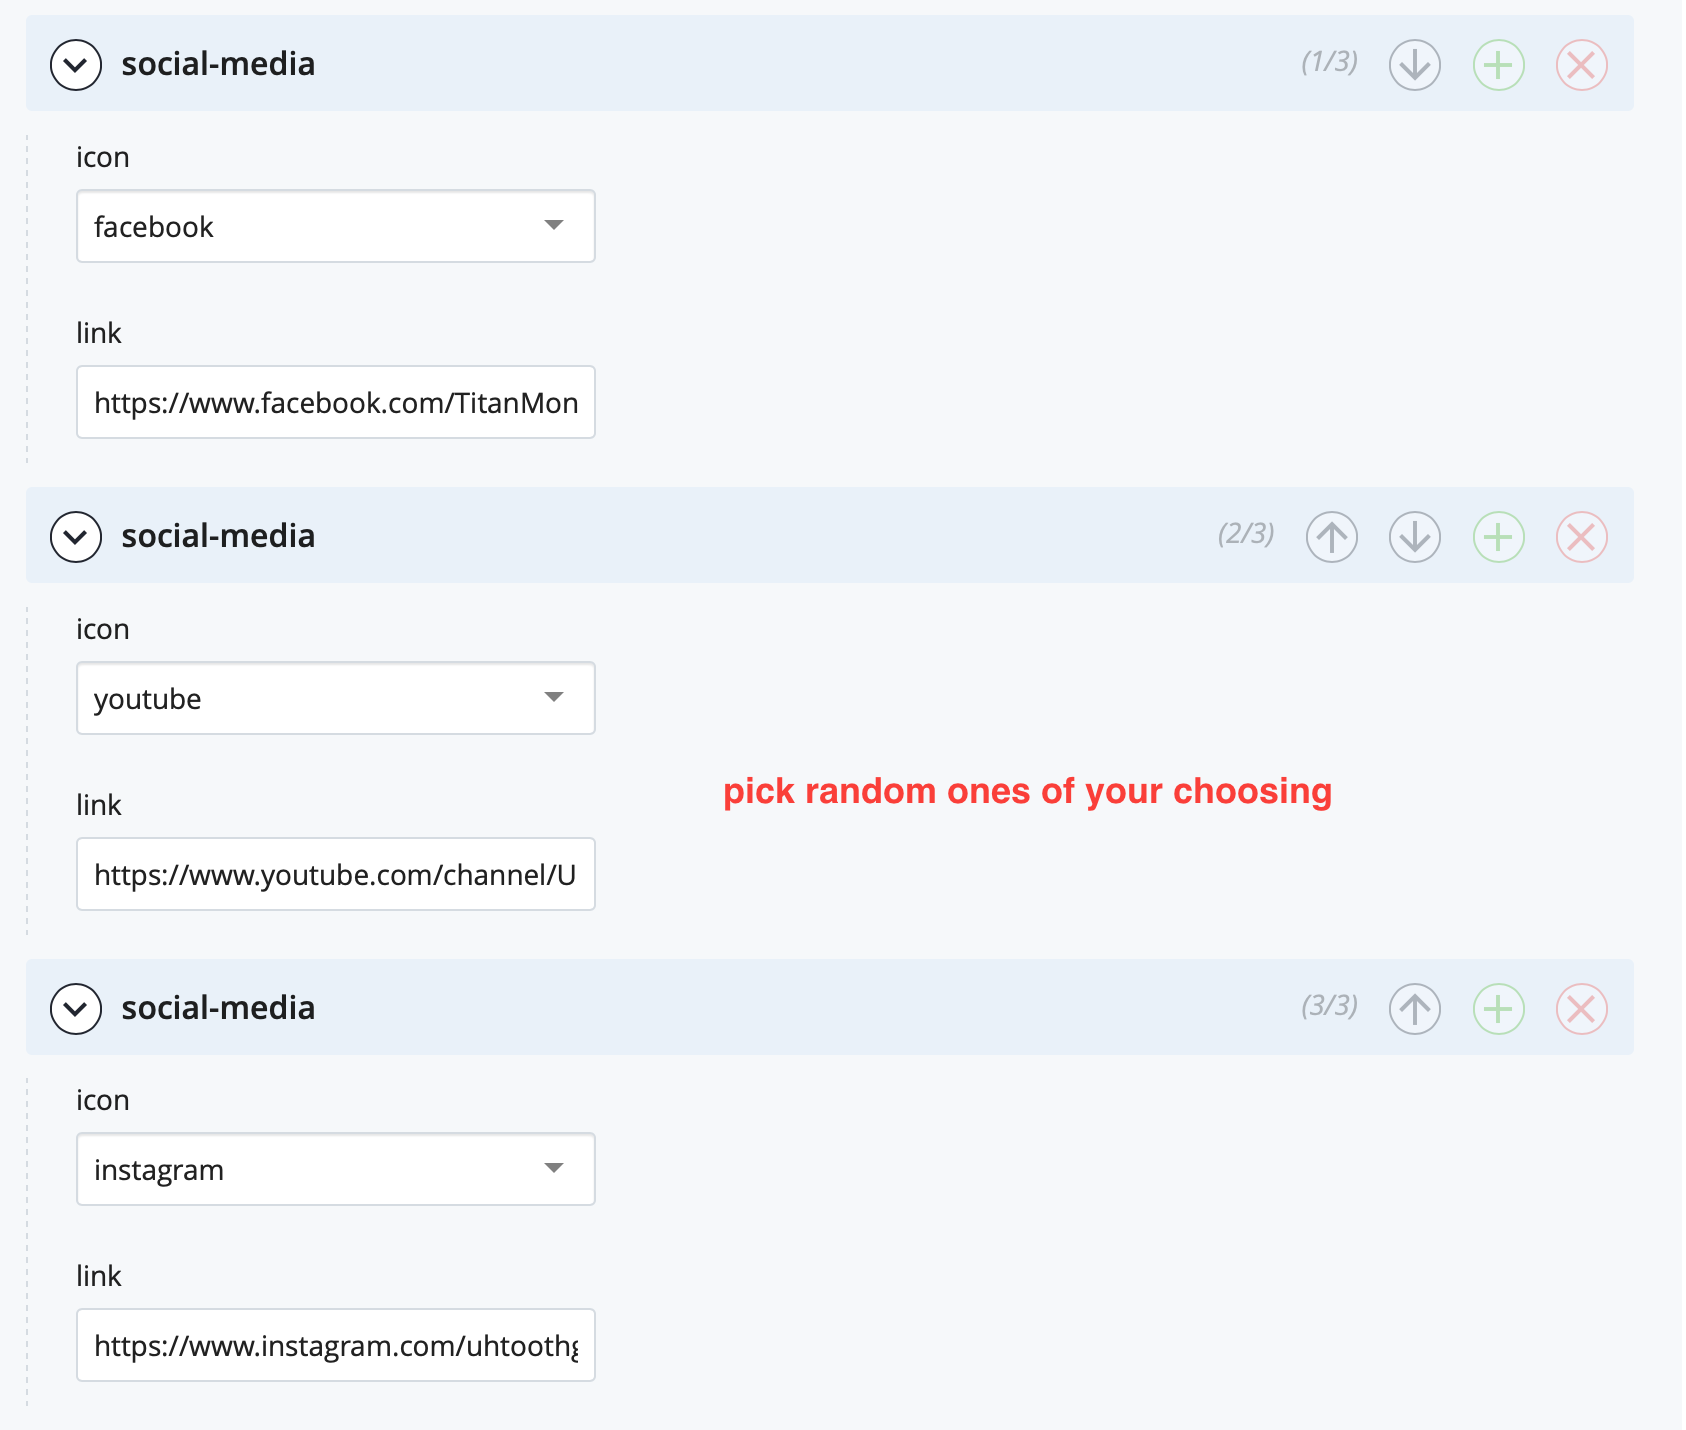
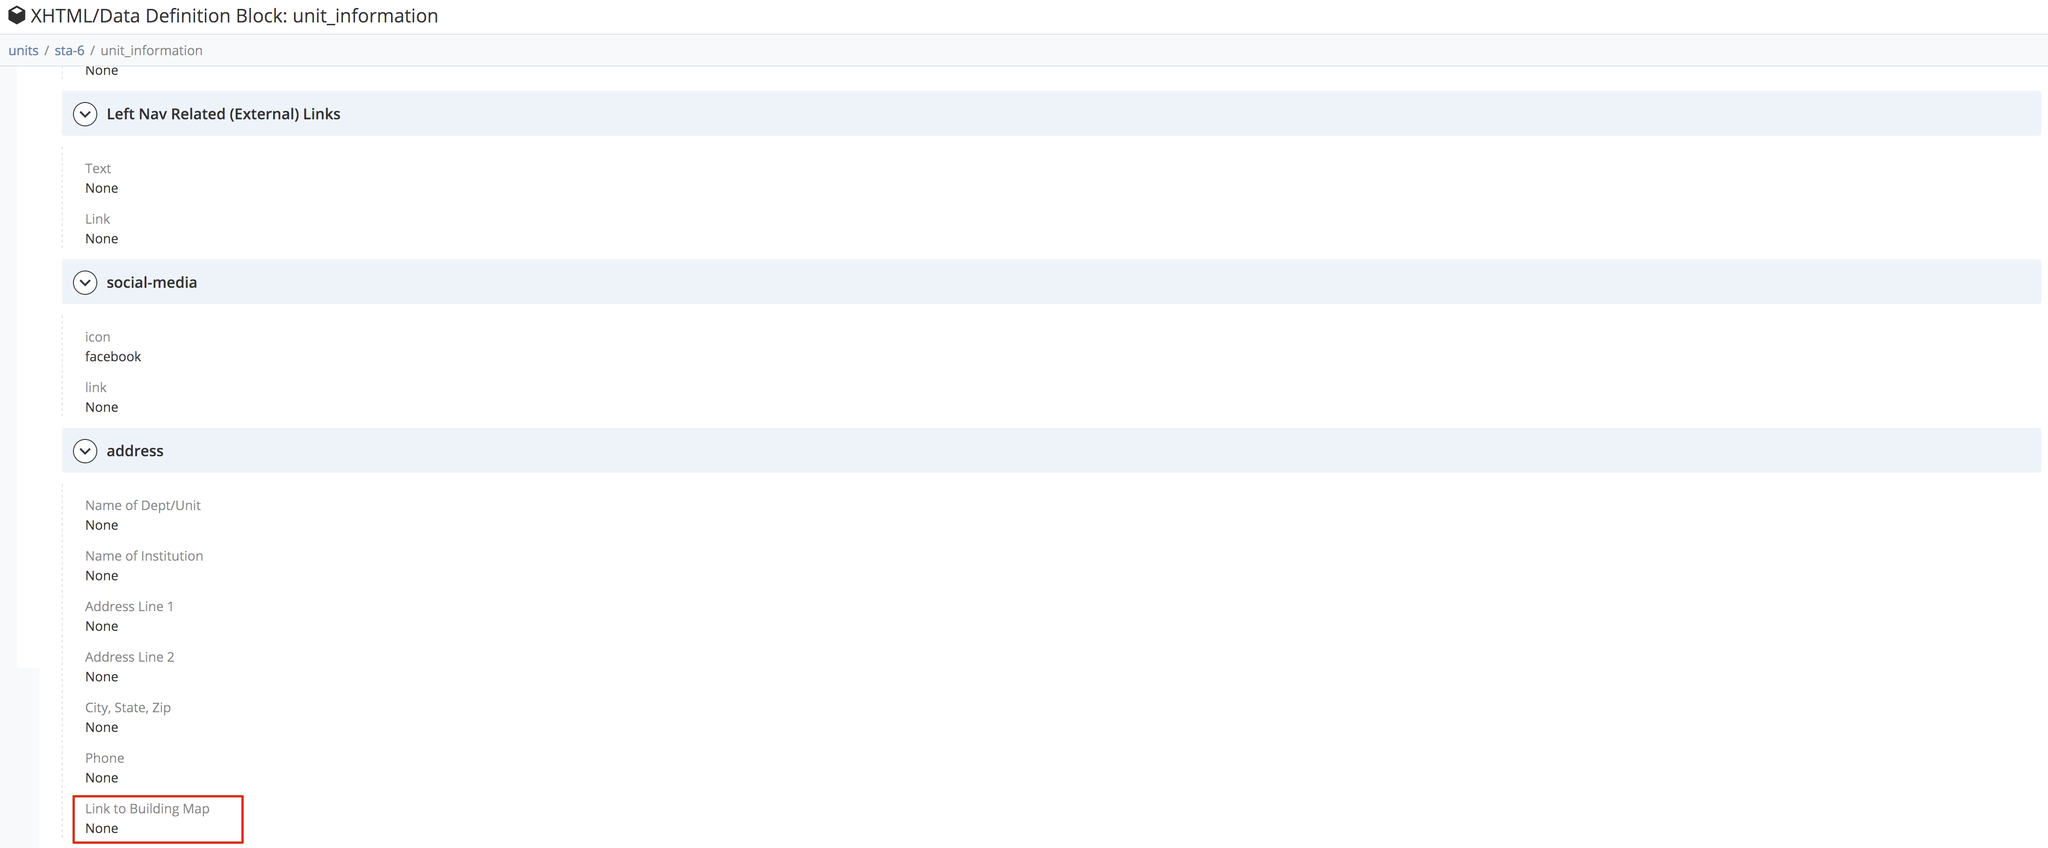
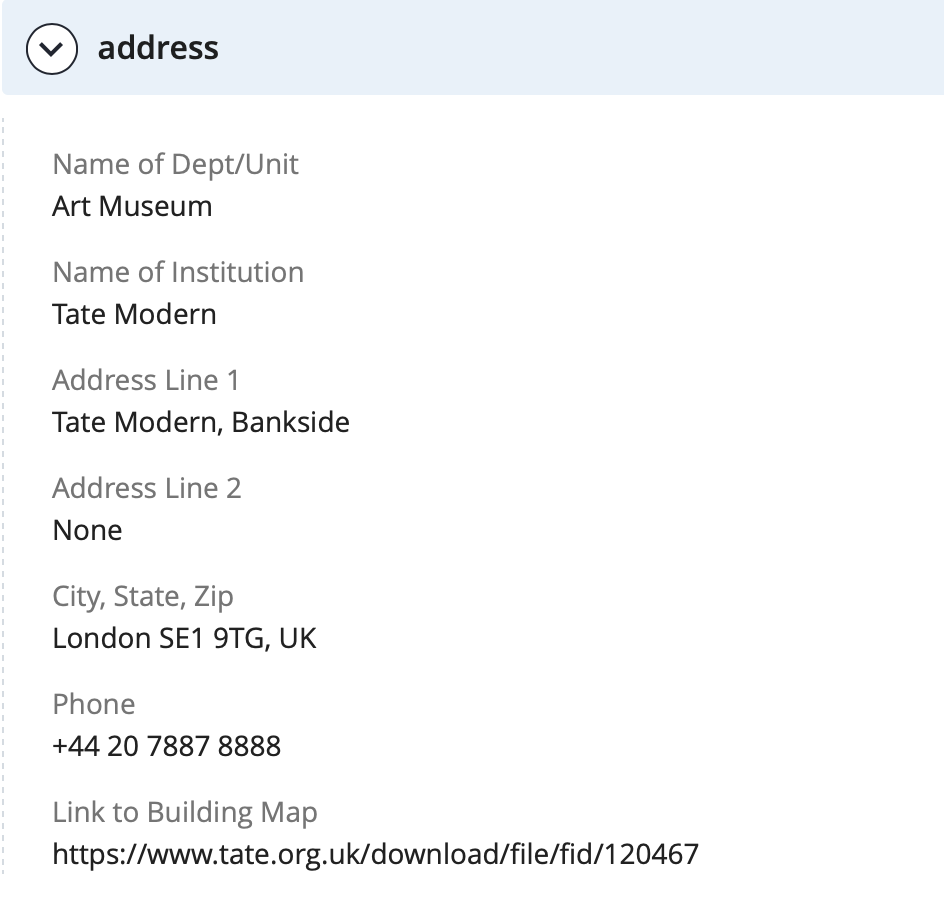
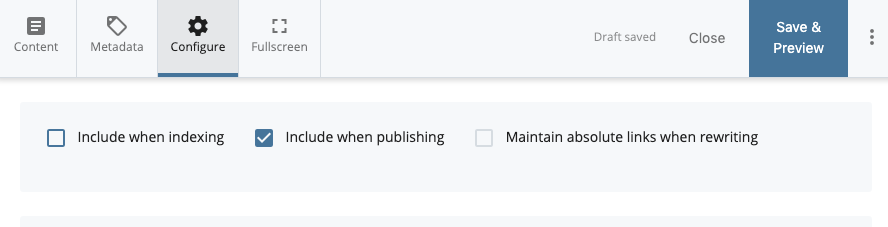
- Place the address in the “address” box shown below


- Invisible means it is published but not included in the index/navigation of the site (you can only get to it with a URL link). Go to the configure tab and uncheck “include when indexing”
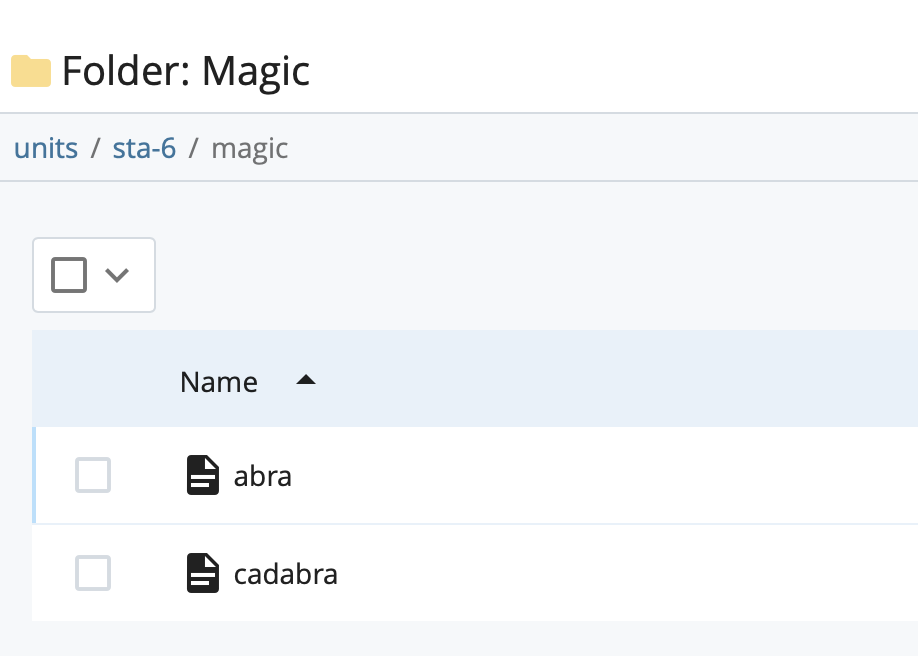
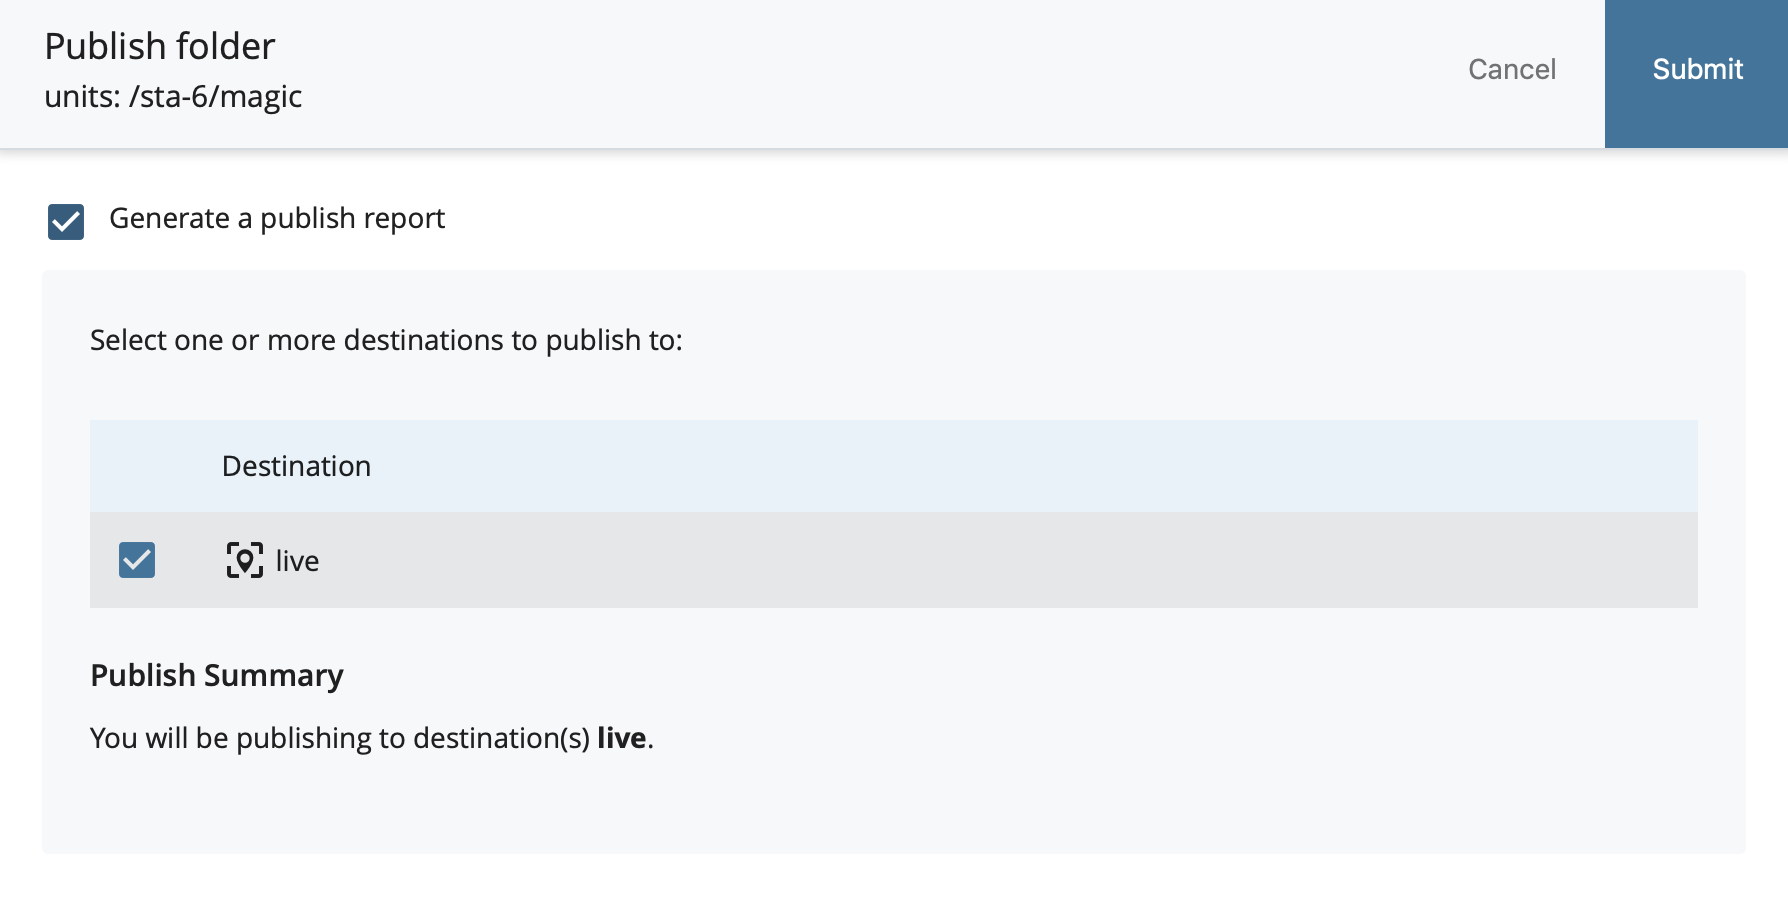
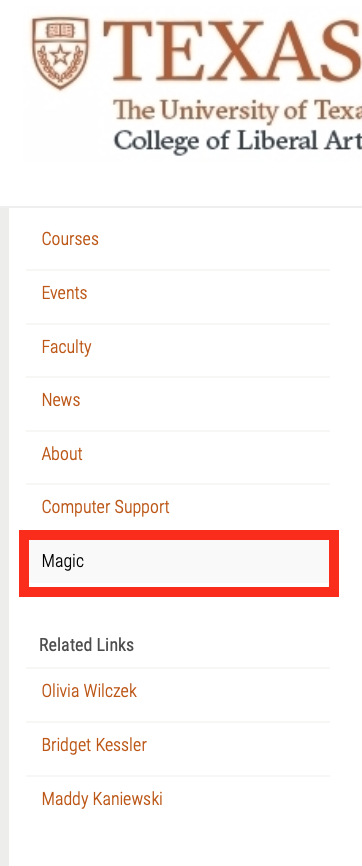
7. Click Magic and make sure only abra page is visible in the navigation of the site. Do not do this on Cascade it will not show. You have to go to the actual live site.
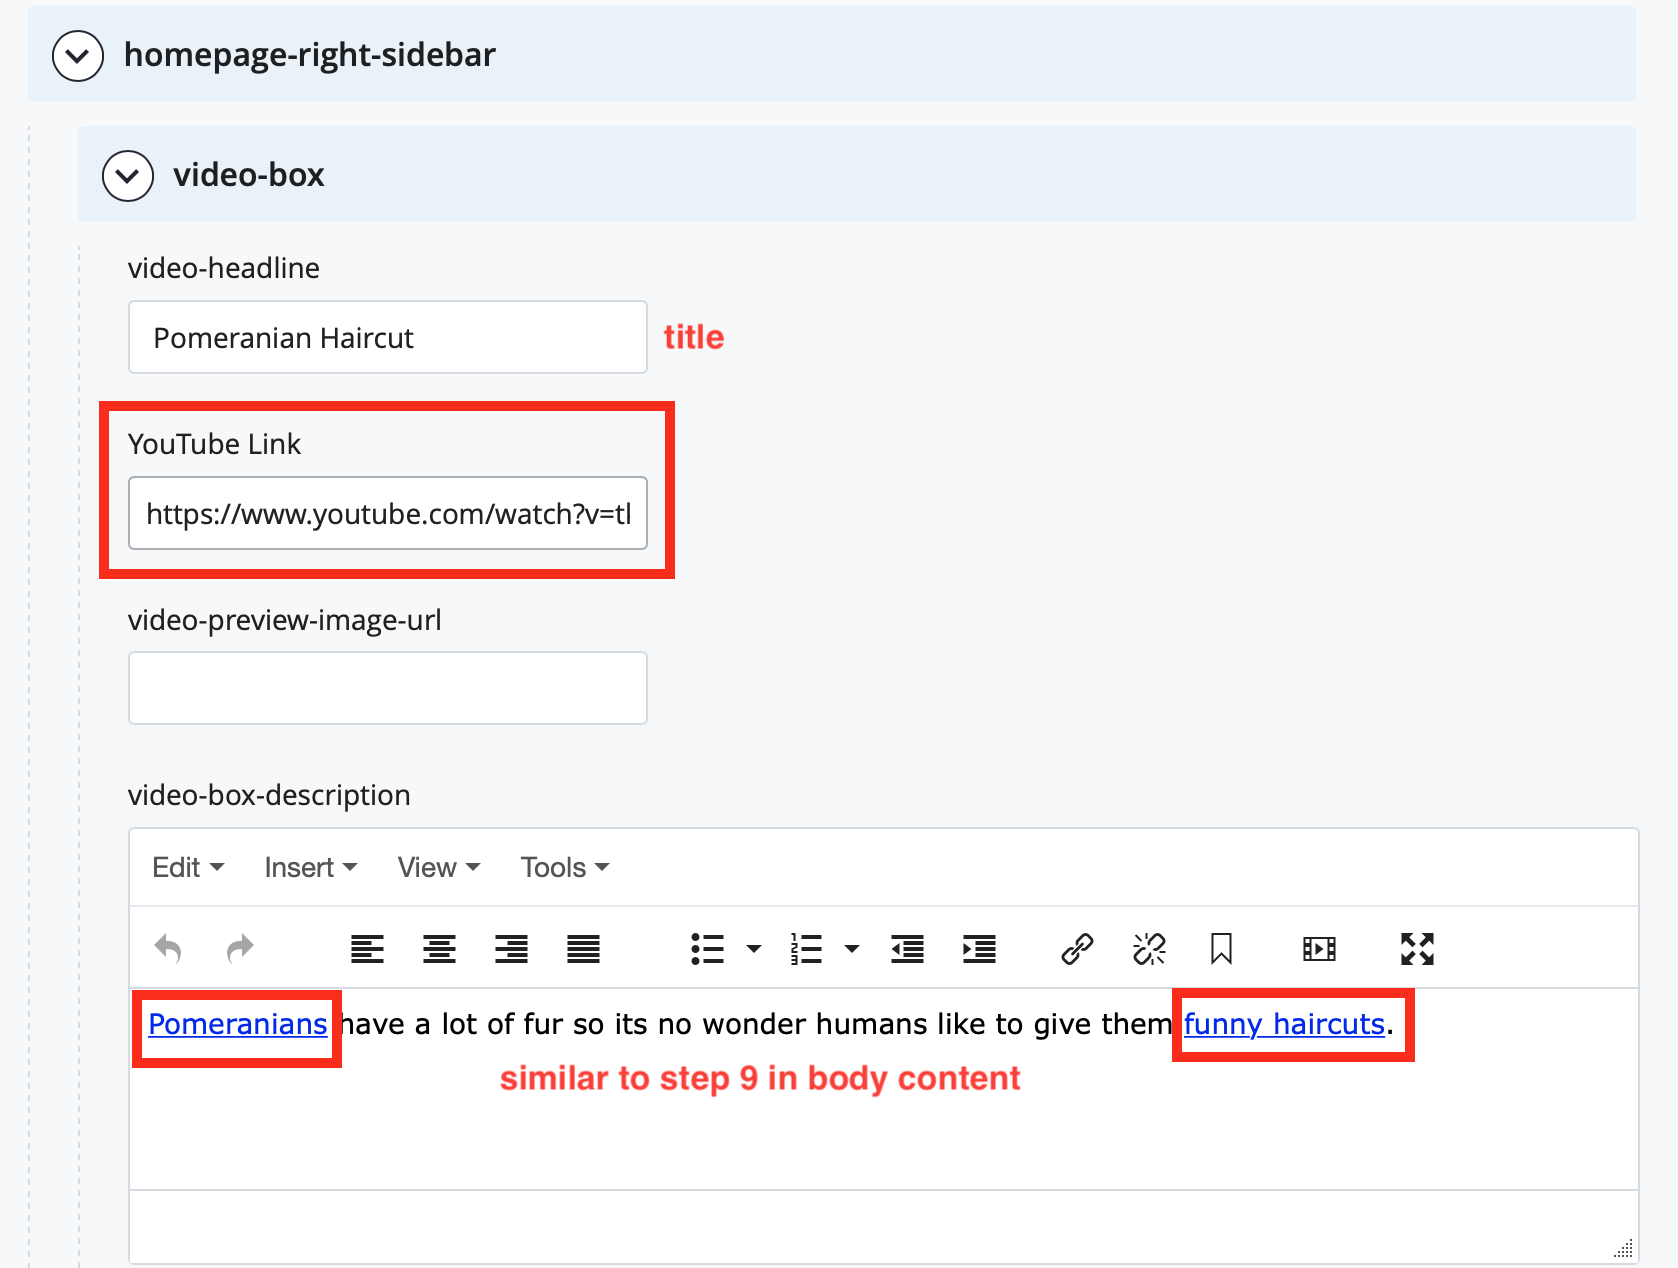
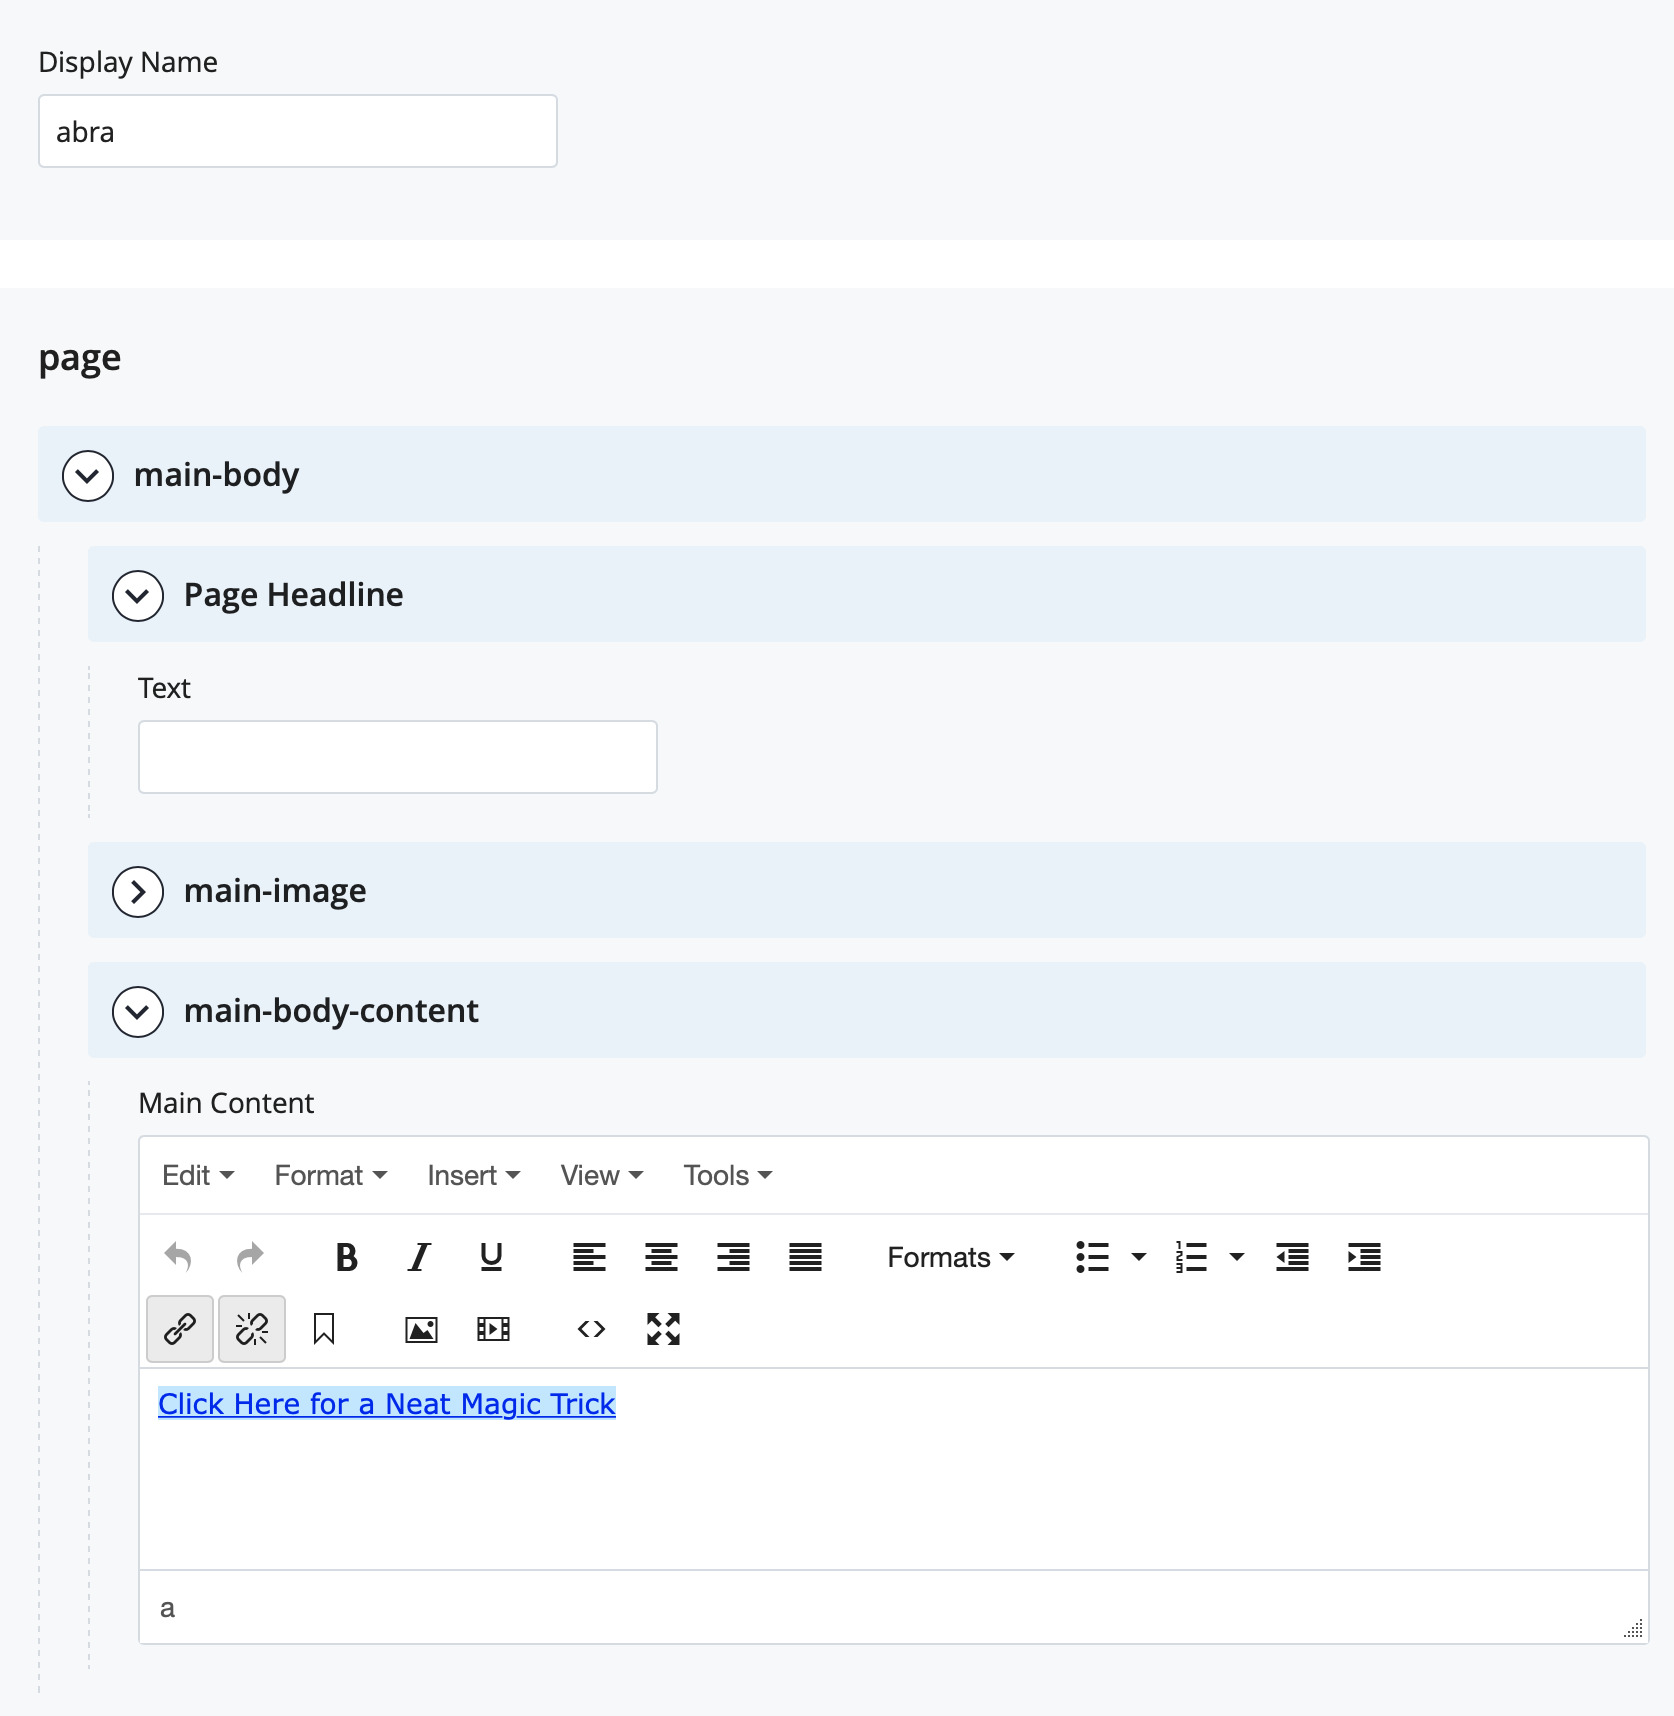
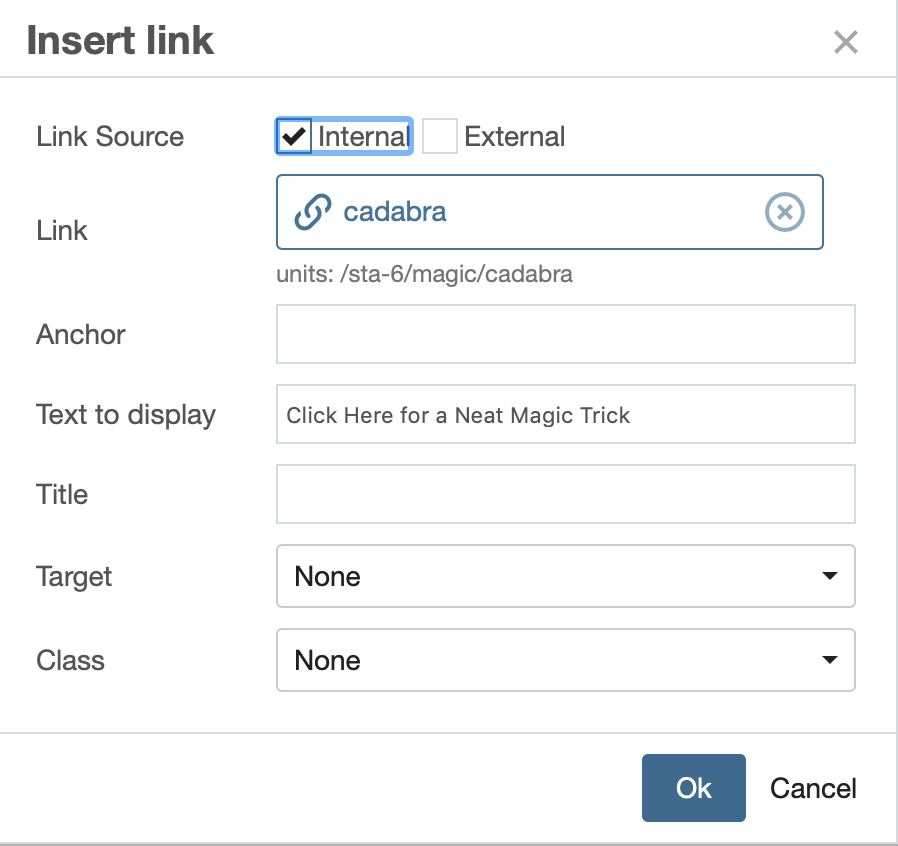
8. Make a link on abra body content that says click here for “neat magic trick” and have it link to the cadabra page
9. Go add something fun in the Cadabra page like so:

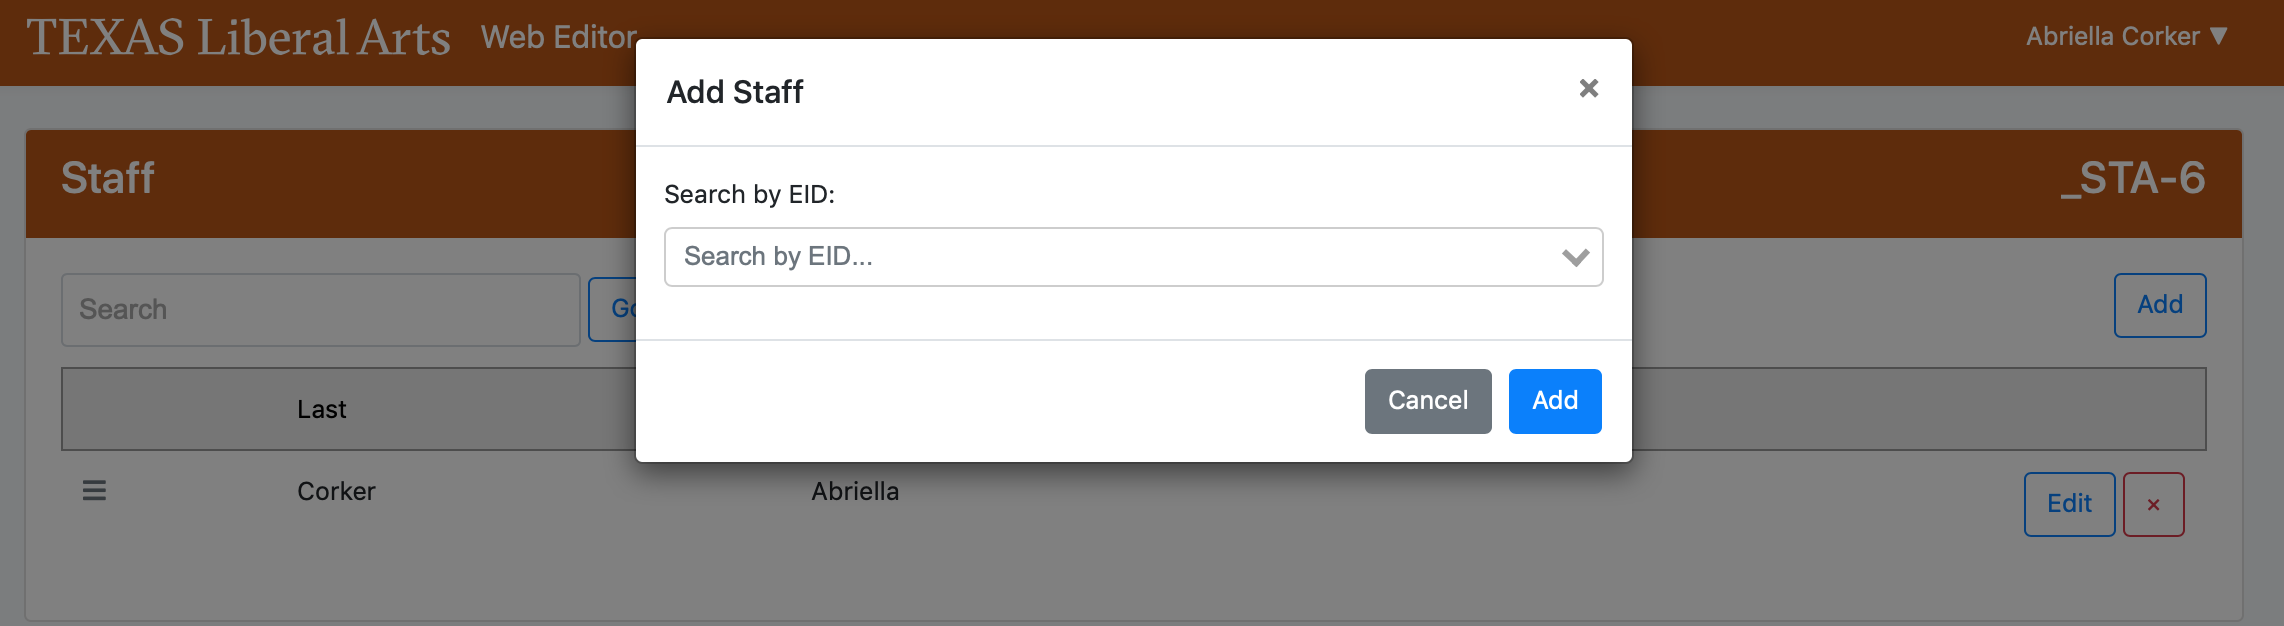
- Staff will be given access to edit your site in the COLA Web Editor, plus they will be publicly displayed on the staff list of your site.
-
- Click on the staff button beside your test site to add a user, or
- Click on the people tab from the drop-down menu and add a new affiliation (choose staff + your office)
- If you don’t know somebody’s EID, use this link to look it up: https://utdirect.utexas.edu/webapps/eidlisting/
-
- Click on the faculty button beside your test site to add a user, or
- Click on the people tab from the drop-down menu and add a new affiliation (choose faculty + your office)
![]()
![]()
reate a new custom page called Videos using the COLA Web Editor
- Ask the Chat-bot about non-admin related Cascade & Cola Web Editor questions. Log-in to the Cola Web Editor https://webeditor.la.utexas.edu/login …give it a try, ask it a question!
- Make sure to review the on-line resources for how-to’s for Cascade and the Cola Web Editor https://liberalarts.utexas.edu/web-admin-help/index.php
- Ask your STA buddies for feed back on basecamp
- Ask your STA buddies for help if you cannot find the answer through the Chat-bot.
- Post links to your Basecamp To-Do from your Cascade test site each time you finish a couple of tasks.
- Your test site is located at: https://liberalarts.utexas.edu/sta-#/. Remember to replace the sta number, with your assigned folder number. Ex: https://liberalarts.utexas.edu/sta-1/ (sta-2, sta-3 etc)