
I. Adding Activities & Cards
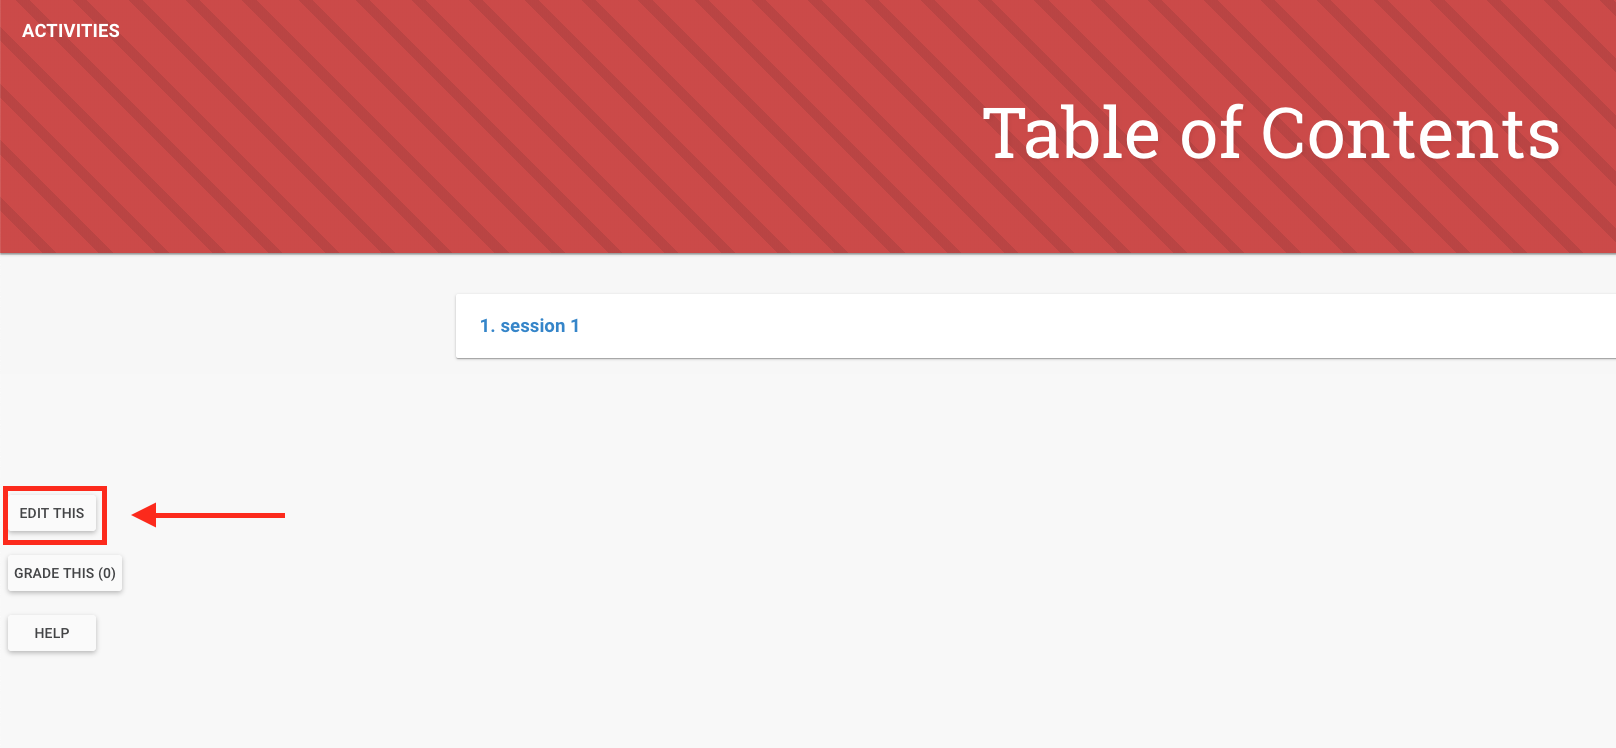
1. To start adding content/ editing in your new CLIO site, click on “EDIT THIS” button on the left side:
2. To add a new activity, click on the “Add new activity + “ button.

3. And name your activity and click “Save Changes.”
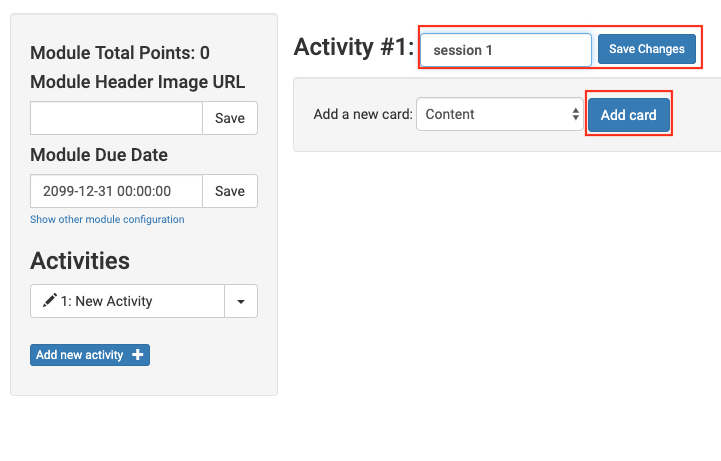
4. Once you’ve created the activity, you can start adding Cards. In the text box, you can add whatever content you want, which includes text, images, videos, and more. All the tools are included in the toolbox right above the text box.

II. Adding CSS/HTML codes for CLIO site
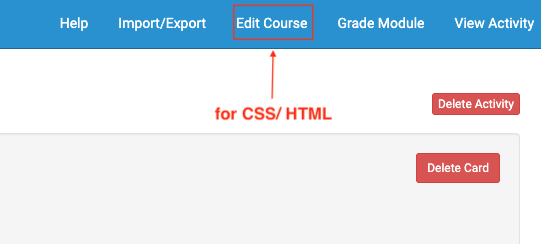
To go to the CSS/HTML editing page, you will see the “Edit Course” option at the top right hand corner.
Adding & Editing Card Headers:
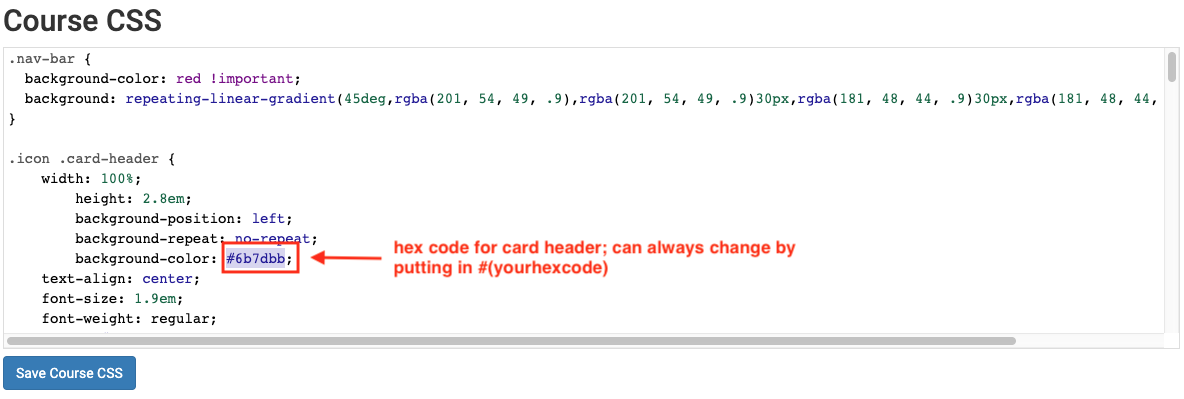
Code Snippet for card headers:
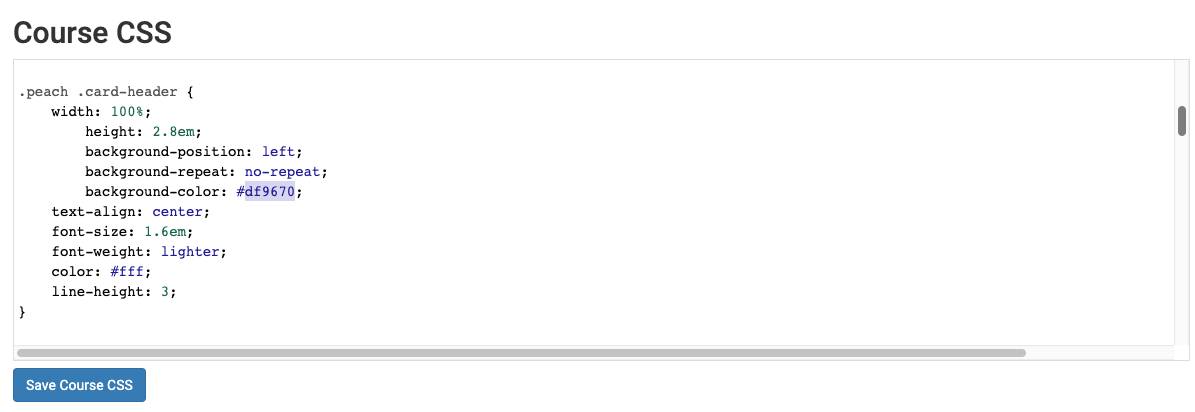
.icon .card-header {
width: 100%;
    height: 2.8em;
    background-position: left;
    background-repeat: no-repeat;
    background-color: #6b7dbb;
text-align: center;
font-size: 1.9em;
font-weight: regular;
color: #fff;
line-height: 3;
}
.peach .card-header { width: 100%; height: 2.8em; background-position: left; background-repeat: no-repeat; background-color: #df9670; text-align: center; font-size: 1.6em; font-weight: lighter; color: #fff; line-height: 3; }
**When you are copy & pasting the codes, make sure that everything, including the closing bracket “}” is at the end of the code! If your code turns bright red, that means that there is a problem/ an error**
You can change the color of the header by replacing it with the hex code (of the color) you want!!! Like this:
(another one):
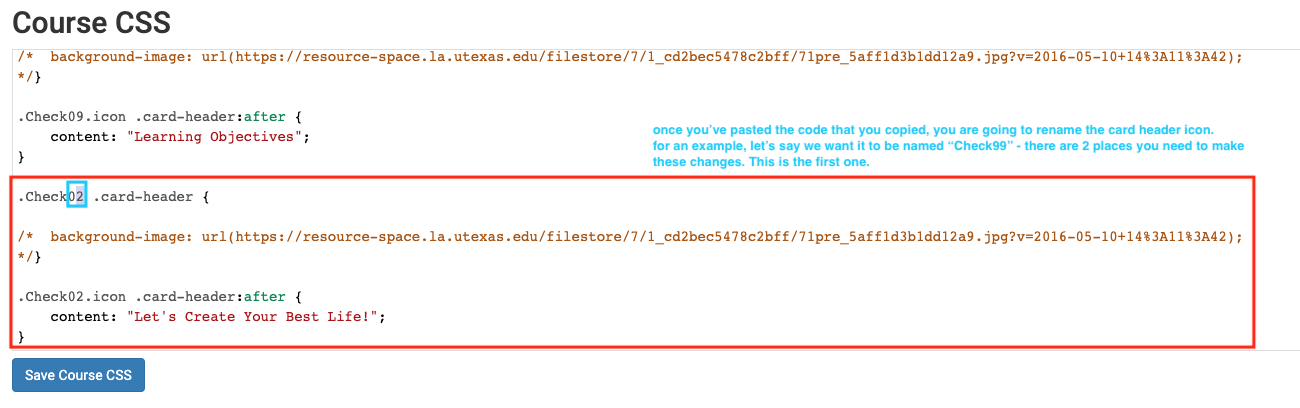
For each new card you make, you are going to create an “Icon.” To do that, first, copy and paste this code snippet:
.Check02 .card-header {
/* background-image: url(https://resource-space.la.utexas.edu/filestore/7/1_cd2bec5478c2bff/71pre_5aff1d3b1dd12a9.jpg?v=2016-05-10+14%3A11%3A42);
*/}
.Check02.icon .card-header:after {
    content: "Let's Create Your Best Life!";
}

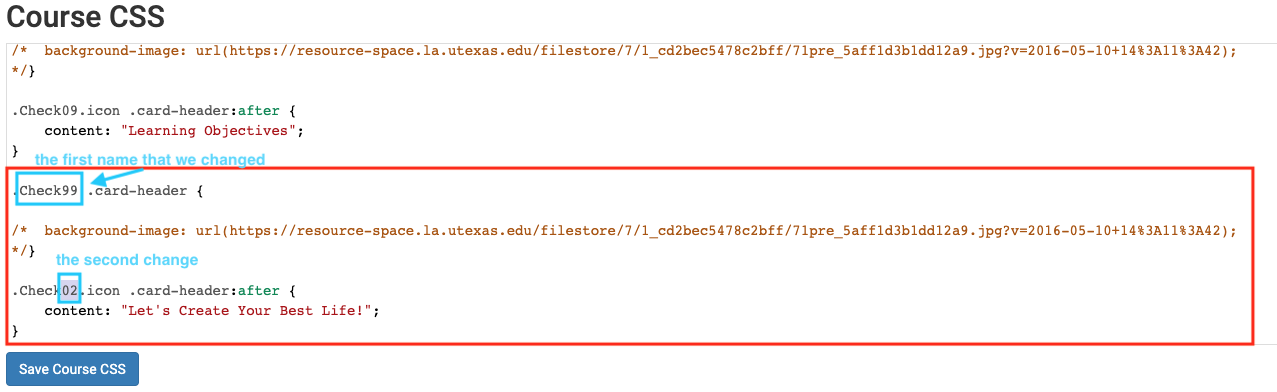
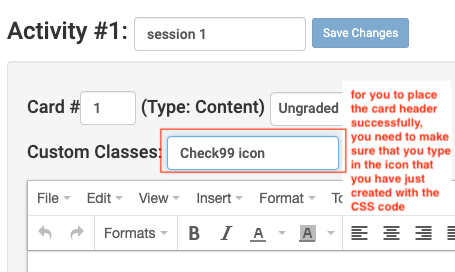
Then, once you have pasted the code, you are going to RENAME the card header icon. Refer to the instructions below:
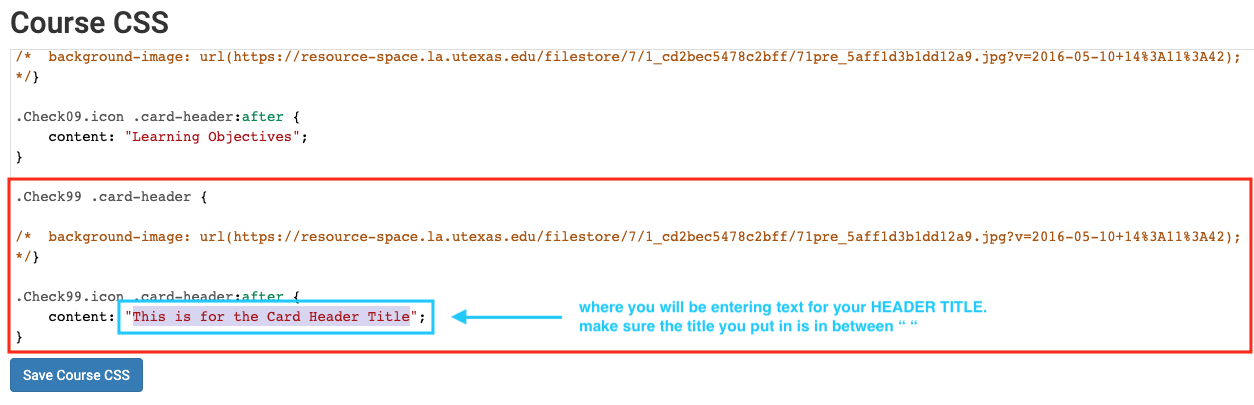
& make sure you put the appropriate card header title, too!!
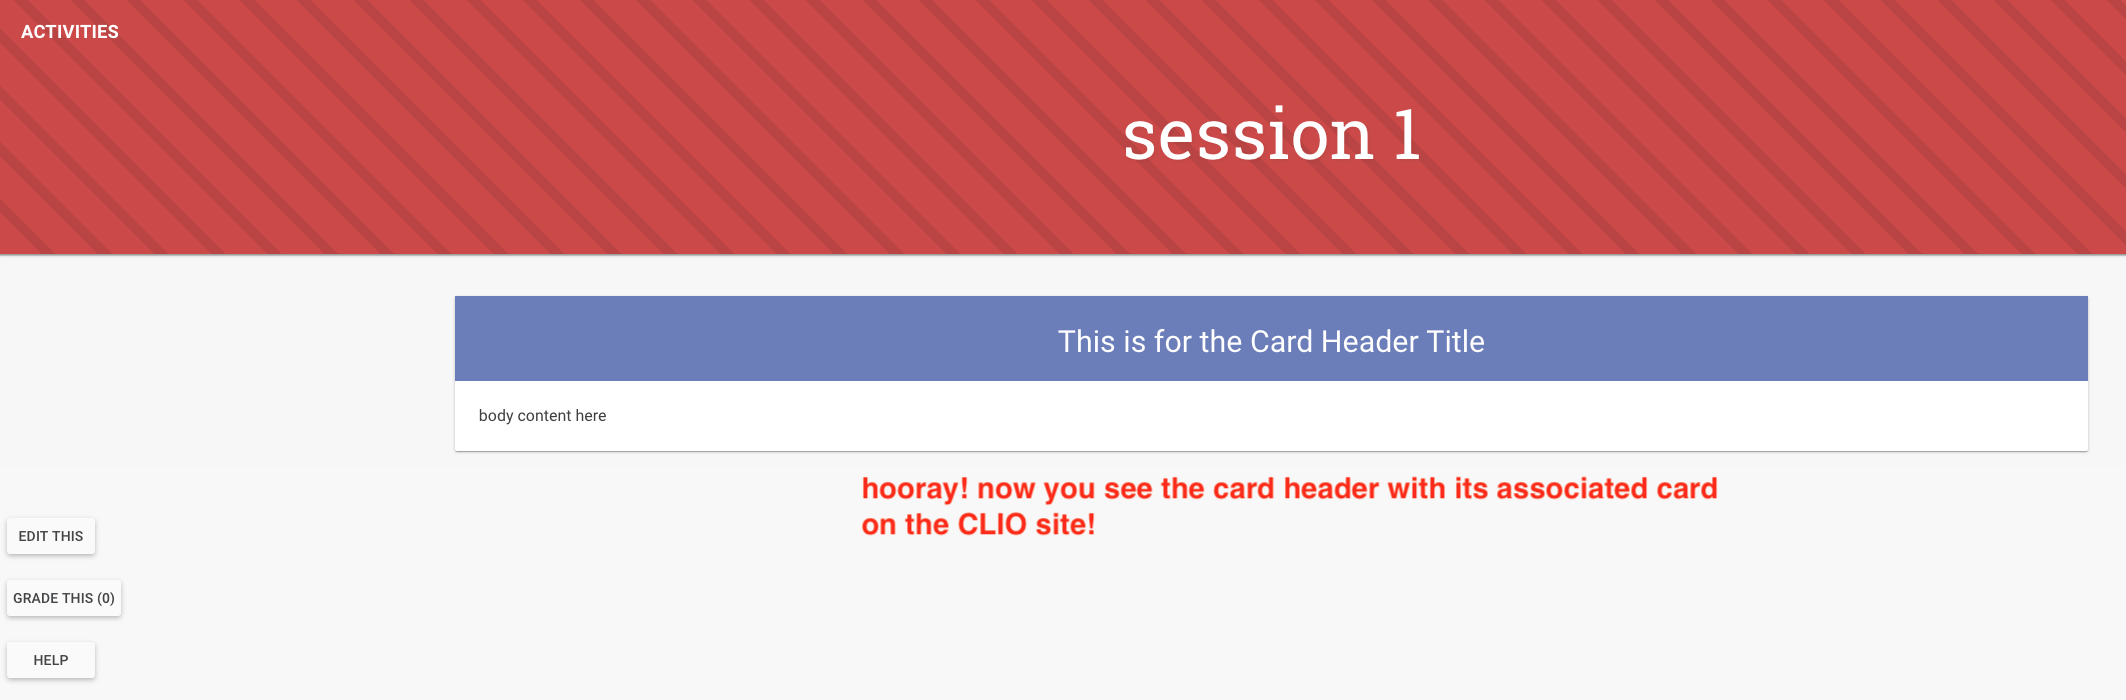
Once you’ve done that, make sure to click “Save Course CSS” to ensure that you have saved all the work you’ve just done. Then, we are going to implement this new card header we just created into the actual CLIO Activity site:
Then save your work. And refresh the CLIO page (not the page that you’ve been editing on) to see that you’ve placed the header successfully!
CHANGING THE HOMEPAGE BANNER COLOR (OVERRIDE THE DEFAULT ORANGE)
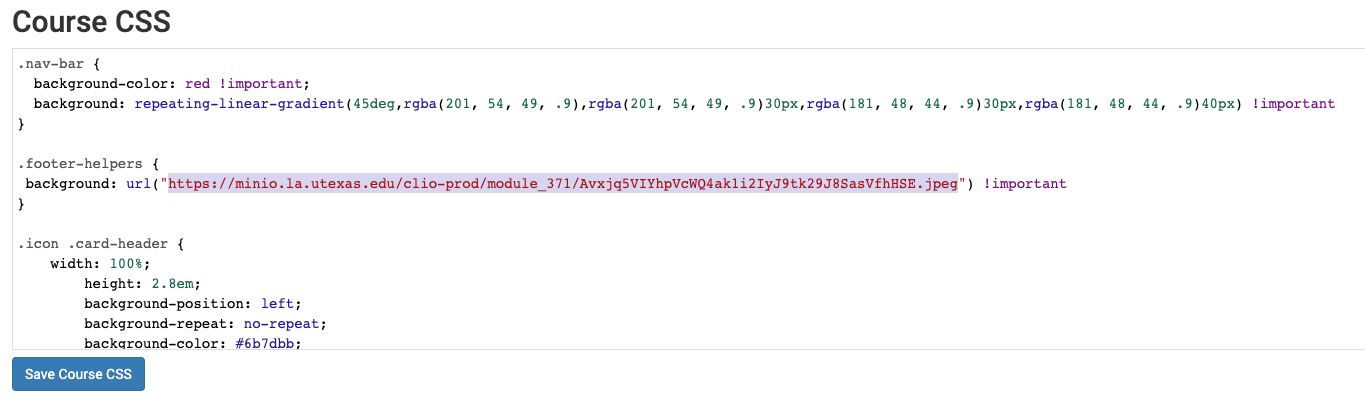
1. This is an example of the red+dark red stripes banner CSS code that overrode the default orange color of the Canvas CLIO site:
.nav-bar {
  background-color: red !important;
  background: repeating-linear-gradient(45deg,rgba(201, 54, 49, .9),rgba(201, 54, 49, .9)30px,rgba(181, 48, 44, .9)30px,rgba(181, 48, 44, .9)40px) !important
}
2. You want to know the RGB for the color that you want to insert, and the “A” is for the opacity of the color on the banner. But the most important thing is that you need the “(color) !important” to override the default orange color.
III. Adding Images through CSS/HTML
1. In any card on the editing page, click on the “add image” icon. Open up the image that you want from your computer, and before you hit “Save,” this window would pop up:
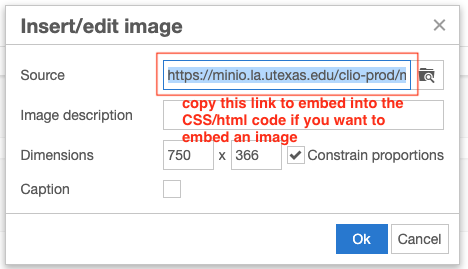
2. Click on the link and copy it (Command + C). Go back to the CSS editing page, and in the code snippet that you want the image placed, just paste the link between “ “. For an example:
3. Make sure that any icons/ logos/ images that you’ve uploaded on the course CSS has been saved and implemented on the actual website (by refreshing the page after you save your work)!
IV. Adding & Editing Image Slides:
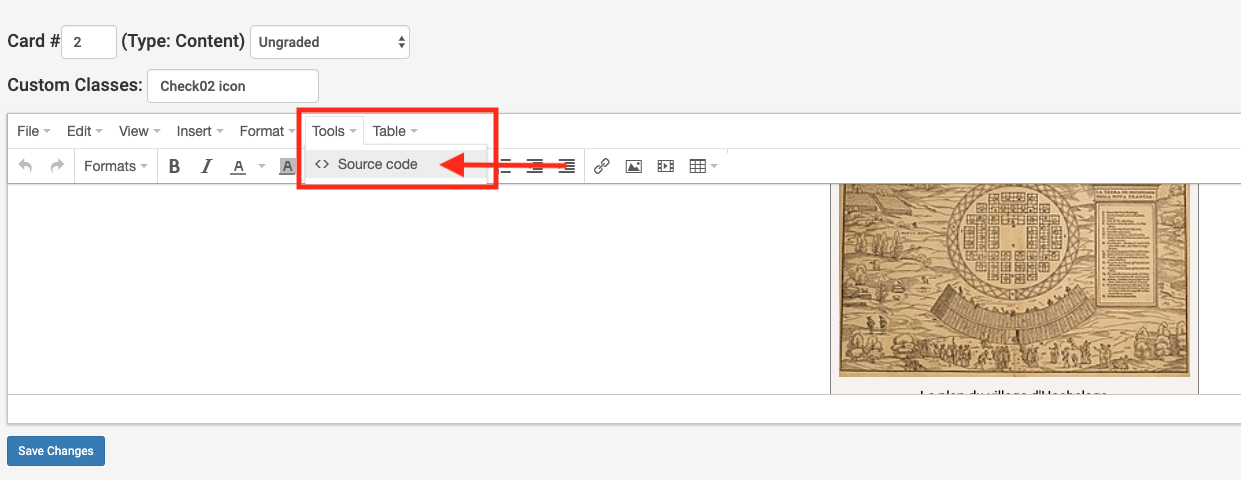
1. In the Card that you want to add photo slides into, go to “Tools” > “Source Code”
2. Use this coding snippet as a reference/guide, but change the image URL & the captions accordingly:
<p style=”text-align: center;”><md-tabs flex=”true” md-dynamic-height=”true” md-border-bottom=”true”> <md-tab flex=”true” label=”Castor canadien” class=”tabbed-content”><img src=”https://minio.la.utexas.edu/clio-prod/module_579/5a8RH7BlhvlKaumD1FhAS54or60Y0CVsEGwvNZd2.png” alt=”Castor drawing” width=”512″ height=”268″ /><br /><em><span style=”color: #434652;”>Castor canadien.</span></em></md-tab> <md-tab flex=”true” label=”Guerrier Iroquois” class=”tabbed-content”><img src=”https://minio.la.utexas.edu/clio-prod/module_579/X75qlYZVgAtLkyLe48UtSMAtcPPZWxwHA0kQGWYB.jpeg” alt=”Iroquois warrior” width=”256″ height=”384″ /><br /><em><span style=”color: #434652;”>Guerrier Iroquois.</span></em></md-tab> <md-tab flex=”true” label=”Un Huron” class=”tabbed-content”><img src=”https://minio.la.utexas.edu/clio-prod/module_579/rcH2qFvA6u6nv8aSsYunuOd4KdpU3nPbAOCRPfBp.jpeg” alt=”Huron” width=”312″ height=”384″ /><br /><em><span style=”color: #434652;”>Un Huron. </span></em></md-tab> <md-tab flex=”true” label=”Des Algonquins” class=”tabbed-content”><img src=”https://minio.la.utexas.edu/clio-prod/module_579/j30KrpCeJnEoITCgTeKXcHILCK3ipSnQh6z4w5wi.png” alt=”” width=”281″ height=”383″ /><br /><em><span style=”color: #434652;”>Des Algonquins.</span></em></md-tab> <md-tab flex=”true” label=”Missionnaire jésuite au 17è siècle” class=”tabbed-content”><img src=”https://minio.la.utexas.edu/clio-prod/module_579/JwYaNhYZ0DenHpYmMEUm8s8B2ZKJRRnVKQsbReRT.jpeg” alt=”Jesuit missionaries 17th Century” width=”256″ height=”340″ /><br /><em><span style=”color: #434652;”>Missionnaire jésuite au 17è siècle. </span></em></md-tab></md-tabs></p>
An example of the final product!!