![]()
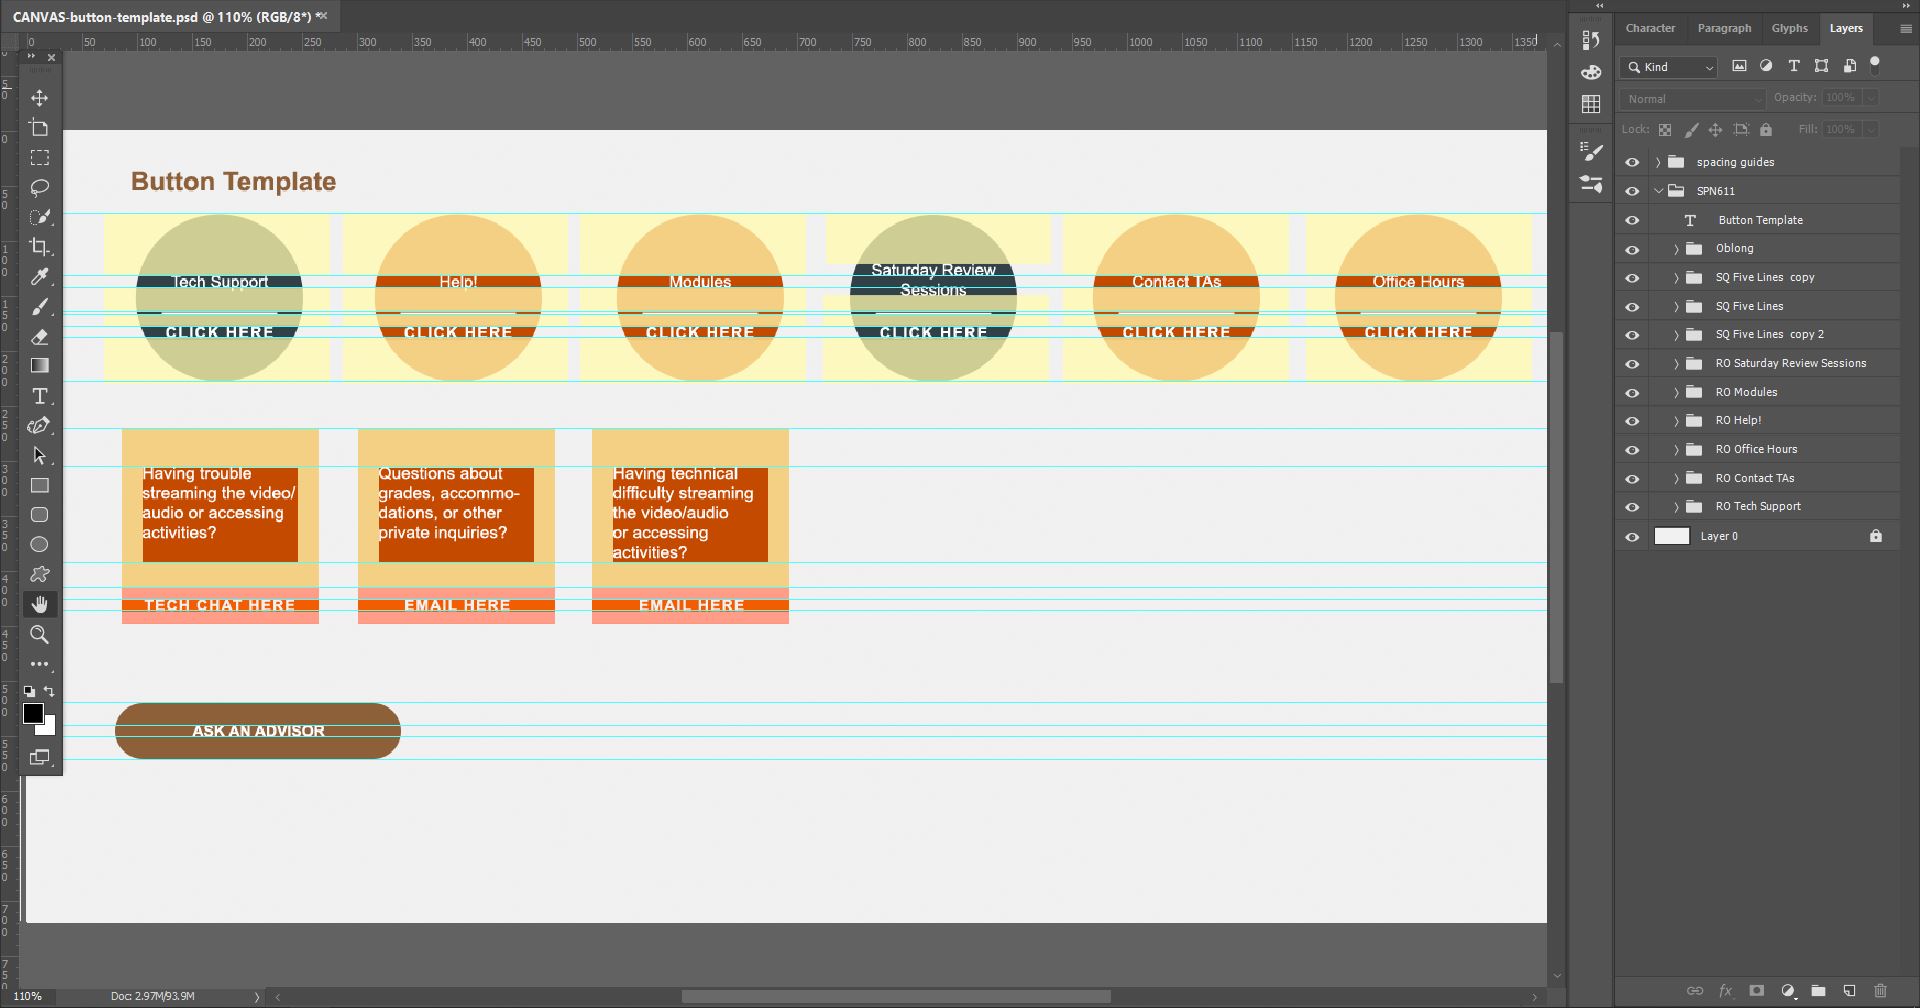
Canvas classes sometimes request a set of buttons to function as external links on their homepage. The buttons are used for things such as tech support, professor’s email, or outside websites that are used frequently for class. In this tutorial, you will use Photoshop to make your own Canvas buttons using the following template: button template
Example of usage: 

The end products will be 3 sets of buttons :
- Set 1: circle buttons
- Set 2: square buttons
- Set 3: oblong buttons
Step 1: Open the guided out template in Photoshop
If you haven’t downloaded the template, click here.
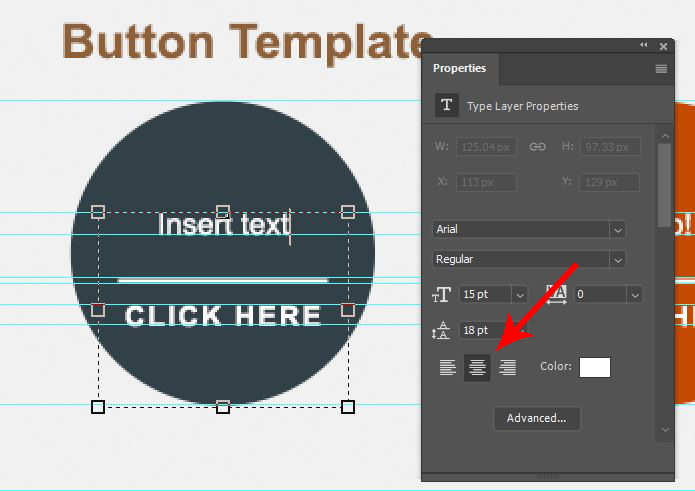
Step 2: Edit the text
To edit the text on the button, select the Type tool. Click on the text you would like to change and make your edits.
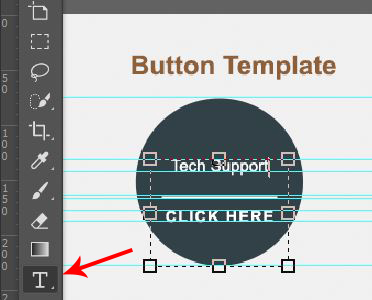
Make sure all the text are set to center align to the button’s shape.
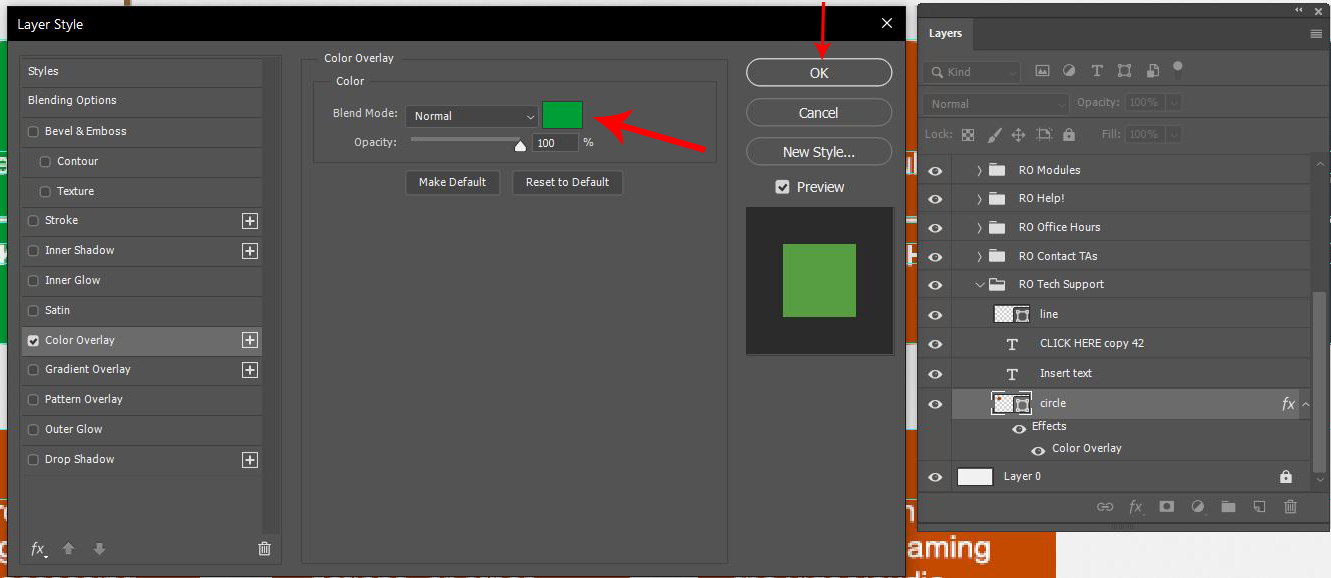
Step 3: Edit the color
Sometimes the client might ask for a specific color, but use of color must be consistent across the university. Click here to see UT color palette.
To change the color,
- select the shape layer of the button
- Click on the fx drop-down to show the Color Overlay effect

- Double click on Color Overlay to open up the effect window.
- Change the blend mode color and click on Ok.
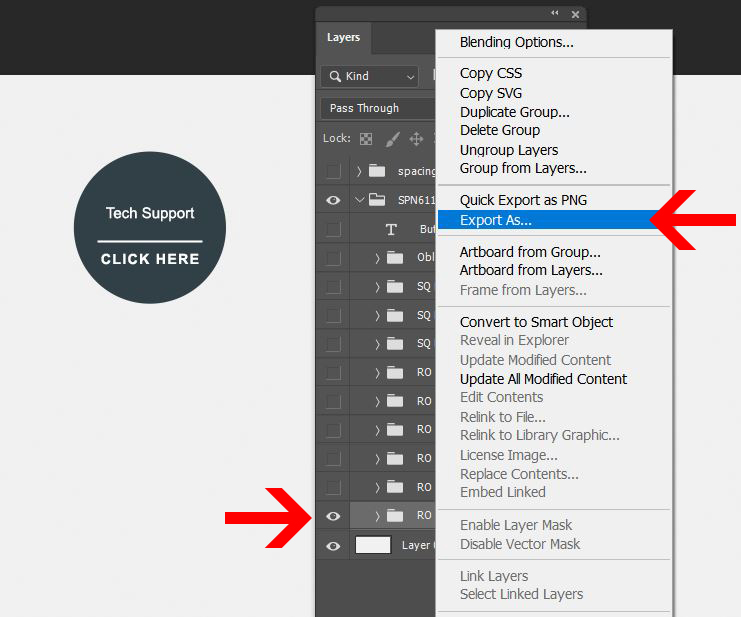
Step 4: Export the button
- Right click the folder of the button you would like to export.
- Select Export As… to open the export window.
In the export window,

select JPG and click on Export All… to export your very own Canvas button!
Please export all three different sets of buttons as individual images.