Client-based projects are a very common thing you will face working as a Student Technology Assistant for LAITS. Therefore, it must be emphasized that for every one of those projects you get assigned to, maintaining proper communication with the client is key. In this KB training you will learn the basics of client communication and what must be included in those emails.
The objective is to learn about:
- PDF Layout showing design assets
- Client communication e-mails 1st , 2nd , & 3rd
- Box files & naming conventions
1. Initial Communication
When you get assigned a client-based project on Basecamp, you will find a copy of the client’s original request in there. Sometimes that will contain enough information for you to start working. But if that is not the case, the following are a few things every first email to a client should always contain:
- Subject Line: your subject line should be something short and simple that the client can recognize
- A good tip for this is to quote the client on their original request
- Use their words to make it easier for them to recognize
- A good tip for this is to quote the client on their original request
- Greeting: always address the client, “Hello Valerie,” and using their name as stated in their original request
- If they are a professor, best to address them as “Professor” or if they have a doctorate, “Dr.” unless they state they’d rather be referred to as their first name
- Introduction: (if you haven’t met in person yet) introduce yourself as the STA working on their request
- Re-state the project or explain what you’re writing about to reaffirm what this email pertains to
- Content: whatever the purpose of this email is, make sure to ask specific questions. For instance, if you are designing something like a logo make sure to ask for clarification on the following (if it hasn’t already been specified):
- The color palette
- The preferred file size
- The preferred file type
- .pdf, .psd, .ai, .png, .jpg, etc
- The intended purposes of the design (web use or printing)
- This one is important to know what type of export you will have to make
- The project due date
- Make sure that you have enough time to work on the project and if the due date does not
- Feel free to to ask anything else that might be pertinent to your specific project
- Follow Up: close the email by stating whatever is next and assure the client that if they have any comments, questions, suggestions, or further requests they are welcome to contact you again (or reference someone else if needed)
- This can look something like “If you have any questions please contact myself or ________…”
- Signature: conclude the email with a formal goodbye and your official STA email signature
- If you do not have an STA signature yet make sure to set that up. Include:
- Your name and pronouns
- Your position as an STA and the year
- Your organization: specify LAITS
- Your preferred form of contact
- Something like this:
- If you do not have an STA signature yet make sure to set that up. Include:
Jac Alford (she/her)
Design Student Technology Assistant
Liberal Arts Instructional Technology Services – LAITS
alfordjaclyn@utexas.edu
(979) 406-0025
- General Tips:
- Keep it short; respect your reader’s time
- Read what you initially wrote; is there a way to write what you are trying to say in a shorter/more efficient way (while still keeping a warm and professional tone fo course)?
- If you mention something, link to it
- Even better if you include images, too
- Always CC Suloni and whoever else may be on that project (staff + other STAs) that way everyone is in the loop
- Keep it short; respect your reader’s time
This is an example of what one of these emails could look like:
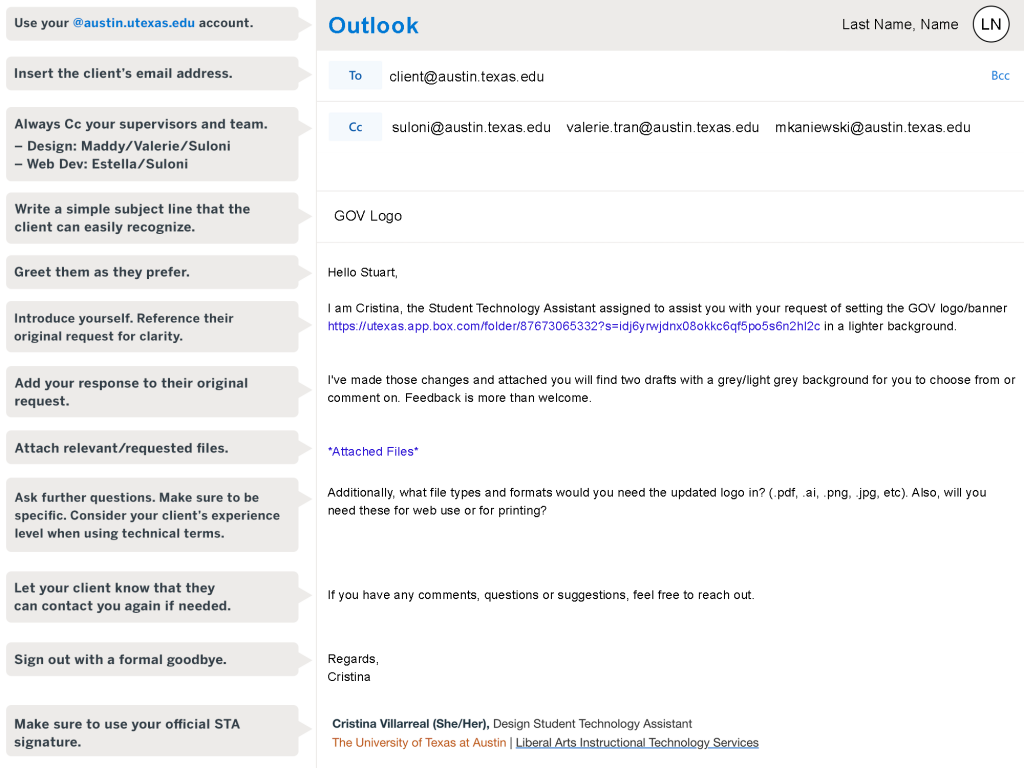
2. Specs Communication
These emails are follow-ups for the client’s requests. They include specifications you might not have clarified yet. Is there anything else you would like to ask or inform the client about? This is your moment to do so.
For these emails –other than using a similar email format as demonstrated in the previous section– you will need to be more specific concerning what your plan of action is. The client must know what they should expect from you by the time you turn in your final designs.
IMPORTANT: If you are attaching images or documents, make sure to properly name any attachments as clear as possible. Not all attached files are visible when receiving an email. Your client needs to know what each attachment is going to be even if they are not able to see the file without downloading it.
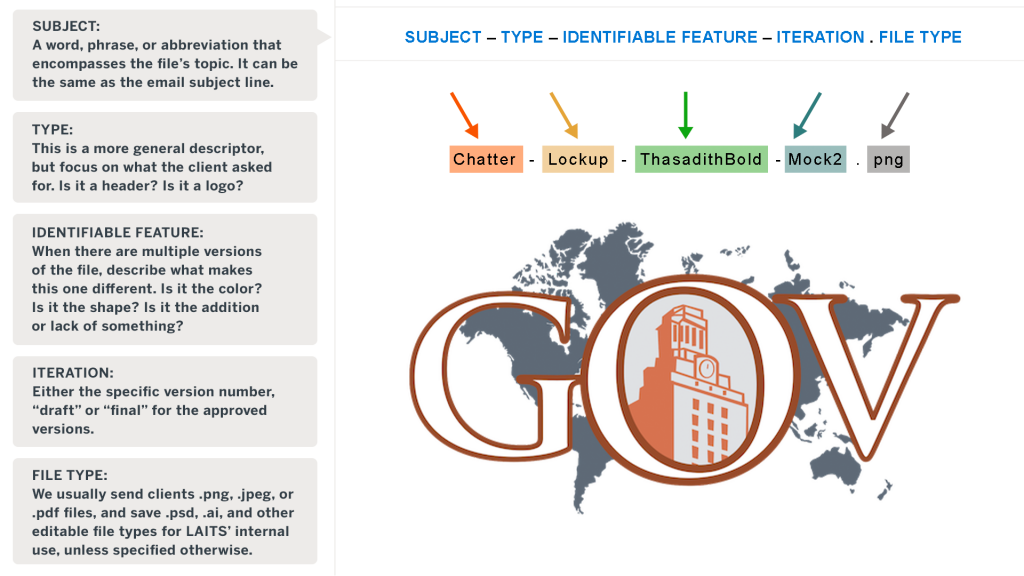
The following is a general guideline for file naming conventions:
Furthermore, this is an example of what one of these emails could look like:
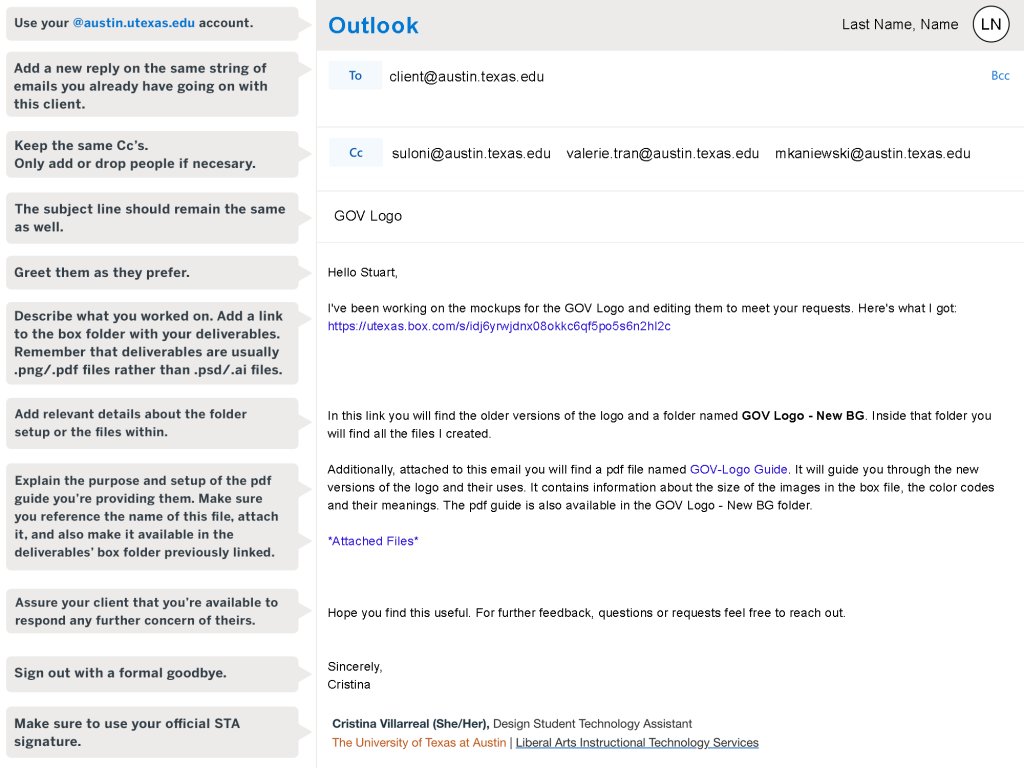
3. Final Communication
Finally, this will be the last email you are expected to send to the client. In this email you should attach whatever final deliverable(s) you worked on. Most of the time these deliverables should be uploaded into a Box folder that you will link in the email.
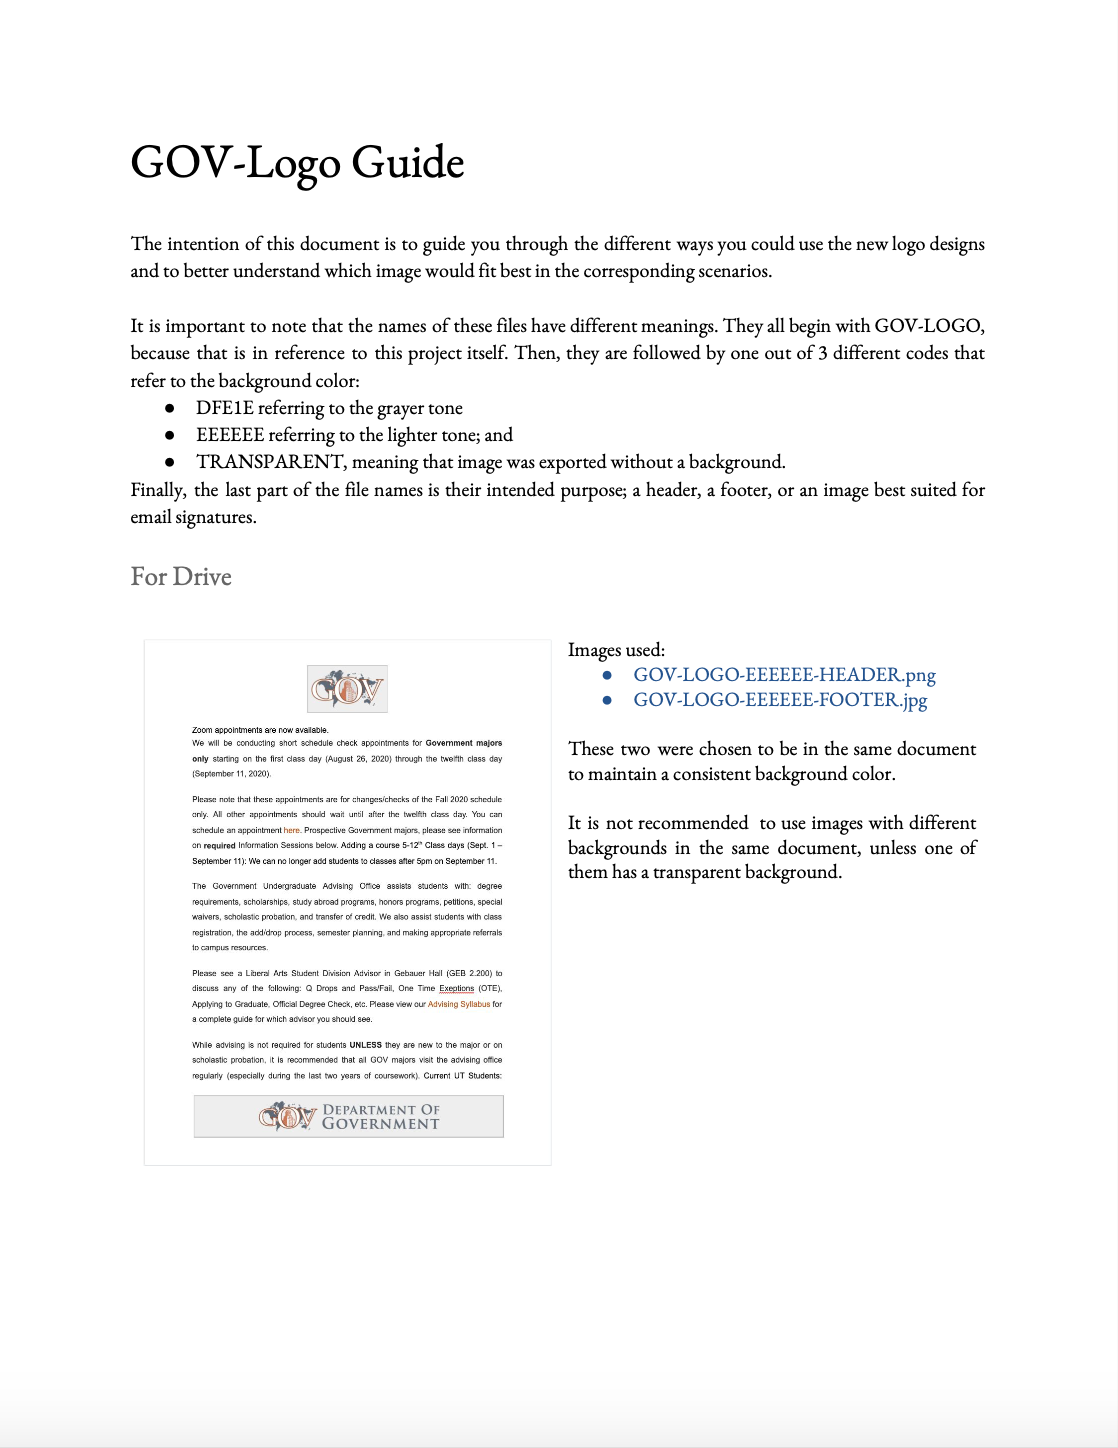
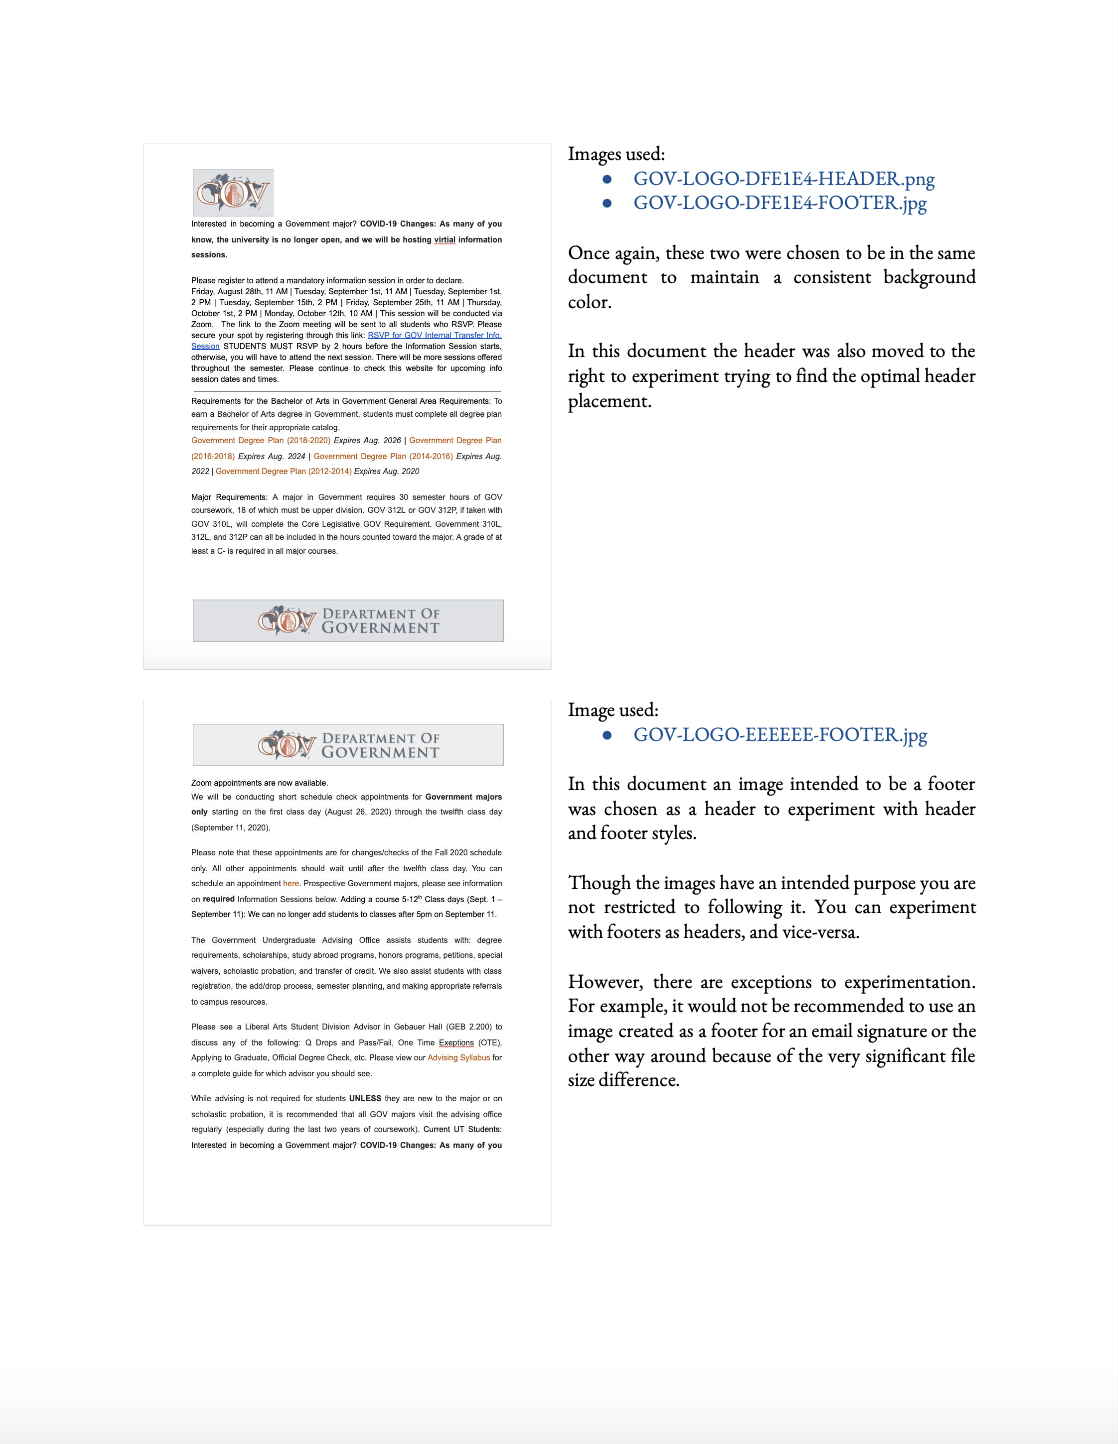
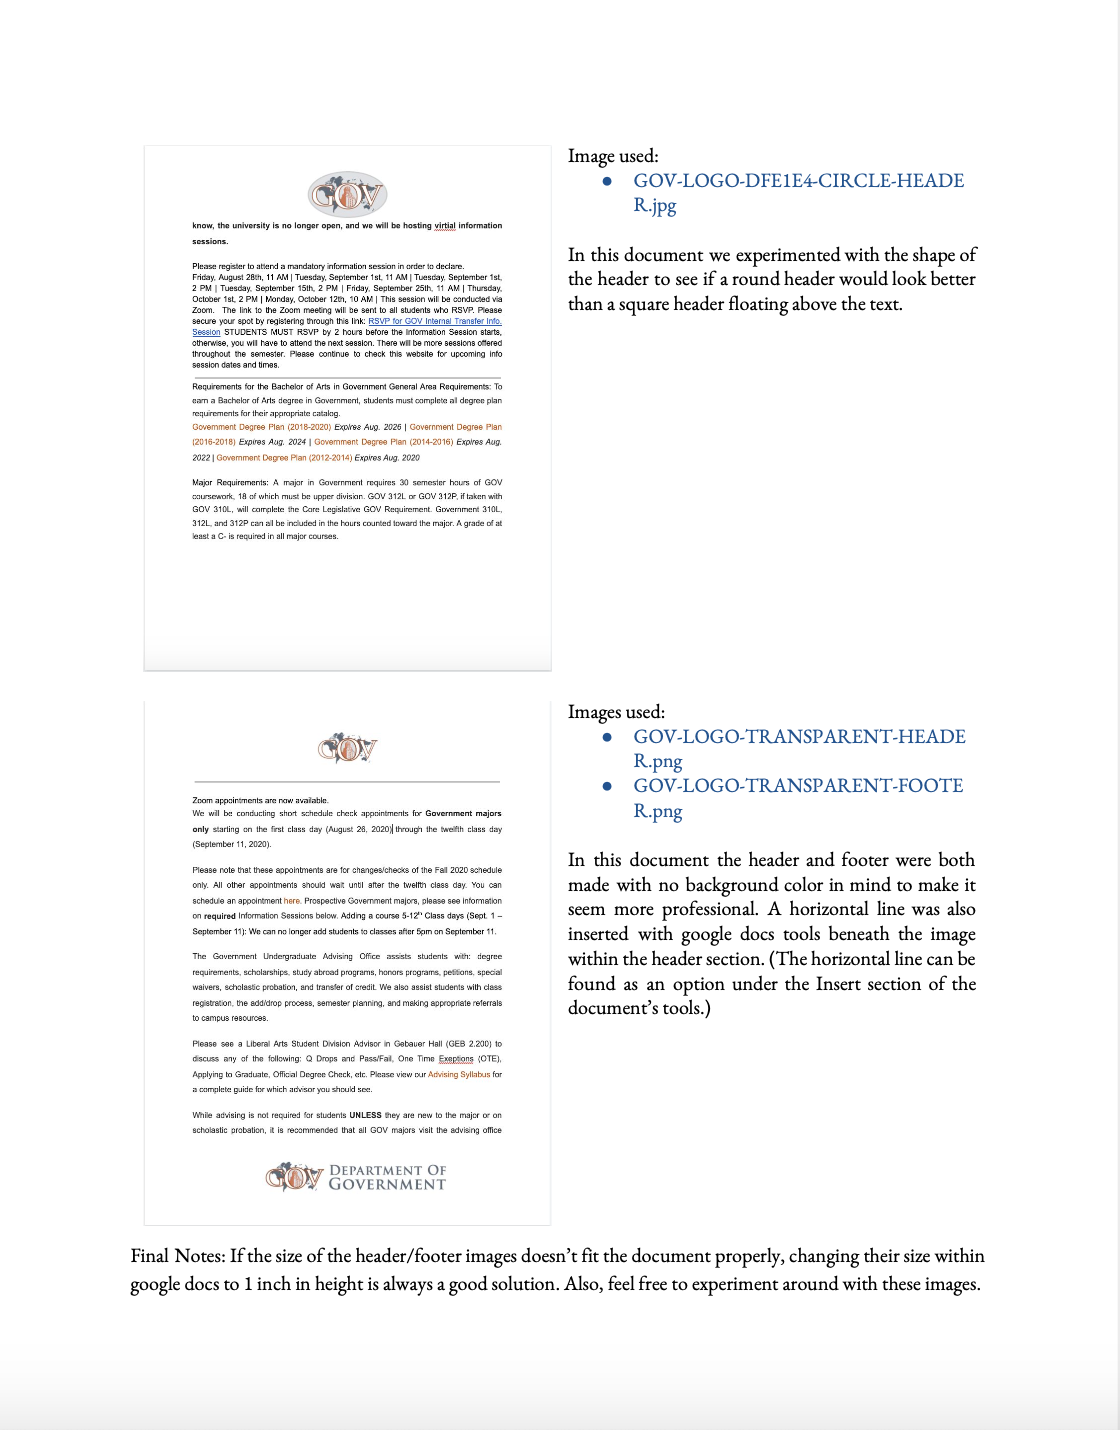
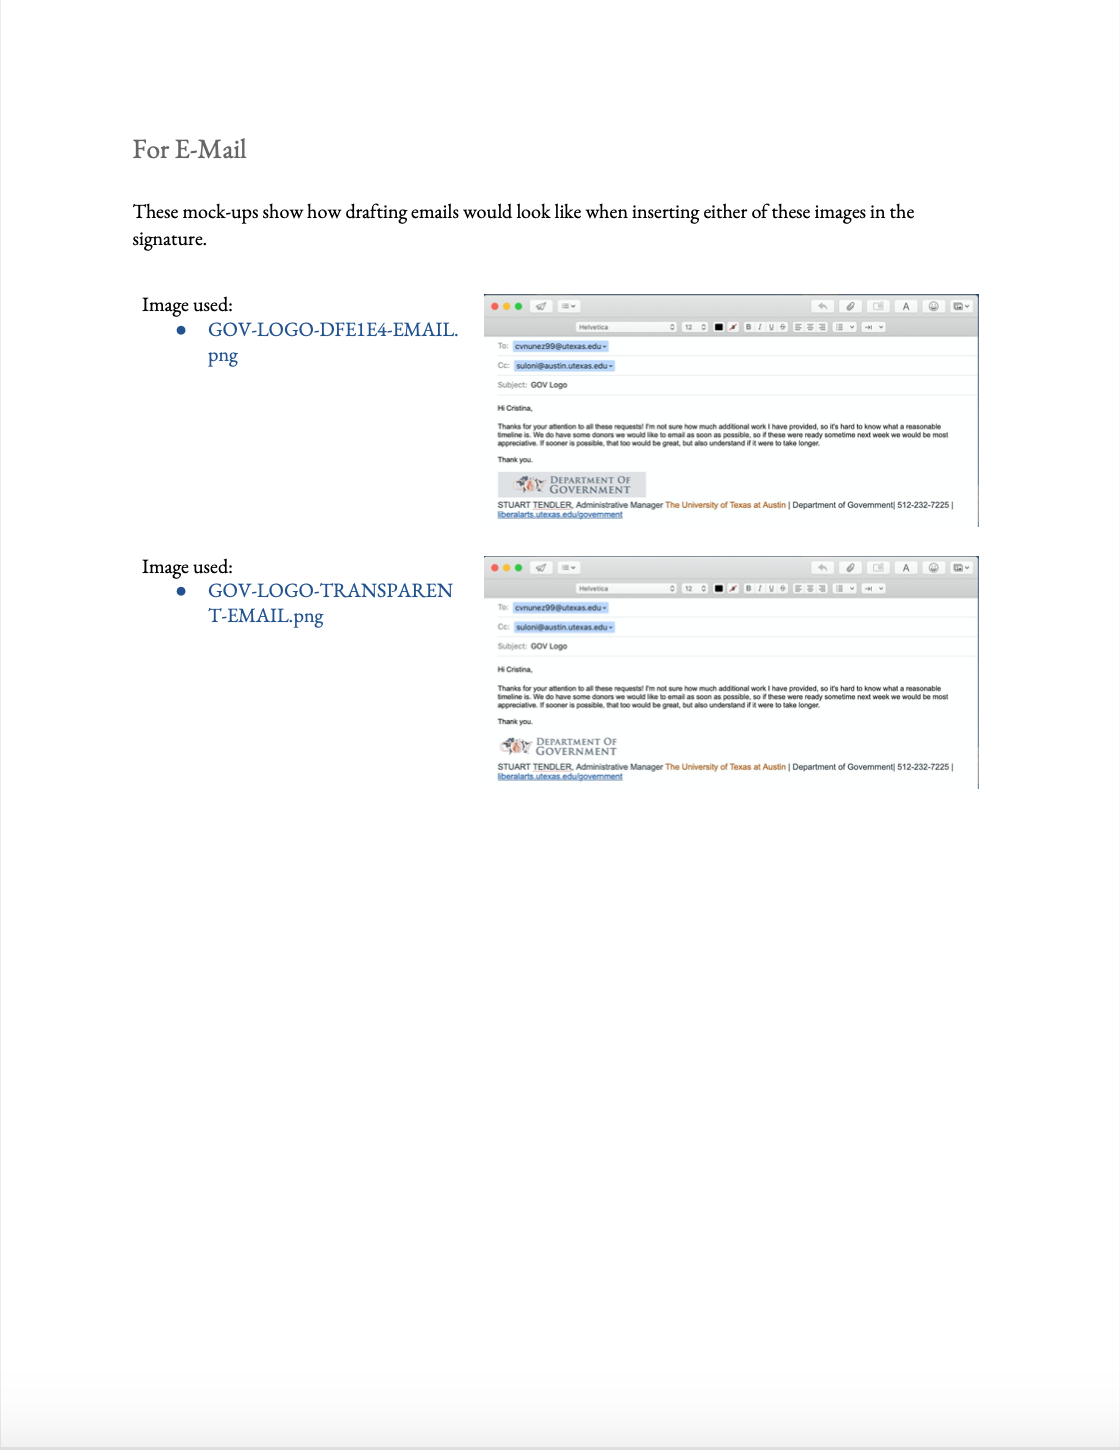
In addition, you are expected to include a usage guideline file. In this document you shall explain in full detail how your designs should be included in their corresponding contexts. The following are a few things every pdf guide should include:
- Introduction: an introduction of the guide’s content
- Naming: a description of the naming conventions and how/why the name of each of the files you uploaded into the Box folder are different from each other
- Mock-Ups: include mock-ups of your design in different formats so that the client can view your work in the corresponding context
- Make sure to explicitly reference the name of the design file used in each mock-up
- Also, if you find it useful, feel free to add explanations for the client to understand why each design is used in their respective mockup
- If the designs are interchangeable in context make sure to say that
- If not, explain why each one has its own specific purpose
The following is a good example of what you could include in a pdf guidance document:

Some other important new information you should include in this final communication email are:
- Introduction: a description of what you worked on
- Link the Box folder!
- Brief description of what is in the folder
- Link the Box folder!
- PDF Guide: comment on how you included a guide for them
- Link or attach the guide
- Assurance: assure the client that if they have any more comments, questions, or further requests they are welcome to contact you again
- Signature: conclude the email with a formal goodbye and your email signature
This is an example of what one of these final communication emails could look like: