Template for Requests with Existing Documentation
Dear [INSERT CLIENT NAME],
My name is [INSERT YOUR NAME] and I am an STA here at LAITS. I will be providing you assistance with your Cascade help request.
In order to [INSERT CLIENT REQUEST], please refer to our documentation at this link here: [INSERT COLA HELP GUIDE LINK].
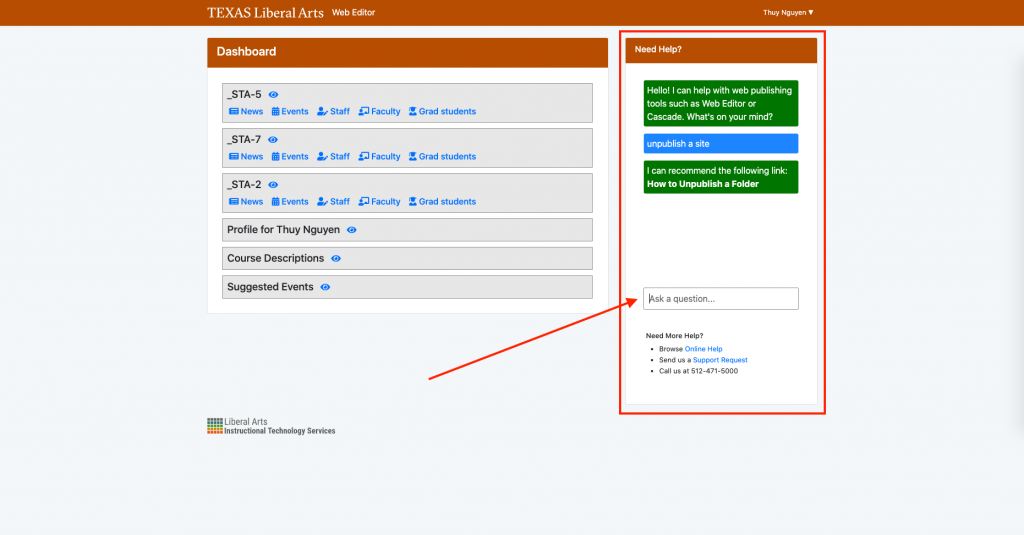
Additionally, if you would like to find a specific documentation according to your need, please log in to the COLA Web Editor at this link here: https://webeditor.la.utexas.edu/. Enter a question or key words relating to your question in the Chatbot column under “Need Help?”. The Chatbot will point you to a link which takes you to a page showing detailed instructions on how to accomplish your task.
Please let us know how we can best help you, and your team. Reach out to our Web Support Team via la-web-support-request@utlists.utexas.eduto ask for Cascade and COLA Web Editor help, I or one of our support team will be happy to assist you.
Thank you!
[INSERT YOUR NAME]
LAITS STA 2020-2021
Template for Requests without Existing Documentation
Dear [INSERT CLIENT NAME],
My name is [INSERT YOUR NAME] and I am an STA here at LAITS. I will be providing you assistance with your Cascade help request.
Below are the step-by-step instructions to accomplish your request.
- [INSERT STEP 1]
- [INSERT STEP 2]
- [INSERT STEP 3]
- [continue inserting steps until done]
Please let us know how we can best help you, and your team. Reach out to our Web Support Team via la-web-support@utlists.utexas.eduto ask for Cascade and COLA Web Editor help, I or one of our support team will be happy to assist you.
Thank you!
[INSERT YOUR NAME]
LAITS STA 2020-2021
——–
General Guidelines on Writing the steps
For each step, insert annotated screenshots whenever possible. Here are the steps on how to appropriately insert an in-line screenshot.
- Type out your step.
- Next to the step you’d like to insert a screenshot, hold Shift + Return. This will enter a new line but will keep the image within the same numbered bullet.
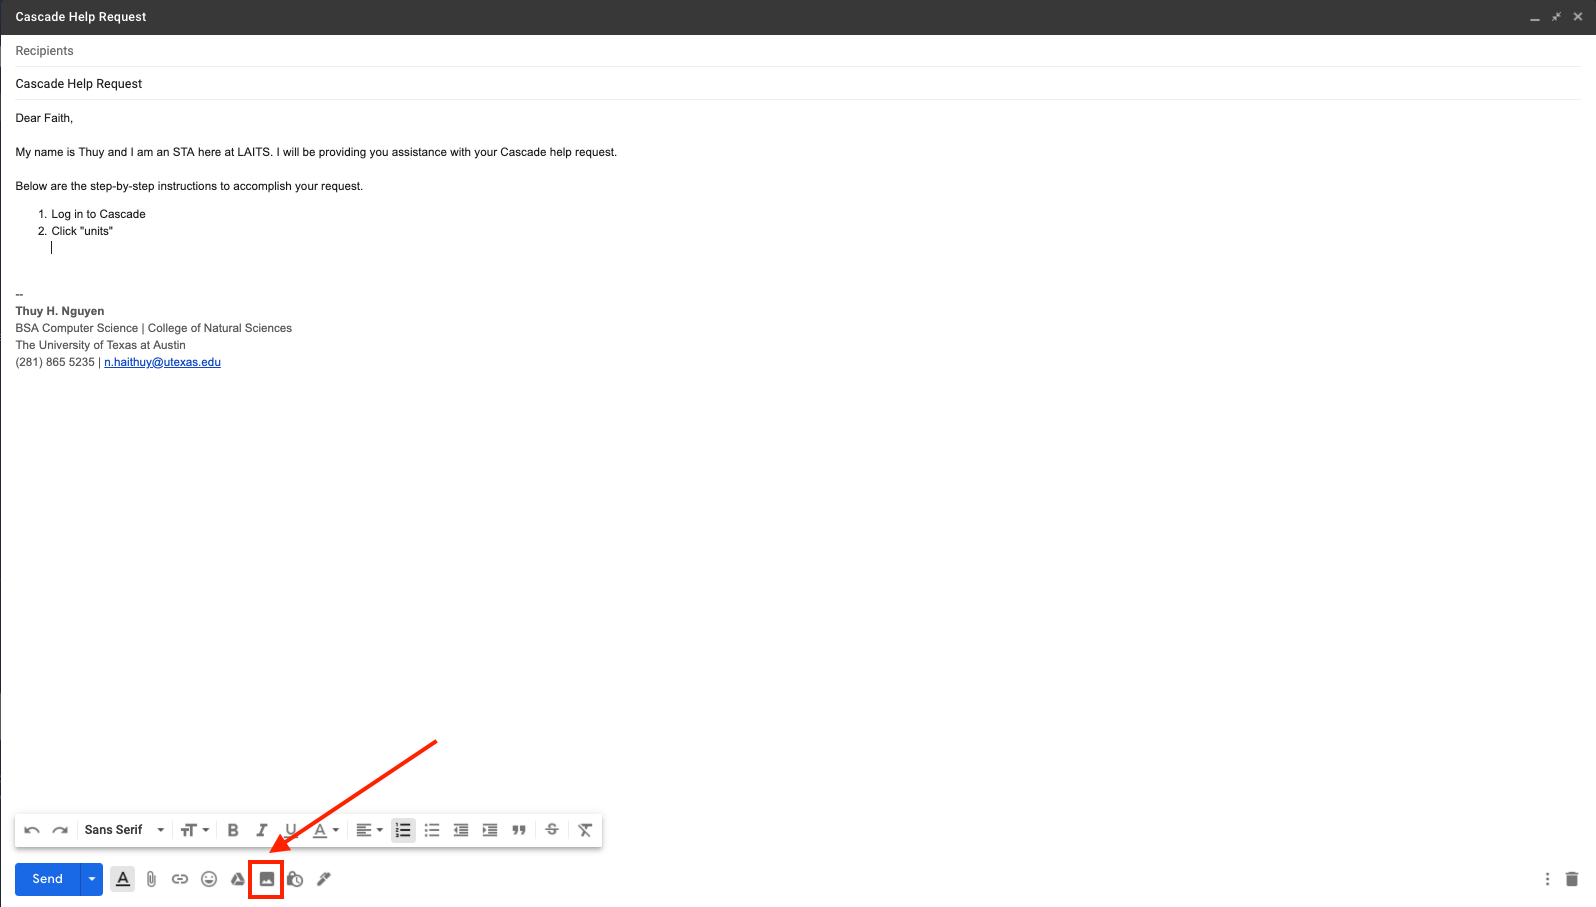
- Click “Insert Photo”.
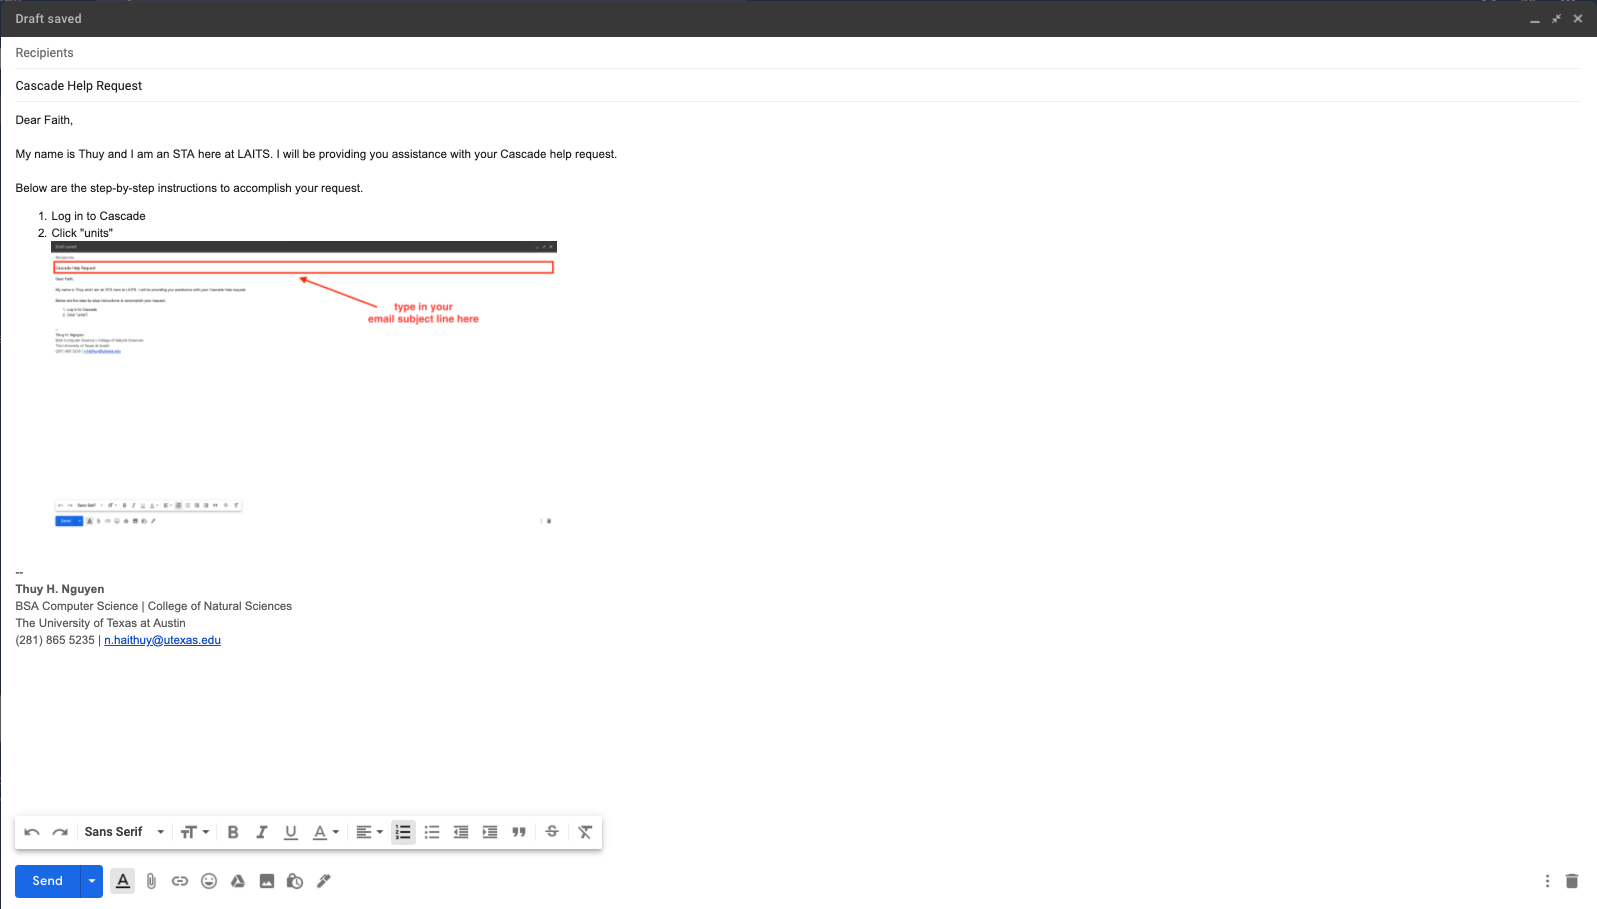
- Choose the screenshot you’d like to include. Be sure that the images are well-annotated (in red) with boxes, arrows, and / or text. Below is an example of an annotated screenshot.
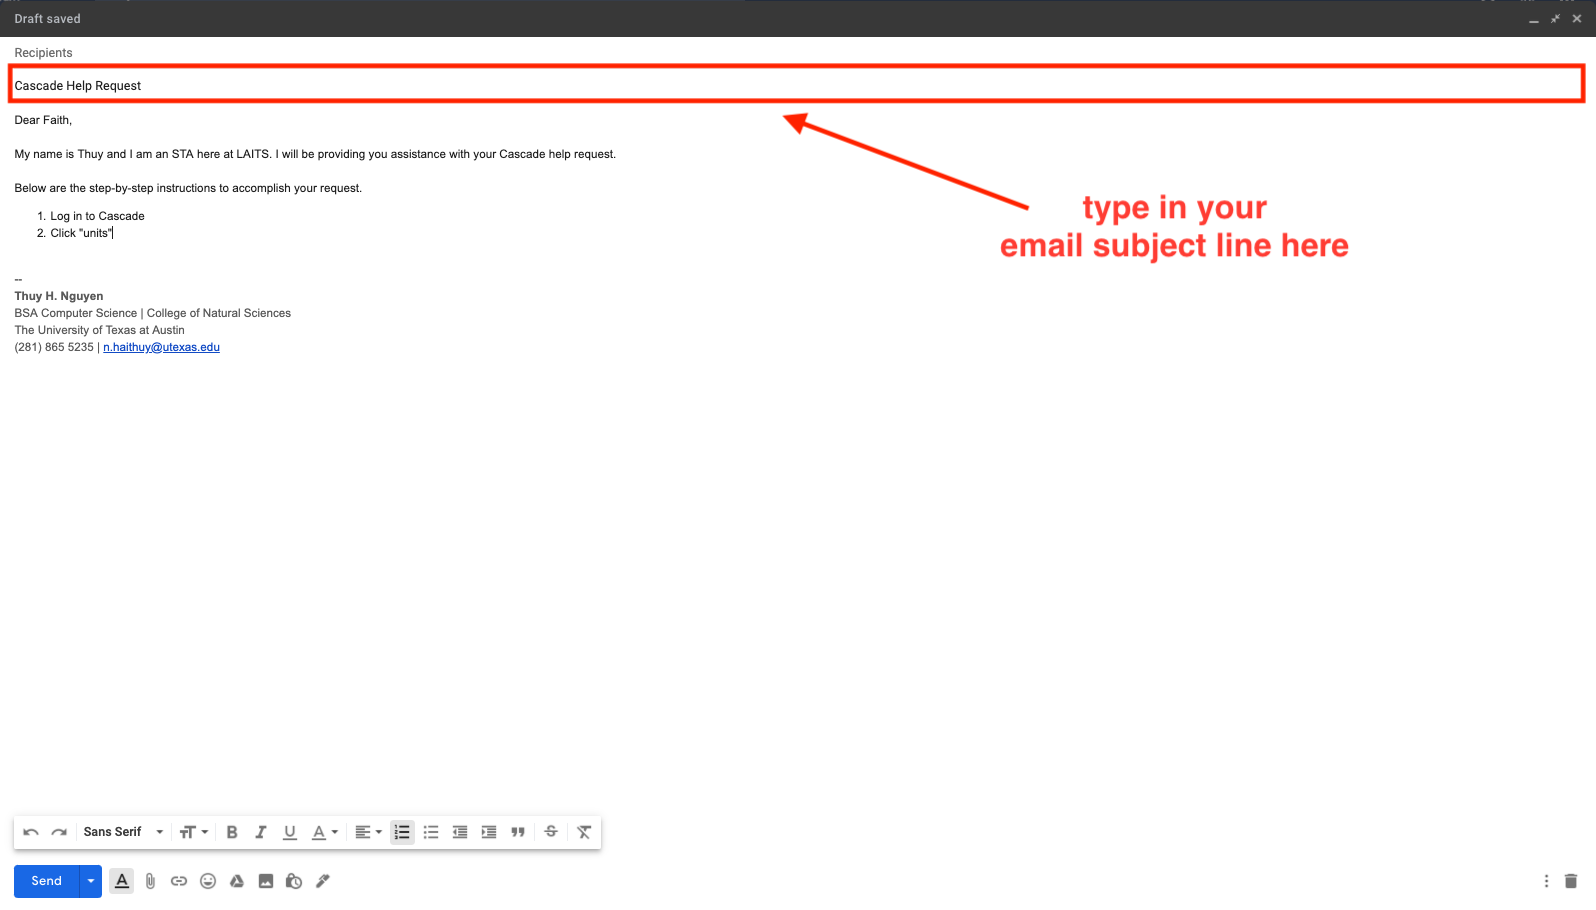
Your step should look something like this.