
Introduction / Review
In the first KB training on Adobe AfterEffects, you learned how to create simple animations for Online Course Graphics. Fundamentals that you were introduced to include:
- storyboarding
- the AE User Interface and creating compositions
- setting keyframes (position, scale/rotation, opacity, and effects & presets)
- rendering/exporting with Media Encoder
In this continuation, you will learn more advanced techniques in AfterEffects to edit and create more complex motion graphics.
“Motion Graphics” is the industry term for animated video. They may be 2D animations, 3D renderings, or GIFS. they may also include audio, voiceover, or sound effects.
Motion graphics are frequently used because:
- they can deliver information or a contained message for easier comprehension
- many things are easier to understand if you can “see” them
- watching motion graphics is often a passive and engaging experience
- viewers don’t have to read, explore data, or exert much mental energy.
- thus, motion graphics are enticing to viewers because they are easy to consume
LAITS employs the use of motion graphics in information videos, video bumpers, and animated logos. In this training, you will be tasked with editing online lecture intro and developing your own logo animation.
A Note on Feedback:
Since you will be working with motion graphics that are time-dependent, it will be hard to give progress updates for feedback with only screenshots. Since AE takes a long time and processing power to export video clips, we want to avoid doing this only until the end when no changes will be made anymore. Instead, it’s recommended that you take screen recordings of your AE workspace. This way, you will also be able to show your Timeline and Effects Panels, and will be easier for another STA to troubleshoot any issues you may have.
For Windows:
1. Press (Windows Key + G) at the same time to open the Game Bar dialog
2. Find the Capture widget box:
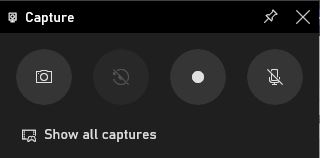
3. Click on the third button to the right to start recording your screen.
4. Stop the recording by clicking on the red recording button again.
5. Your recording should be automatically saved in This PC > Videos > Captures folder.
For Mac:
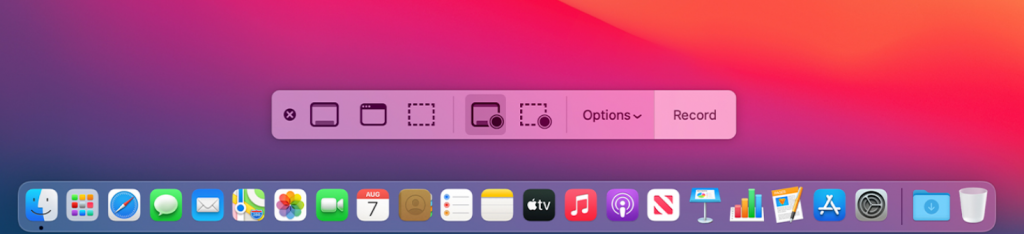
1. Press (Shift + ⌘ + 5) at the same time to open the Screenshot toolbar
2. Click the Record Entire Screen button in the onscreen controls. Your pointer changes to a camera.
3. Click Record in the onscreen controls.
4. To stop recording, click the Stop Recording button in the menu bar. Or press Command-Control-Esc (Escape).
A Note on Shortcuts:
Throughout this training, there will be notes for shortcuts for your convenience.
Part I: Using Masks
Much like masks in any other Adobe software, masking in AE allows you to determine the visibility of specific parts of a layer. Masks are created by drawing paths on any layer with a visual component (they must be closed paths, which affect the layers’ alpha channels).
How To Create A Mask
- first select the layer that you wish to mask
- make sure you are working within a layer, otherwise, you will create a shape, not a mask
Option 1: Preset Shapes
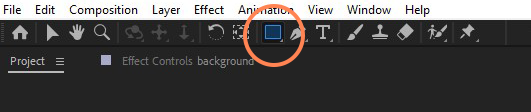
- Click on one of the shape tools from the toolbar
- possible shapes: rectangle, rounded rectangle ellipse, polygon, and star
- shortcut: you can cycle through the possible shapes by pressing “Q”
- Click and drag in your composition viewer to create the mask!
Option 2: Organic Shapes with the Pen Tool

- Click on the pen tool from the toolbar
- Click point-by-point to create straight sides to your shape
- Click and drag while creating points to make rounded sides to your shape
- There are other pen tools for adding and subtracting and modifying these paths
- shortcut: cycle through pen tools by pressing “G”
- The pen tool works just like that in Adobe Photoshop and Illustrator!
Editing Multiple Mask Properties
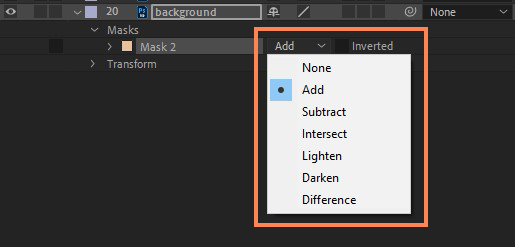
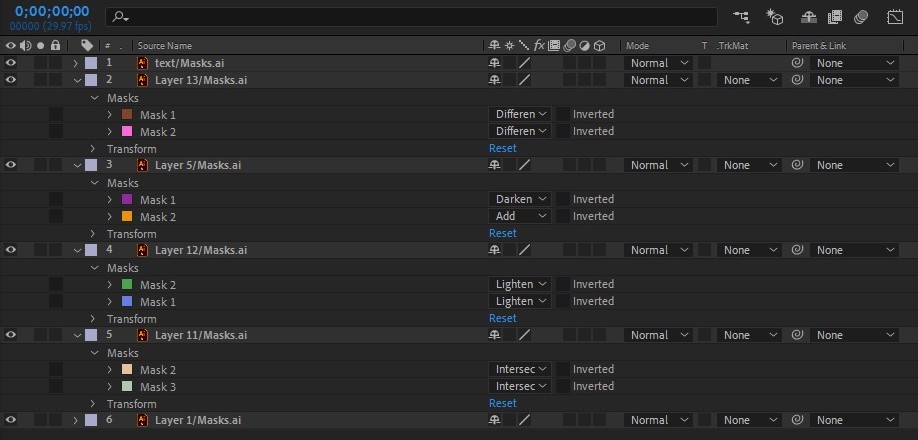
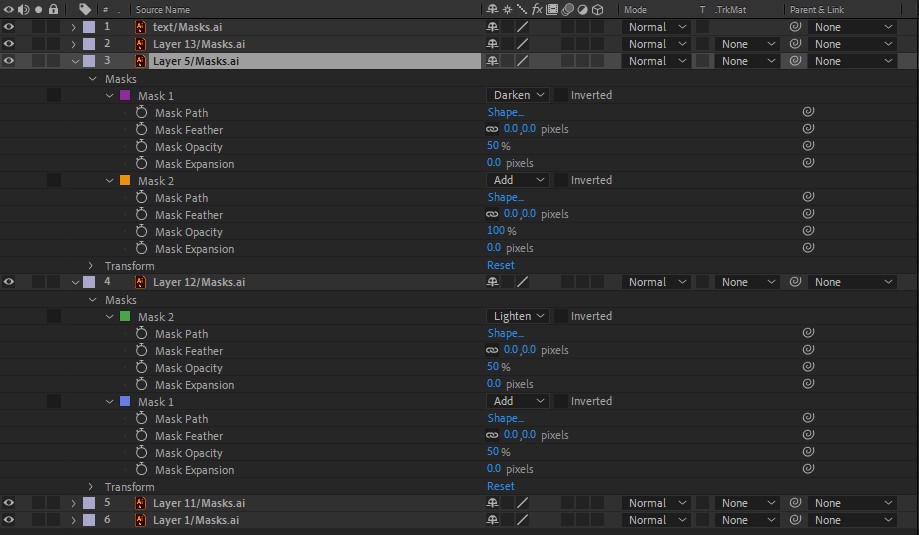
When you click on your mask(s) within a layer, you can view and edit their properties:
Add is the most commonly used and default mask mode. It simply creates a mask, and if you lay multiple masks together it will sit one on top of the other.
- “subtract”: This mask mode shows the difference between a mask and anything beneath it, negating the one beneath it but unaffecting the mask above it.
The other options relate to interactions between multiple masks
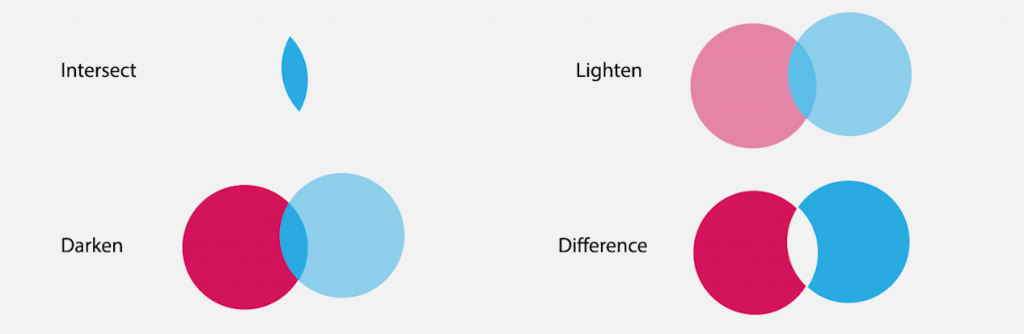
- “intersect”: If you have more than one mask that overlaps, the Intersect mask mode will reveal only the sections of the masks which overlap.
- “lighten”: When two masks that have less than 100% opacity overlap, the color of the intersection will be darker than the opacity of the rest of the masks. Selecting Lighten will make the opacity even across the masks.
- “darken”: Darken works the opposite way of Lighten, increasing the opacity of two masks that are intersecting.
- “difference”: Difference is basically the opposite of Intersect. Selecting the Difference mask mode will reveal all of the mask, except for the section which is overlapping another mask.
You can also change the properties of your mask, which you can view and edit by using the click down arrow. these include mask path, feathering, opacity, and mask expansion
Working With Masks
Remember with working with masks that:
- masks will always move and transform with the layer that they are on
- any effect(s) that you apply to a layer, will only be visible with respects to your mask properties
Now, let’s apply what you have learned to the following mock client request!
“Hello! My name is Jack Stamps and I am a lecturer for the AET Department. Last year, LAITS created an animated introduction for my course: AET304 Foundations of Art and Entertainment Technologies. I was hoping to reuse this asset for the upcoming semester, but it seems the file has been corrupted! Can you correct the effects in this AE file to restore the original motion graphic? I also have footage of the old motion graphic for your reference. Thanks so much!”
File to Download: https://utexas.box.com/s/2044xvji1bpy0y8elss63028a3smatc9
File for Reference: https://utexas.box.com/s/8dzyhl6cw8626p7vqwllupafj4279qq1
Comment your thoughts and work on Basecamp for a fellow STA to review!
Part II: Using the Puppet Tool
The Puppet Tool is a helpful tool in animating character movement, which can also be employed in motion graphics for LAITS.
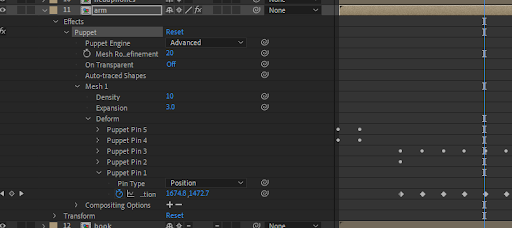
How to Apply Puppet Pins

- First, place “pins” on the png layer you wish to move.
- pins define the joints that After Effects will apply to your picture
- to place a pin simply select the Puppet Pin Tool, ensure your layer is selected and click directly onto the image.
- a small yellow circle will be visible to indicate the location of a pin
- once you have placed all of your pins, you can grab the pins and drag them around to change the pose of your puppet
- Mesh
- to determine how to deform your puppet, After Effects uses a Deformation Mesh
- you can show this deformation mesh by checking the ‘Show Mesh’ checkbox in the Puppet Pin toolbar
- when you move a pin around, After Effects uses this mesh to deform your image based on all the joints you added to your puppet.
- you can adjust the expansion and control how many triangles the mesh contains to make sure it covers your image adequately
- to determine how to deform your puppet, After Effects uses a Deformation Mesh
- Keyframing
- As you create pins, you can view your effect under your layers in the timeline. To create movement over time (like any other effect), click the stopwatch and move your pins around in the manner that you wish for them to move. Think of your pins as keyframes.
Now, let’s apply what you have learned to the following mock client request!
“Hello, It’s Jack again. Thanks for fixing the old introduction for AET304; I’m impressed by your work!
However, after some thought, I’d like to see something fresh and new. I have this banner (an AI file) that I’d like to see animated into something that can play before my online lecture. It doesn’t have to be long, something that plays for about 5 seconds will do. Specifically, could you perhaps make the tentacles of the octopus move, or perhaps make the bats fly around? I look forward to seeing what you make out of this!”
File to Download: https://utexas.box.com/s/jjufh5r8ahezob50fvo34tg82dhfk0s6
Comment your thoughts and work on Basecamp for a fellow STA to review!