

1. Introduction
This lesson explains how to use the logo you created on How to Design a Logo and turn it into a motion graphic using Adobe After Effects (AE). This activity aims to provide STAs with multiple tools with which one can create a customized animation that emphasizes the message that a logo conveys.
Why make animated logos?
- Uniqueness: an animated logo allows the brand to have more creative freedom when representing the logo
- Brand awareness: dynamic images, as well as video content, are comprehended better than static which means they are easier to remember
- First impressions: an original animated logo is a good way to surprise people and increase the chances that they will remember your brand
- Storytelling: an animation can give a more detailed explanation of the nature of a business than a static logo does
After Effects skills you will learn from this training:
- File import (AI to AE)
- Application of custom shape effects
- Keyframing
- Layers and masks
- File export (AE to GIF)
For further reading on animated logos, you can visit these websites:
- 5 reasons you should get an animated logo
- Don’t Stay Still. Why Brand Needs an Animated Logo
- Animated logotypes – Why, how, and where to use them
Before you start animating your logo, check out the following videos to get some inspiration on what’s already out there. As you watch these animations, think about how it relates to the name of the brand and the level of complexity in each of them.
This training should take 2 – 3 hours to complete, depending on your previous knowledge on After Effects and the complexity of your animation.
2. Storyboard
After watching the above videos for inspiration, it is now your turn to think about how you could animate your logo. For this, start by sketching out a short storyboard that describes the progression of the animation.
Things to consider:
- The duration of the animation should be around 5 seconds
- The complexity of the motion graphic should be limited to a level you are comfortable with when using After Effects
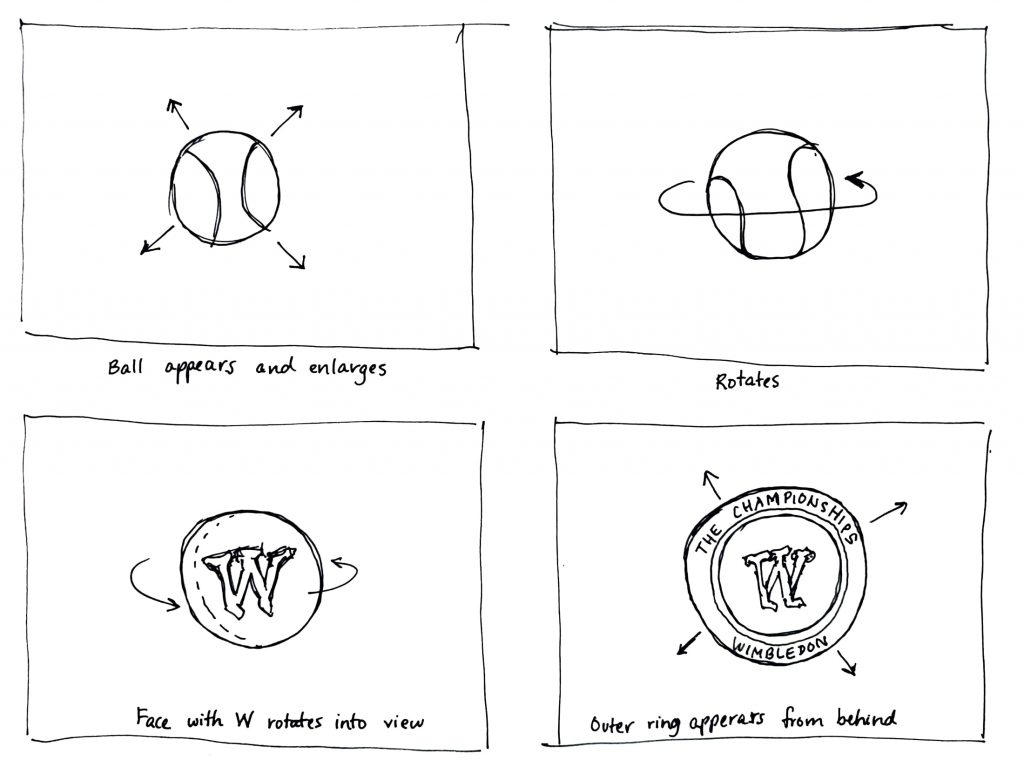
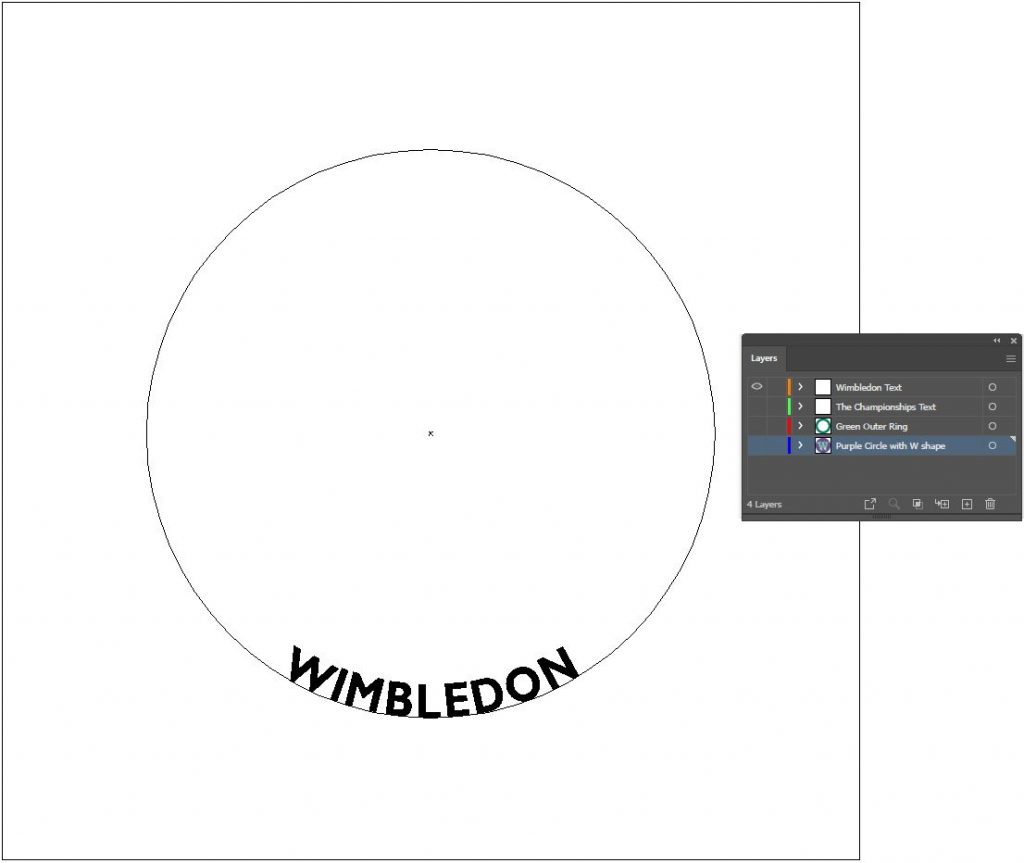
The example logo for this activity is a customized wordmark that takes inspiration from the Wimbledon tennis tournament:
Based on this logo, this is the storyboard I came up with to create the animation:
Once you come up with your storyboard, post it on Basecamp to receive feedback!
3. Importing Assets into AE
Once your storyboard has received feedback from another STA, start thinking about the different elements of your logo that will have independent animations. On your Illustrator file, create separate layers of these elements.
In my example, I separated my assets into four different layers:
- Purple inner circle with the W shape
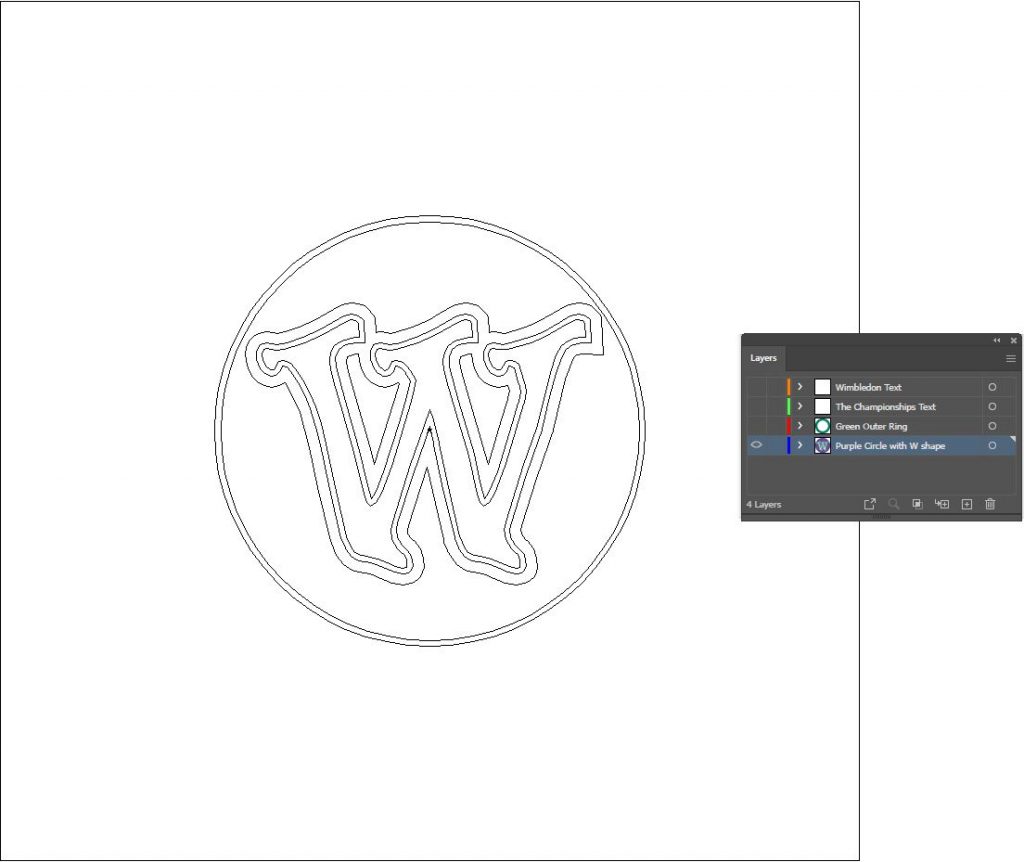
2. Green outer ring
3. “THE CHAMPIONSHIPS” text
4. “WIMBLEDON” text
After arranging all of the elements into their specific layers, save your AI file, close it, and open a New Composition in AE using the same resolution as your AI file.
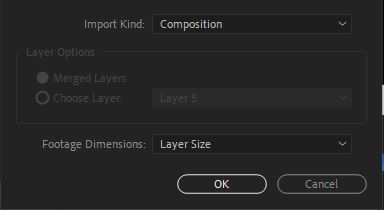
Import your AI file by going to File / Import / File

Import the file as a Composition and Retain Layer Size:
The file and layers will then appear in the Project Panel:
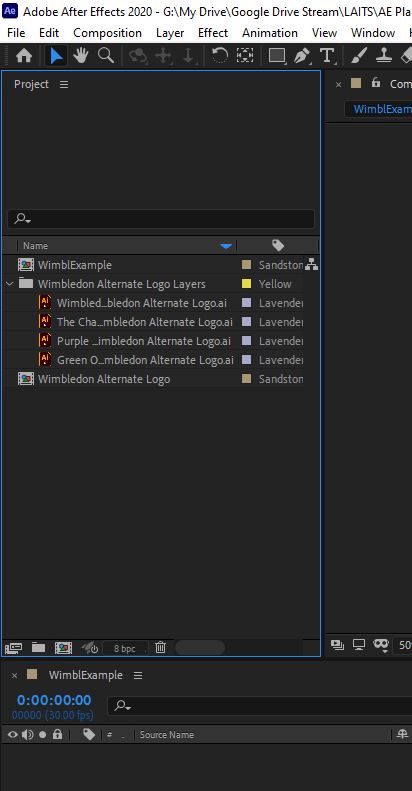
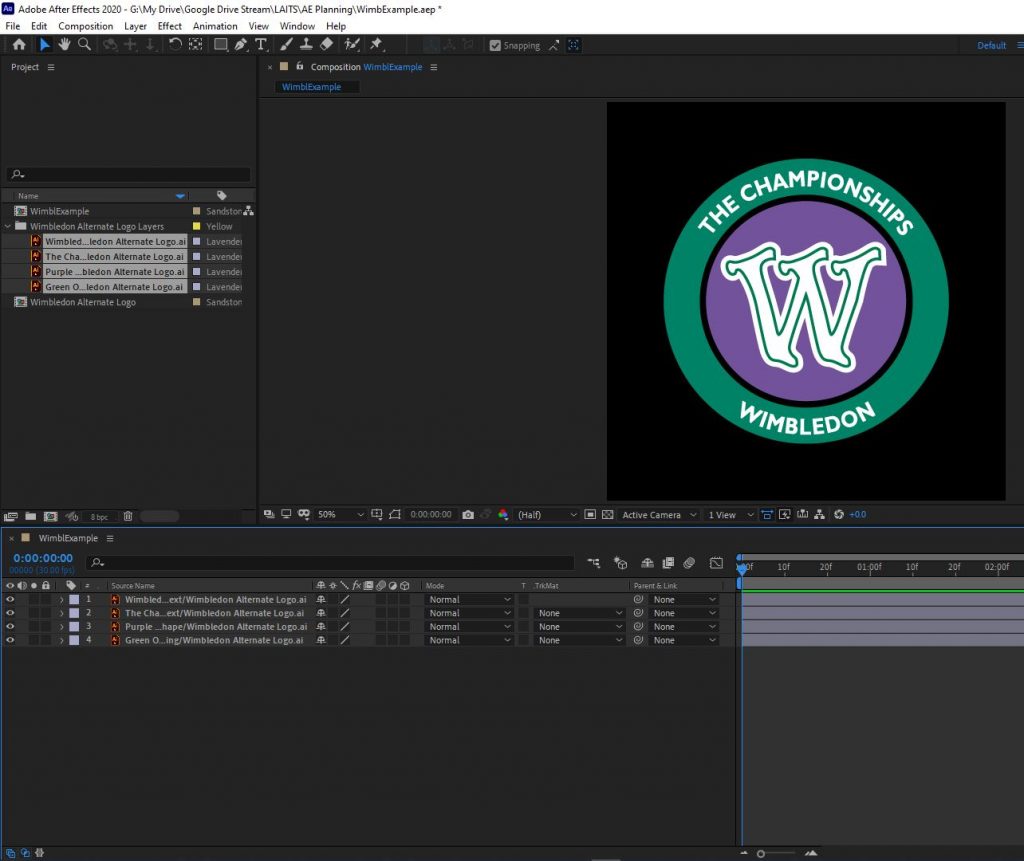
Select all layers and drag them into the Timeline Panel, at which point you should see your logo on the main Composition Panel at the center of your workspace.
4. After Effects Workflow
Layers
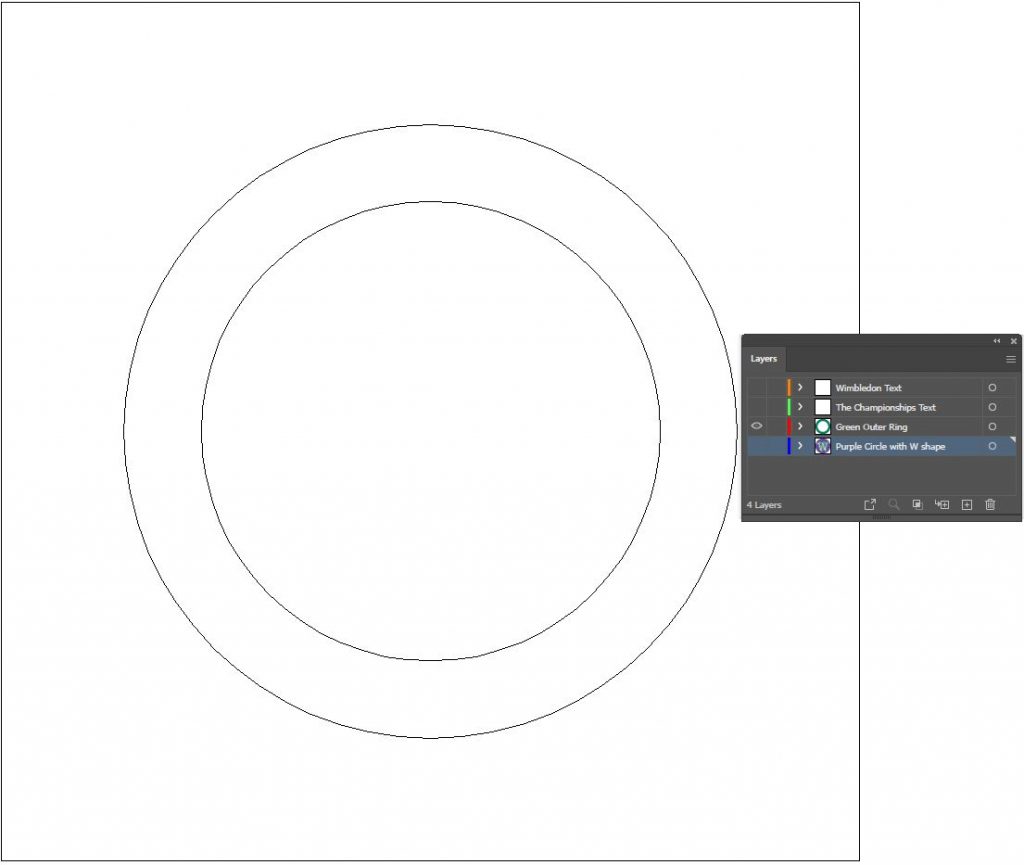
All the layers that contain vector paths from AI can be converted into native AE shapes, which are much easier to modify and transform. In the case of the Wimbledon logo, the layers containing the purple circle and the green outer ring can be converted into shapes.
To do this,
- select the layers on the Timeline Panel
- right-click
- hover over “Create”
- select “Create Shapes from Vector Layer”
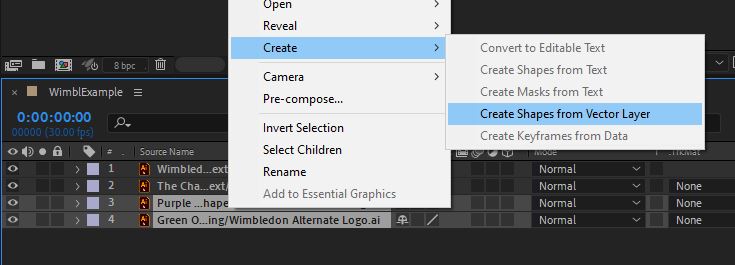
A new Shape Layer will be created for each selected AI vector path layer. You can recognize these layers by the star icon next to their name, which indicates it’s a Shape Layer. You can delete all AI vector path layers and keep the AE Shape Layers, which are the ones you’ll be using.
Other ways of adding Shape Layers are using the Pen and the Shape tools, which work similarly as in AI and PS. The difference is that you can create animations that follow the paths of these shapes and even the shapes themselves can be transformed over time to have a different appearance through the movement of anchor points and bezier curves. To create a Shape Layer with these tools, click on either the Pen or the Rectangle icons at the top of your workspace:
You can also press down a longer period of time on these icons to show more shape options, like adding anchor points or creating an ellipse.
Any imported layer containing text cannot be converted into an AE Shape Layer. In order to have text with editable properties like font, size, and spacing, you will need to create a Text Layer. To do this, click on Layer / New / Text:
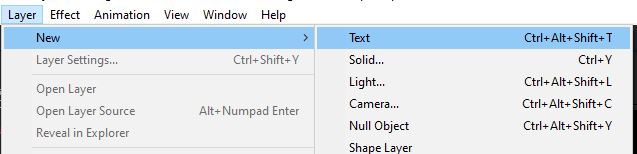
Or simply click on the Text icon to the right of the Pen Tool icon.
Keyframes:
Use your knowledge on keyframes from the previous sections of this training to set up the timing and motion rate of your animations. Use the following link for a quick refresher on keyframing:
Effects:
From your experience on the previous sections of this training, add effects to your assets as needed according to your storyboard. Try to be as creative as possible while still thinking about the complexity of your animation. If there is an effect you want to use that was not covered on the previous section, take the time to look up a Youtube tutorial specifically about it. This is always the best way to learn about After Effects!
You can check out the tutorial below to get started:
3 Popular Logo Animation Techniques in After Effects
More Tutorials STAs Have Used
- a growing list
- as STAs go thru this training
- and add the tutorials they used
5. Exporting the Animation
Once you have received feedback from your finalized logo preview and you are satisfied with how it looks, it is time to export your AE file. For this training, you will be exporting your animation in a GIF format, a widely used way to create looped animations that don’t require too much storage space.
1. To start, hit Save on After Effects.
2. Open the Adobe Media Encoder. This is an independent Adobe Creative Cloud app that you can download, as it is one of the many apps that comes with your Creative Cloud Suite.
3. Once the Media Encoder is open, go back to After Effects and click on Composition > Add to Adobe Media Encoder Queue…
4. Go back to the Media Encoder and wait for the name of your file to show up on the Queue Panel (usually found on the top right part of the Media Encoder window):
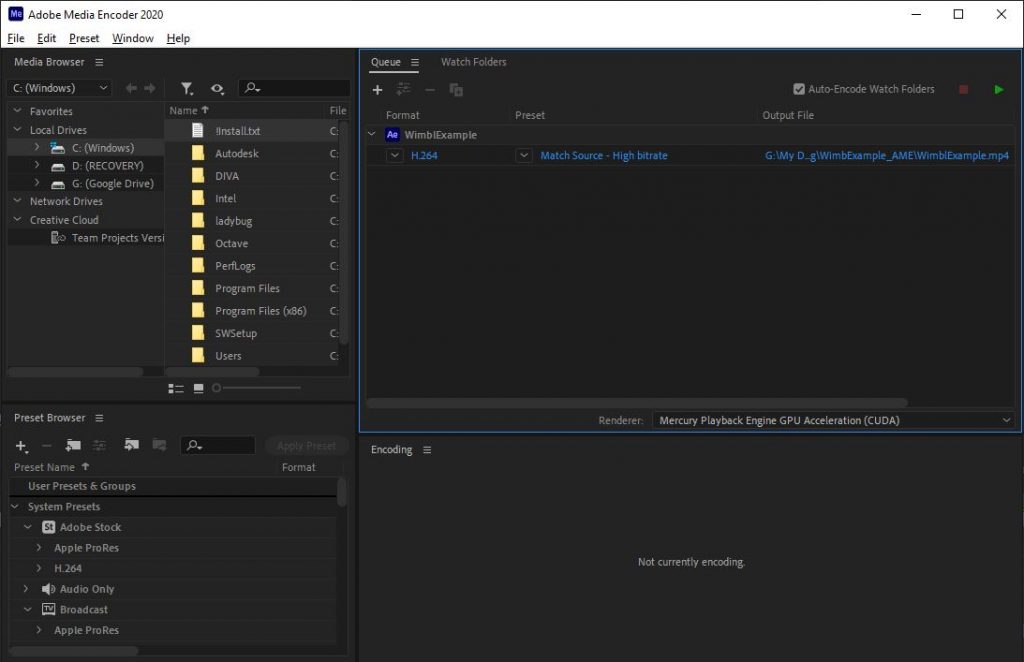
Notice how the “WimblExample” AE file has a row below, containing a default Format output is set to H.264, a Preset default output, and a default Output File location.
5. Click on the down-arrow to the left of the Format output and look for “Animated GIF”. This will consequently change the Preset to a default “Animated GIF (Match Source)”.
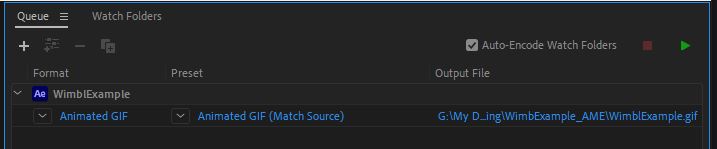
If you have a lot of elements on your AE File, this Preset format might export a very heavy GIF file.
6. To make sure this isn’t the case, click on the blue “GIF Sequence (Match Source)” text to connect to the Dynamic Link server and open the Export Settings window.
On the bottom left panel of this window, you will be able to move the Current Time Indicator around and trim the duration of the animation using the white markers at the sides of the blue bar:

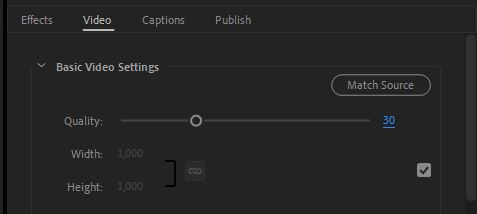
7. Once you have trimmed the content, find the Video tab on the top right panel and change the Quality slider value to no more than 35, in order to greatly reduce the file size.
Scroll down in the same section and make sure that the frame rate is set to 25-30 fps, which is an optimum frame rate for a GIF. To do this, uncheck the box to the right of this parameter and click on the dropdown for Frame Rate.
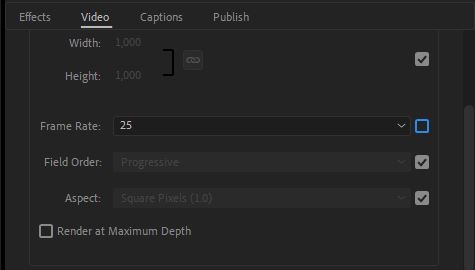
Make sure to leave all other parameters’ boxes checked so they are set to Match Source (your AE file).
8. Click “OK” on the bottom right of the Export Settings window to close it and save your changes. Your Preset should now say “Custom”.
9. Next, click on the output file path and select any folder to which you want your GIF to save. Then hit “Save”.
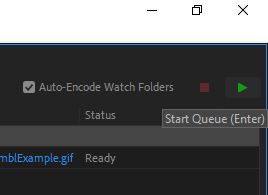
10. Finally, click on the green “play” icon on the top right of the Queue Panel to Start the Queue and export your file.
6. Post your results on Basecamp
- Once your GIF file has been saved to the specific folder you assigned by the Adobe Media Encoder, share your results with the STA who has been giving you feedback.
- If you used a YouTube tutorial that wasn’t on this KB and think would be helpful for someone else, post a link to the video on Basecamp as well so it can be added to the “More Tutorials STAs Have Used” section above.
