
One of the fundamental concepts in working on After Effects is working with keyframes. These are markers in time that allow you to tell After Effects where you want to change the value of an effect or transformation, such as position, opacity, scale, rotation, amount, particle count, color, etc. By setting these ‘markers’ and changing the values, you create a customized animation.
How to set Keyframes:
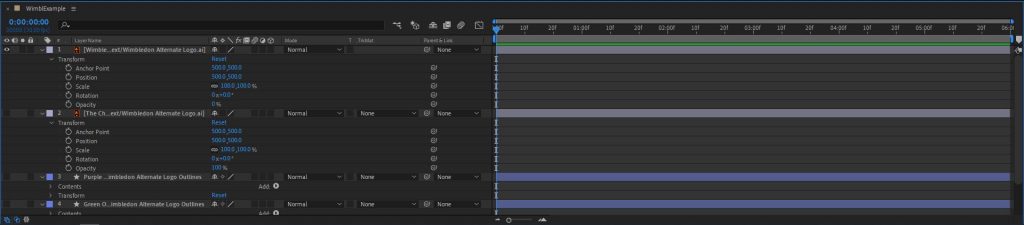
1. Expand the layer you want to edit by clicking on the right-pointing arrowhead to the left of the colored square that defines your layer. Keep expanding until you find the property that you want to keyframe.
In this example, I will be working on the Rotation and Opacity of the “WIMBLEDON” Text Layer.
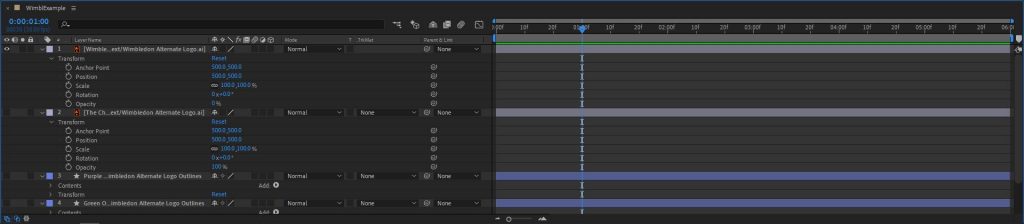
2. Set a specific time at which you want to start the animation of your layer. You can do this by clicking on the blue time marker at the top left corner of the Timeline Panel in the Layers section.
In my example, I have set the time to [0:00:01:00] (hour:minute:second:frame). Notice how the Current Time Indicator has moved in the timeline as well.
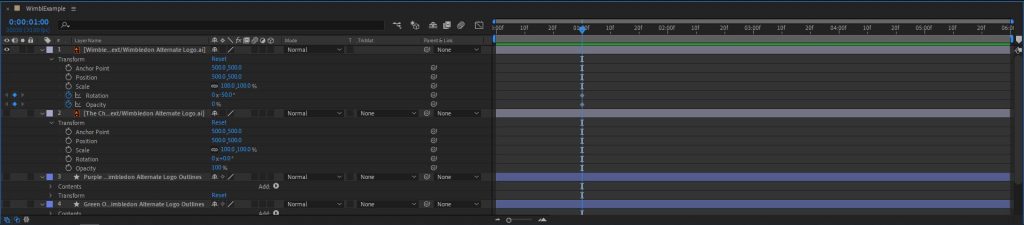
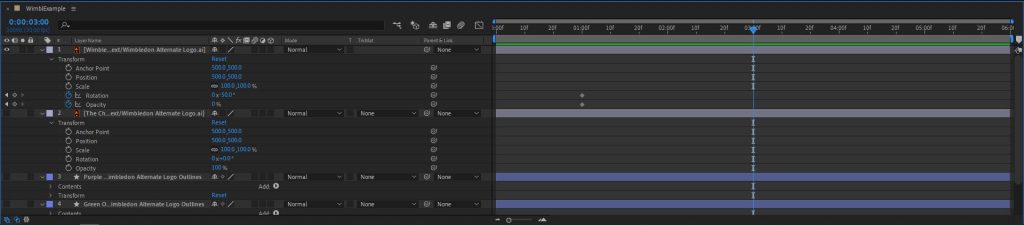
3. Click on the blue text to the right of the names of the properties to set a certain value onto a specific property of the layer and then click on the stopwatch icon to the left of the name of the property to activate a keyframe.
In this example, I have set the Rotation to [0x -50°] (zero full rotations, 50 degrees counterclockwise) and Opacity to [0%] (no opacity). Notice the small diamond shapes that have appeared on the timeline, which are aligned with the Current Time Indicator. These represent the keyframes.
4. Set a new time at which you want to edit the value of the properties you are interested in. You can do this by clicking on the time values at the top left corner or by dragging the head of the Current Time Indicator to the new time.
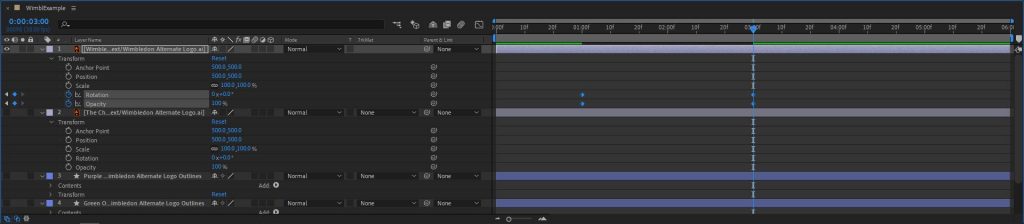
In this example, the new time at which the Current Time Indicator has been moved is to [0:00:03:00].
5. Once again, click on the blue text to the right of the names of the properties to set a certain value onto a specific property of the layer. You won’t need to click on the Stopwatch icon again, since the keyframe will be added once you are done changing the values of each property:
6. At this point, you have created the first part of your animation. You can preview this by dragging the head of the Current Time Indicator back to the first keyframes and pressing down the spacebar to play the animation.
Tip: hold Shift as you drag and the Indicator will automatically snap onto the nearest keyframe in the timeline, regardless of what layer it’s in.
As you preview the animation, notice how abruptly these animations start and end. This is because default keyframes have a linear relationship with time in which the rate at which the value of a certain property changes is always the same. A quick way of making these animations smoother is by:
- selecting the keyframes of interest
- Right-click > Keyframe Assistant > Easy Ease
Notice how the diamond-shaped keyframes have been transformed into an hourglass shape. Preview the animation again and see how much smoother the animation is.
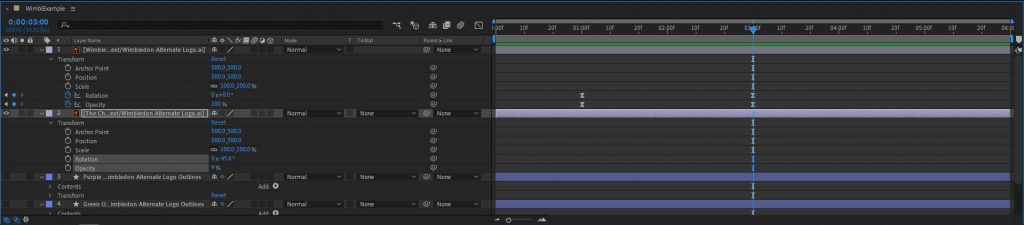
7. If you have other layers that you want to animate the exact same way as the first layer you’ve added keyframes to, you can select these keyframes and copy them (Ctrl + C). Next, select the other layers’ properties and set the Current Time Marker where you want the keyframes to start. Then paste the keyframes (Ctrl + V).
In this example, I have copied the Rotation and Opacity keyframes of the “WIMBLEDON” text layer and have pasted them at the same place onto the Opacity and Rotation properties of the “THE CHAMPIONSHIPS” text layer.

Note: If you want to move a keyframe to another time in the timeline, simply drag it and move it somewhere else. Remember that it will snap to align to nearby keyframes if you hold down Shift while dragging.