Photography Tips – By Ryan Miller/STA 2010-12
The equipment I have been using is the following:
-Nikon D300
-Nikon 80-200 2.8 AF-D
-Nikon 17-55 2.8 AF-S
My typical settings for a sunny day:
f/4, aperture priority, ISO 200, shutter automatically determined
My typical settings for a cloudy day:
f/4, manual/aperture priority, ISO 400-500, shutter controlled manually or set to automatic
Technical Setup
What should my f/stop be? I always use an f-stop of f/4. In my opinion, it gives you the most valuable depth of field, especially for portraits. A background that is blurred will make the subject stand out more, f/4 does this while making sure certain parts of the subjects body, such as ears, are not blurred out. You are left with images where the individual is in perfect focus and the background blurred.
Extending on these comments, try to use a long focal length for portraits. If you have access to a lens similar to an 80-200 f/2.8, you will be in excellent shape. However, if you do not have that type of glass or cannot reach anything below an f/4, you can follow several guidelines when setting up your photos to achieve very similar results.
First, make sure your subject stands in front of a “clean” background. A clean background entails a background that is not “busy” or with a lot of detail. You can find these types of backgrounds throughout the “six-pack” area. A basic example of a clean background can be a wall of the same color. This is most basic example I can think of, however a clean background does not have to be limited to a single color or texture.
Second, make sure your subject stands away from any sort of background if you are using a high f-stop. This concept is relatively simple; if you leave your subject near a background, the background is going to be in more detail than it would if your move the subject away from the background. The focus of your image should always be the subject. As such, if you risk having the background in clear focus, it will distract the eye away from the subject.
What shutter speed should I use? Shutter speed is not of big importance. The only thing you need to make sure is that the shutter speed is higher than the longest focal length on your lens. For example, if your focal length is 200mm, make sure your shutter is higher than 1/200 or else your image will be blurry. If the photo session is outside, you shouldn’t have to worry about having your shutter fall under this rule of thumb.
What about my ISO speed? If your shooting outside, make sure it’s low, around 200-400 max. If you have a sunny day, use an ISO of around 200 or less. If it’s overcast, use 400. Anything above this is simply unnecessary unless, for some reason, you are having difficultly ensuring your shutter speed stays above your longest focal length (see the section above).
Should I be using a built-in camera mode such as “Portrait” or should I be shooting full manual? The answer to this question really depends on the photographer’s preferences. I’ve been around photographers from Getty Images and the AP who like to control everything and as such, prefer to do everything manually, including the white balance. I’ve also seen photographers who depend on their cameras to calculate everything automatically. For me, I’ve found the Aperture priority mode (Av mode on Canon) extremely useful. The ability to control your aperture and let the camera control the shutter saves you a lot of worry on photo sessions, especially those outside where clouds can vary your speeds.
Aside: The exposure value (EV) can work wonders when combined with Aperture priority. EV denotes all combinations of your camera’s shutter speed and relative aperture that give the same exposure. On most cameras, EV will be a “+/-” button. When using it, -1, for example, means 1 full stop down (darker) and +1 would mean one full stop up (lighter). The reason why I find this tool so helpful is that it can assist with troublesome lighting situations. Let’s say your subject is standing in front of a dark shadow caused by a tree branch. Sometimes your camera’s meter will read the bright light on your subject’s face (foreground) and will overcompensate by taking into consideration the dark shadow (background). Although you are often left with a useable image, I find that a lot of shadows are lost and the image needs post-work to bring them back. To prevent this from happening, I almost always shoot with -1. Why -1? Well, I find that -1, especially with Nikon cameras will always keep shadows and distinctive lighting on the subject’s face. I always like to shoot darker because it will also help with post-editing. It’s always easier to edit with an underexposed image than an overexposed one. Underexposed images can allow more contrast and and be easily fixed with curves or levels (more on this later).
Should I use my camera flash? Depends. I’m one of those photographers who dislikes the look of flash. My background is in photojournalism and my mentors over the years (being photojournalists) always encouraged me to put it away unless completely necessary. I’ve always looked at making the situation as realistic as possible and using natural light to create neat shadows and compositions. Notwithstanding, flash can be a great addition to your portraits. I’ll admit, sometimes when I do portraits around campus (even on those bright sunny days), I wish I had a flash! So it’s totally up to you. Sometimes you will find a great background, but your subject is standing in the shade and you can’t get your subject well lit without completely blowing out your background. If you do decide to use flash, make sure you have your exposure set right and be careful you don’t overexpose your subject’s face or clothes.
Is there a particular white balance that works? Auto white balance is so accurate these days, setting your white balance to automatic should suffice. If you are unhappy with your coloring, it’s a super easy fix in photoshop (Image>Adjustments>Color Balance). In my opinion, white balance is useful in studio portrait situations where you are using strobe lighting. If you are doing photos outside, leaving your white balance at auto will almost always give you a good, usable coloring on your subject.
Working with the Subject
Becoming comfortable with your subject is an absolute must to create images that everyone is happy with. A subject that is uncomfortable will be stiff and not themselves. The result: a picture they will most likely hate. When you first meet your subject, ask them how their day is going and start small talk. There isn’t much time to actually get to know them but you can inquire about the feature they are being shot for, talk about their major and/or future ambitions (if it’s a student) and try to ask questions relevant to their field of study (if the subject is a pre-law student, a question regarding a major legal case will get them going). The goal is to make them forget about what they are doing! I always take the subject to my farthest location first. By doing this, I get a couple minutes to chat and to let them relax around me. By the time you get to the first location, they should be fairly comfortable with you and the camera. Another tip to get your subject comfortable is to limit the amount of directions you give them. I usually check three main things before snapping a picture. Is the lighting on the subject good? Is there anything that looks abnormal (such as hair in the face, etc)? Is their posture/pose alright? If the answer to all three questions is yes, I snap away. This leads me to another point, snap all you want! If digital cameras have one advantage, it’s the ability to take a ton of pictures and not worry about the cost of film. If the subject is in a nice position, snap away….start close, work your way back and maybe side-to-side. Heck, if all the images in the sequence turn out horrible, you can delete them with a mouse click.
Good Locations Around Campus
There are so many spots around the “six-pack” area, formally known as the South Mall. I’ve never really had to go outside the area. A couple spots I really like are:
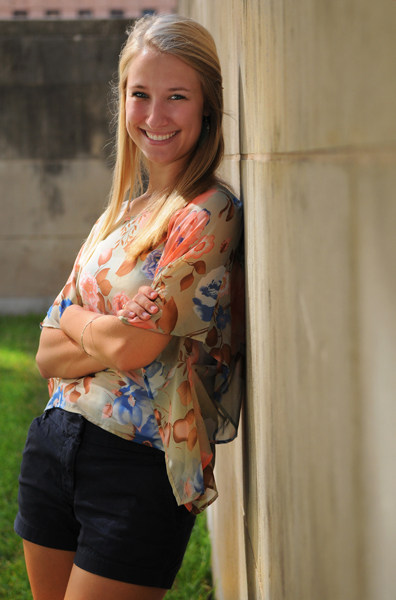
The outside area surrounding Calhoun Hall. This place is a gem. So many cool angles and the light can be gorgeous in both sunny and cloudy weather. If you need a guaranteed good shot, go here. See below for some example shots.
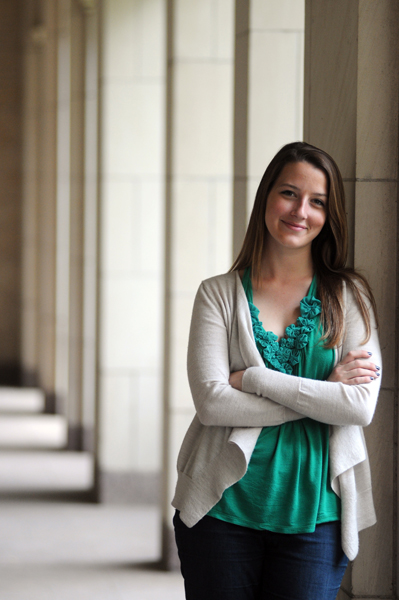
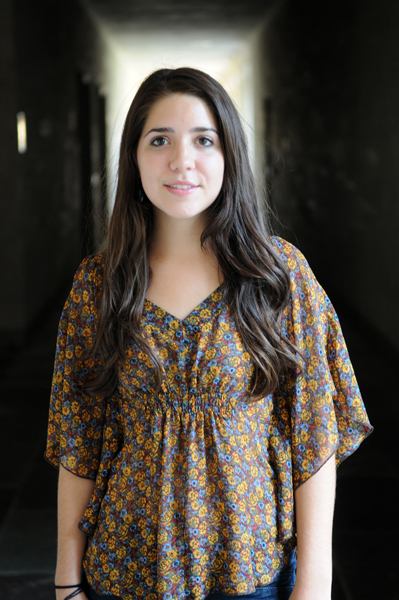
Great big windows can be found in the hall connecting Calhoun and Homer Rainey Hall. The windows in here are great and you can definitely get away with a good indoor shot of your subject, regardless of whether it’s cloudy or sunny. One thing: students often flock to this area to rest or study so often there will be students that could interfere with your shot.
Outside, left bottom side of Waggener Hall. From the back of Mezes, head towards Waggener Hall. Walk past the left side of the building, you will notice you will head down a small hill. Once you get to the bottom, turn around and head back the way you came but notice an area opens up where you can enter. There are some neat clean walls you can play with. I’d recommend bringing a wide angle lens because space is limited and there is only so much you can do with a telephoto.