
Follow these steps to edit a photo so that it can be made into a College of Liberal Arts Photo ID suitable for display on a webpage.
You will be making photo IDs for faculty, staff, and graduate student webpages. All photos will be edited for this uniform size: 240 x 300px. There will be exceptions to the 240 x 300px size, although this will be rare.
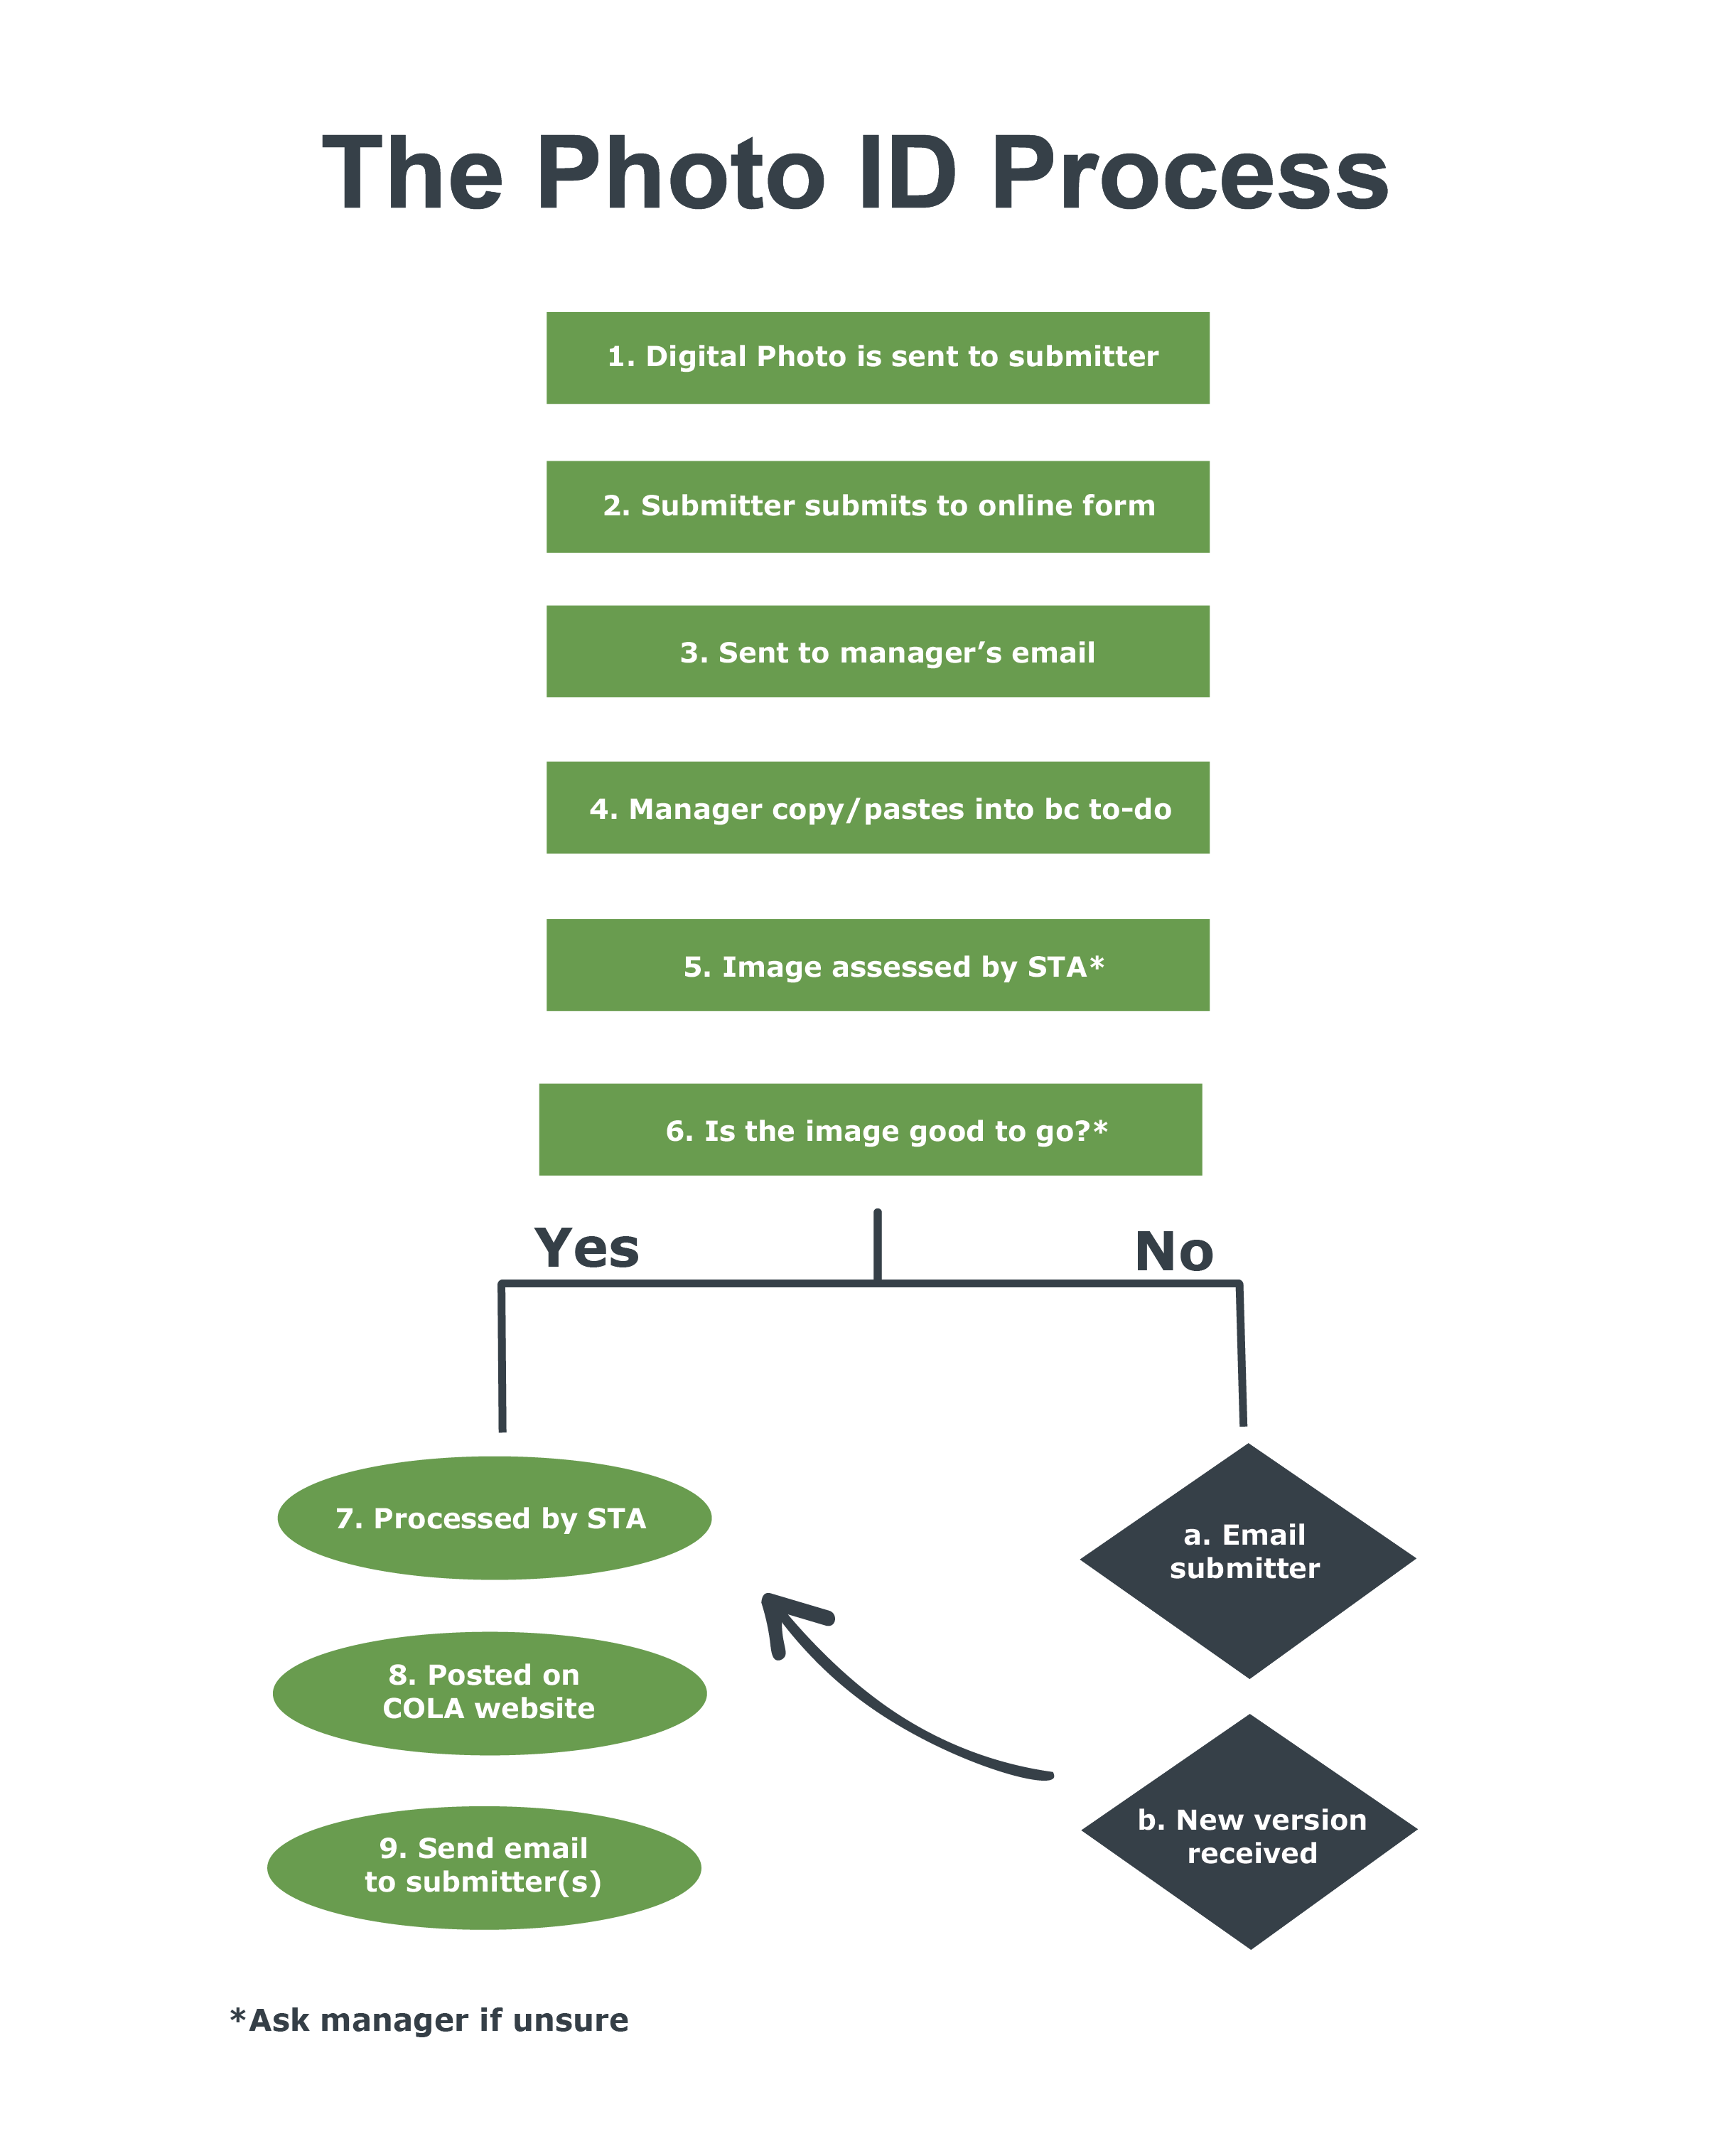
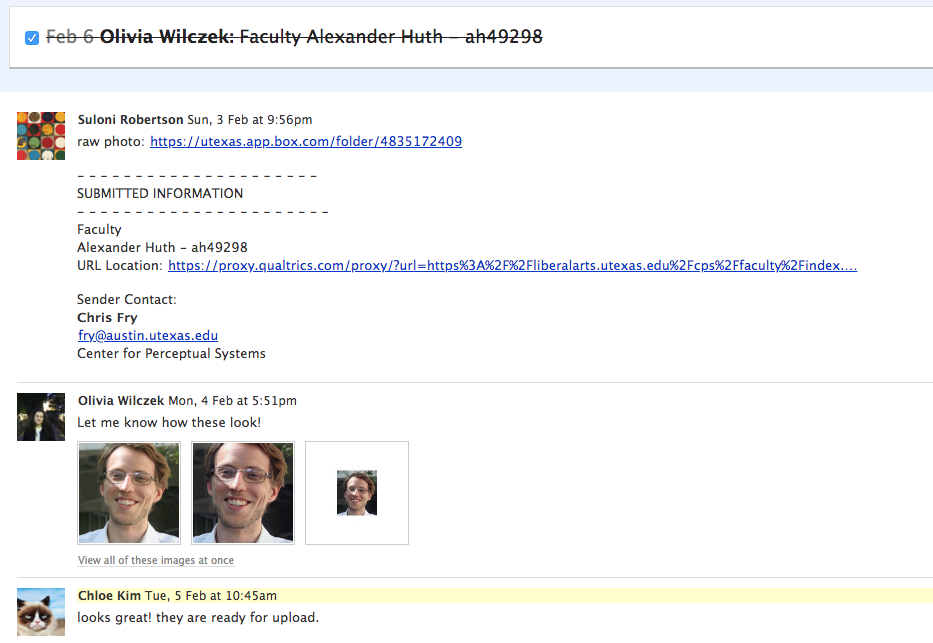
Editing photo IDs is one of the recurring tasks that design STAs will be responsible for. See the below graphic for the general process and protocol for photo ID edits and communication:
For faculty and graduate students, you will submit their photo ID as both their profile image and list view image. The list view image will show up in search results, and the profile image will show up in the body of their webpage. For staff, only a list view image will show up on the website.
“List view” a list of all faculty, staff, or grad students
“Profile image” one profile image on a profile page – only found in faculty or graduate students

Now that you know what you’re going to make, take these steps to edit and upload the photos you’ve been assigned.
Before Any Editing…
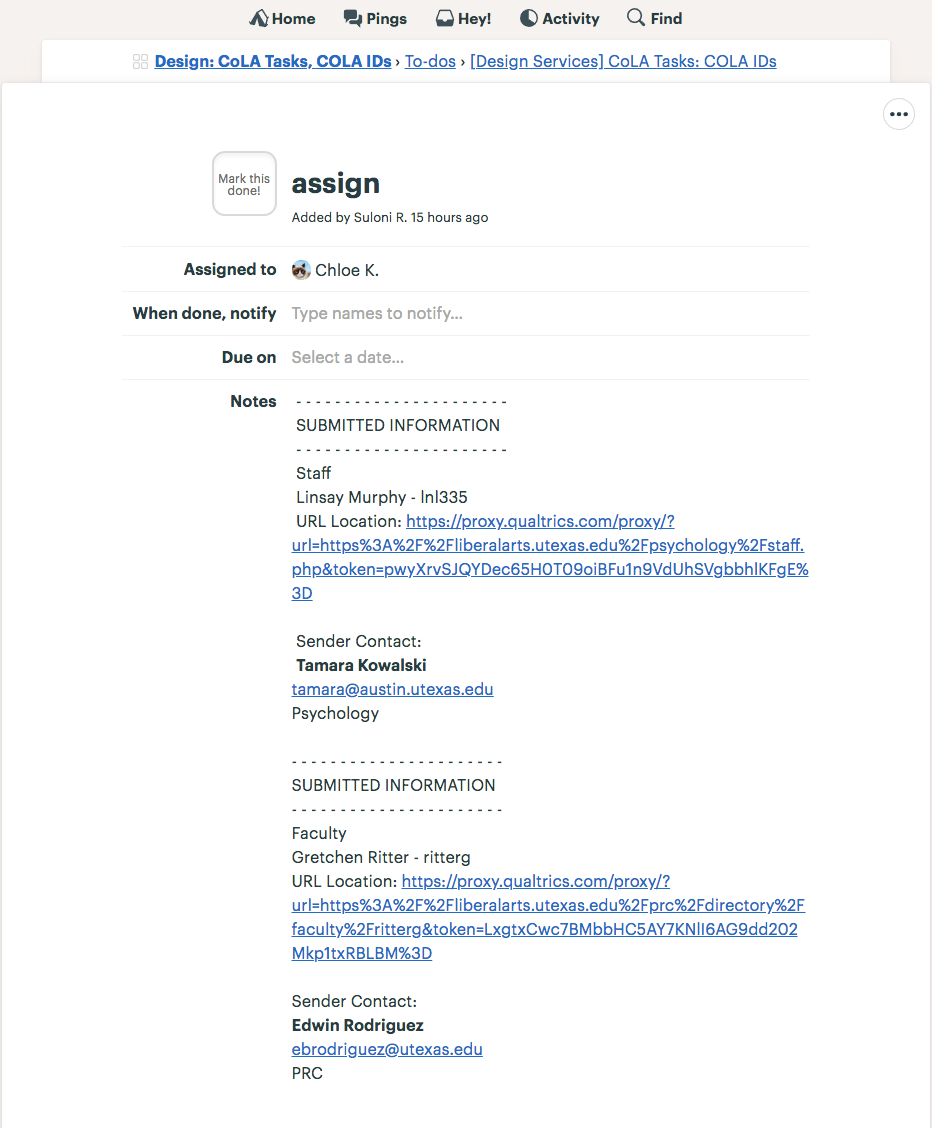
1. Check your Basecamp to-do’s for the Photo ID assignment.
Basecamp To-Do’s contain information about the staff, faculty or graduate students whose photo needs to be updated (including name, EID, and position) and also includes the “Submitted by” contact info.
2. Find the raw photo submission
You’ll need to find the raw photo that you want to edit. The raw photo is going to be stored in our LAITS PHOTOGRAPHY BOX folder:
https://utexas.app.box.com/folder/4835146337.
Look at the sender email in the Basecamp assignment. Cross reference that email with the most recent additions to the LAITS Photography folder. Many times, the raw photo submissions are not named correctly, and will not appear in searches.
For this training, you will download, edit, and write a mock email for 2 photos in each category of difficulty in this Box folder:
https://utexas.box.com/s/1310yclqeogyo8h00cggversw11xww5r
3. Make sure the file is named properly
When you’re looking up the name in the BOX folder, make sure that the file that you want to down load is named correctly according to our file naming conventions: https://utexas.app.box.com/file/361742649853
Handy Naming Convention Chart – always refer to this:
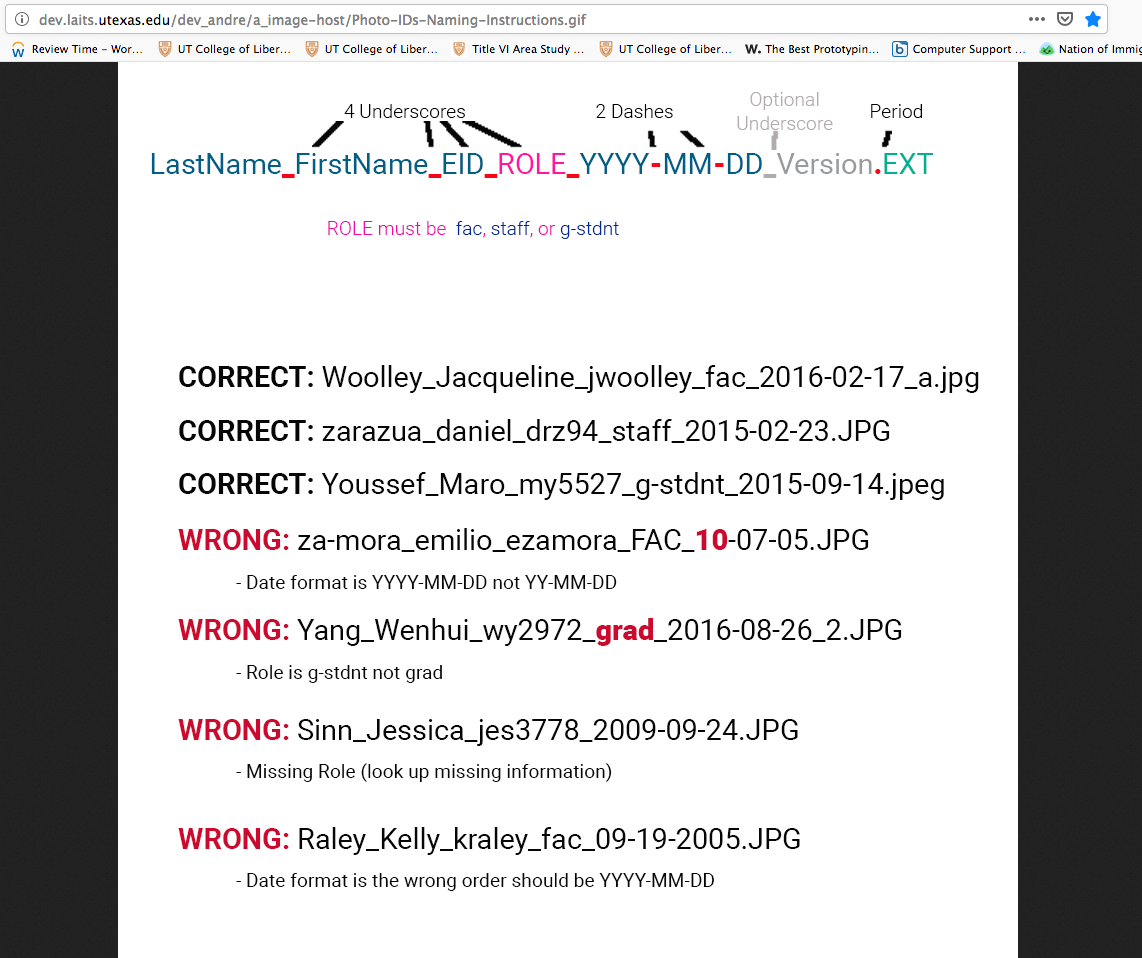
Correct convention: Lastname_Firstname_EID_Role(fac/staff/g-stdnt)_YYYY-MM-DD.jpg
If the photo that the client submitted does not follow the naming convention, please rename the file in the BOX folder to exactly follow the correct naming convention.
Downloading files
1. Download the photo from the BOX folder 
2. Also, download your guided Photoshop templates from this BOX folder with all the resources needed for photo ID processing: https://utexas.box.com/s/szxnjdpz0jgp3r2el55knpla2069i8vj

Submission guidelines and special cases
Generally, we allow most photo submissions, unless they:
- are significantly too small
- are cropped too close to the face
- are completely backlit
- use a an obvious and unprofessional social media filter
- are a group photo
Beyond these, there are some special cases for photo ID editing.
This image was created when the standard sizing was 200 x 300. While the image itself is good, its ratio does not allow it to fit into the standard sizing. As such, it has been cropped to 200 x 210. Ask your supervisor if you are unsure about cropping an image.
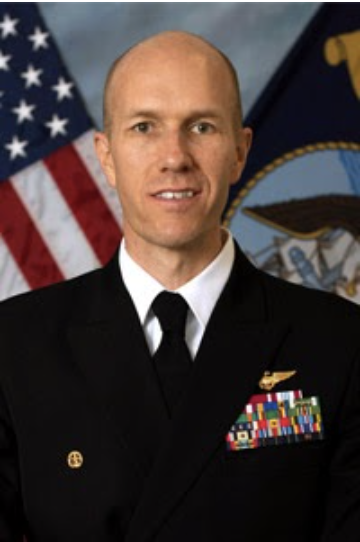
Naval Science photos should include medals
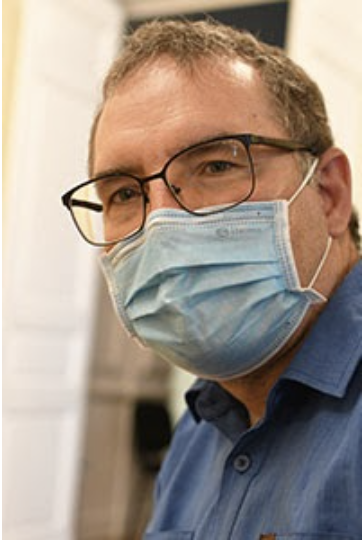
Faculty photos with masks are okay
Photos for body of faculty profile pages
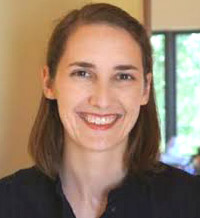
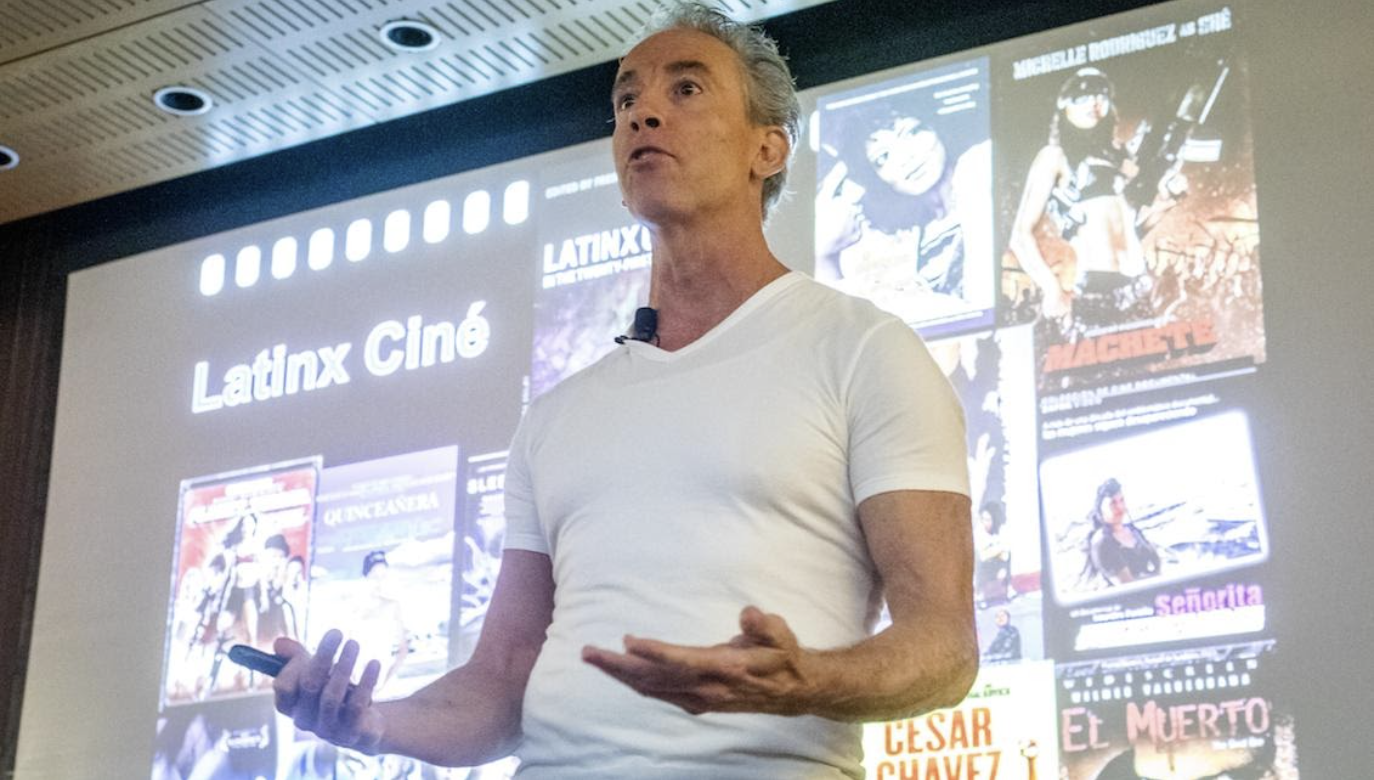
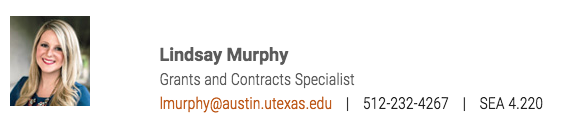
Some photos not meeting profile picture (240 x 300) guidelines are still okay to use in the body of a faculty member’s profile.
For example, the photo below does not meet profile picture guidelines, but because the faculty member wanted it on their page, we included it in the body of the profile page.
Editing photo IDs
1. Open the guided templates and the photo up in Photoshop.
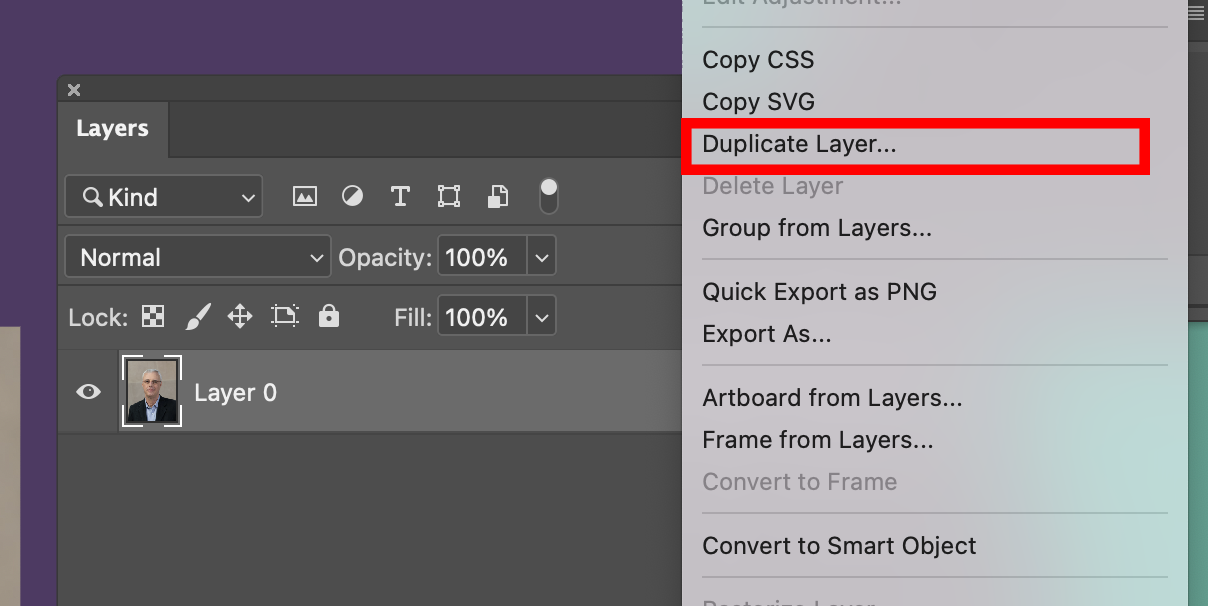
Before editing the photo, duplicate the original file by right clicking on the layer and click “duplicate layer.” This is just a safety precaution, in case you mess up your edits or you want to compare your edited photo with the original one.
2. Edit the photo – make sure it looks as NATURAL as possible. Essentially, you want it to look like it has natural lighting, natural coloring, and is cropped correctly.
Important tools:
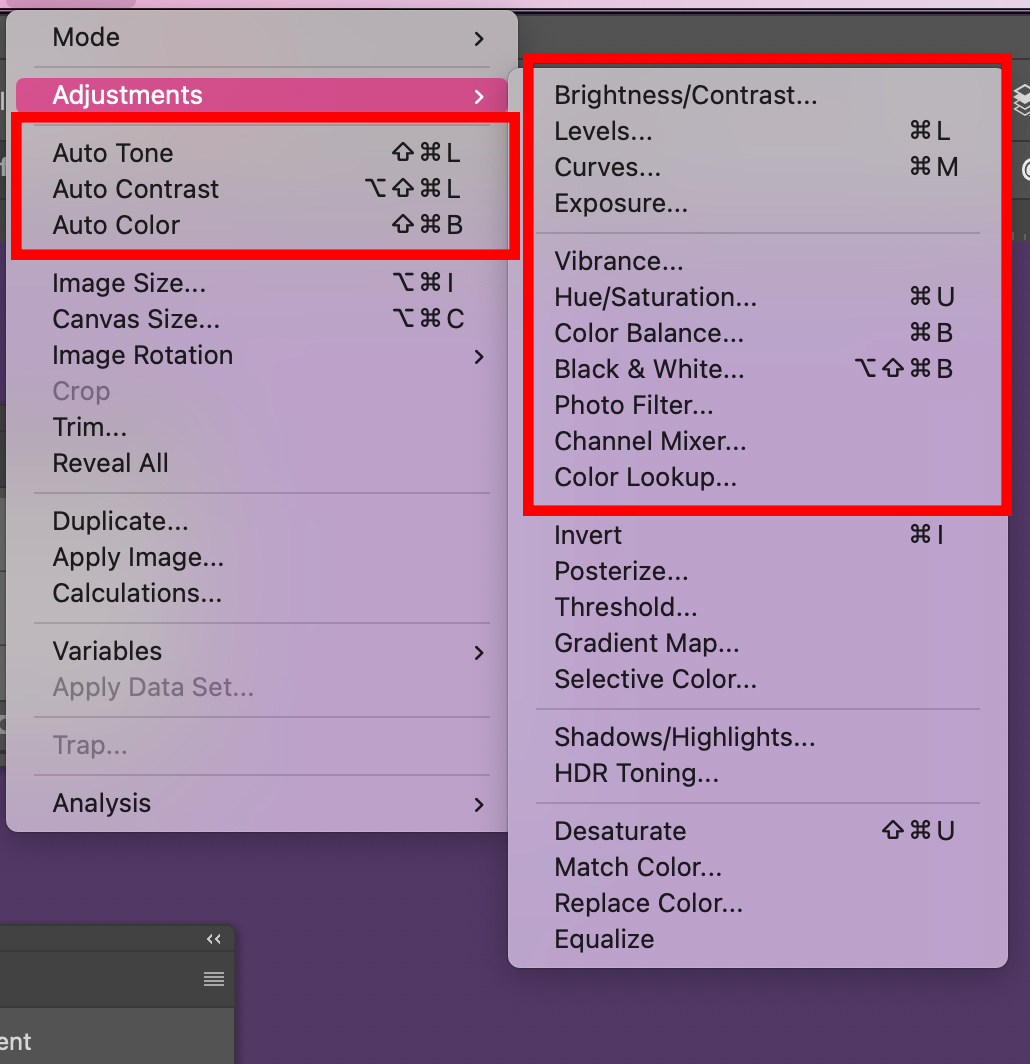
- The majority of photo editing tools can be found in image > adjustments. Most important are brightness/contrast, vibrance, hue/saturation, and color balance
- Brightness – Adjusts how light/dark the image is.
- Contrast – Adjusts how drastic the visual difference is between the darkest and lightest colors. Most professional portraits lean towards having a bit more contrast than you may find in real life.
- Vibrance – Takes parts of the image that are less colorful and adds more color to them. This is very important as it can add color/life to an image without it getting too intense.
- Saturation – Similar to vibrance, but adjusts every color in the image. Only use this if the whole image needs more color.
- Hue – Changes the colors in the image entirely (you probably will never need this.
- Color Balance – Takes the lighting of the image and can recolor it to be cooler/warmer/neutral. This is very important as many images are submitted with filters that cause them to appear too cool or warm.
A few more advanced tools:
- You can also use the auto color/tone/contrast tools, but keep in mind these use an AI system that may not always do the best job. You’ll need to tweak them!
- Exposure – Based on the exposure tool that cameras use, can adjust how much light is present in the image. This tool is similar to brightness, but tends to only affect the lighter parts of the image. Use this if the image is overexposed (light is too intense), or underexposed (image is too dark.)
- Selective Color – allows you to focus on a specific color in the image that you want to edit. For example, if you want the image to appear less red, select the red from the image and use the slider to lower the amount of red.
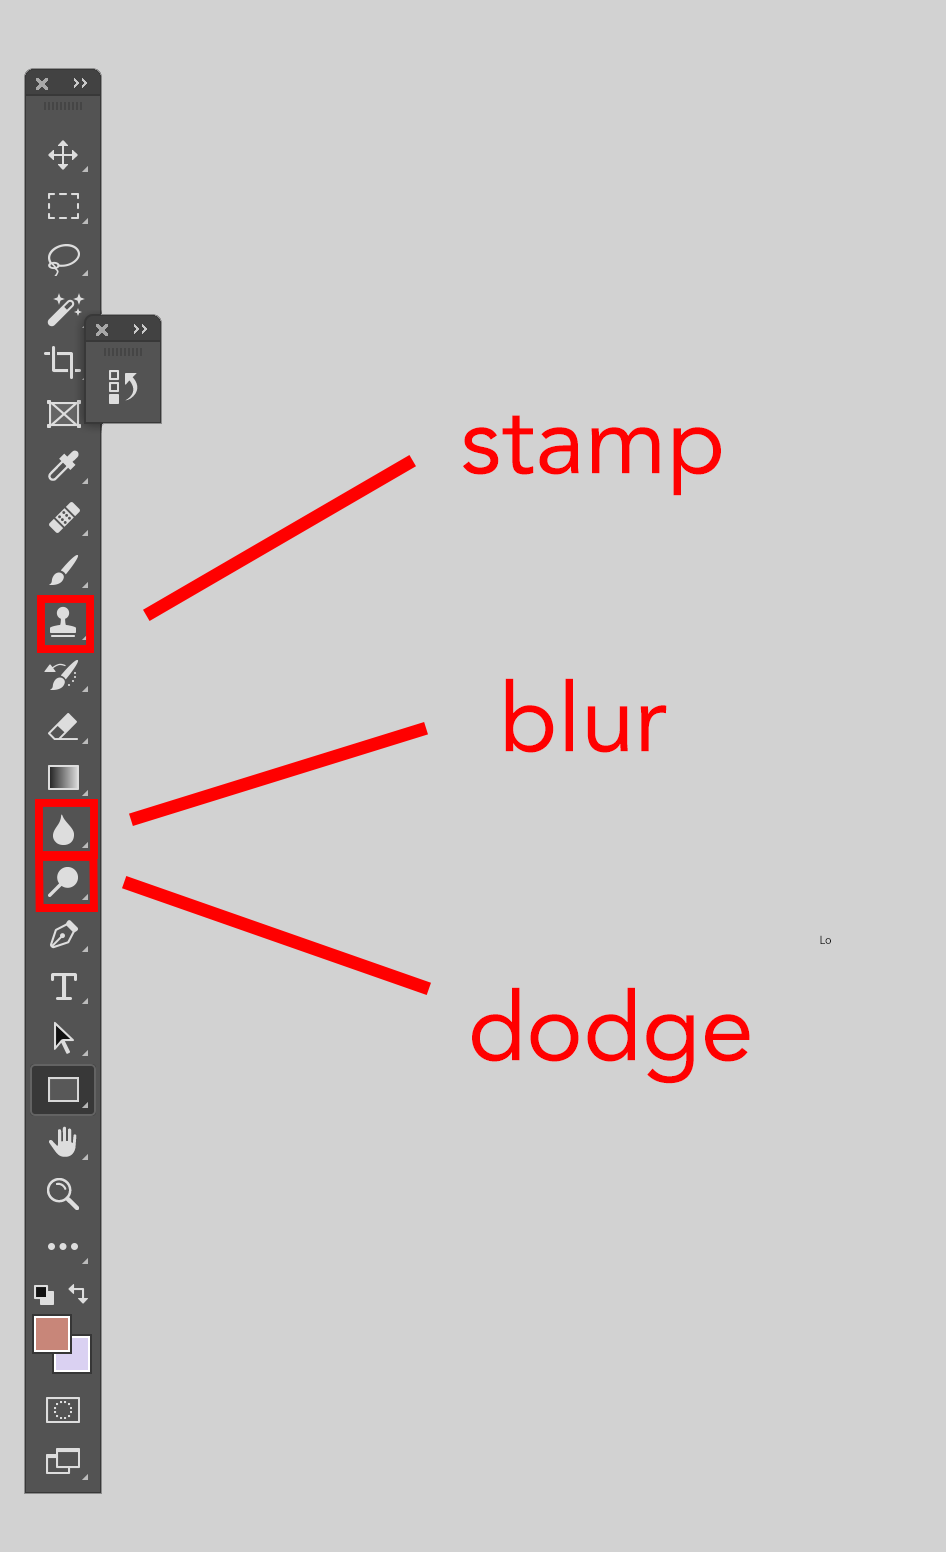
A few tools you may need from the side bar:
- Blur – a tool that can selectively blur parts of the image (for example – a distracting background)
- Dodge – lightens specific areas of the image (good for shadows)
- Stamp – use this to make one part of the image look similar to another. This is rarely needed, so don’t worry about it for now.
3. Make the cropped version
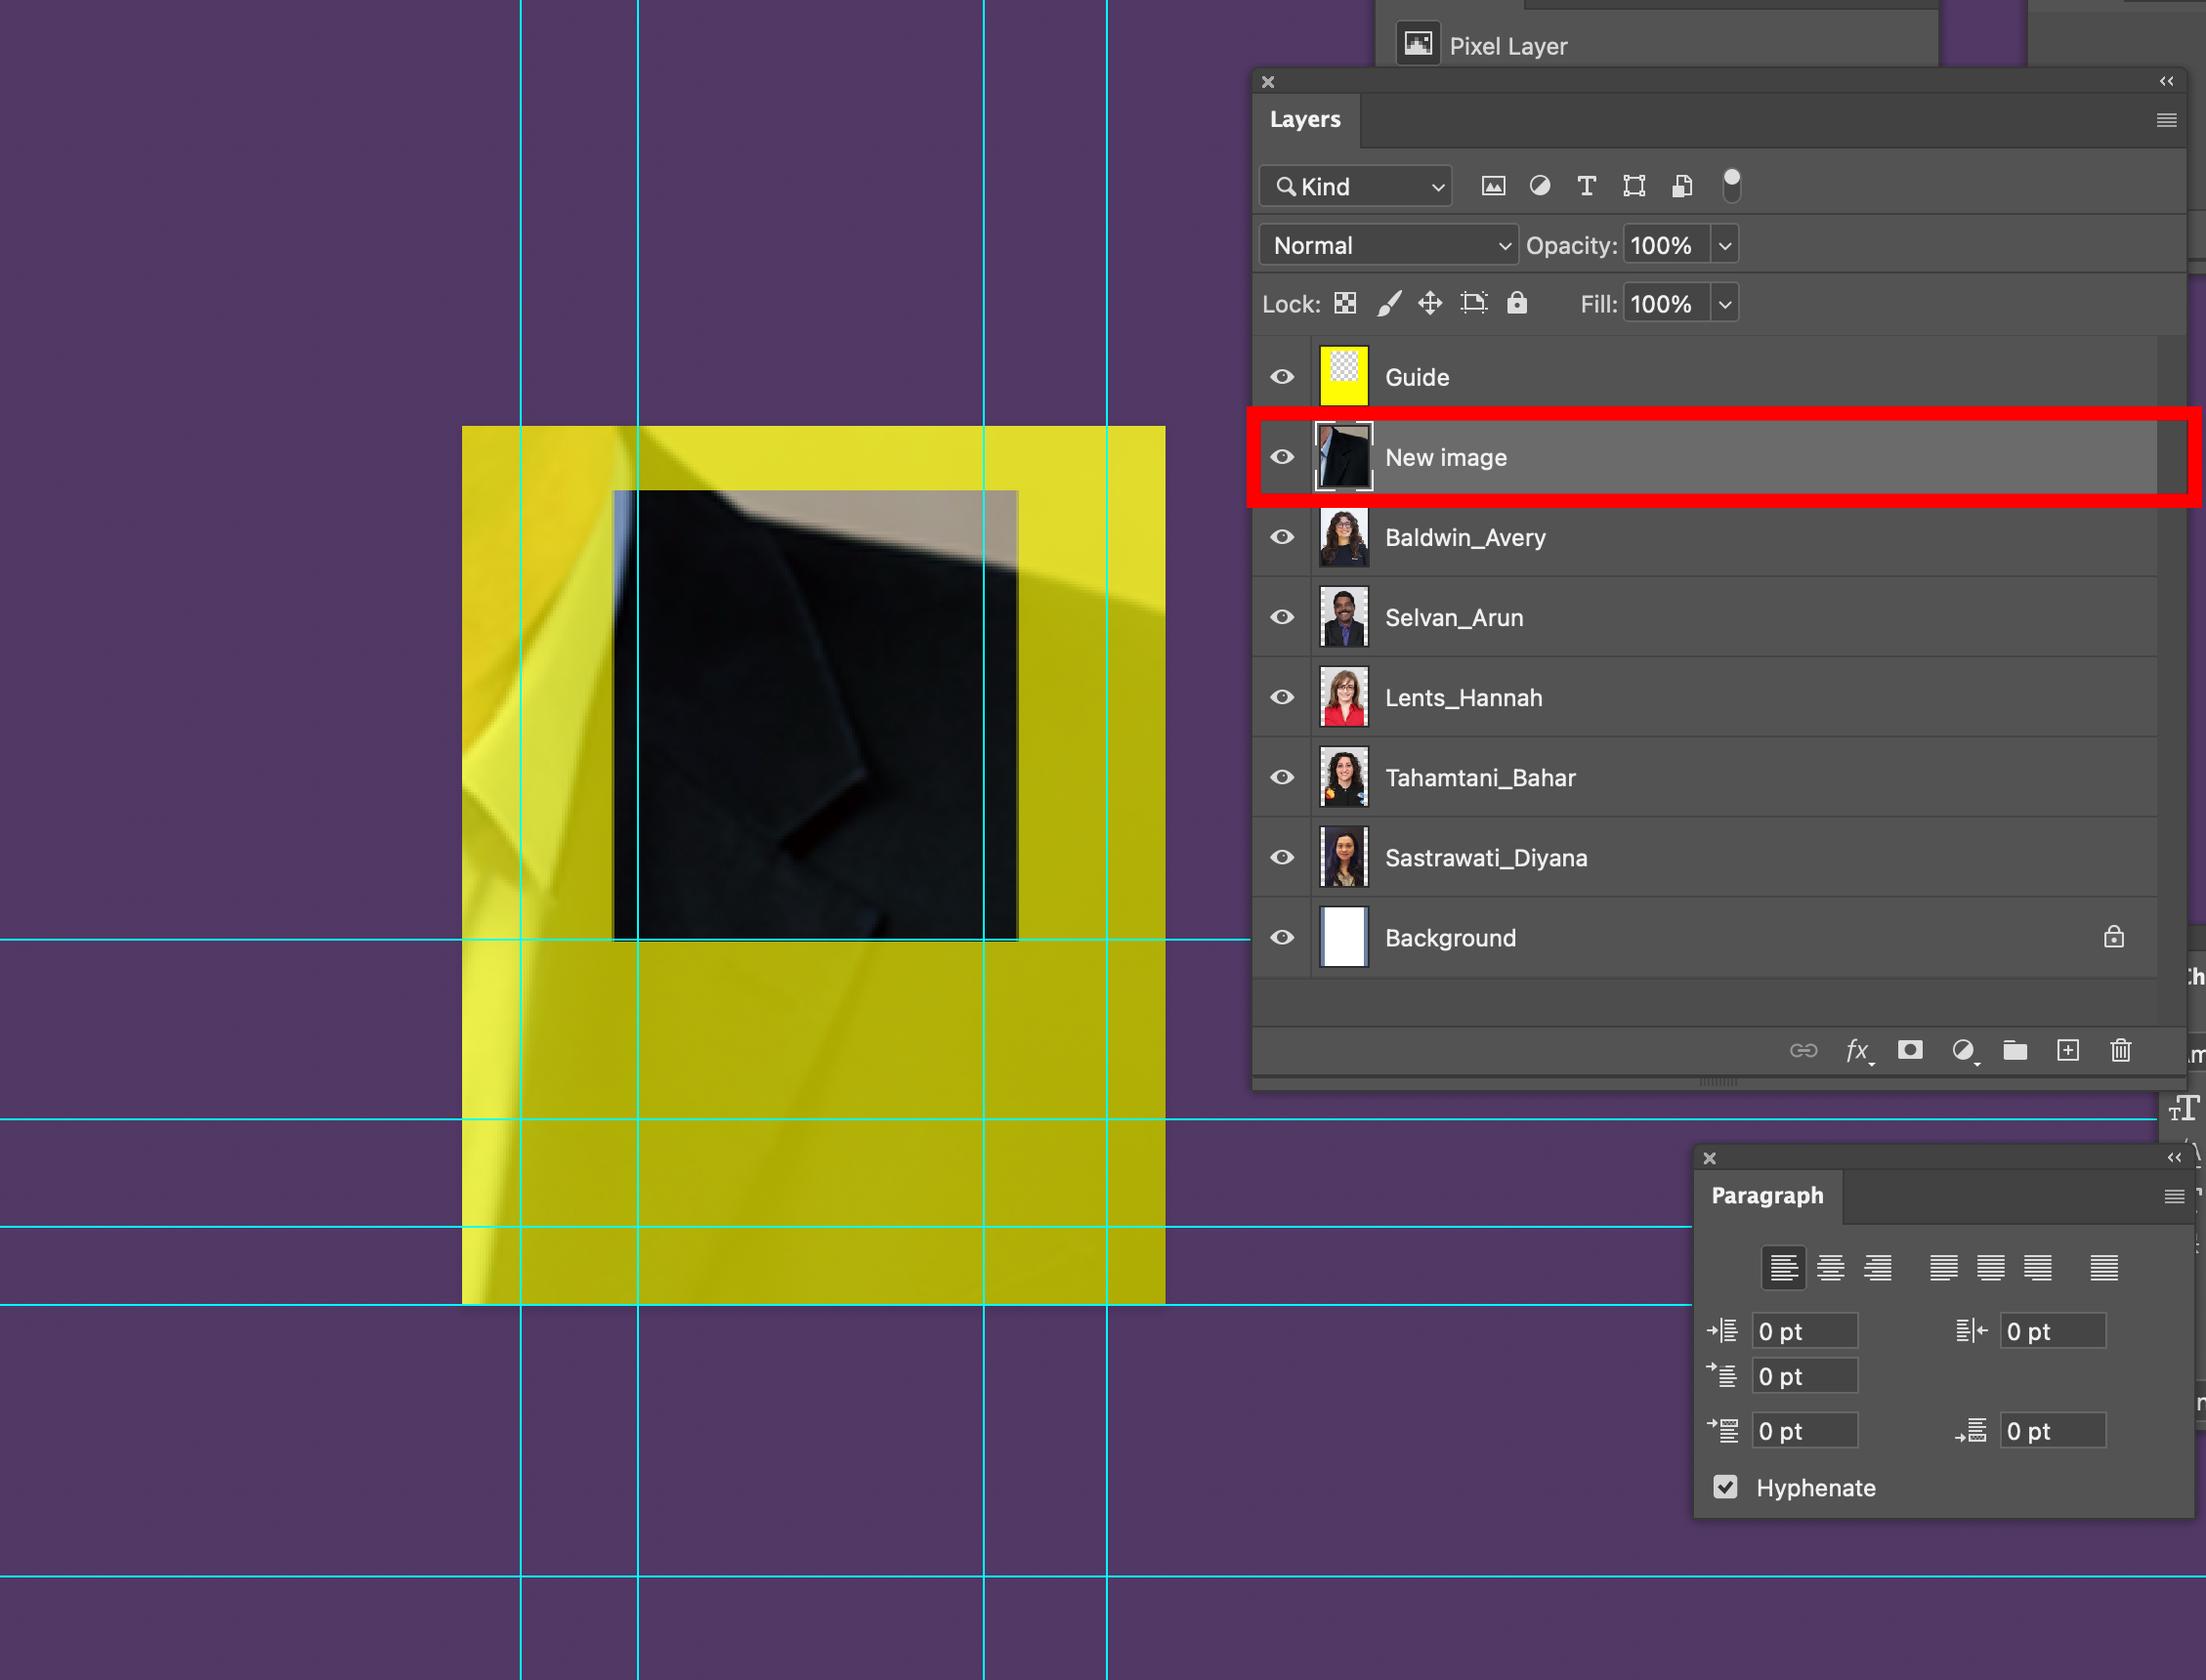
- Once your edits are approved, open up the 240 x 300 photo reference .psd.
- Copy and paste your edited image into this psd. Make sure the image is on a layer above the reference images but below the yellow reference box.
3. Command + T to select the image and press down SHIFT as you adjust the image size to fit onto the canvas. Holding down SHIFT while resizing preserves the aspect ratio. Some versions of Photoshop are the opposite, so don’t hold down SHIFT if it doesn’t preserve the W/H ratio.
- Prioritize maintaining the 240 x 300 size over fitting the face in the square. If the image absolutely cannot fit into the 240 x 300 size, please consult your supervisor about making an exception.
- If the image is too small, do not try and expand it to fit 240 x 300 (this will make it more pixelated.) Instead, work with the original image size and see if it can be cropped similar to 240 x 300. Alternatively, you may need to request a new photo or a higher quality version of the photo.
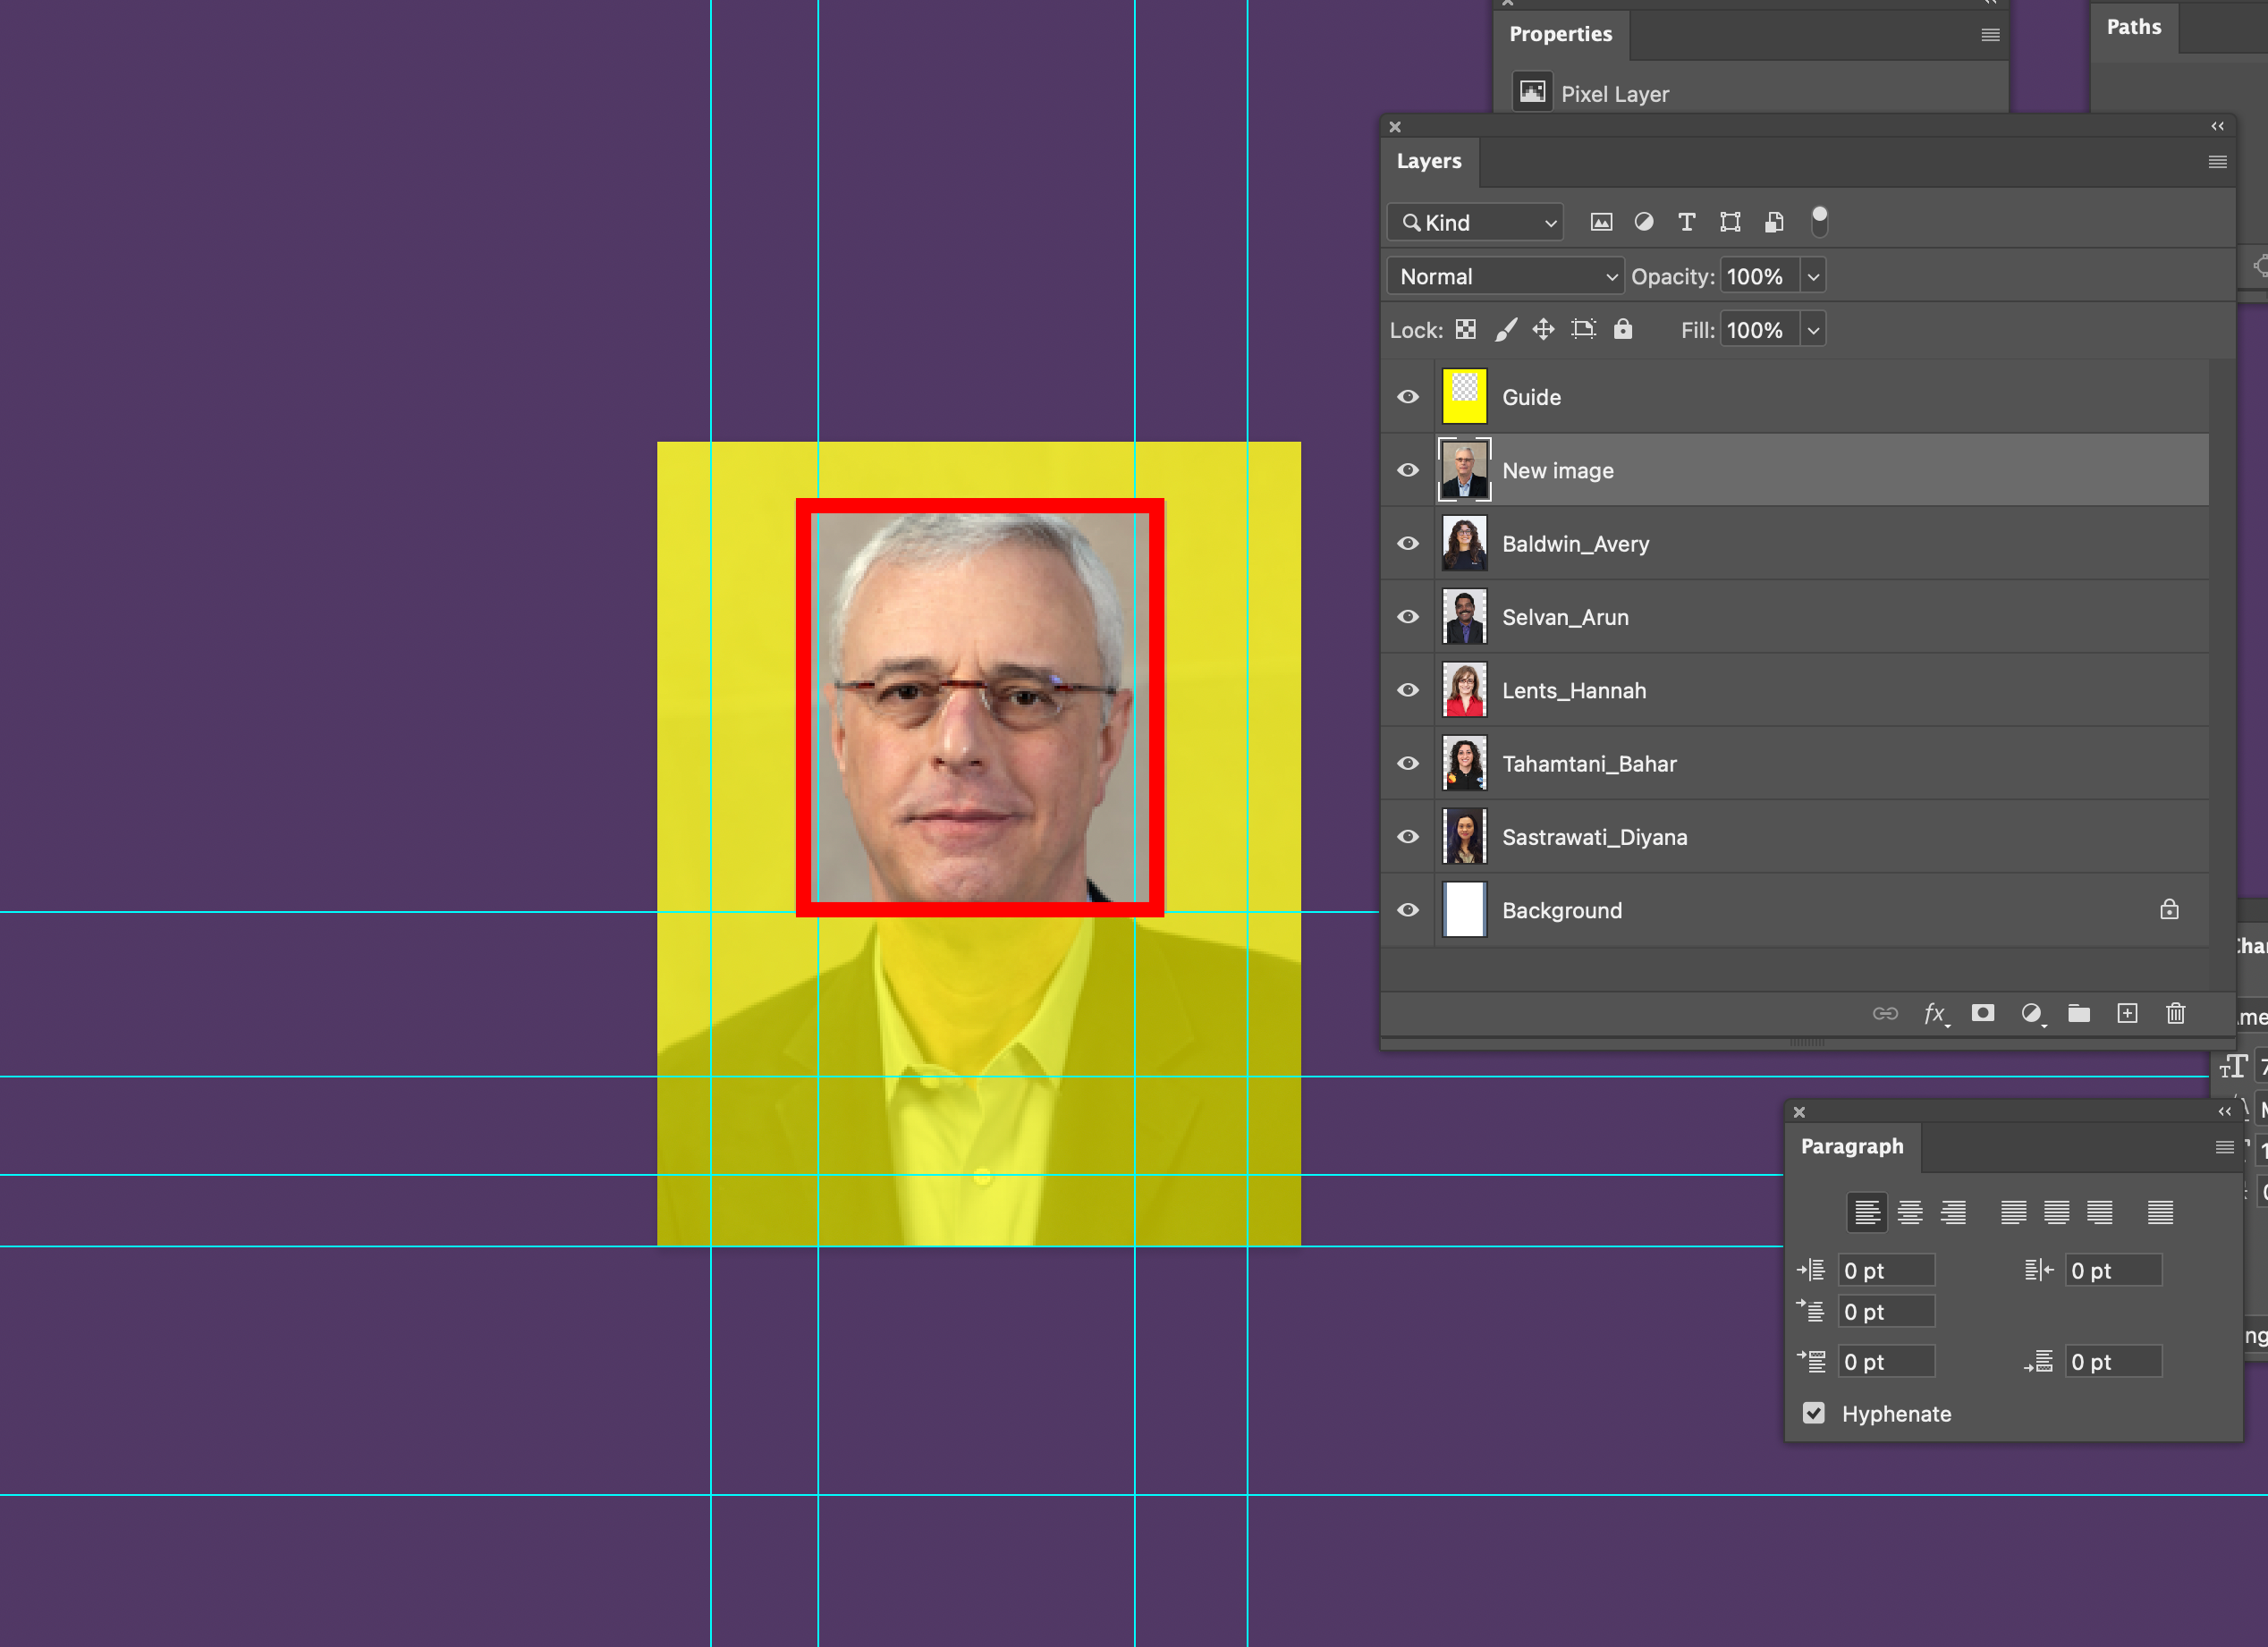
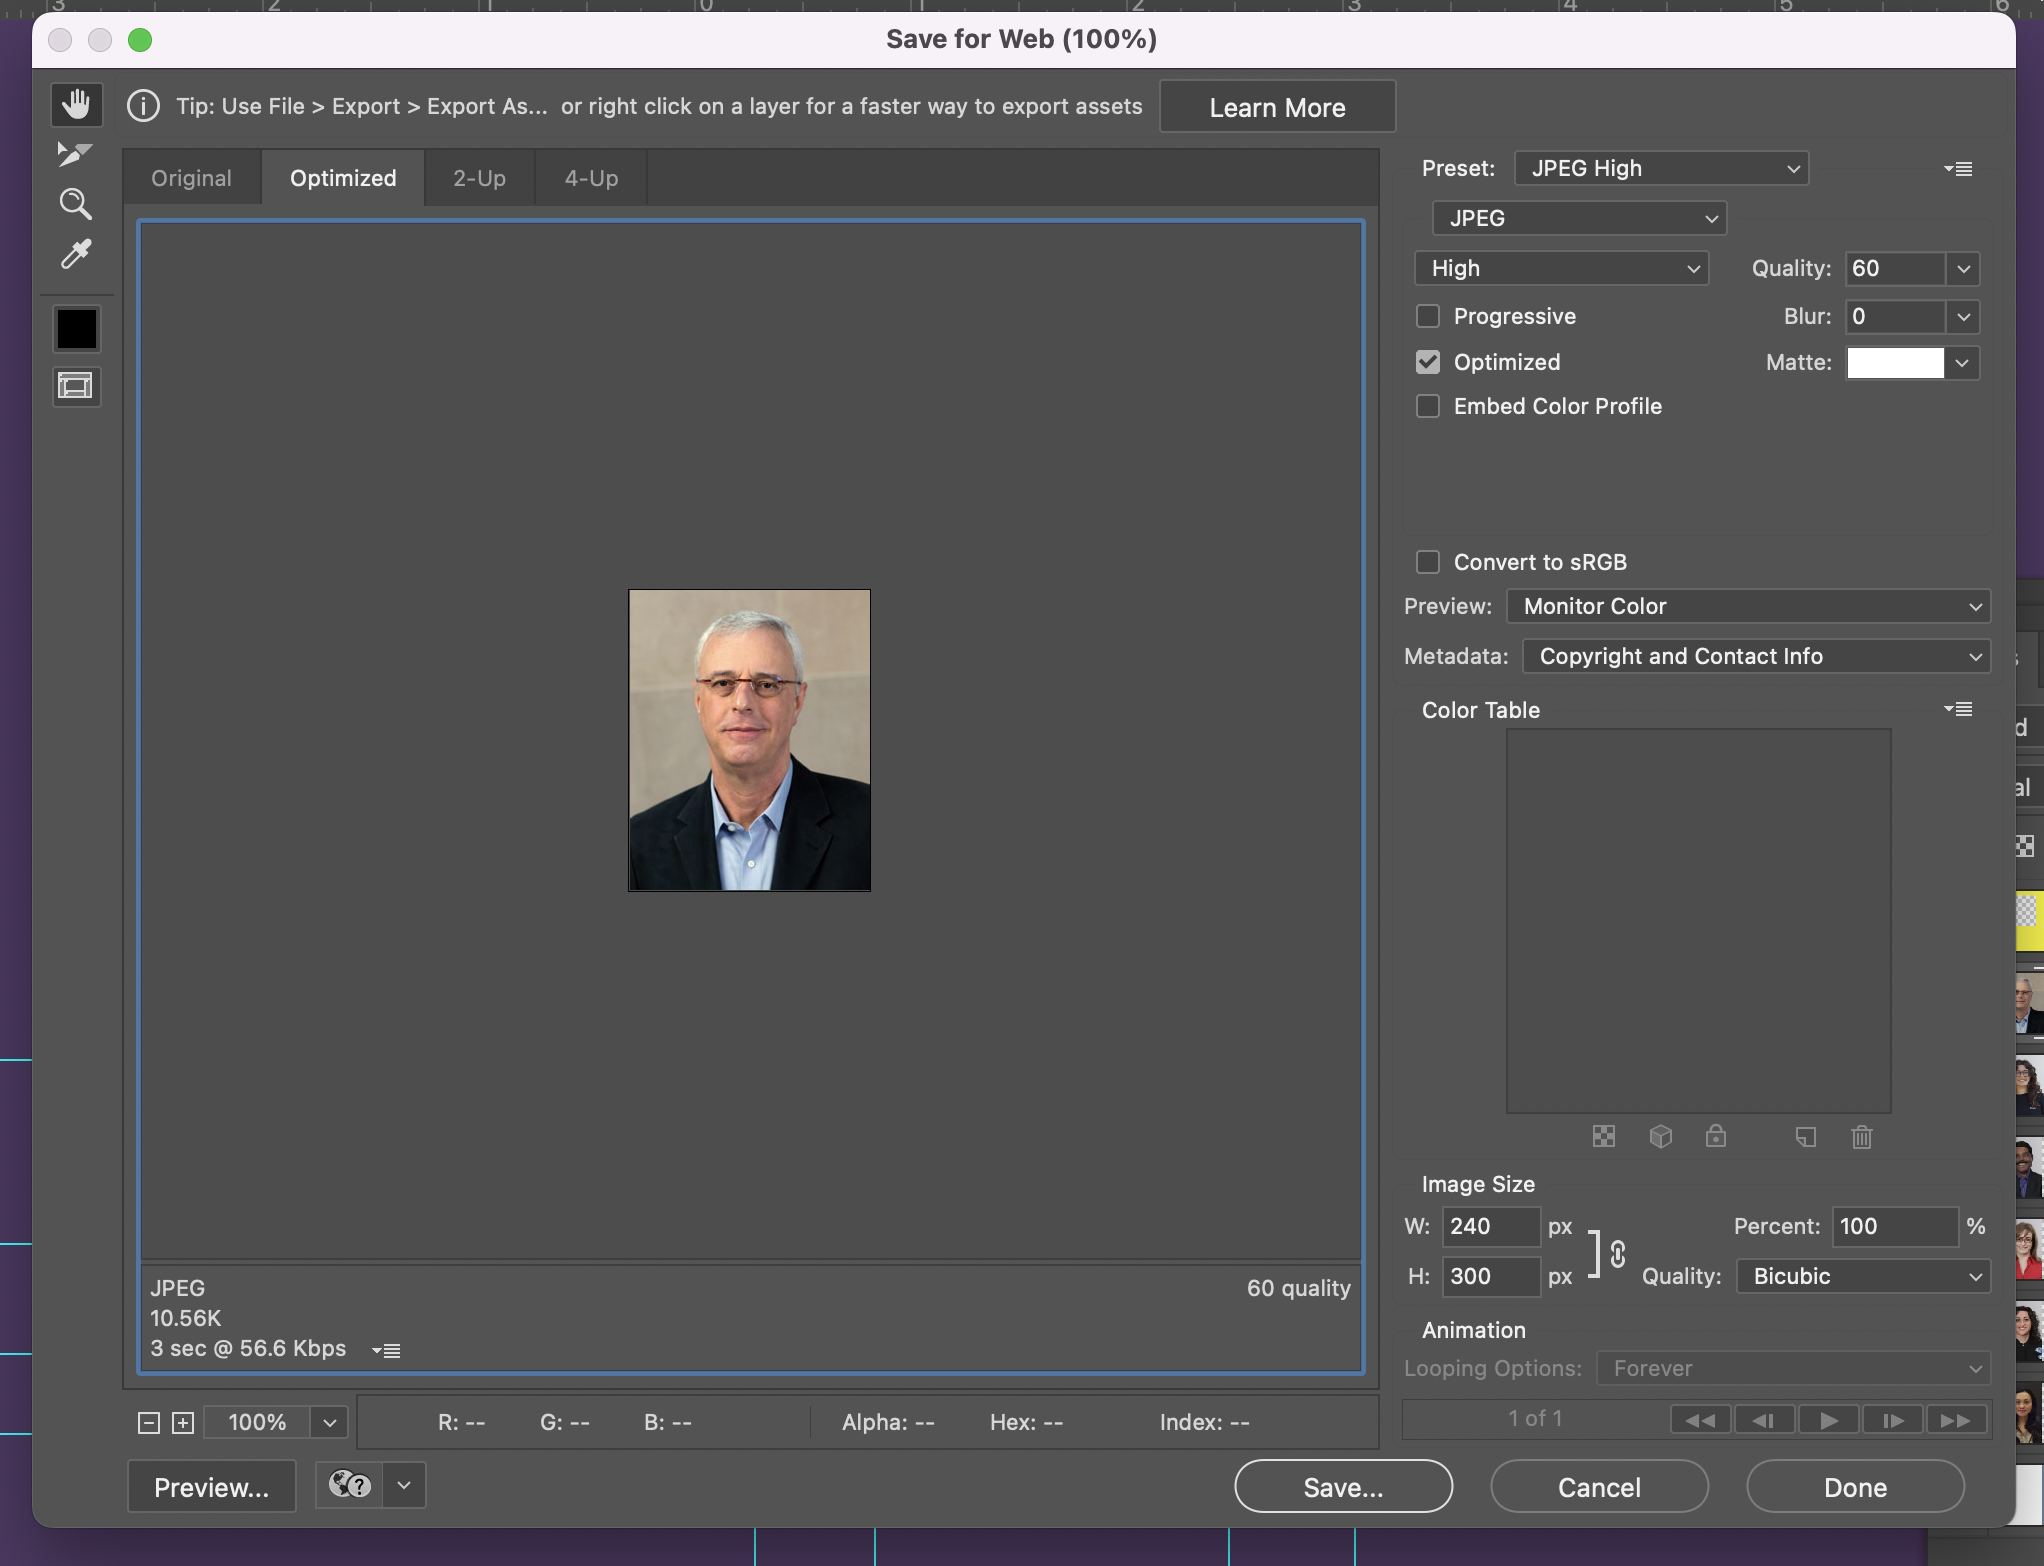
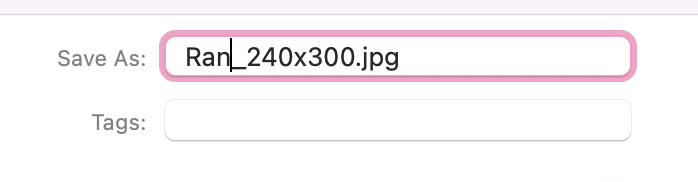
4. Once positioned correctly, remove the yellow reference box (click the eye on the left of the layer). Then, go to File > Export > Save for Web. Make sure you are saving it as .jpg (other settings should be set automatically). Personally, it’s easier when saving the file names as “their name_image size” (ex. “maria_240x300”).
5. Upload the edited photos ALONG WITH the original photo (before any edits) – so a total of 2 images – to your ID to-do on basecamp. Make sure your supervisor and STA mentor are added in the to-do comments section.
On that comment, ask for approval or suggestions before uploading your edited files to the Cola Web Editor. * Engage in the approval process for all of your ID to-do assignments, until your supervisor gives you the go-ahead to skip the approval step.
(ask for approval any time though, when you are unsure of your edit, or if you have any other ID related question (-:)
6. Once you get the approval, upload the photos onto the COLA Web Editor: https://colaweb.la.utexas.edu/
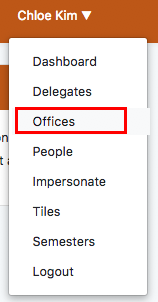
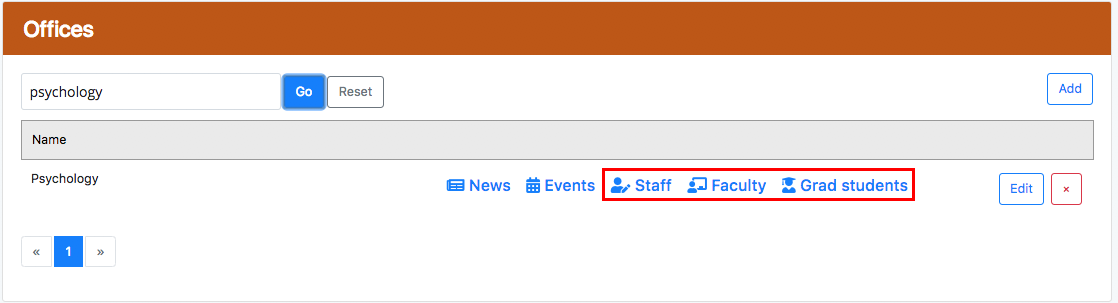
7. Go to the top right corner and click on your name, and click on “Offices.” Then go to the appropriate collage that the individual is in and click the appropriate title (Faculty/ Staff/ Grad Student) and search for their names.
OR, you can go to “People” and search for the client’s UT EID.

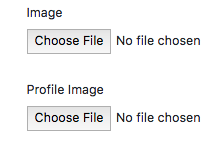
8. Click “Edit” and upload the photos. Remember,
- Image (for both faculty/grad students and staff – the list view image that shows up in search results)
- Profile Image (only for faculty/grad students – the profile image shows up in the body of their page)
9. Check to make sure their photos have been updated by going to their official UT site (you’ll probably find this by Googling their name; helps when you type in UT Austin along with their name when searching).
10. Send email notification. Follow the email templates found in this KB:
Photo ID Email Templates
You do not need to notify graduate students who have sent their own photo.
At times, you may need to send emails regarding photos that do not fit guidelines/are missing, etc. These can also be found in the email templates KB.
Remember :
- When sending any email regarding photo IDs, please cc Suloni and Valerie.
- When posting about photos in your blog, do not use the name of the individual in the photos .