In this training, you’ll learn how to create your own miniature, infinitely-looping animated gif using the timeline tool in Photoshop. You will create between 5 and 10 Photoshop layers which will be converted into frames for your animation. Your design should mimic 8-bit style graphics (pixel art) and be composed of solid black pixels on a transparent background. The end product will be a small, black-and-white-style gif, although there shouldn’t be any white in your final design.
The examples below were created by former STAs. You can download any of them and open them in Photoshop to see the layers that were used to create them:


![]()
![]()

![]()


Step 1: Create Layers for Your Gif


First, you’ll need to come up with a concept for your animation. Start to visualize the frames that will make up the animation; if you want you can sketch them out on paper first.
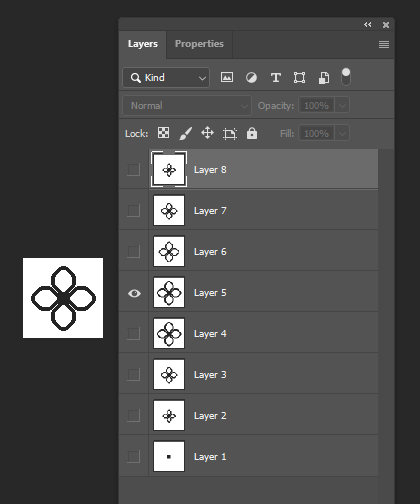
Then open a new 80 x 80 px document in Photoshop to start creating layers for each frame of your animation. A frame can represent a single layer or a configuration of layers.
The background layer cannot be animated, so make sure to start on a new layer or convert the background layer into a regular layer.
Follow these specs when you’re creating layers your gif:
- 80 x 80 px document
- 5-10 layers total
- Only use opaque black (#000000)
- 8 bit, pixel style
- Transparent background
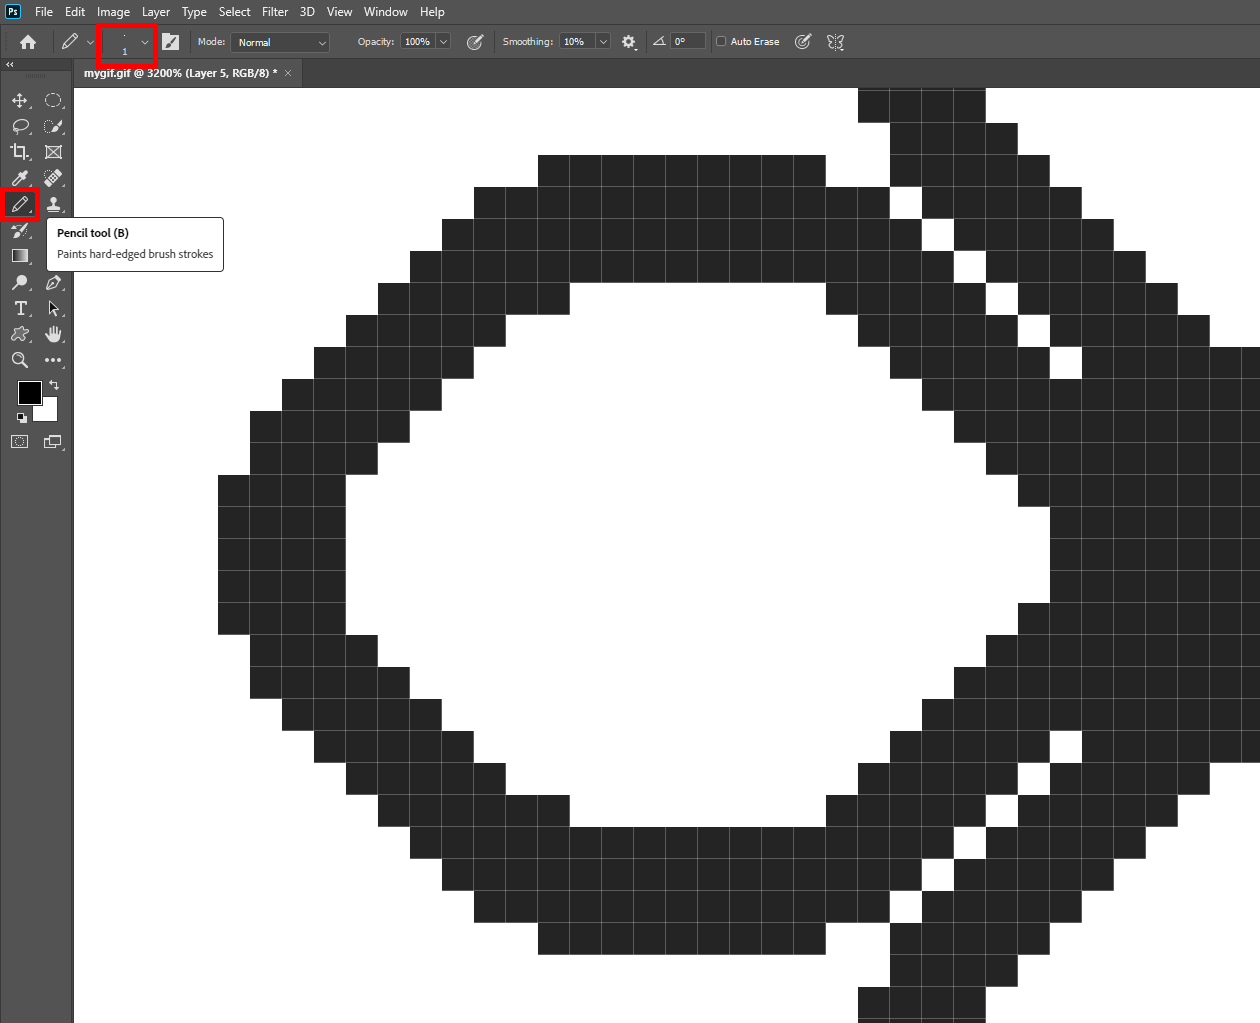
Make sure you’re editing your design on the pixel level. A good way to do this is to zoom in on your design in Photoshop and select the pencil tool. Resize the pencil to 1 px and select black as your color. This will allow you to fill in one pixel at a time.
There should be no gray or white in your final design, only black pixels.
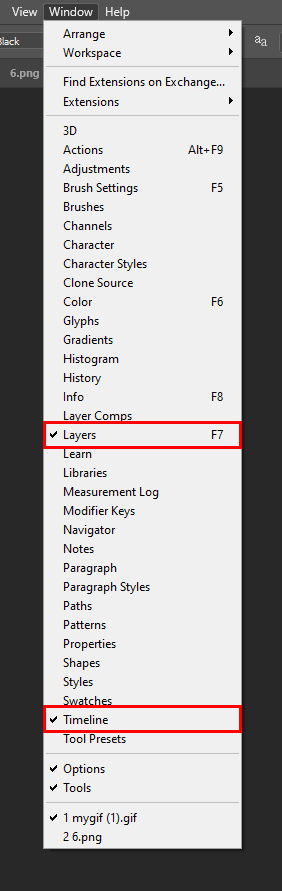
Step 2: Open the Timeline Window
When you’re ready to start animating, you can open the timeline window.
Click on Window and make sure both the layers panel and the timeline window are selected.
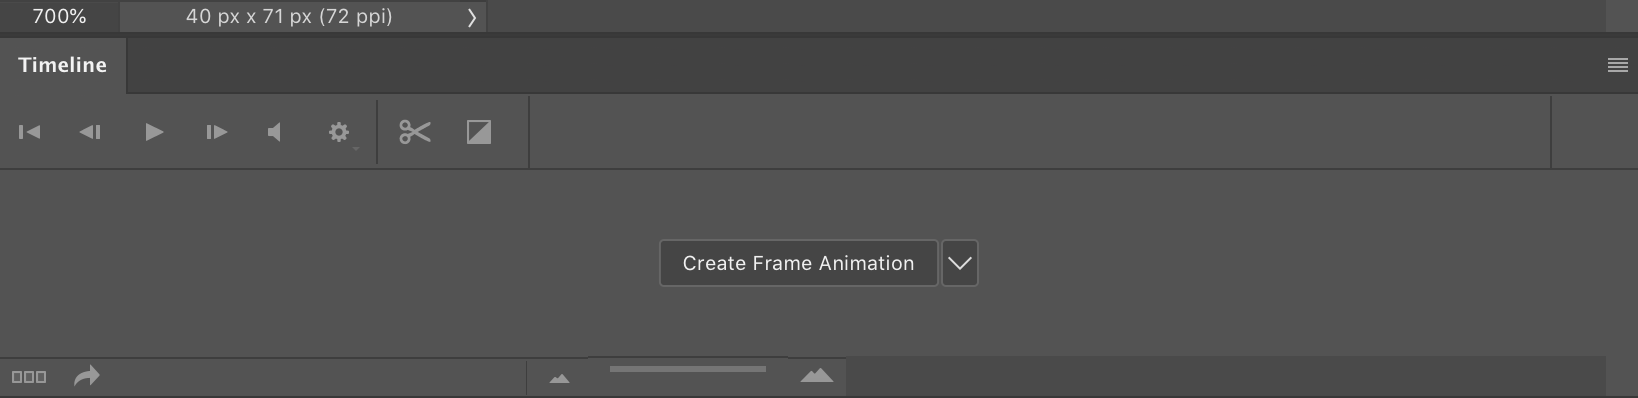
Step 3: Click ‘Create Frame Animation’
From the dropdown menu that appears in the timeline window, click on the button to create a frame animation.
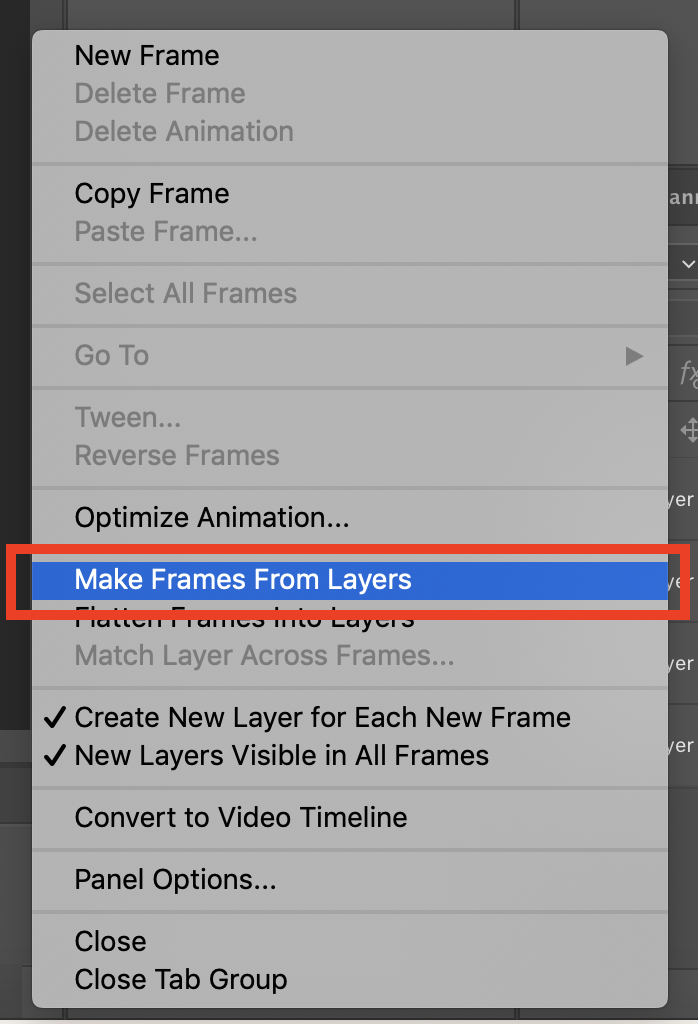
Step 4: Make Frames From Layers
Then convert all your layers into frames.
1) Click on the menu button in the timeline panel.
2) Click on Make Frames From Layers.
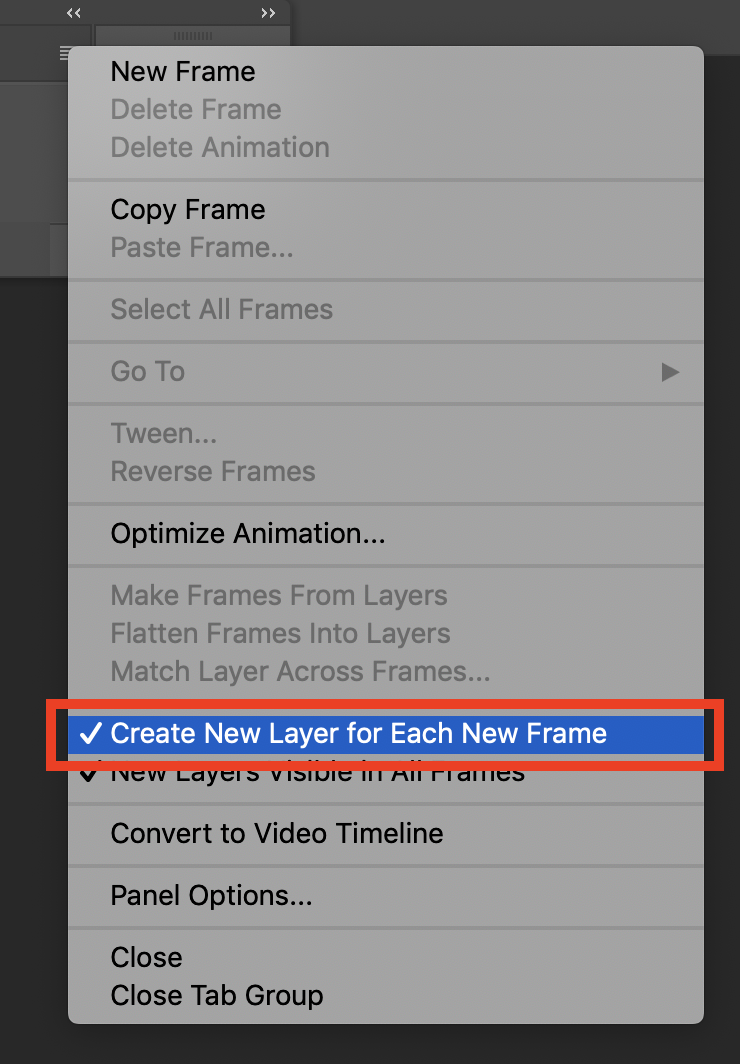
Step 5: Create a New Layer for Each Frame (Optional)
Now all your layers have been converted into frames. To add new frames at this point, you can either 1) Create new a new layer for each new frame or 2) Edit a single layer across multiple frames. (To do the latter, skip the step 6.)
1) First, select all of your layers (go to Select > All layers or press alt + command + a on a Mac)
2) Then click on the menu button in the timeline panel (horizontal bars in the top-right corner)
3) Select Create New Layer for Each New Frame.
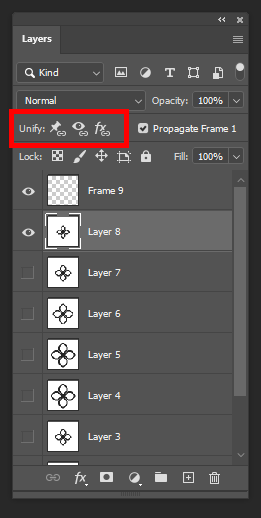
Step 6: Unify a Single Layer Over Multiple Frames
If you want to use a single layer across multiple frames, you can use to unify tools in the layers panel. When you check one of the unify buttons, any change in position, visibility or style will be applied to all the frames within an active layer.
- Unify Layer Position
- Unify Layer Visibility
- Unify Layer Style
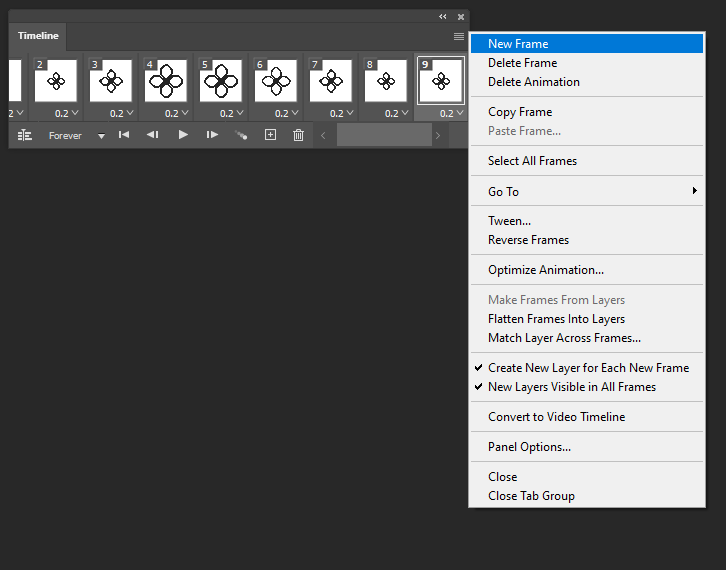
Step 7: Add, Delete, and Edit Frames
Preview your animation by clicking on the play button in the timeline window. You can keep tweaking your animation; if you want to add new frames or delete frames, click on the menu button.
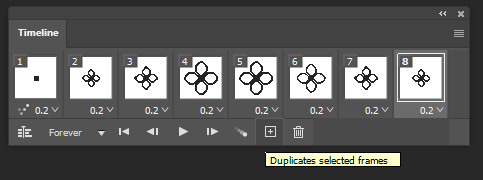
You can reuse frames by pressing the duplicate button:
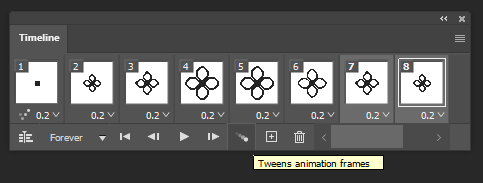
You can also use the tweening feature, which allows you to create intermediate frames between selected frames. This is really useful for creating a fade in or out, or moving an object across a frame.
Select the layer(s) you want (use shift + left-click), then click on the tweening button. If you select more than one layer, the new frames will be added in between the selected layers.
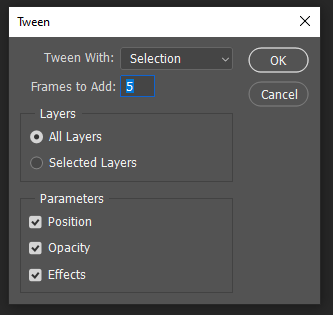
Then choose the number of new frames and the properties you want the modify (position, opacity, effects).
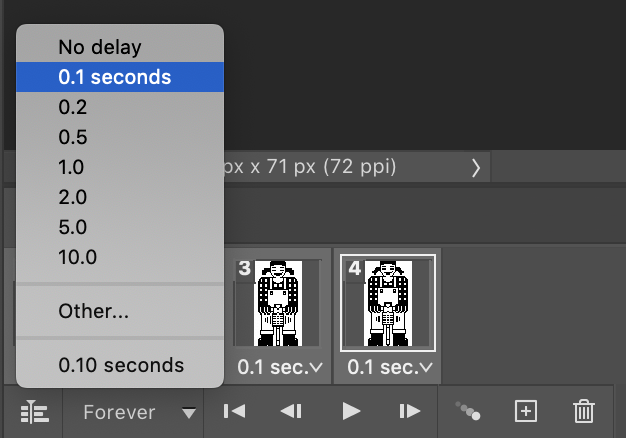
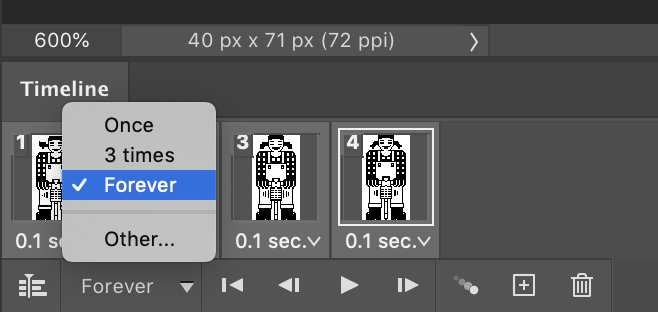
Step 8: Set the Frame Delay and the Looping Frequency
1) Highlight all your frames to edit them at one time.
2) Select the amount of delay you want between your frames (depending on how fast you want your gif to be)
 r
r
3) Then make sure the looping frequency is set to forever.
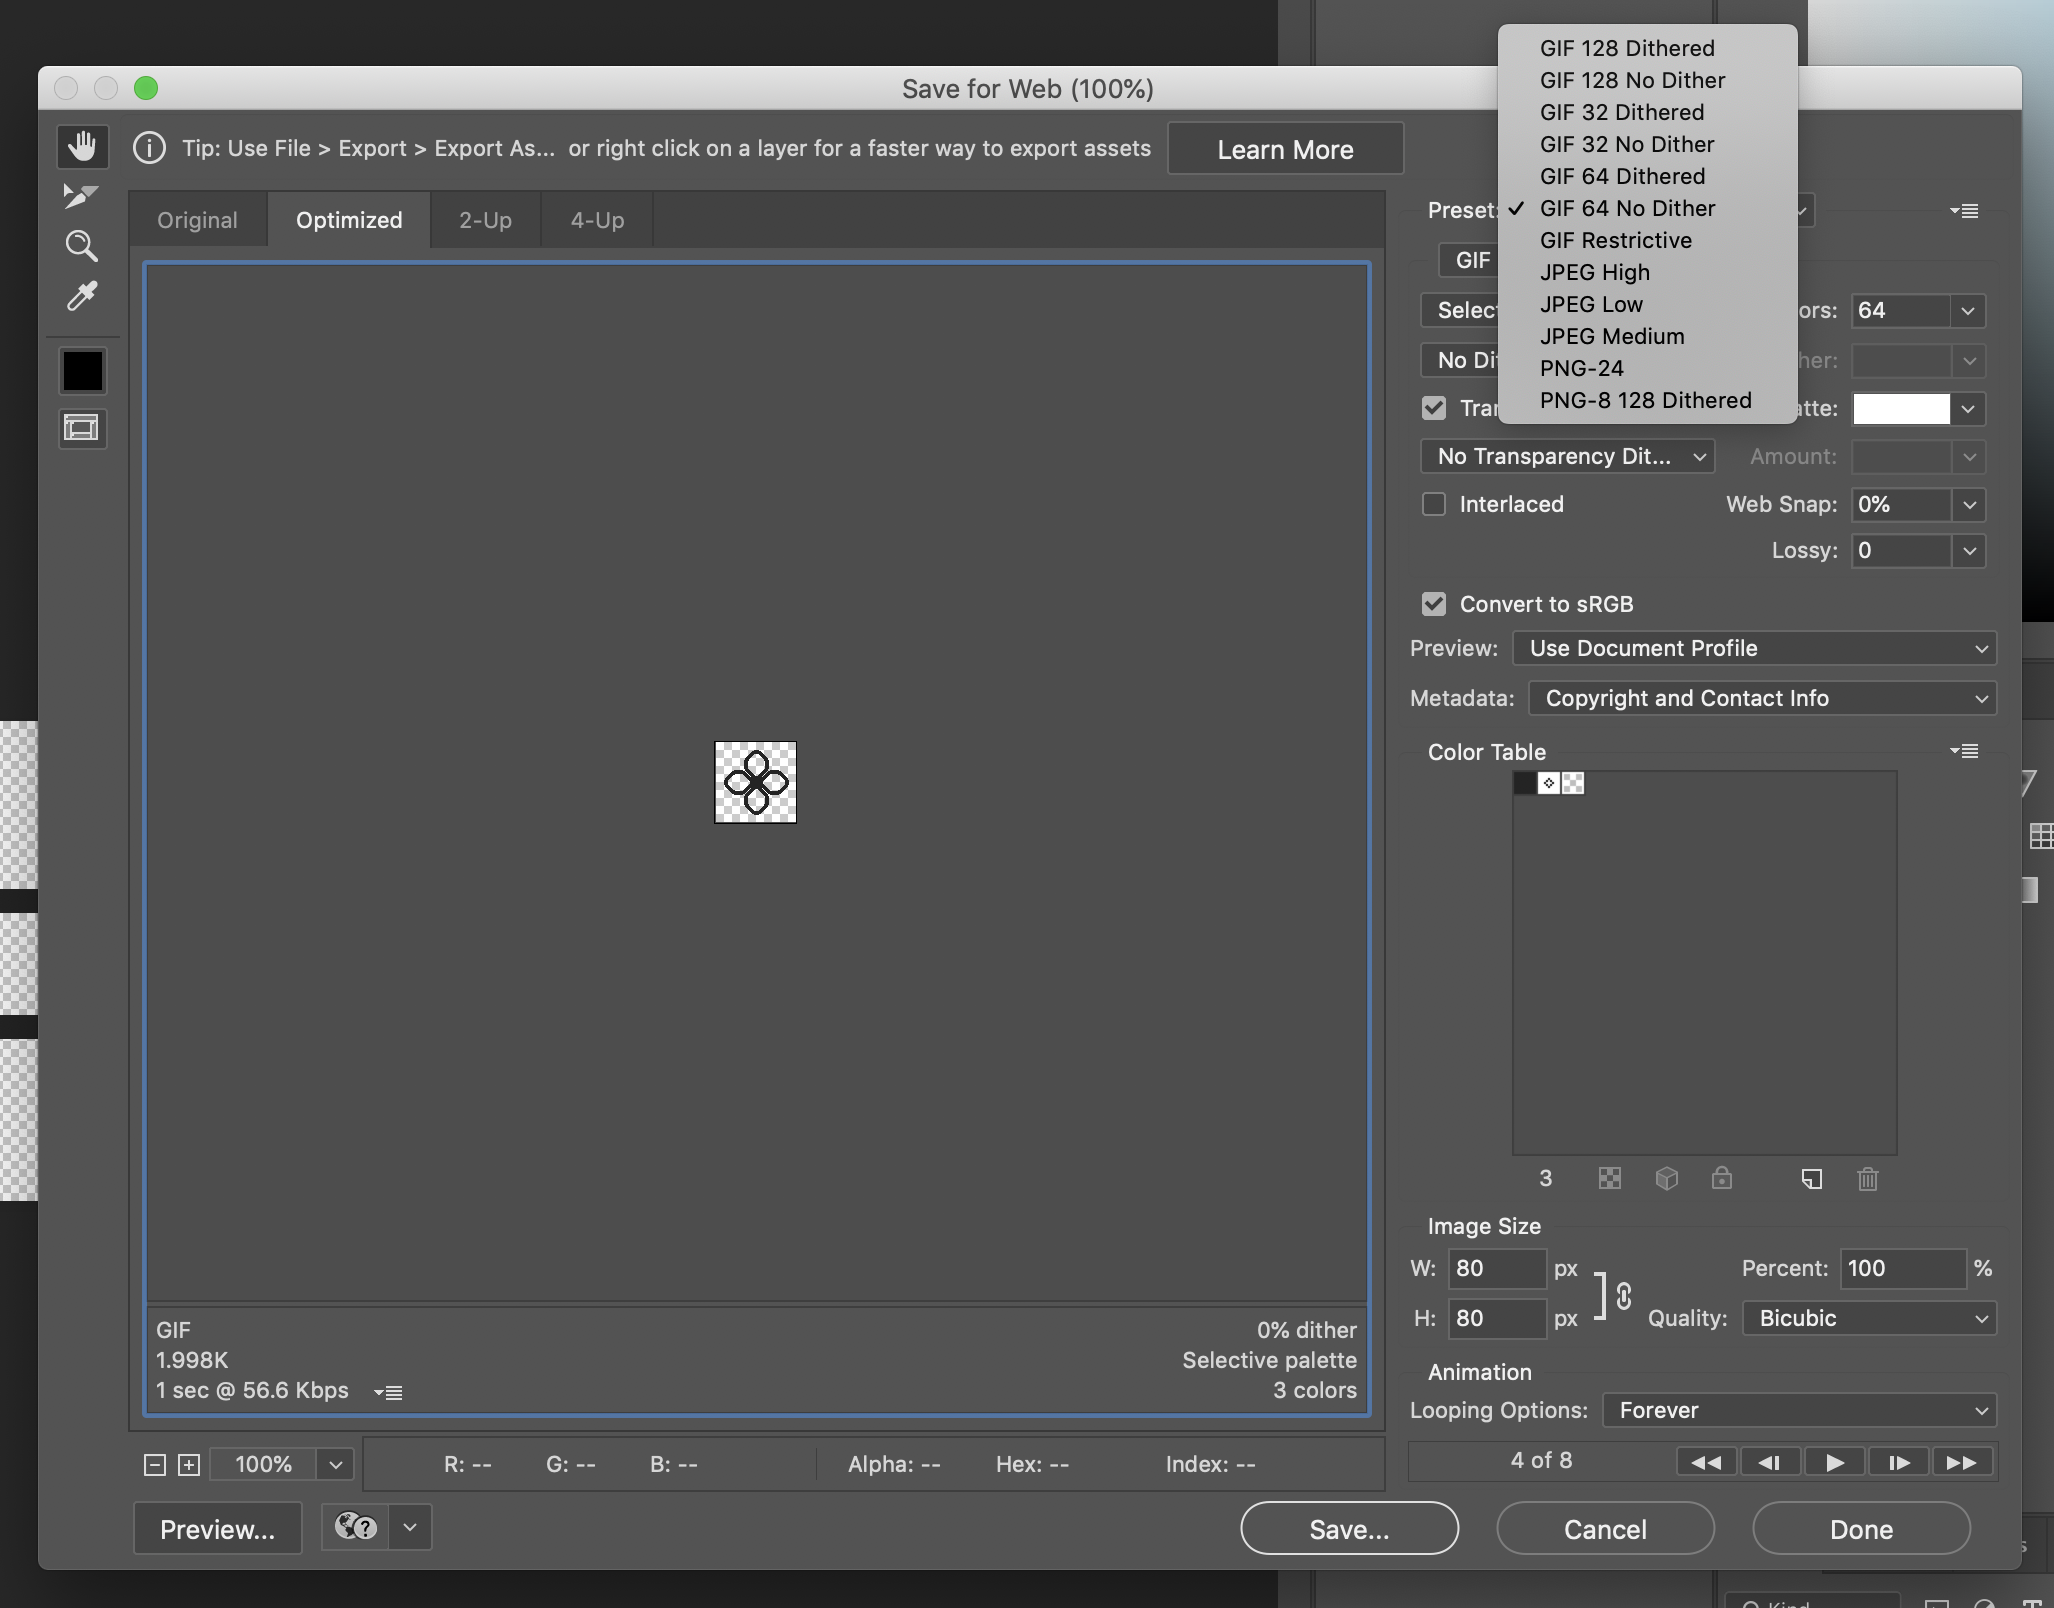
Step 9: Save and Export Your Gif
1) Save your PSD so you can go back and edit it later if you want to make more changes
2) Then export the gif by going to File > Export > Save for Web (Legacy)
Follow these naming conventions when you save your PSD and GIF files:
[your name]-[name of your gif]-8bitgraphic.gif
(e.g. bridget-cactusflower-8bitgraphic.gif)
https://3.basecamp.com/4001554/buckets/7892081/todos/1961166886