When creating a design that will be printed, such as newspaper, flyer, or brochure, InDesign would be the ideal software as it offers easier multi-page/layout edits. But if you are not familiar with InDesign, Illustrator is also capable of creating multi-page projects. This tutorial will cover how to create a brochure design that is ready for print in Illustrator.


Assets you will Need
https://utexas.app.box.com/folder/149348366527
For this training, you will pick one of the folders to create a brochure out of. Follow the guidelines for elements you need to use in your design in the PDFs. Included are the .svg files for official logos.
Step 1 – Picking a layout
Confirm the following information with your client or the print shop.
- File format needed for the print shop (ex: pdf)
- Brochure type and print size (ex: tri-fold, 8.5″ x 11″)
- Bleed size (ex: standard bleed size: .125″)
- Page order/layout
- provide the client with a print layout guide

- provide the client with a print layout guide
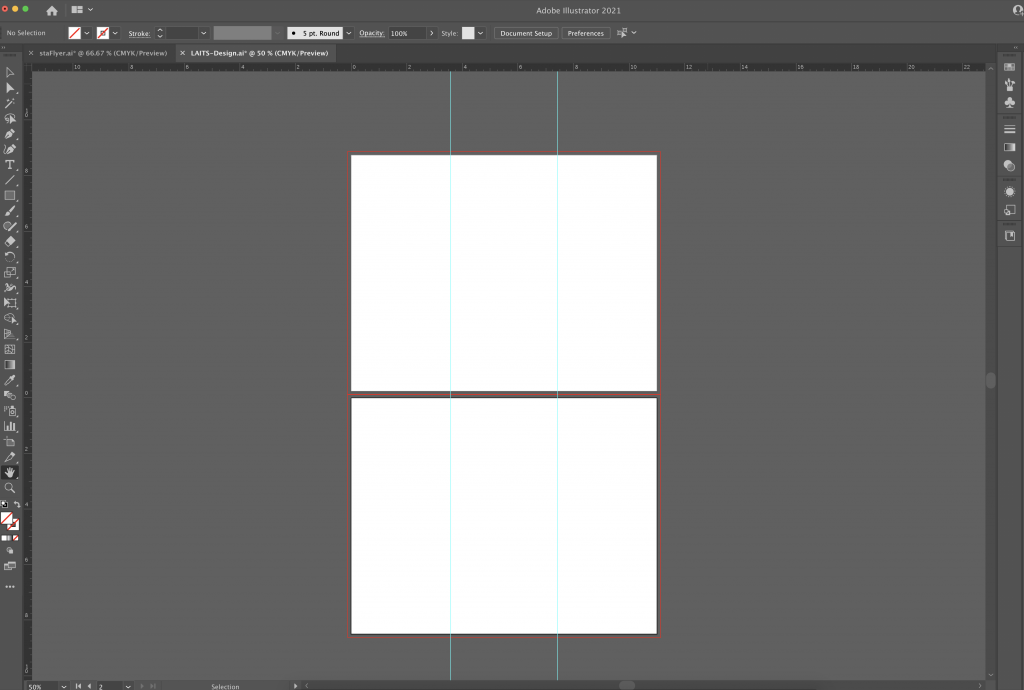
Step 2 – Create a new file with the proper bleed
When you create a new illustrator file for your project, add the bleed on all 4 sides. Since the design will be printed, make sure the color mode is set to CMYK.
For tri-fold brochure, the width would be 3 times the page size and height would be the single page height. Create 2 artboards (one for the front of the brochure, one for the back).
Step 3 – Designing the brochure
Press Ctrl/Cmd+R to open rulers or go to View > Rulers, drag out the guide from the ruler to mark out the pages.
! Make sure you embed your graphics/images !
Illustrator tempts to always link images/graphics, linked artworks are connected to files outside of your illustrator file, which may cause issues when you try to work on your project on a different computer or when image/graphic files are relocated.
You can embed (or store) the file within the document. When you embed a file, you break the link to the original.
Select the image/graphic you would like to embed, then open the properties panel (Window > Properties). Click on Embed under quick actions.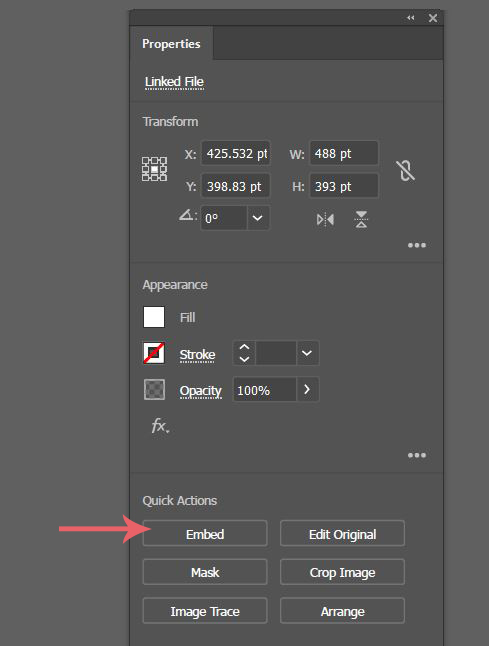
Then start designing each page. Design should cover the bleed, but keep in mind that contents in bleed will be trimmed.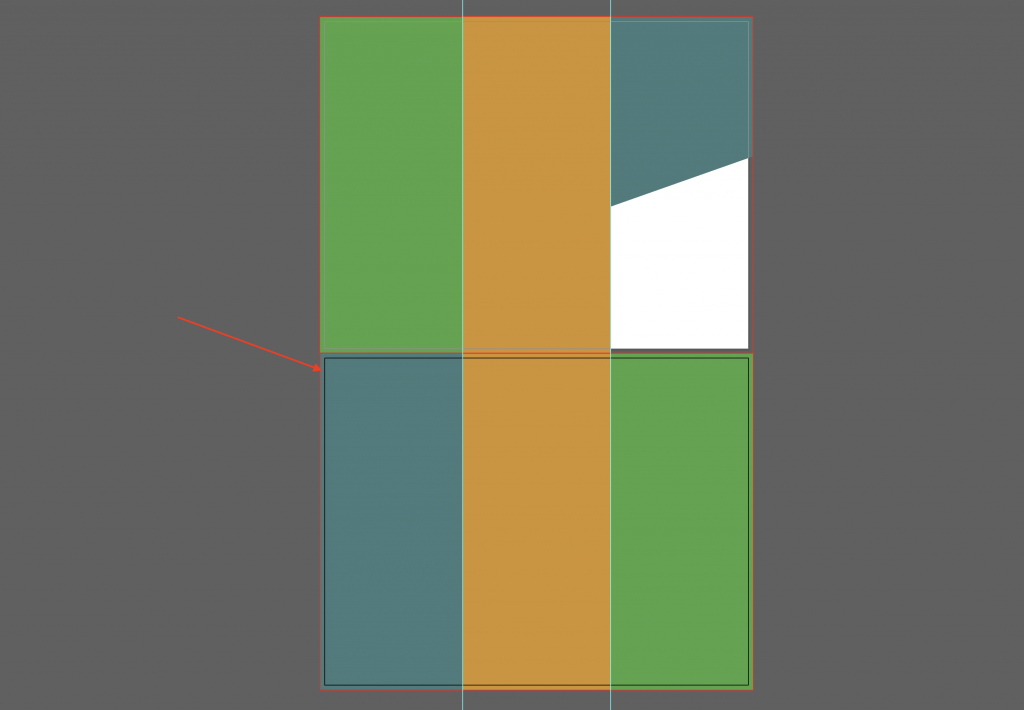
Double check the page order before exporting.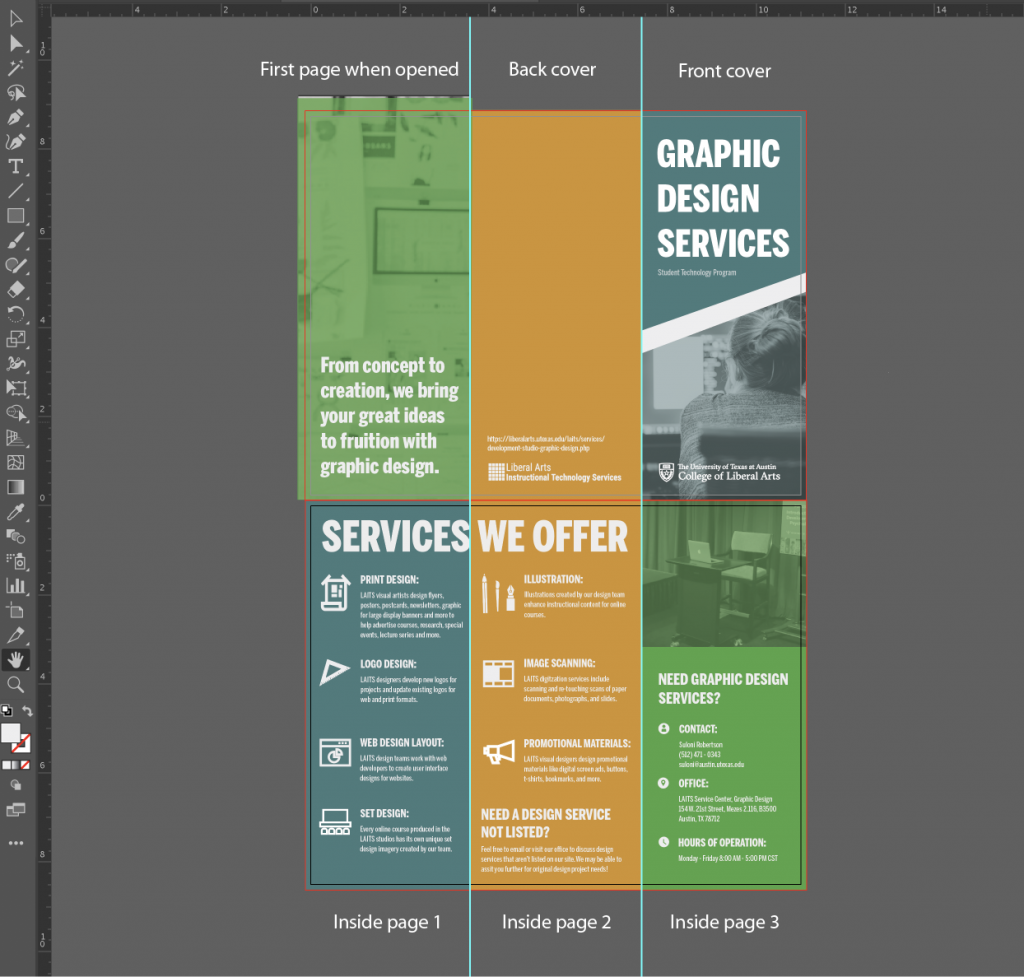
Step 4 – Exporting the design
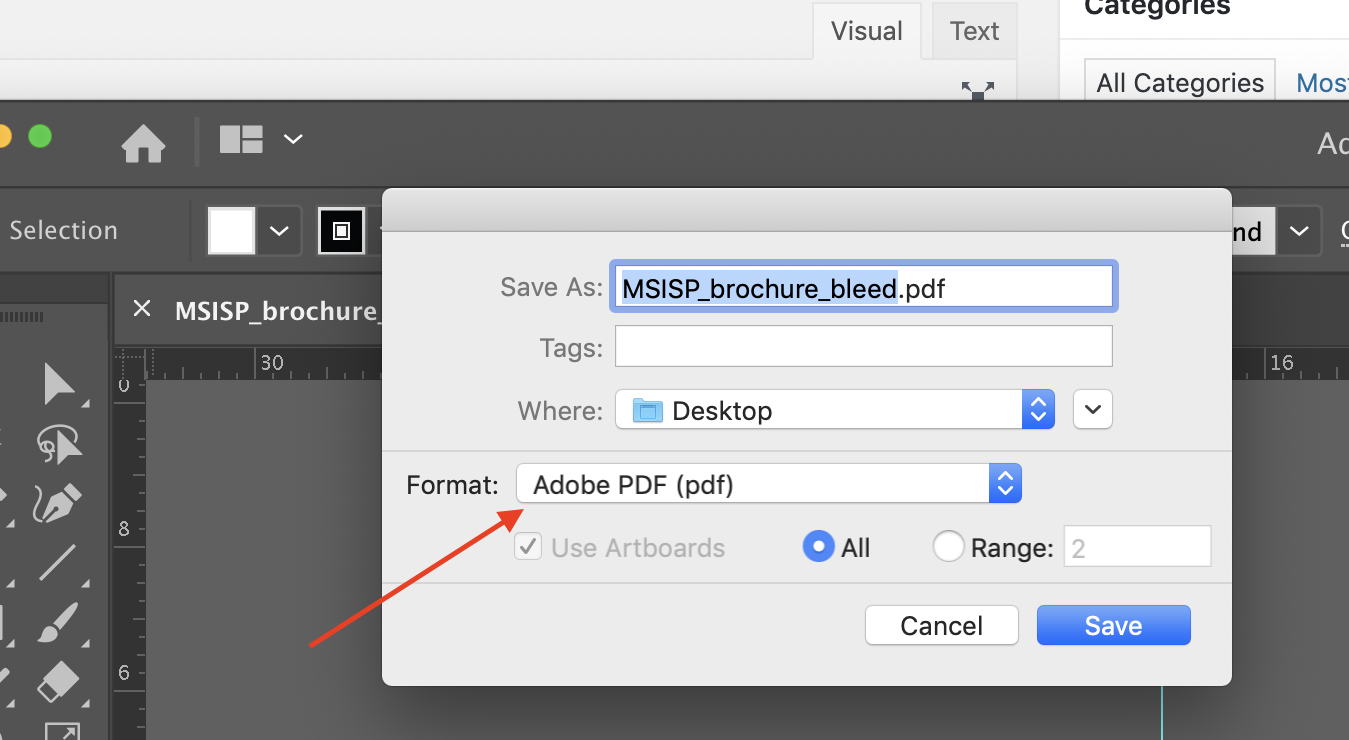
When the file is ready for export, go to file -> save as -> change format to pdf and click save, then the setting window would pop up.
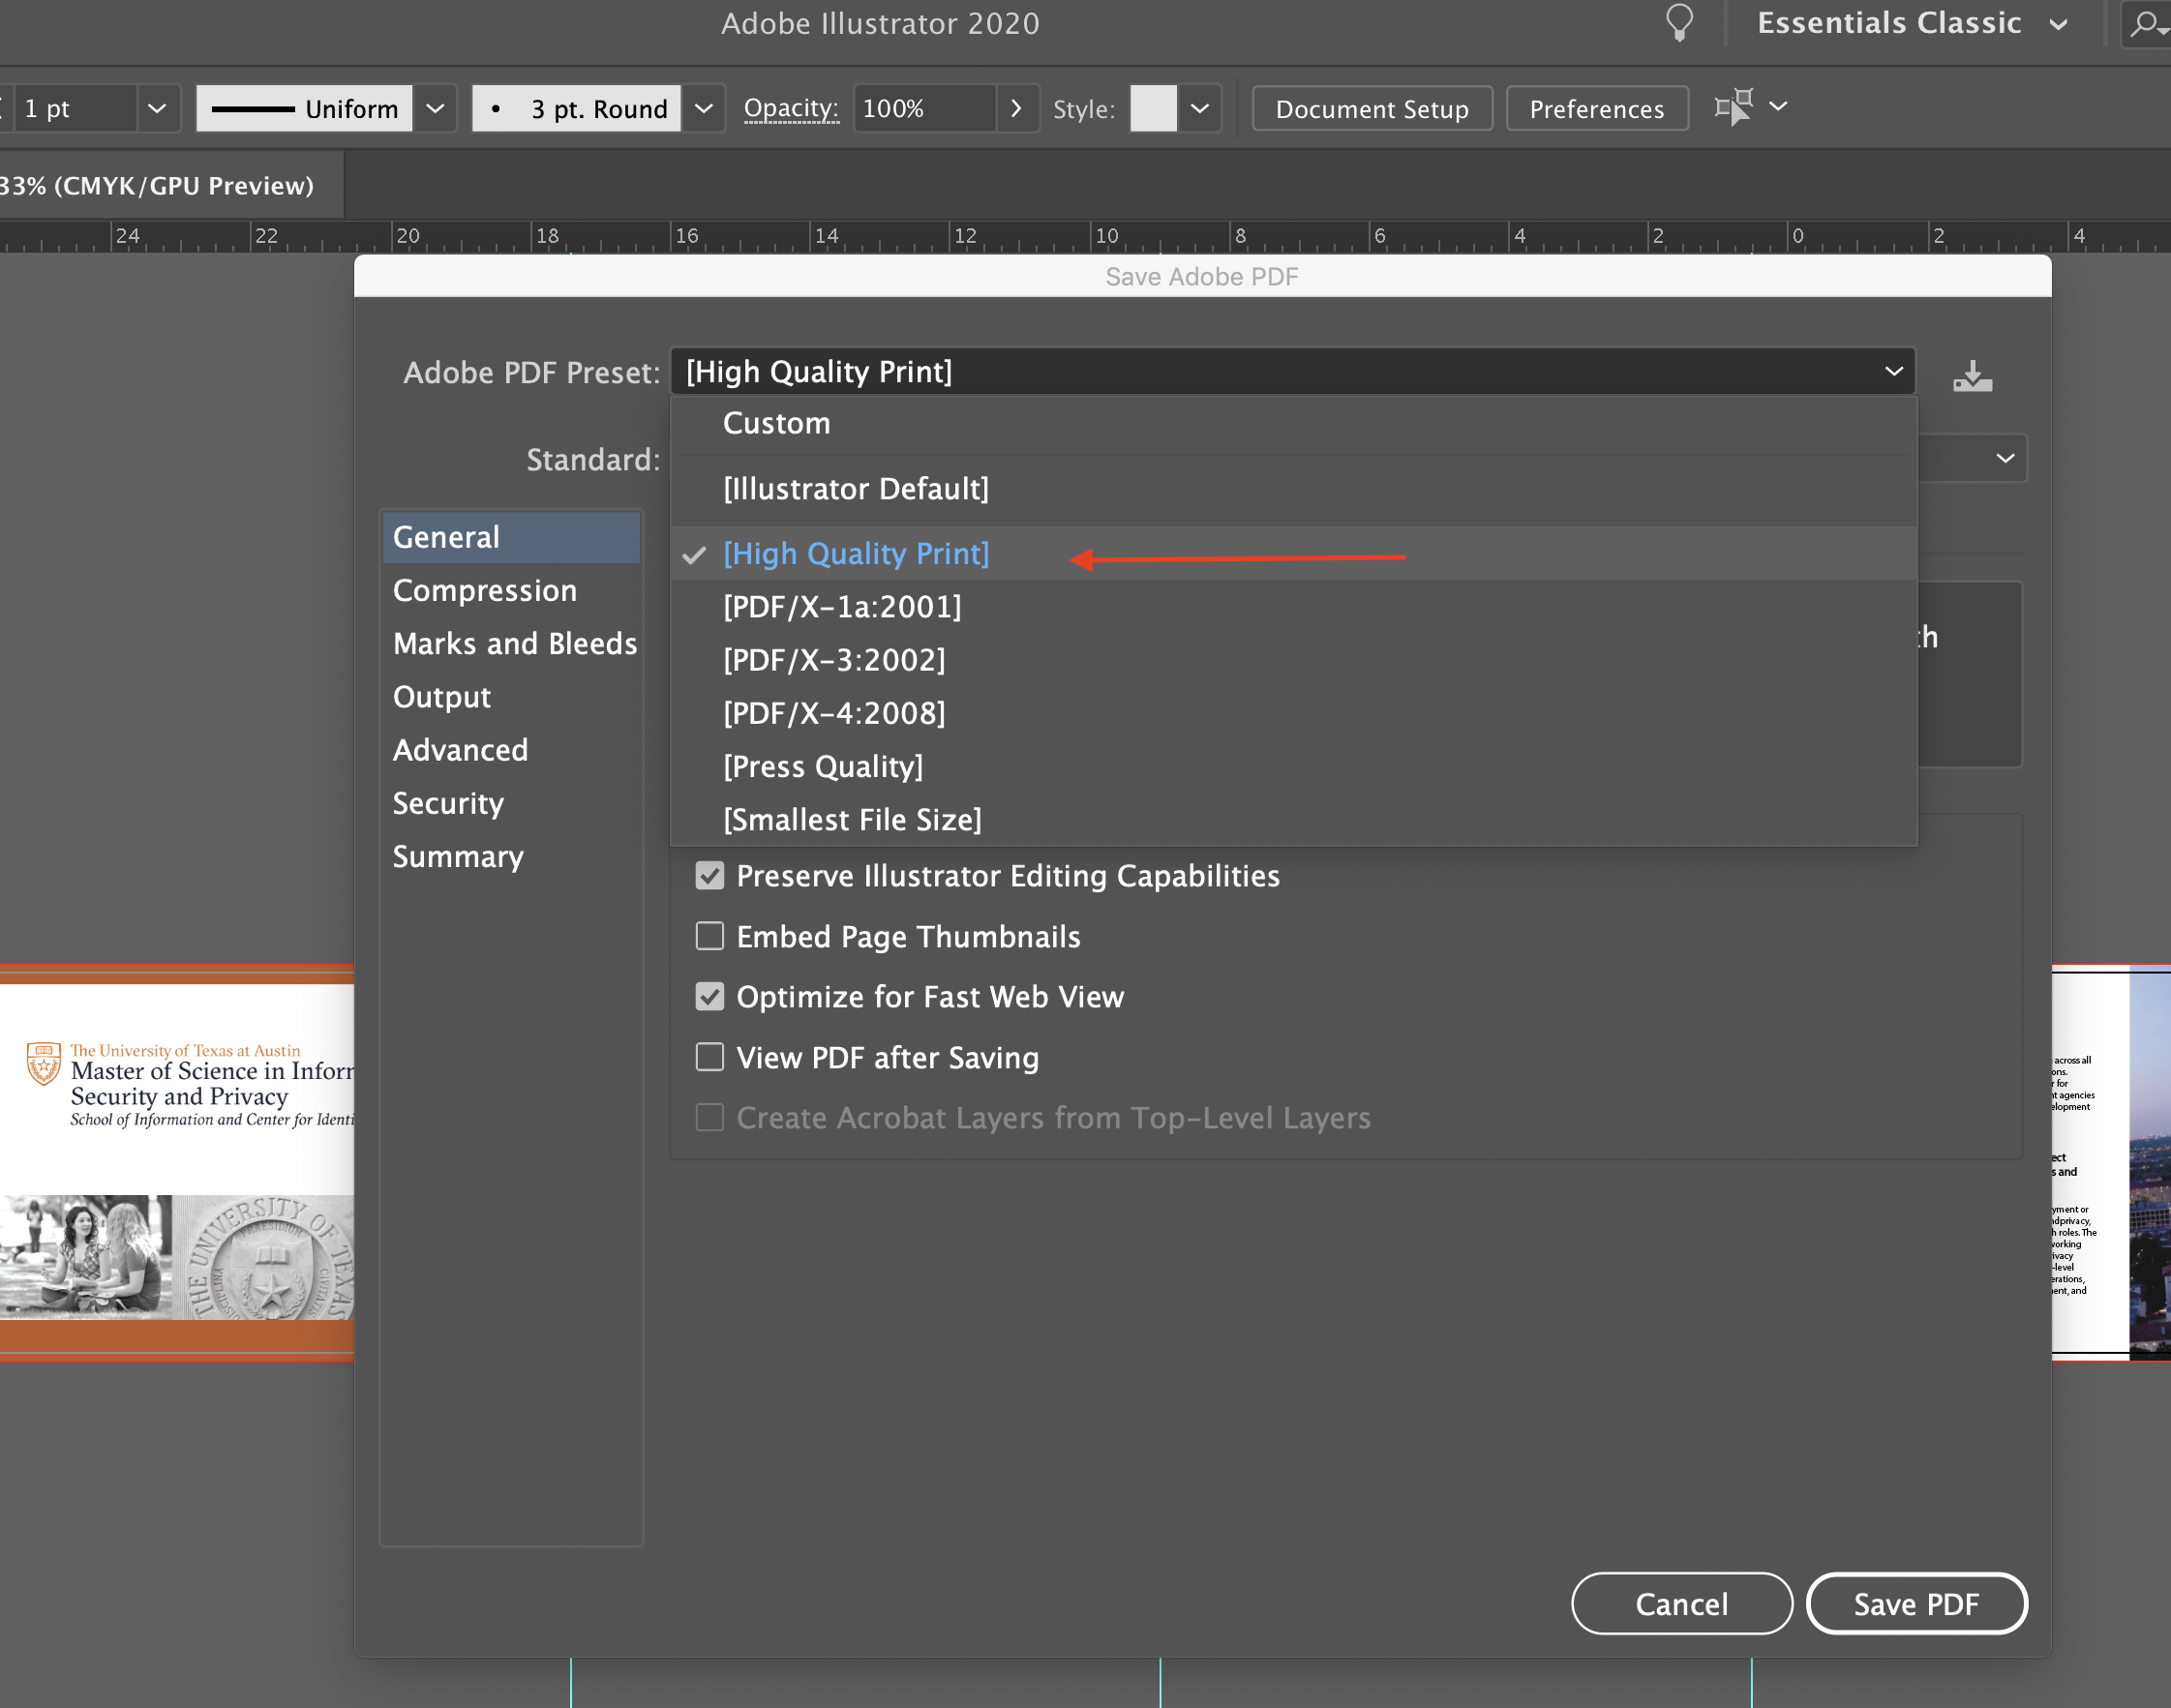
In general setting, choose High-quality print.
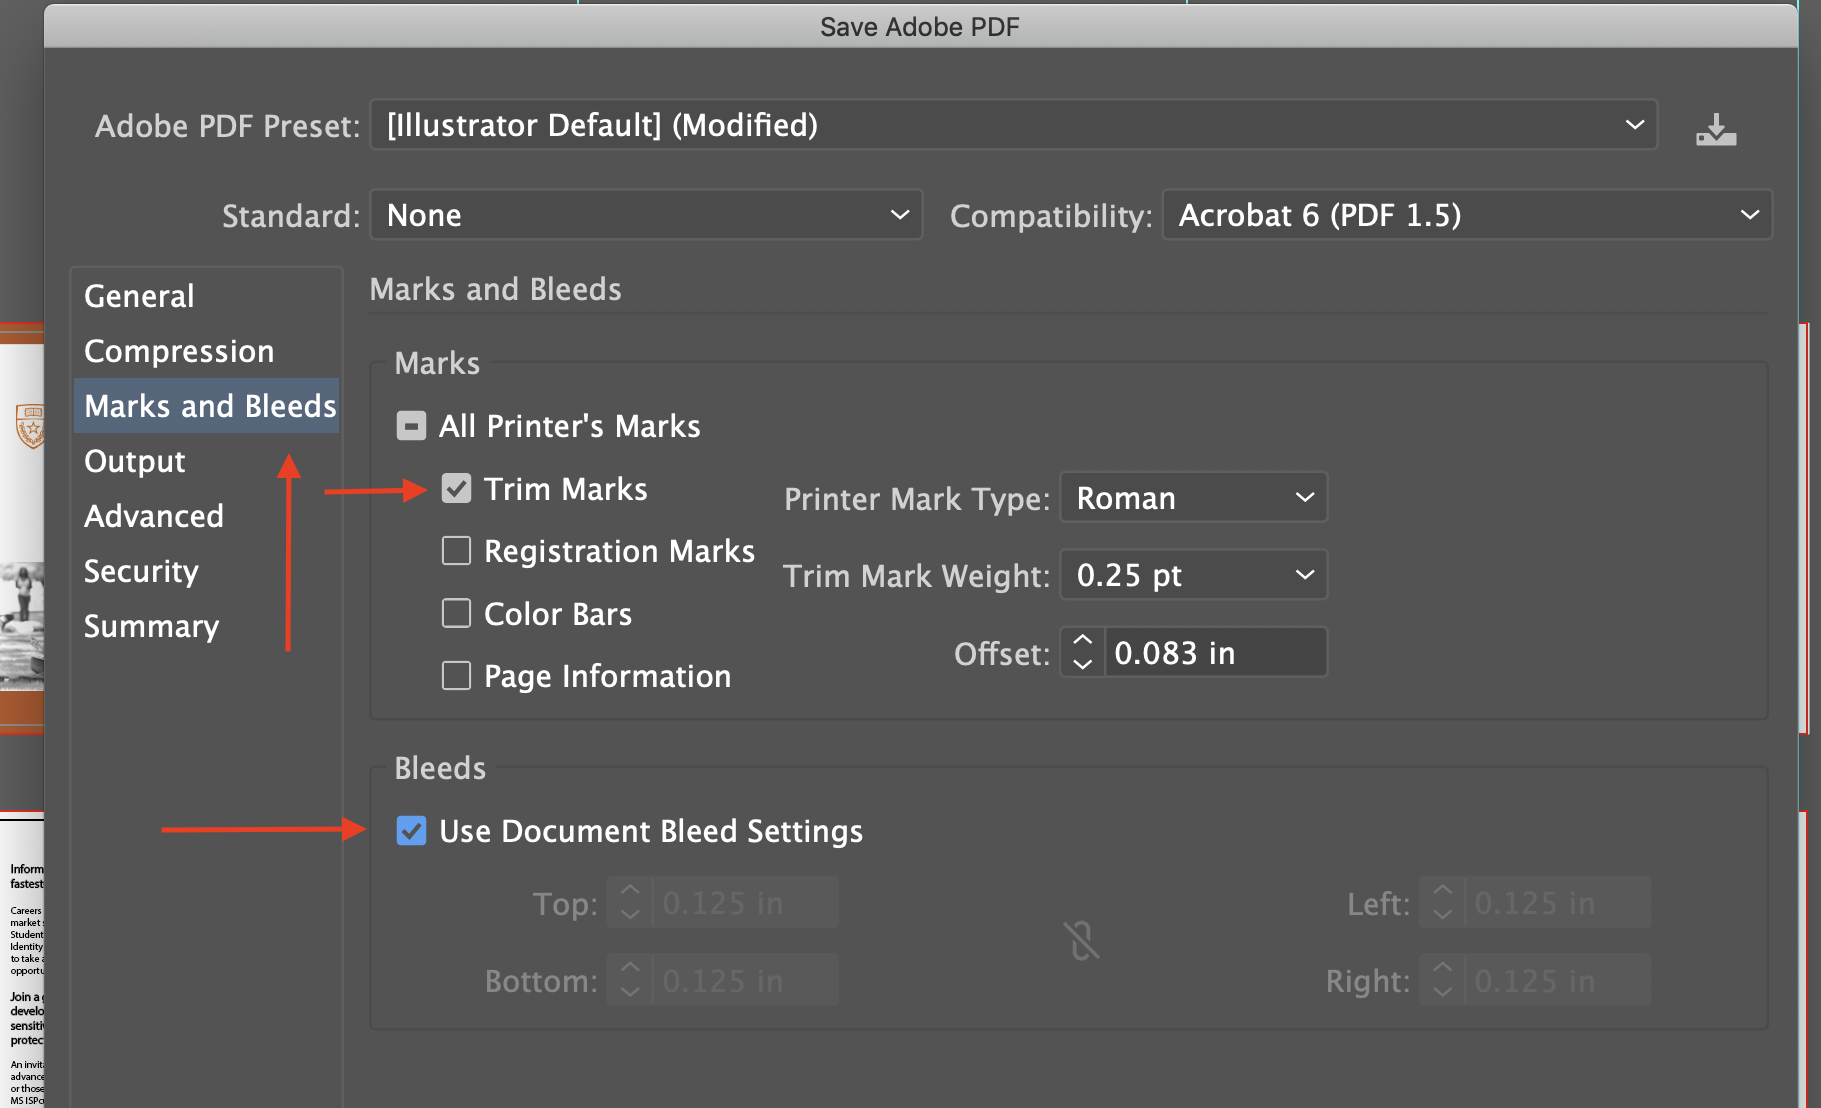
Then go to the ‘Marks and Bleeds‘ tab,
check ‘Use Document Bleed setting‘ and ‘Trim Marks‘.
This will show the trim marks for the print shop to use when they are cutting the brochure.
Finally, click save PDF. See following link for example.