
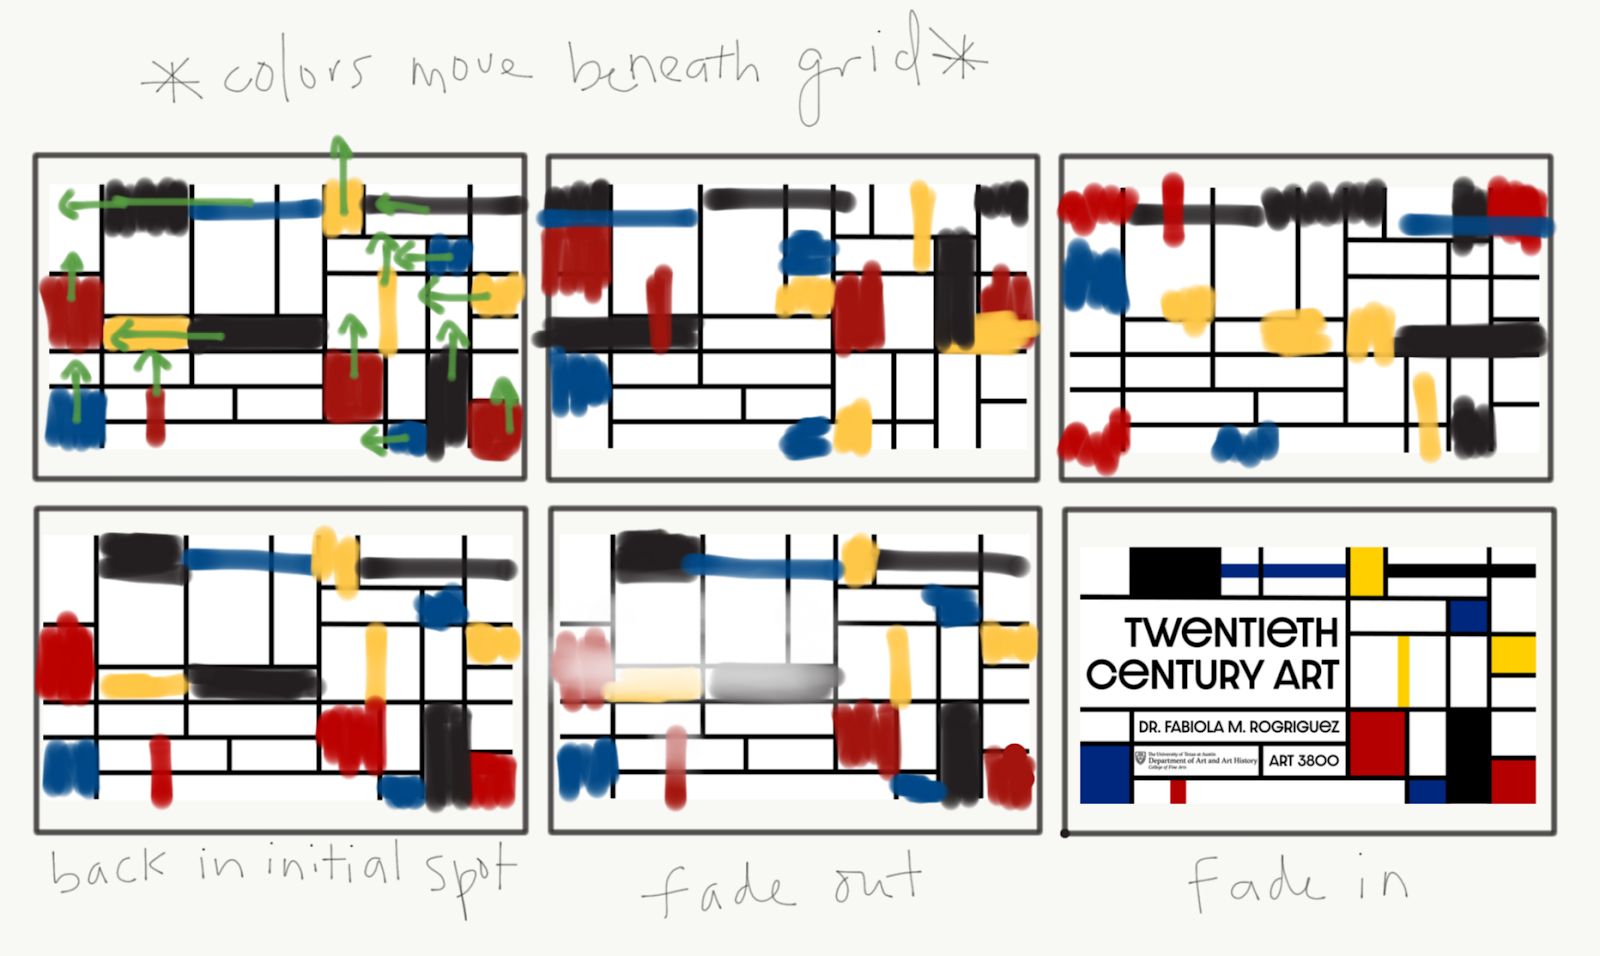
After Effects is a video and animation-based tool that’s used to add elements to moving pictures and animations. Most designers use it to create titles, intros, and transition between clips for more seamless video production. STAs at LAITS work on online course graphic projects and some of the clients would request introduction animation such as the one shown below. This tutorial will go over the basics of how to create simple motion graphics using After Effects.

Step 1: Preparation
– Create a storyboard for your motion graphics (try to use simple shapes/text)
– create the assets in Photoshop or Illustrator. (make sure each element you would like to animate is on its own layer)

Now you are ready to move into After Effects!
After Effects UI
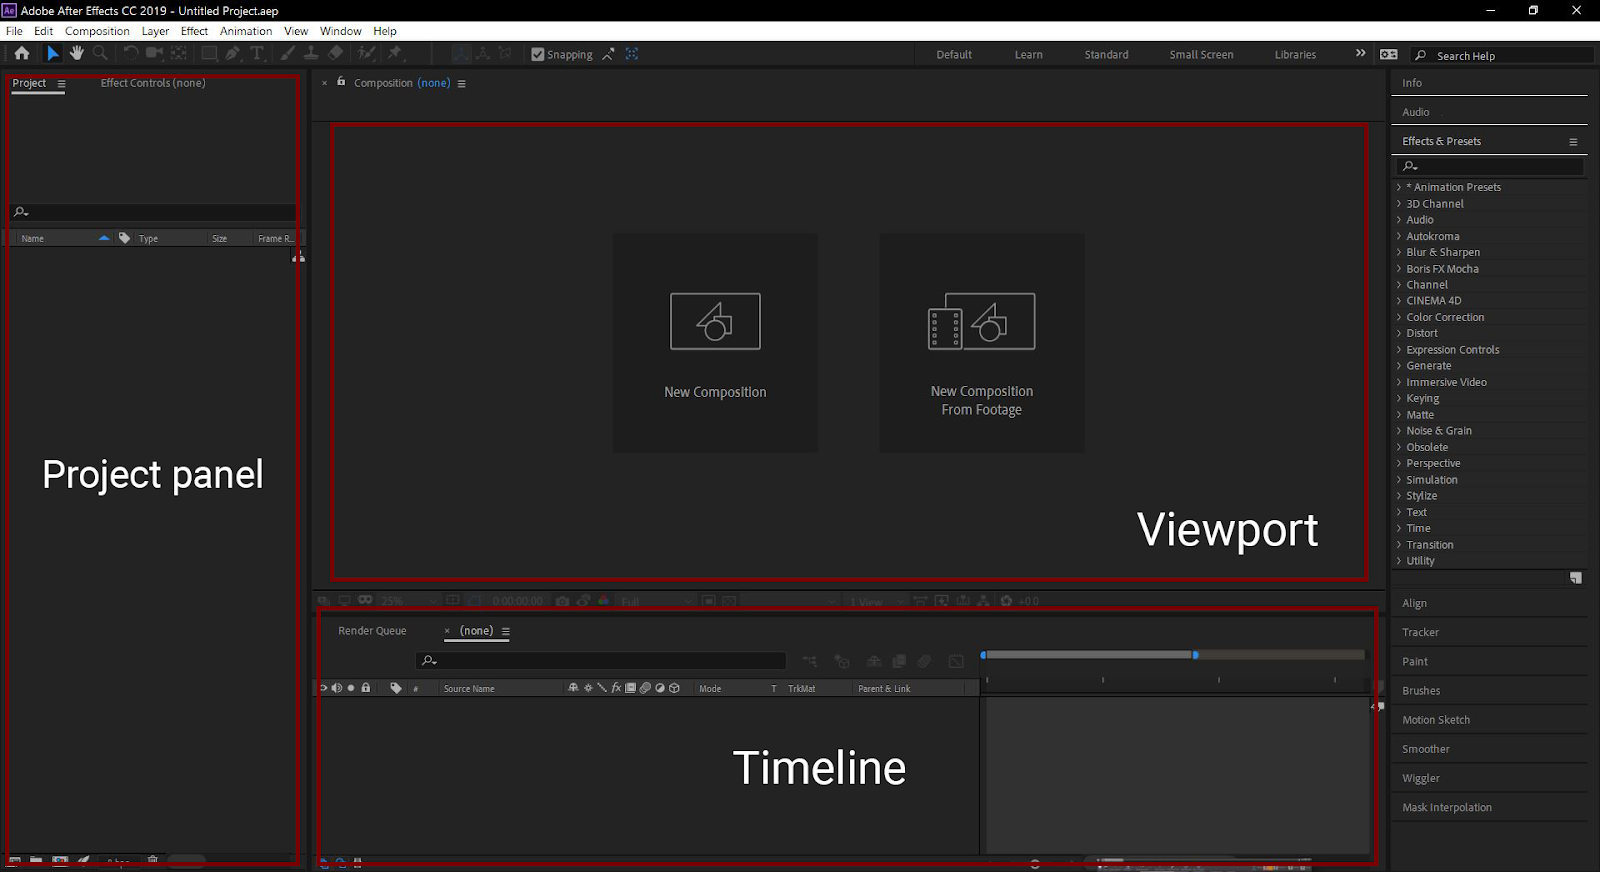
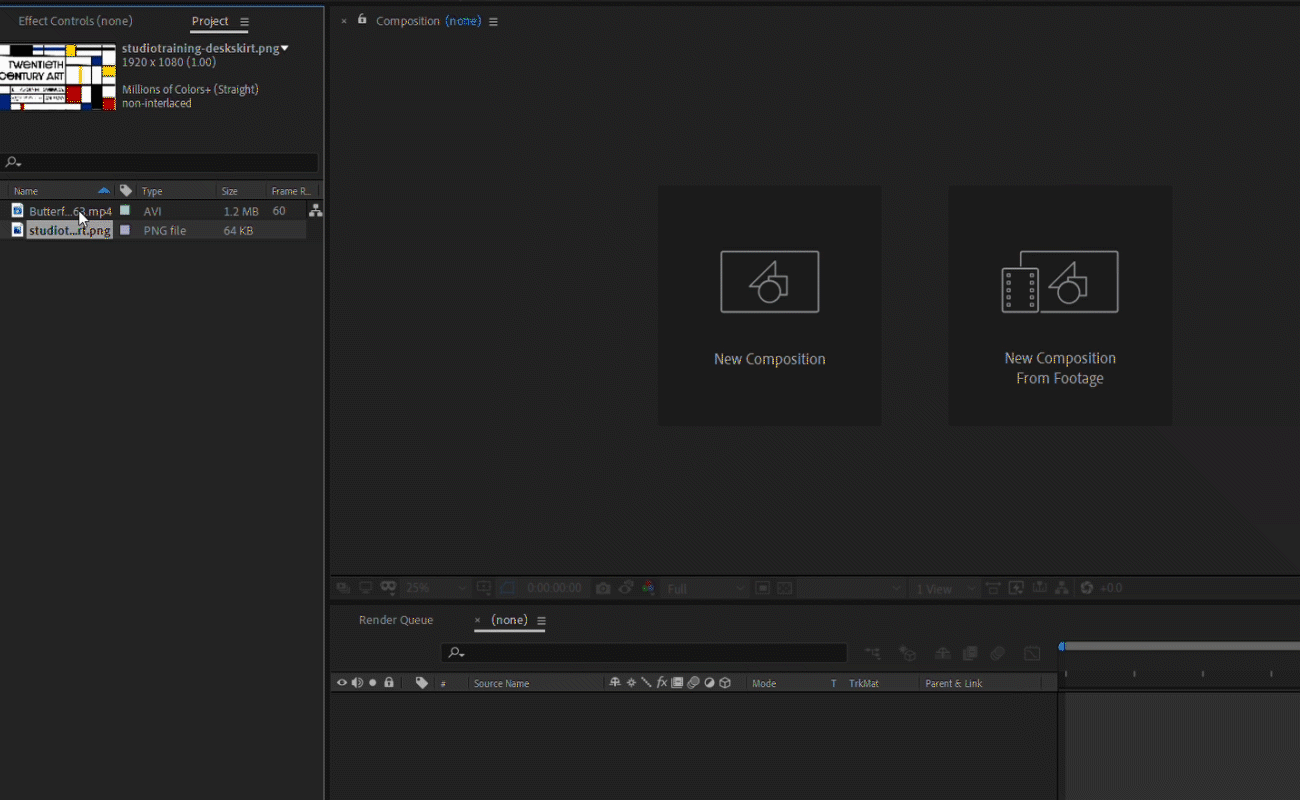
To create a movie/animation in After Effects, you work in a composition
- A composition is a container that stores layers of video, audio, text, etc. Each composition has its own timeline. There are 3 general ways to create a composition: creating a composition without assets, from image/video, and from PS/AI file.
Creating a composition without premade assets
- click on “New Composition.” (Skip this step if you want to create a composition with your image/video or with PS/AI files)

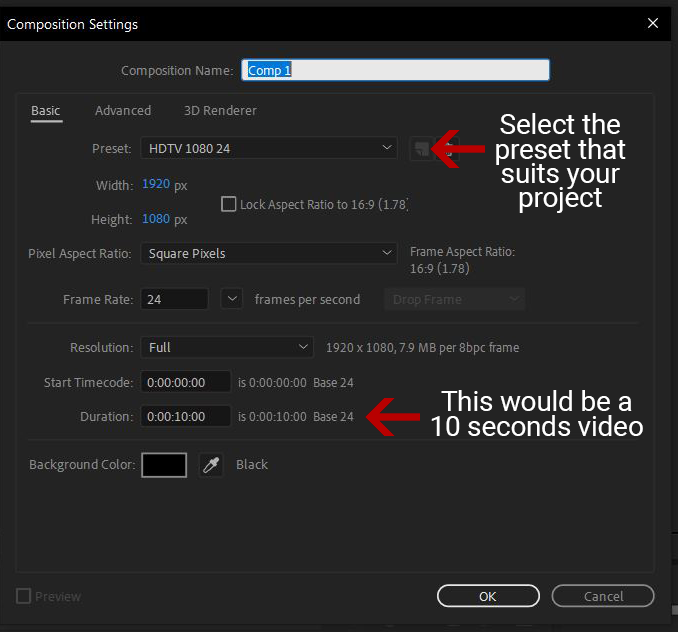
- Set up your composition with preferred settings.

Creating a composition with your image/video
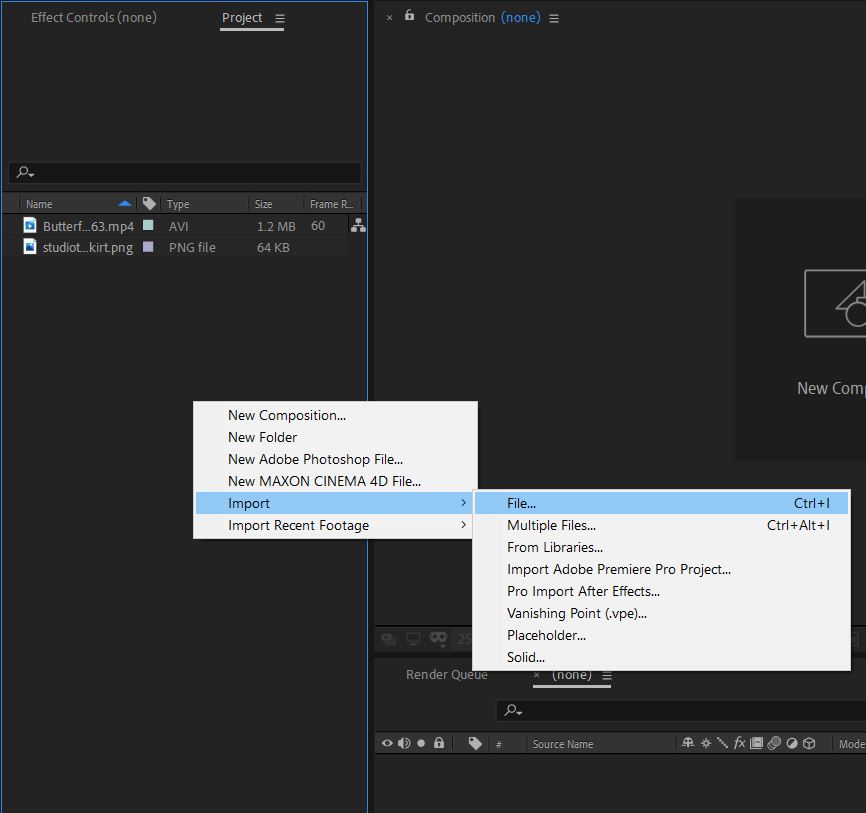
- Ctrl/cmd + I or right click on the project panel -> import -> file… then select the files you would like to upload.

- Click and drag the image/video onto the timeline.
- To adjust composition settings, ctrl/cmd + k or go to Composition -> Composition settings…
Creating composition with PS/AI files
- Make sure each element you would like to be animated is on its own layer in your PS/AI files. Import the file into your project by Ctrl/cmd + I or right click on the project panel -> import -> file… then select the files you would like to upload.
- On the pop up window, select “Composition” for Import Kind
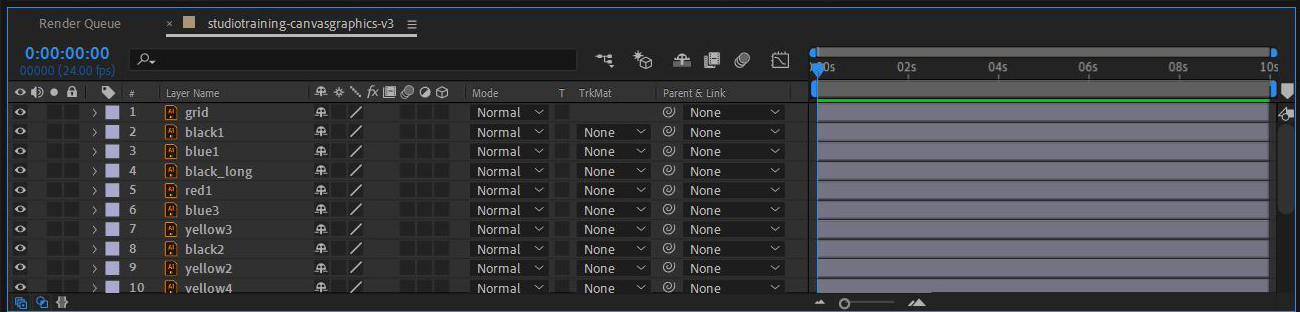
- Double click on your composition to open it, you should see all the layers in your PS/AI file on the timeline.
- If you ever want to add new assets to the composition, repeat the importing steps then click and drag the imported asset onto the timeline.
Step 2: Simple movement & setting keyframes
Once you have imported your assets, it’s time to animate them by creating keyframes. Keyframes are markers in time that allow you to tell After Effects where you want to change the value for a layer or effect property such as position, opacity, scale, rotation, amount, particle count, color, etc.
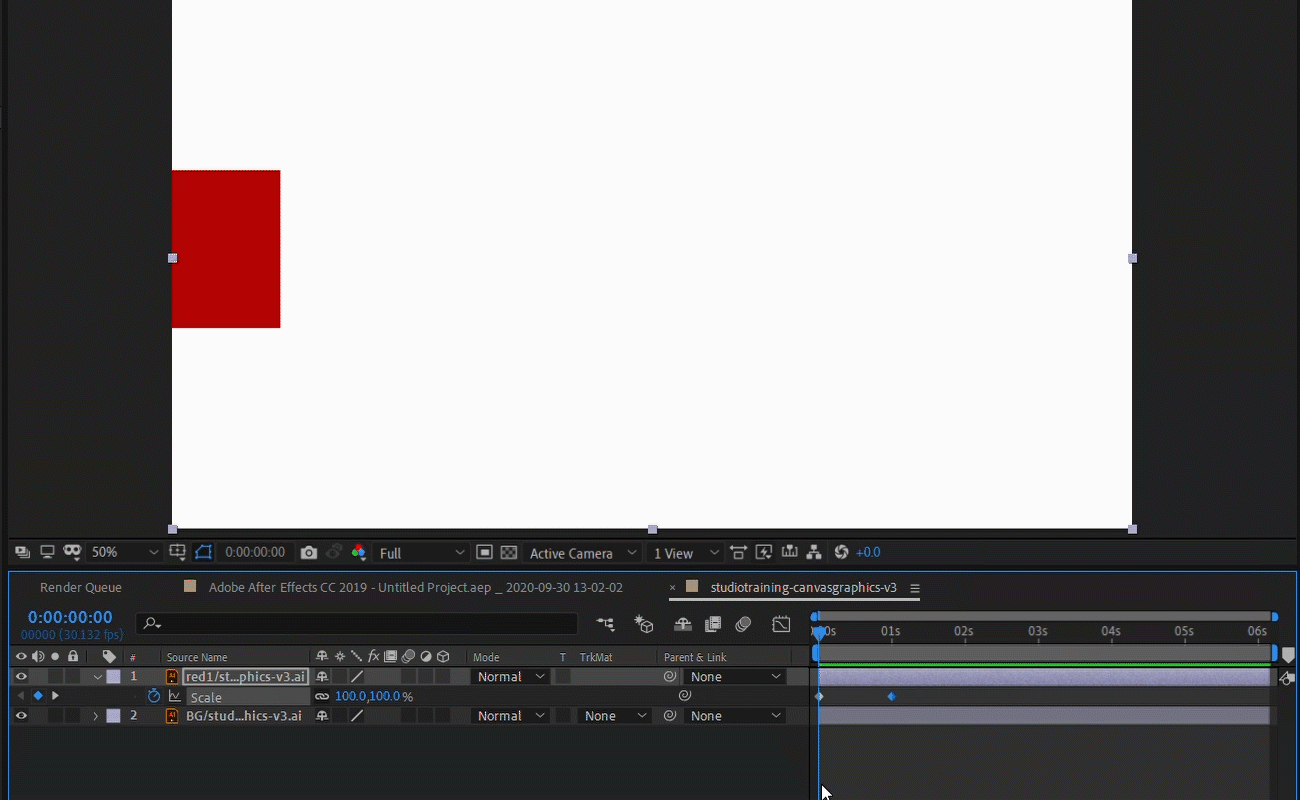
Keyframing position
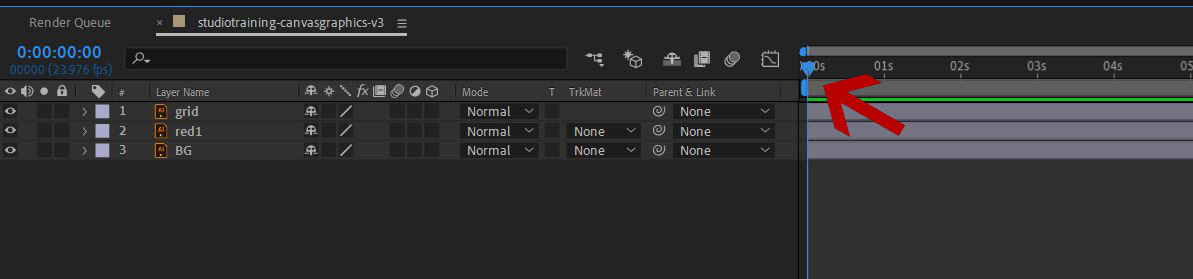
- Drag your playhead to the beginning of the timeline to set you initial position
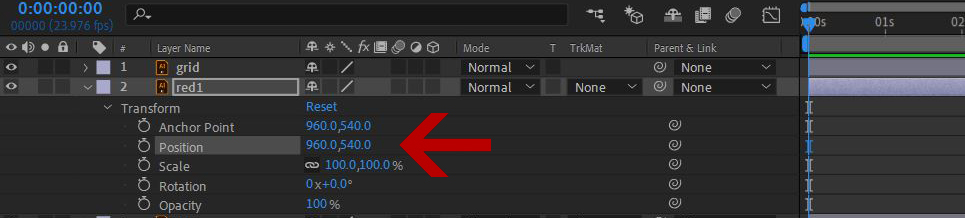
- Select the layer you would like to animate, and press “P” to show “Position. ” (You can also find position by clicking on the layer dropdown -> “Transformation”)
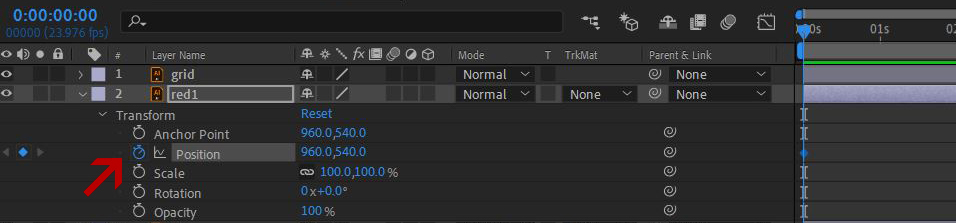
- Move your graphic to your desired starting position and click on the clock icon to add a keyframe.
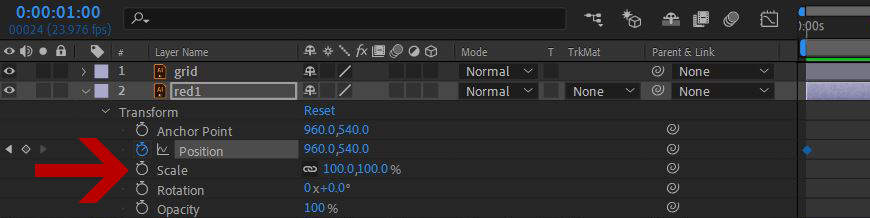
- Drag your playhead to the next second or later.
- Move your graphic to a new position, it should automatically add a keyframe for you. (if not, click on the diamond shape ‘⬥’ to manually insert a keyframe)
- Now drag your playhead back to the beginning and press Space to play your animation.
- Follow the same steps to add in more keyframes


Need some more help understanding keyframes? Read through our post on Keyframes: The Very Basics.
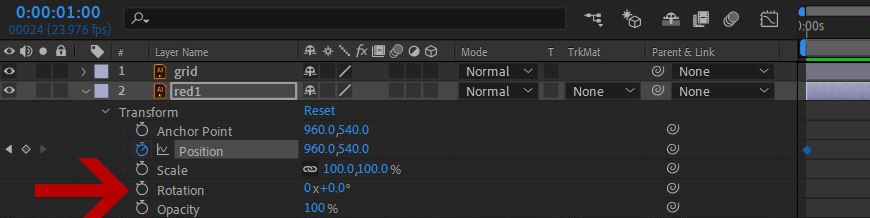
Keyframing scale/rotation
- To animate scale up/down, create keyframes in the scale column. Select the graphic layer and press “S” or click on the layer dropdown -> “Transform” to show “Scale”
- Follow the same steps you did for keyframing position, but this time do it on the Scale column.
- Here is an example of scale animation:
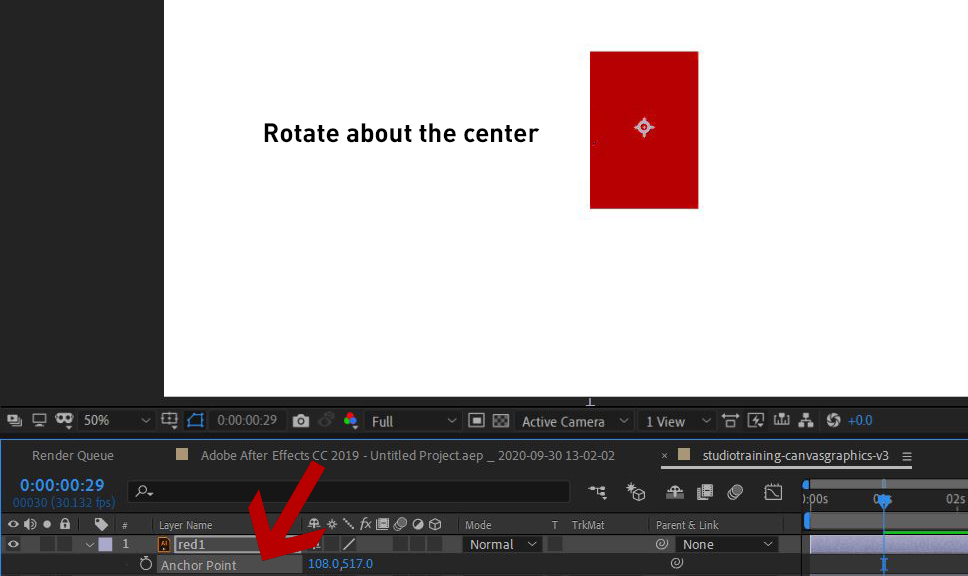
- To make your graphic rotate, adjust your anchor point to set the origin of rotation. Select the graphic layer and press “A” or click on the layer dropdown -> “Transform” to show “Anchor Point”
- create keyframes in the rotation column. Select the graphic layer and press “R” or click on the layer dropdown -> “Transform” to show “Rotation”
- Add keyframes on the rotation column following the same steps you did for position and scale.
- Here is an example of rotation animation

Step 3: Fade in & Fade out
- To create a fade in effect, drag your playhead to the beginning of the timeline.
- Select the graphic layer and press “T” or click on the layer dropdown -> “Transform” to show “Opacity”
- Lower opacity to 0% then create a keyframe by clicking on the clock icon.
- Drag your playhead a few seconds or frames ahead (depending on how long you want the fade in to take)
- Set opacity to 100%
- Do a play back and make adjustments to the fade in as you like.
- Fade out would go from 100% opacity to 0%


Step 4: Adding effects
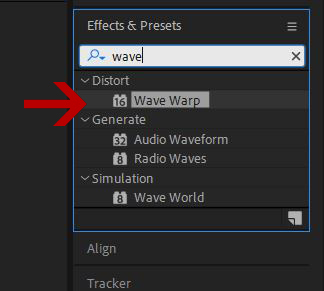
- There are many built-in effects in After effects that are ready to use, to apply an effect to a graphic, go to the effect panel. You can find it under “window” -> “effects & presets”
- For example, search up “wave wrap”
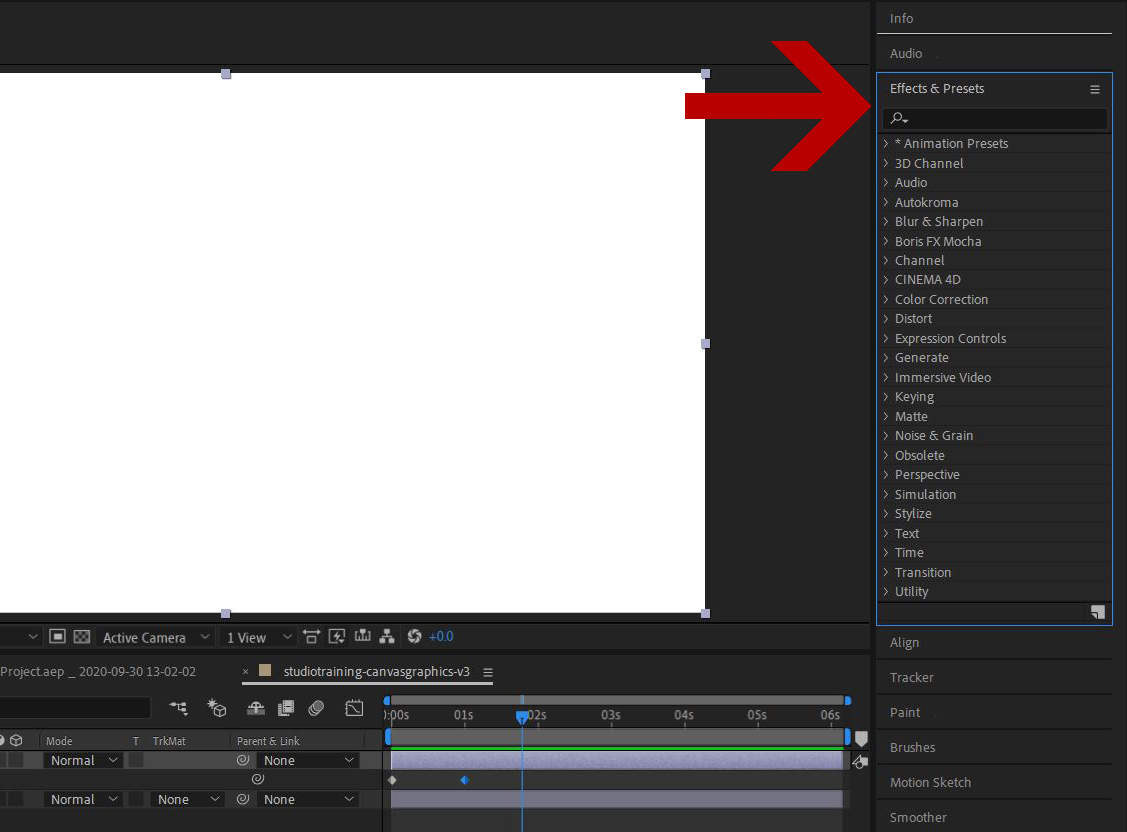
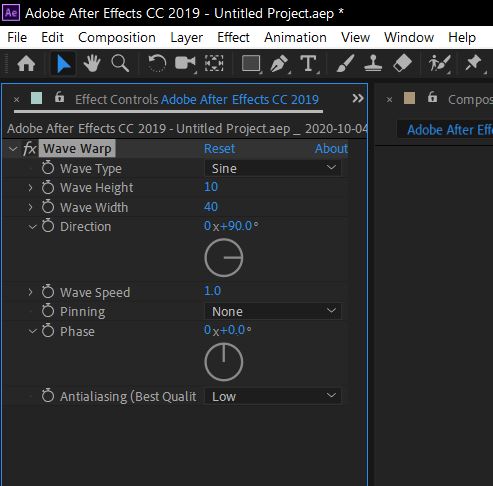
- drag and drop the effect onto your graphic layer
- You can adjust the strength and other properties of the effect in the effect control panel. (a tab next to the project panel)

- Explore other effects :))
Step 5: Rendering & Exporting
Adobe Media Encoder is used to compress audio and/or video files. Typically, when a project is rendered (Rendering (computer graphics) , it is rather large in file size. … Once all those variables are considered, it can be processed through Adobe Media Encoder. However, you can also render in After Effects, but there would be less preset options.
Export with Adobe Media Encoder
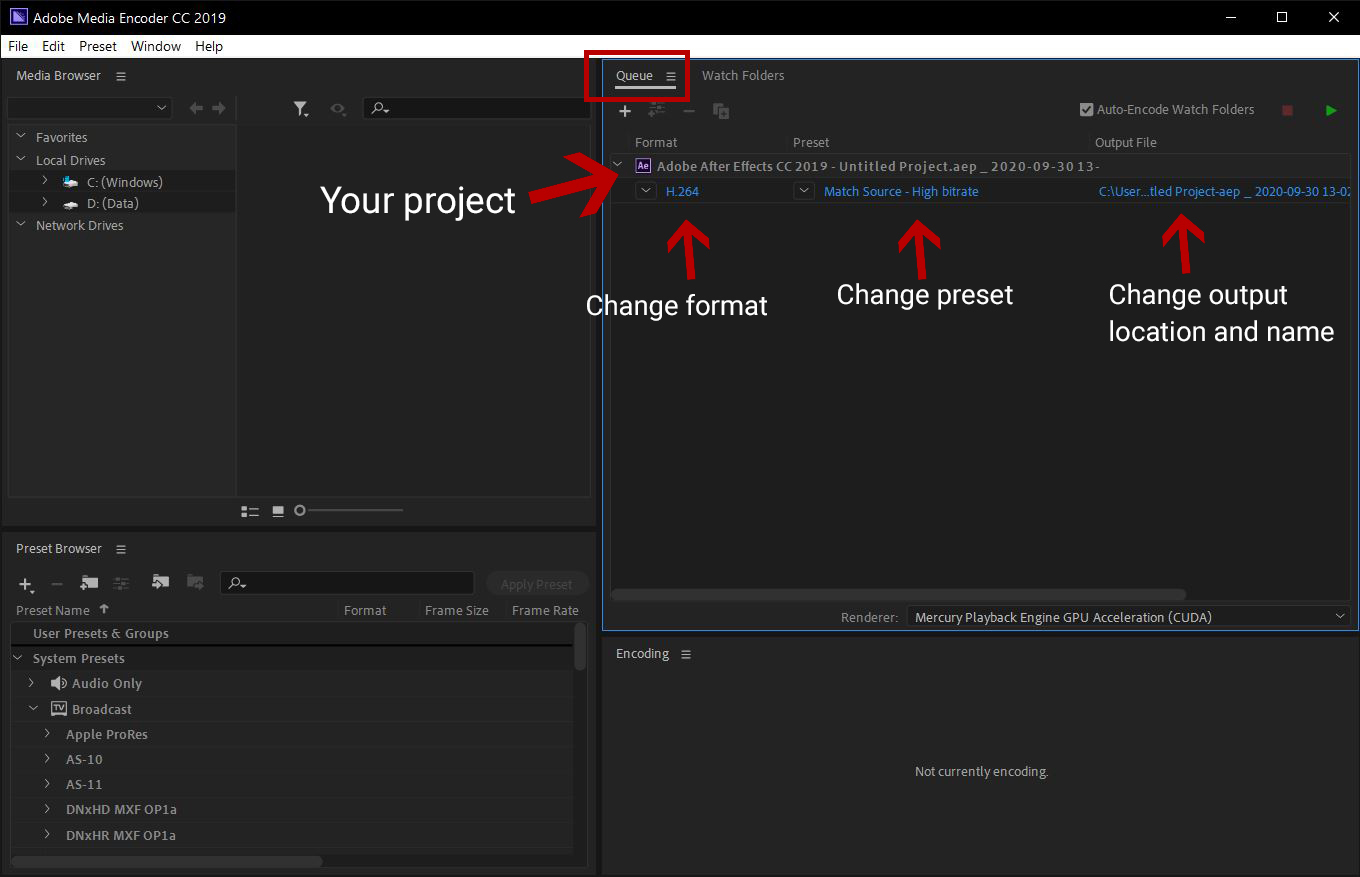
- Select your composition then go to “File” -> “Export” -> “Add to Adobe Media Encoder Queue…”
- Wait a few seconds for your project to show up in Queue. Once your project is loaded, you can change render format, preset, and output.

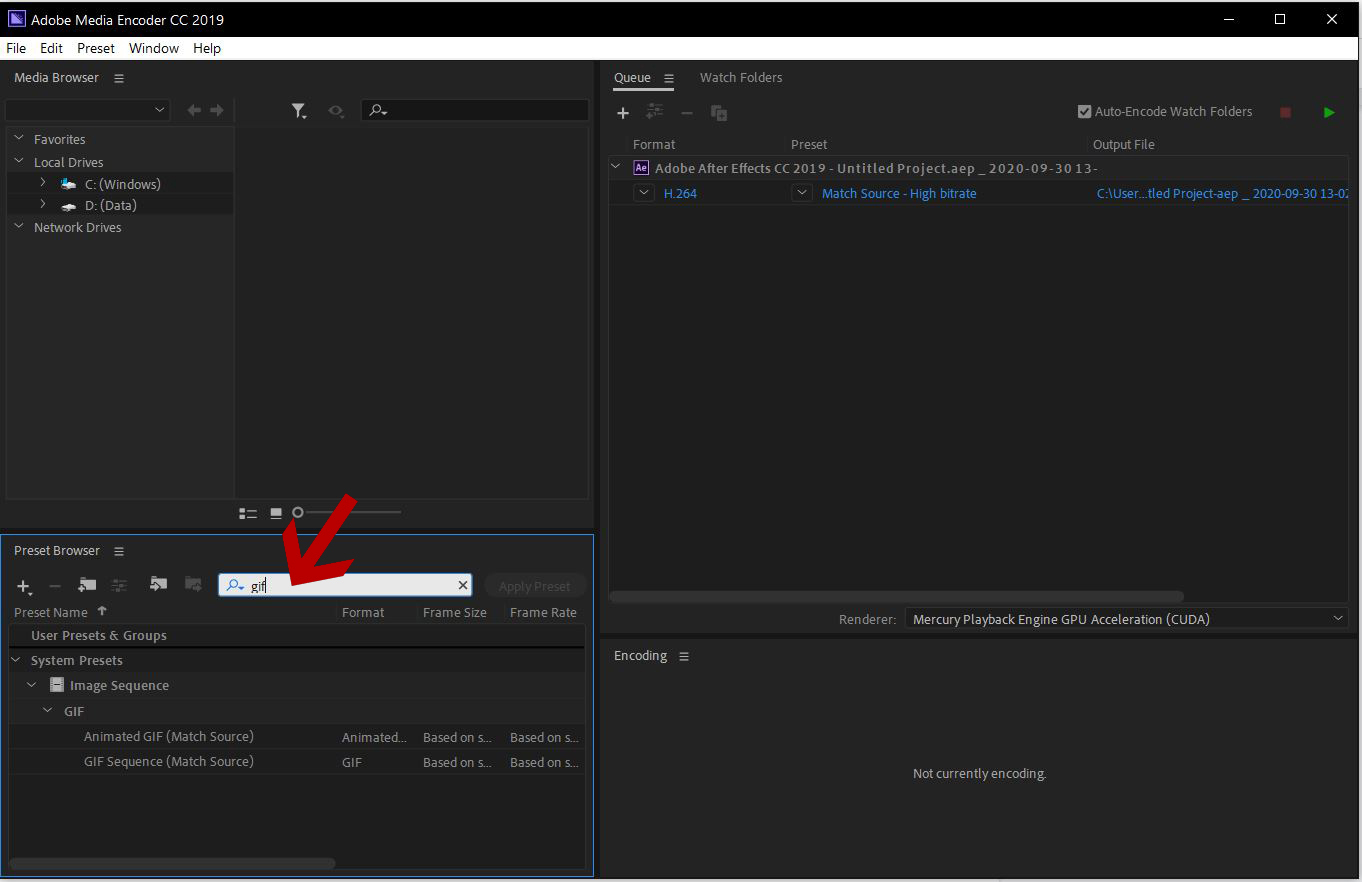
- To search for a specific preset, go to the preset browser on the bottom left. (You can also find this at “Windows” -> “Preset Browser”
- For example, to export an animation as a gif, type in “gif” in the preset browser.
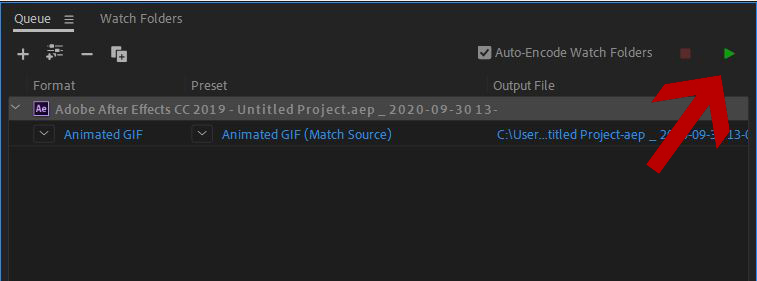
- Drag and drop the “Animated GIF” preset onto your project in the Queue panel.
- Select your project and press the run button to render out your video

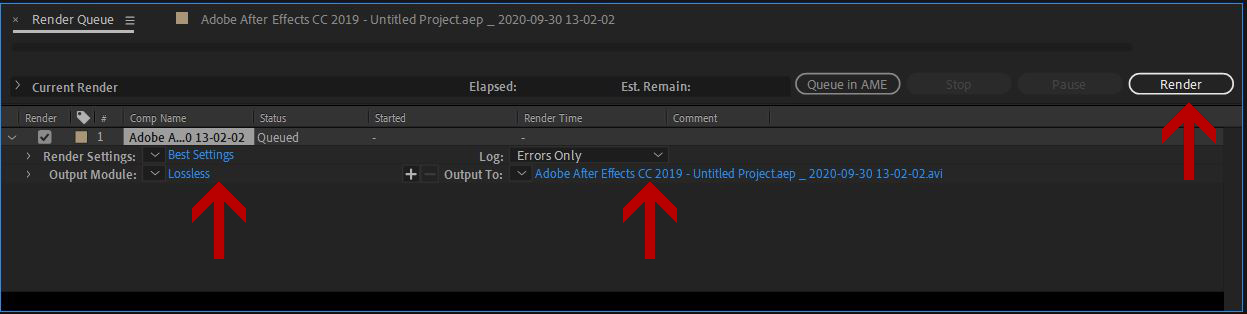
Export in After Effects without Adobe Media Encoder
- Go to “File” -> “Export” -> “Add to Render Queue”
- Set your render settings, output module, and output location. Click on “Render”