

Follow the process below for
- Project Intake
- Time Cost Estimates
- Project Work
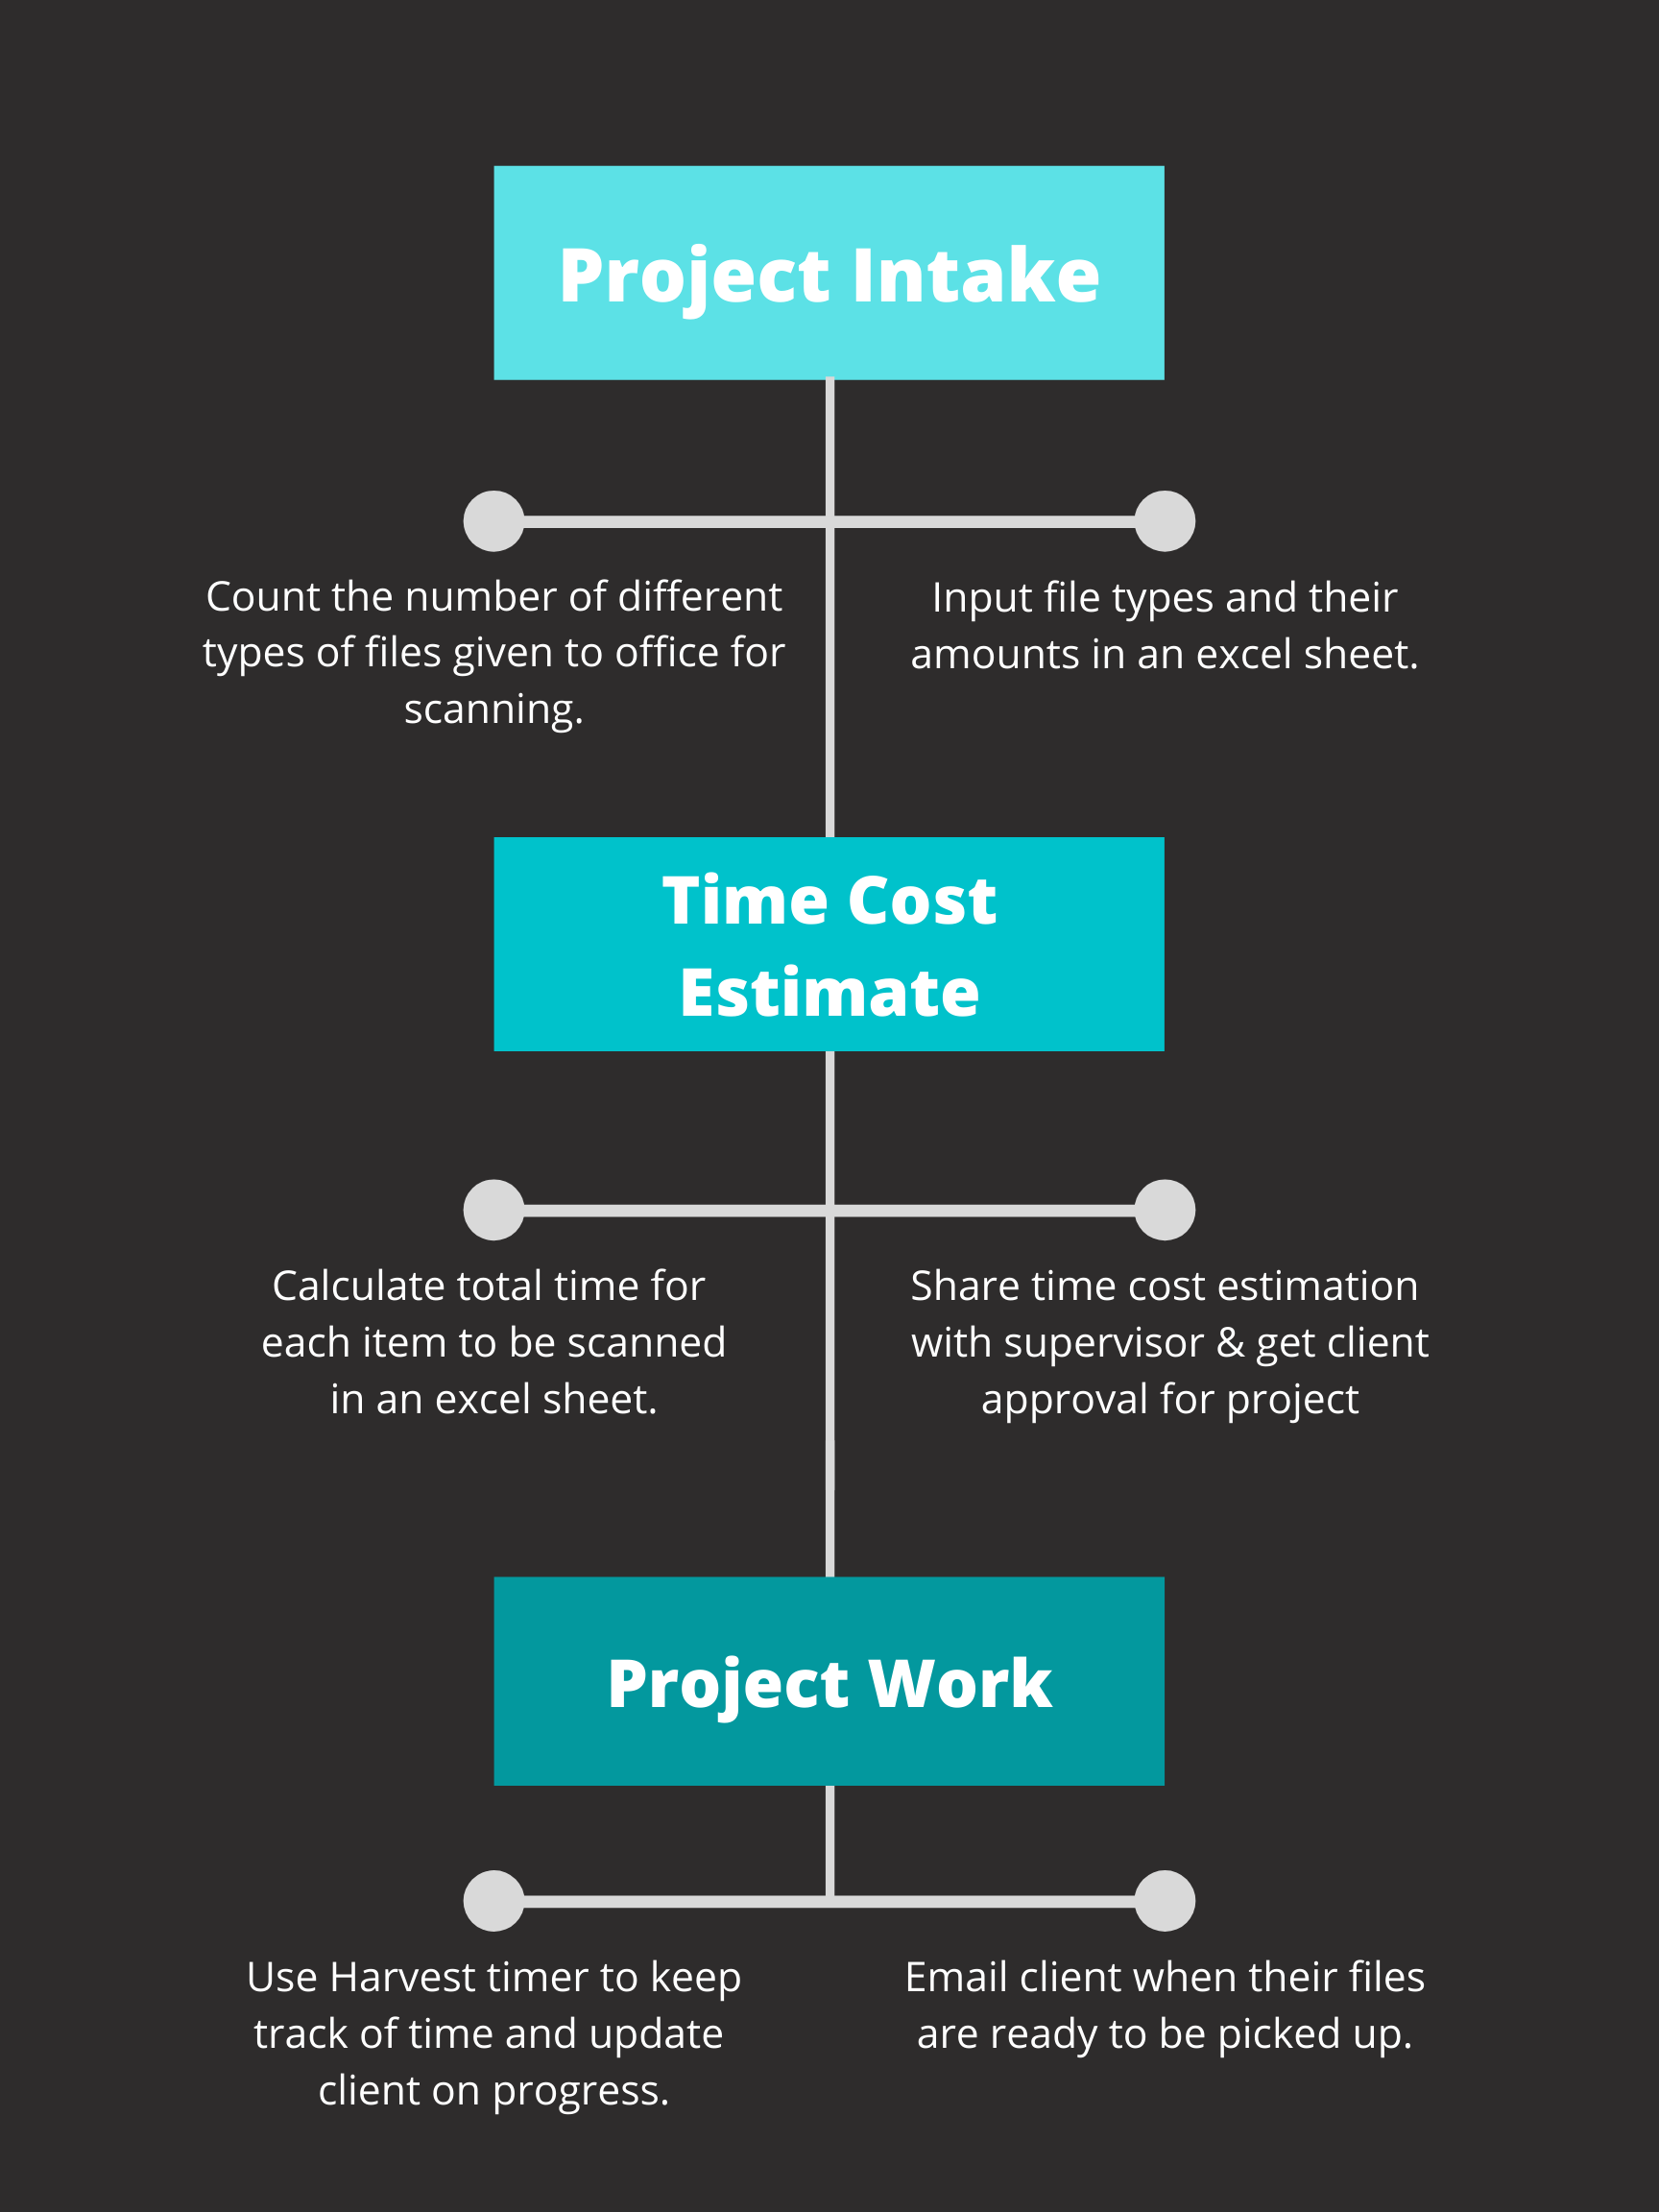
Project Intake
Step 1
(LEAD STA OR SUPERVISOR) Once you have received the client’s material carefully count and quantify all the files left with us. Calculate how many single document pages, single photographs, postcards, pamphlets, maps, slides, film, booklets, etc there are for each category of file type. And the total amount of these files combined as well. Record your findings in an excel sheet to be shared with your SUPERVISOR. Below is where you can find the template to make a copy of and edit:
smb://file.laits.utexas.edu/sta/_STA_resources/Scanning Project Time Template.xlsx
or
https://utexas.app.box.com/file/680117366263
Time Cost Estimates
Step 2
(LEAD STA OR SUPERVISOR) Create a cost estimation based on how long each file type takes to be scanned. Calculate the total amount of time it would take for all the files to be scanned. Include the total time it may take to organize and name files for communication.
Some files may be too large for the scanner and will have to be photographed. Include how long it would take to get each file photographed with 5 mins added for editing time for each photographed image.
Use the following information to determine the total time for a scanning project based on the number of file types counted:
12 min. to scan
1 tray of 12 slides
1200 dpi
5 min. to scan
35 mm negatives
4 in a strip
@1200dpi
2 min. to scan
1 page in a pamphlet back and front
8.5×11.5in
@300dpi
2 min. to scan
1 page in a packet front and back
8.5x12in
@300dpi
2 min. to scan
1 photo front and back
5x7in
@300 dpi
2 min. to scan
1 postcard 4.5×7.5 front and back
@300 dpi
Step 3
(LEAD STA: Share the itemized cost estimation with your SUPERVISOR)
Once estimations approved by your supervisor, share it with the client for sign-off/approval. You can re-adjust estimates if the client decides to forgo larger format scanning.
Set expectations with the client for when they can have their materials returned to them and digitally uploaded to BOX.
![]()
Project Work
After the client approves the cost estimate, we can begin work.
Step 4
(SUPERVISOR) Set up the project in Harvest.
(STA) When working in harvest use the “timer” to get very accurate time spent on the project as these are time-sensitive.

(SUPERVISOR or LEAD STA) Convey all work parameters, workflow, time considerations, and all instructions with the STA(s) who will be doing the scanning.
Step 5
(SUPERVISOR) Have the LEAD STA send the client weekly updates on progress.
(LEAD STA) Cc supervisors until the project is completed.
(LEAD STA OR SUPERVISOR) Arrange a time for the client to pick-up materials.(SUPERVISOR) Closeout the project on Harvest and basecamp
Scanning Instruction Resources:
Basic Training: Page Scanning for Books and Magazines
Basic Training: Slide and Film Scanning