![]()
This basic training will introduce you to the image trace tool in Adobe Illustrator. The tool allows you to quickly convert any raster image (.png, .jpeg, .psd) into vector artwork (.pdf, .eps, .ai) without having to manually retrace the image. Vector images are useful because they are made up of shapes and can be scaled up infinitely without losing quality, unlike raster images, which are made up of pixels and lose quality when they are enlarged.

Rex / Public domain
Image tracing is great for converting scanned drawings, photos, or logos into scalable vector art. This training will walk you through how to turn a photograph into a black-and-white vector image.
Once your photo is traced, you’ll be able to keep editing and fine tuning the image in either Illustrator or Photoshop. You’ll also learn how to turn your image into a custom shape that can be reused anytime you open Photoshop.
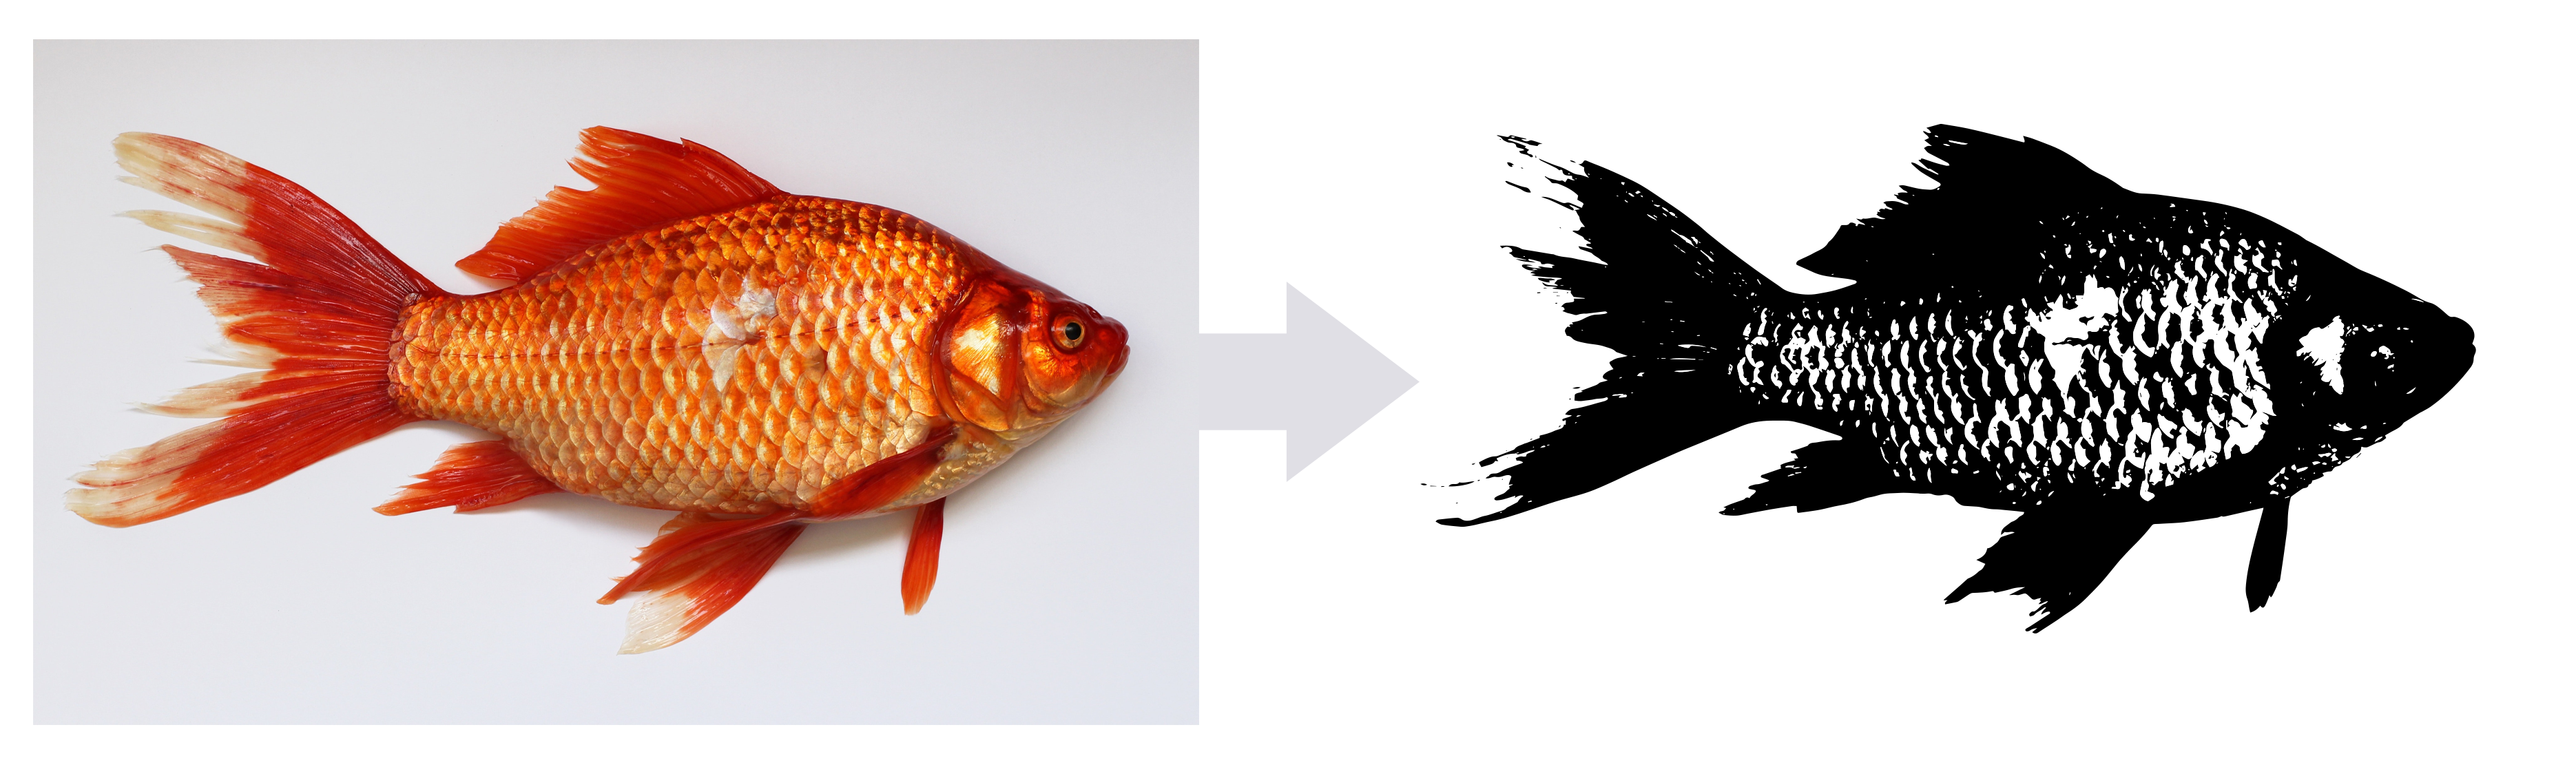
Step One: Find a High Quality Photo
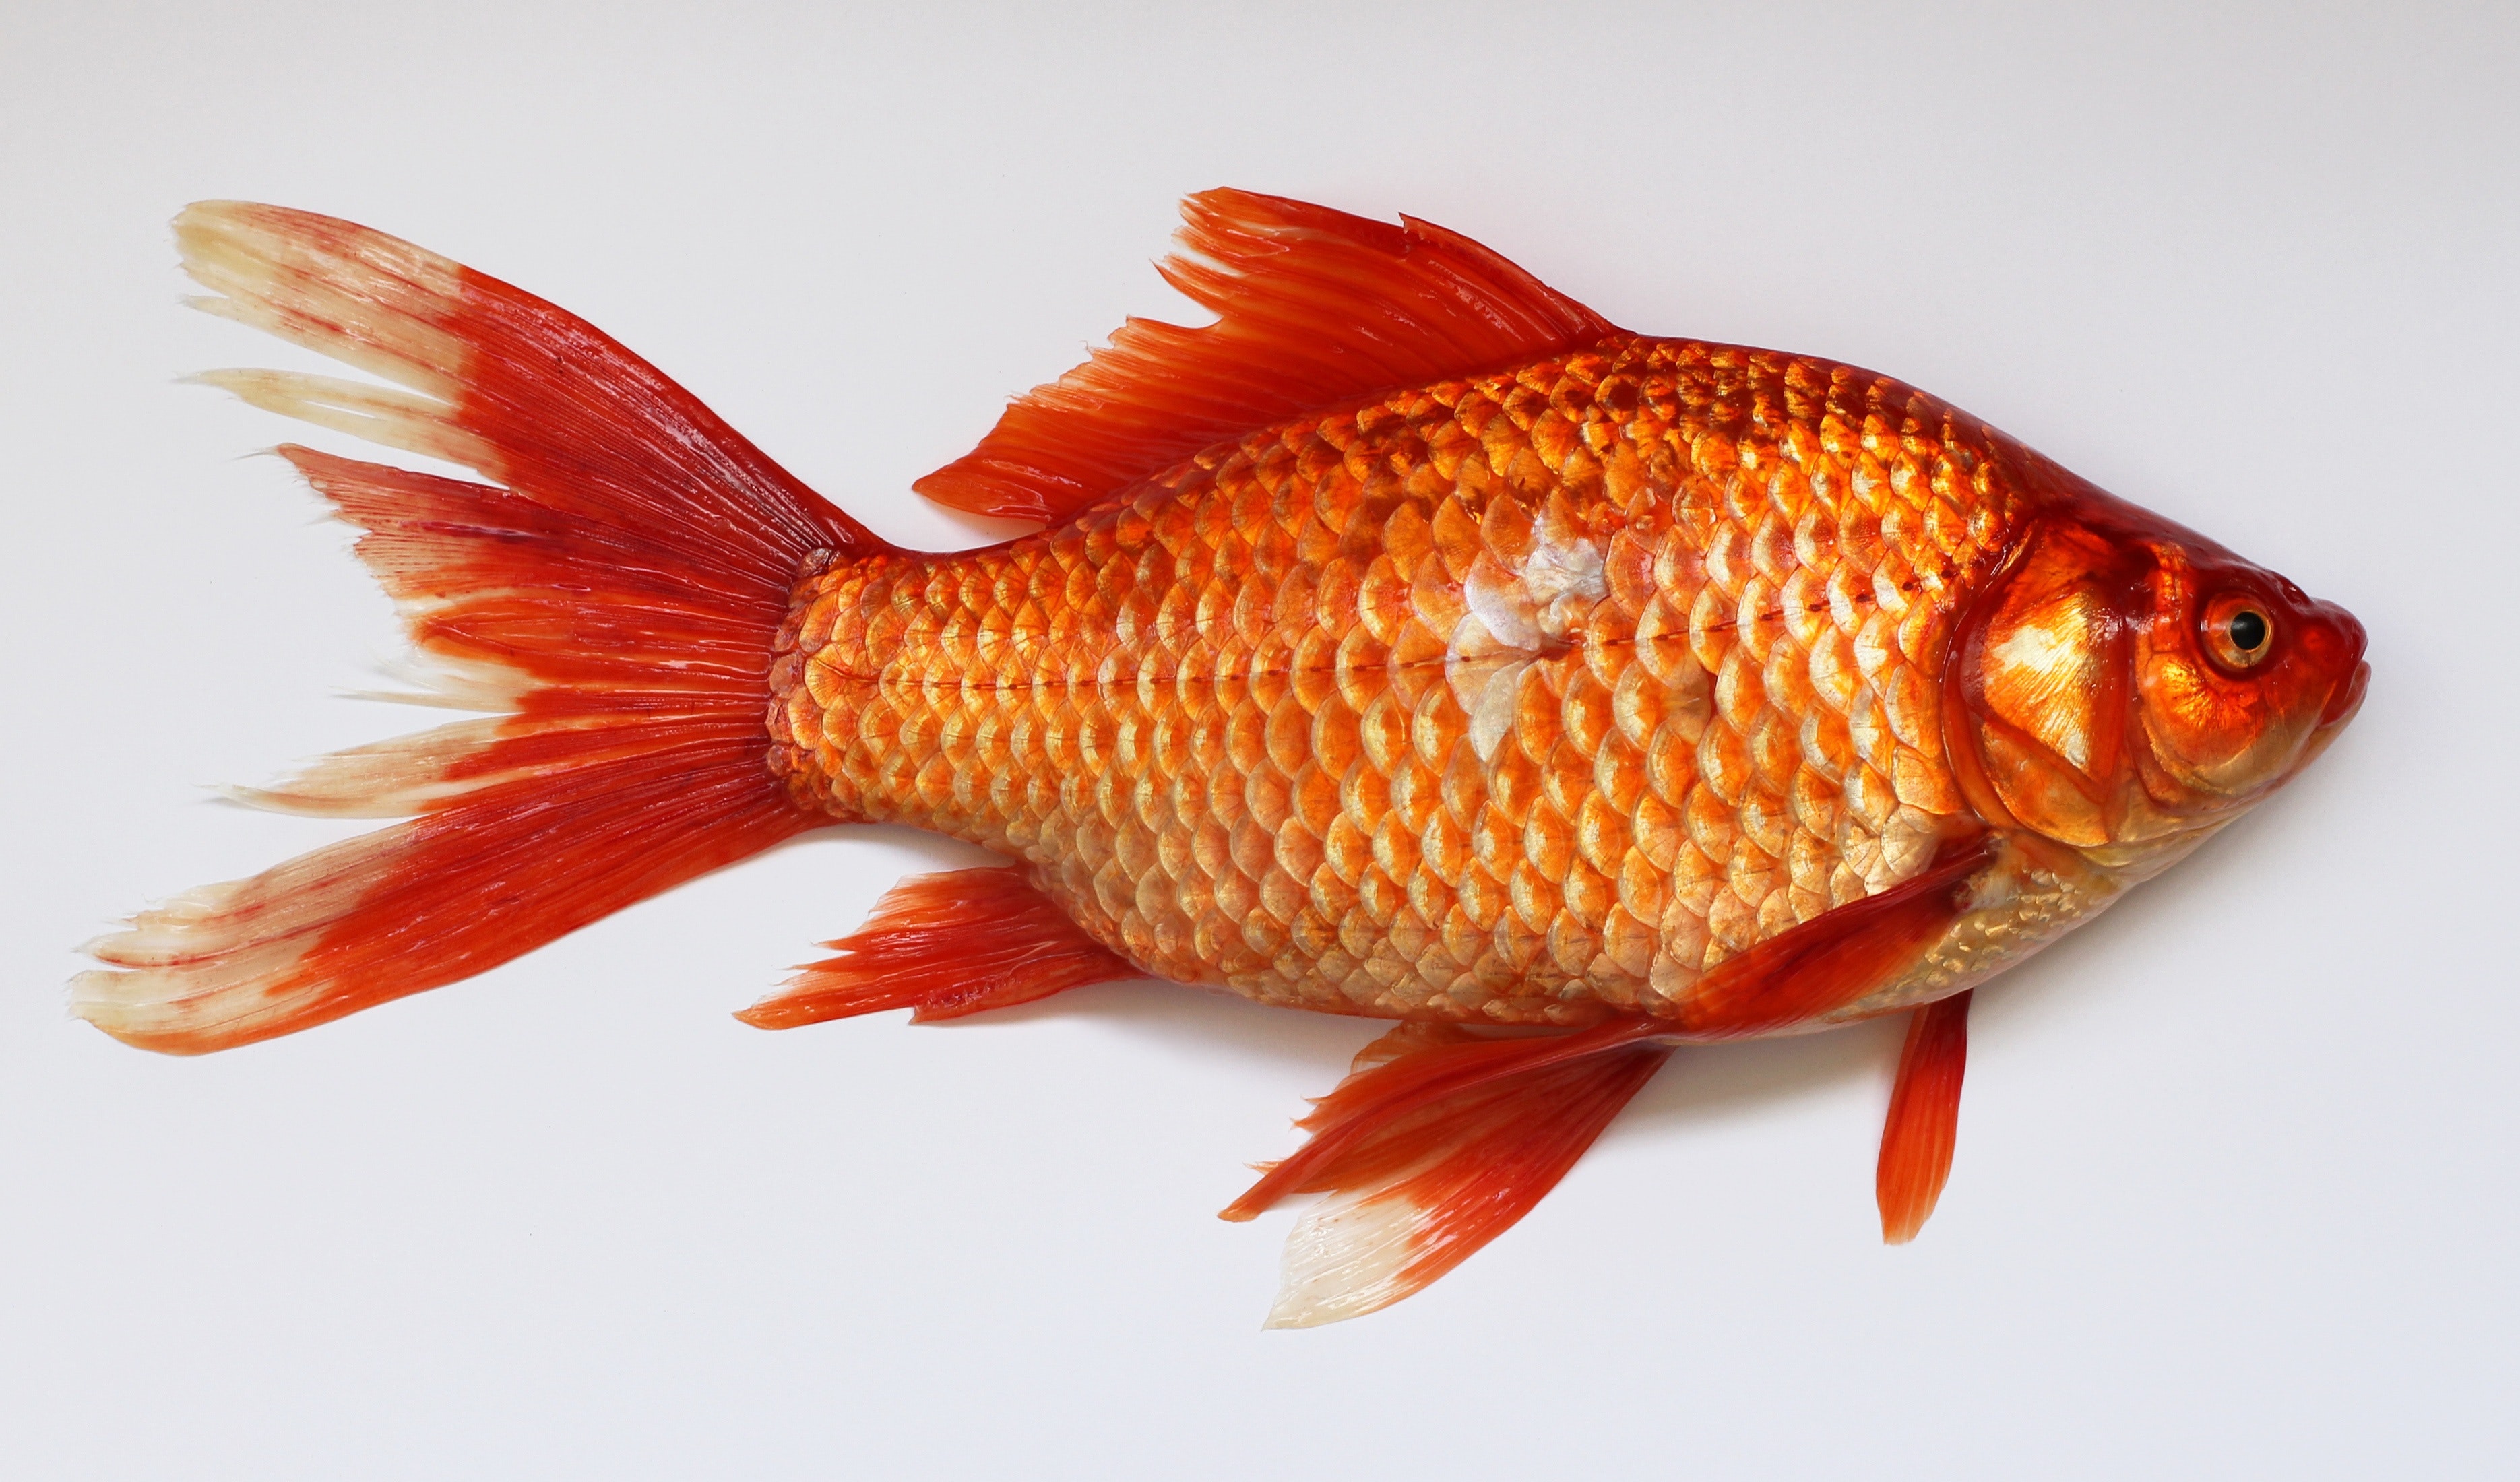
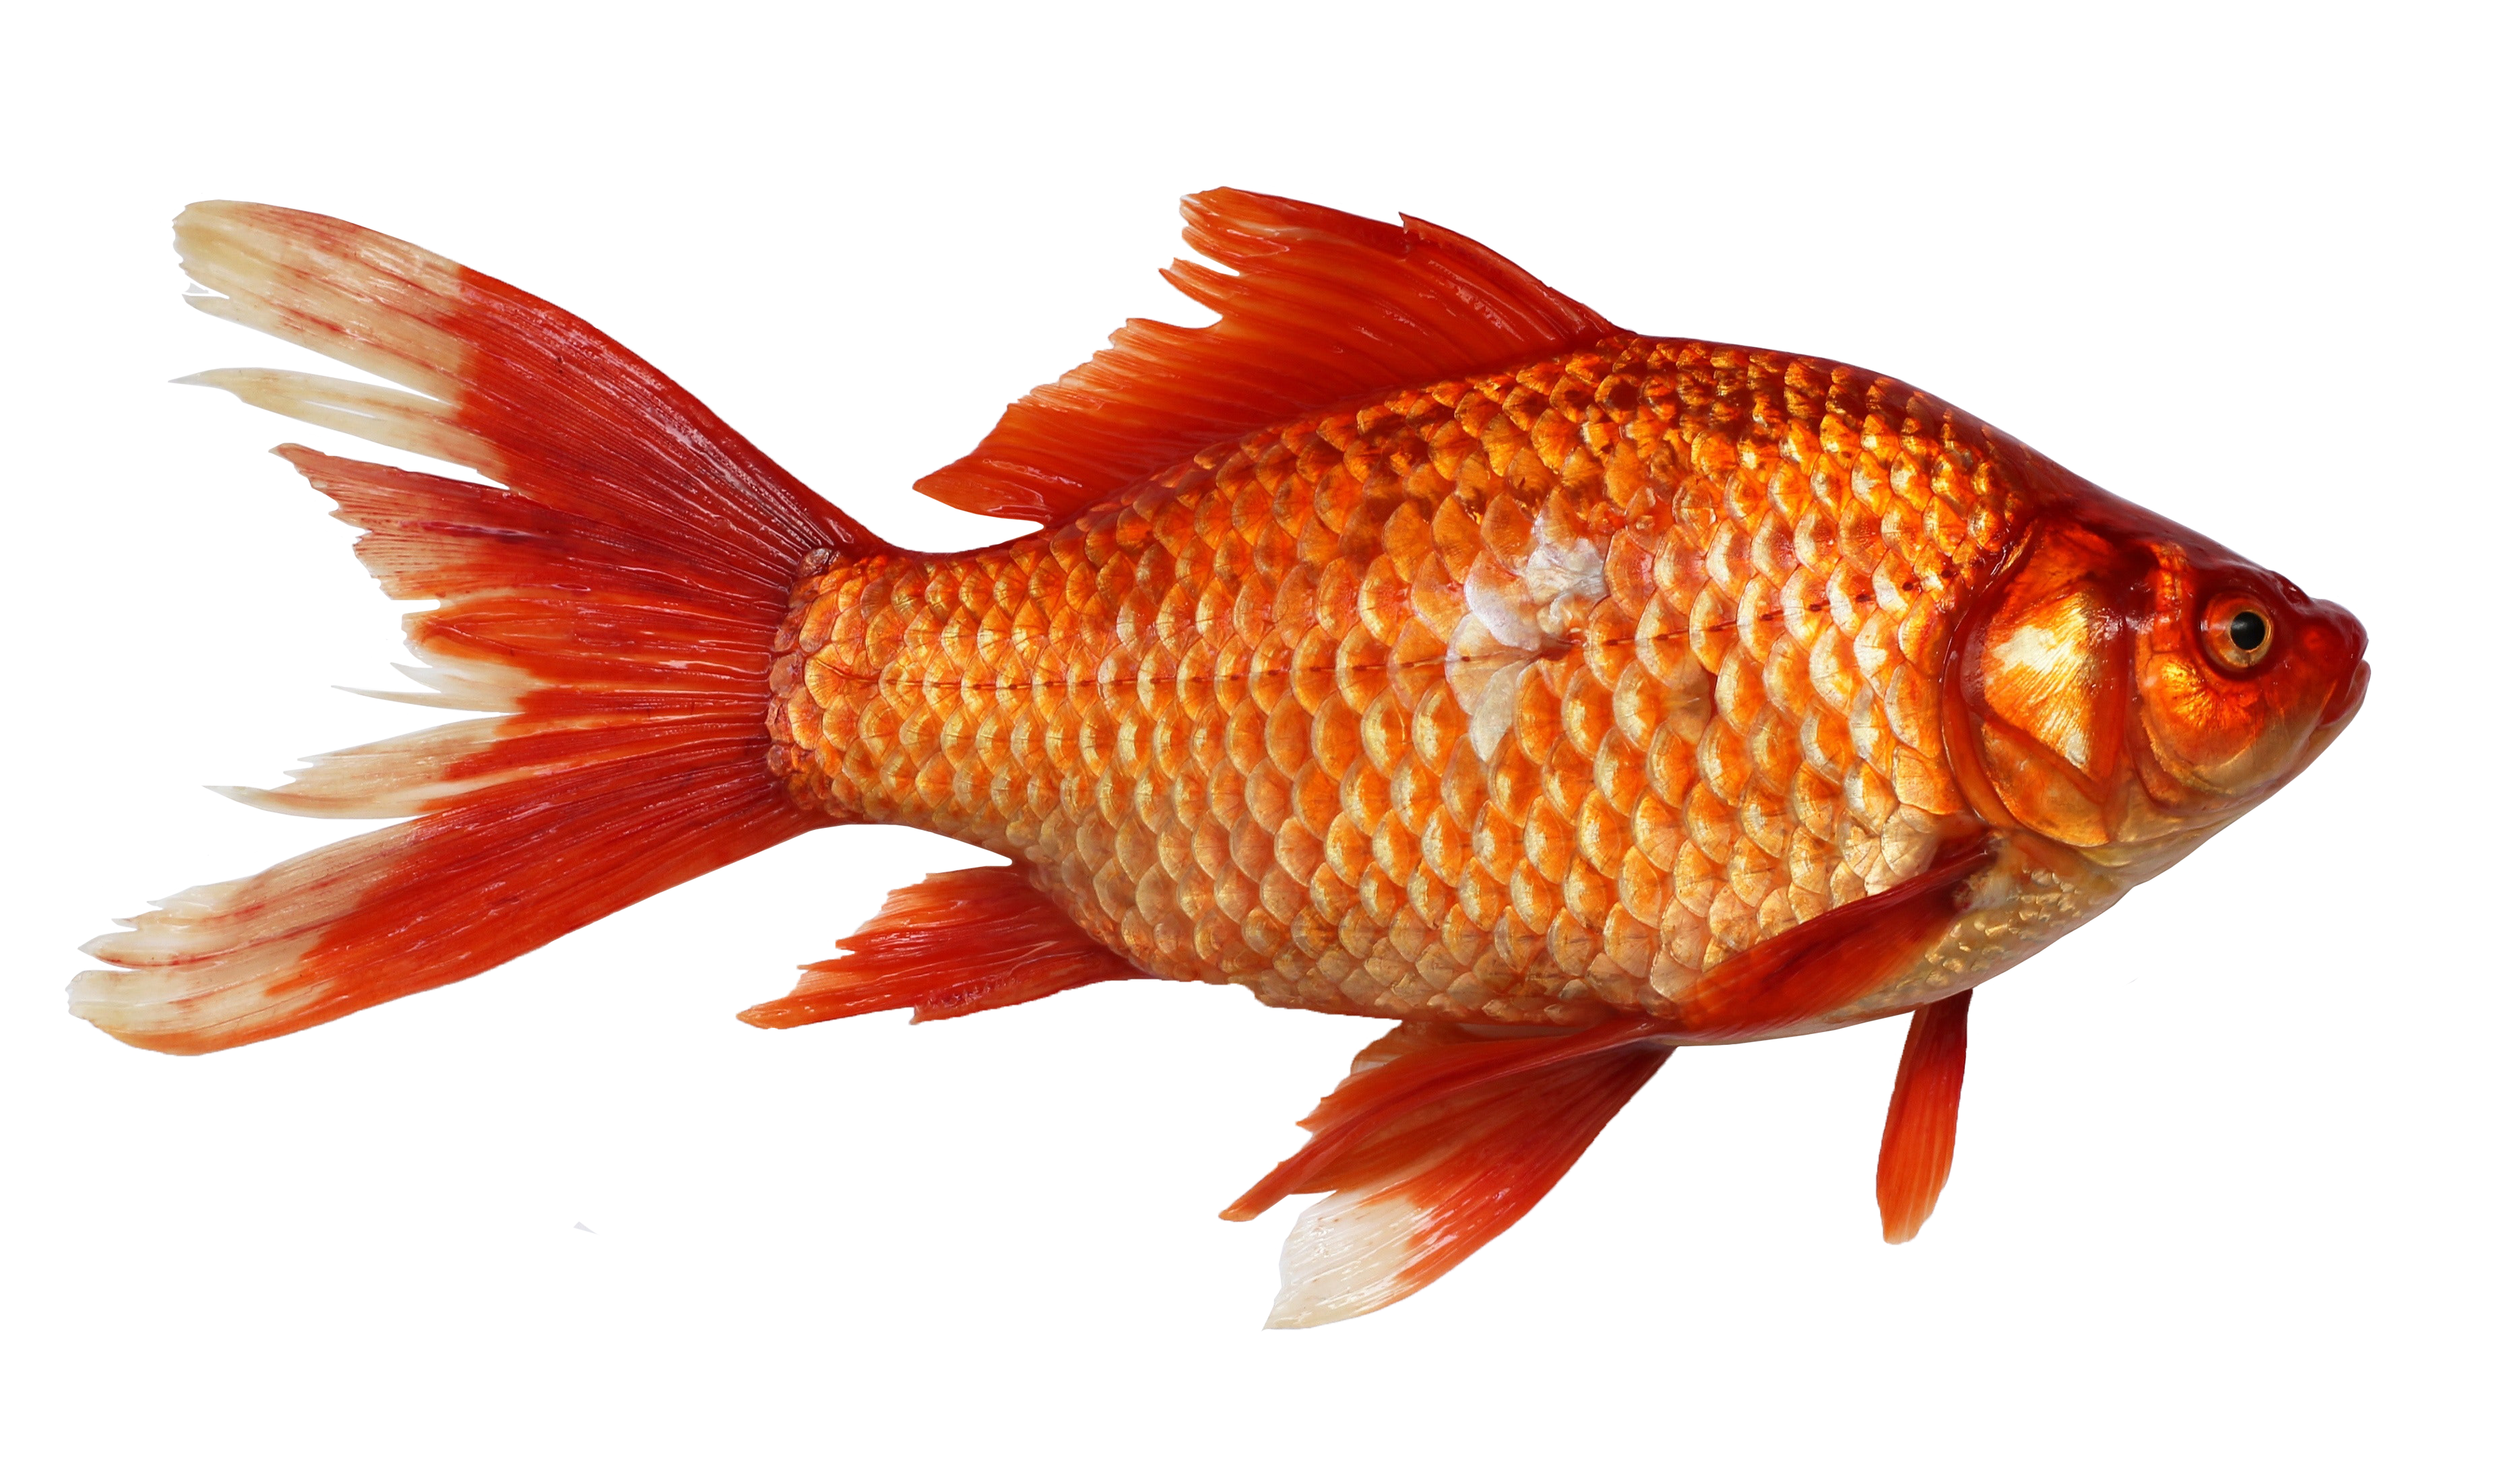
Find a high quality photo of an animal or object to use for this training. You can use one of your own photos or find a free usage photo online. The higher the quality, the more detail will be preserved in the vector art.
Step Two: Remove Unnecessary Parts of the Image
Before tracing your image, it’s good to remove unnecessary parts of the image that you don’t want to be part of the final vector art, especially if your photo has a busy background.
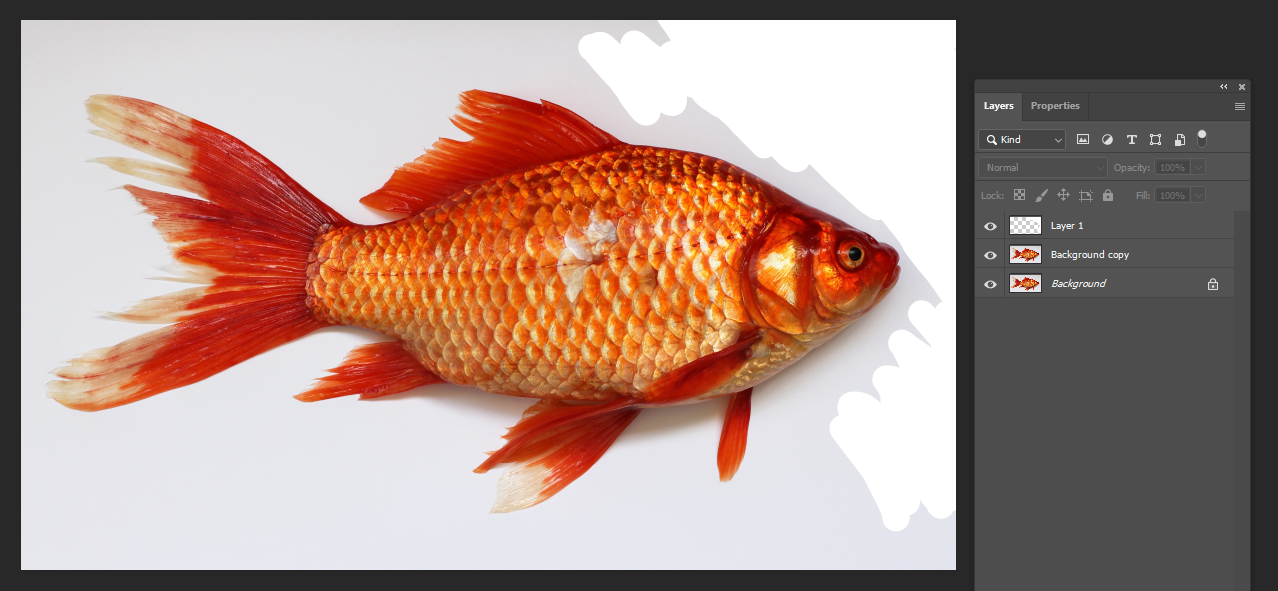
Open your photo in Photoshop and duplicate your photo in a new layer so you have a copy of it (this is always a good practice so you never lose your original image).
Then on a third layer, use the brush tool to start coloring around the object with white. You can use the quick selection tool to select the areas around the object or animal in your photo.
Step Three: Merge the Top Layers
When you’re done coloring the background, select all layers except for the background layer (the original photo), right-click, and press Merge Layers. Keep the background layer hidden, then save the .psd file.
Step Four: Open the PSD in Illustrator
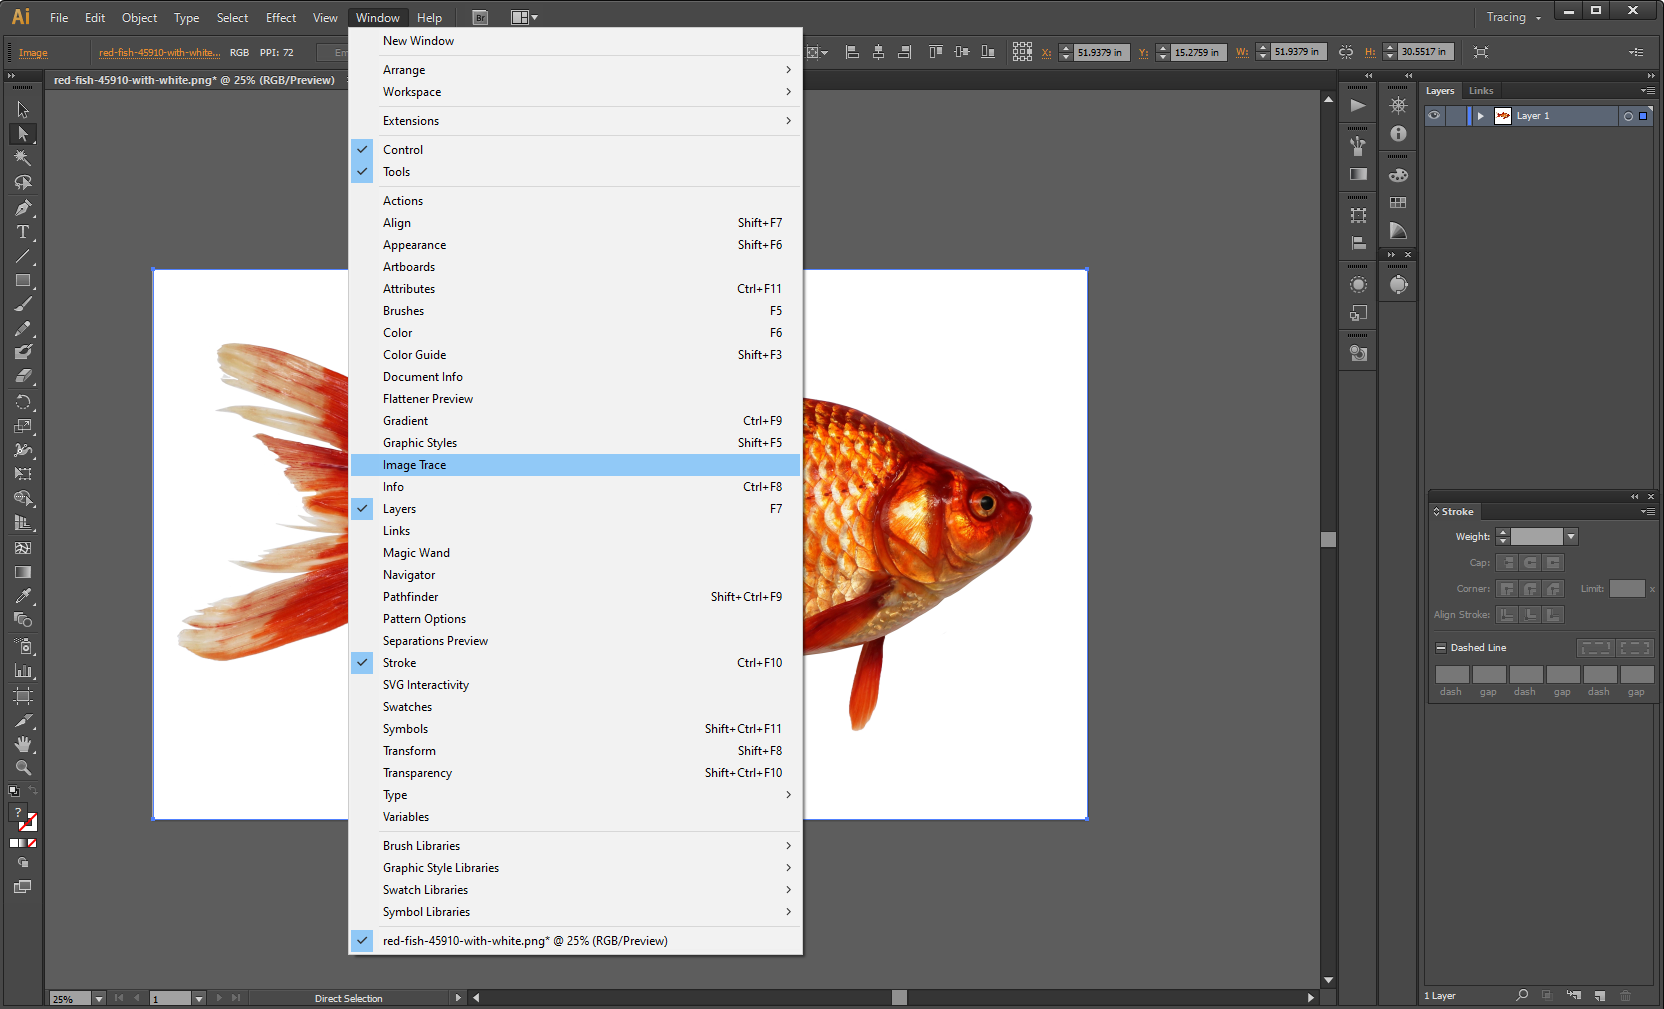
You can open your Photoshop file directly in Illustrator by dragging and dropping it into the app or going to File > Open.
Step Five: Open the Image Tracing Panel
There are two ways you can trace an image:
- Select the entire layer (ctrl + a or command +a). Then go to Window > Image Trace to open the image tracing panel. This will give you more options to fine tune the style of your tracing.
- Select the entire layer (ctrl + a or command +a). Then go to Object > Image Trace > Make to quickly trace an image with the default settings. This will create a black-and-white tracing of your image.
For now, open the image tracing panel so you can learn more about the options that are available.
Step Six: Select the Black and White Preset
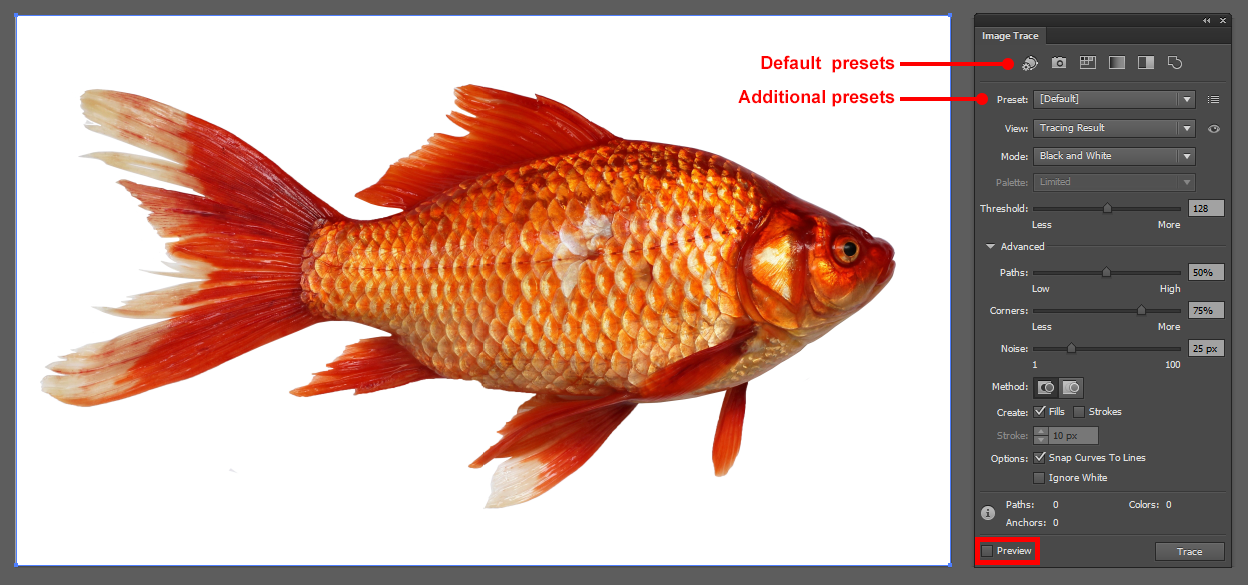
In the image tracing panel, there will be default presets shown at the top as icons. Below that is a drop-down menu with additional presets you can choose from.
When the preview box is selected (bottom-left corner of the panel), you’ll be able to preview any of the image tracing presets before committing to one.
Try out some of the presets to see how they affect your photo. Then select the black-and-white preset (the fourth icon). Higher resolution images may take a few seconds to trace.
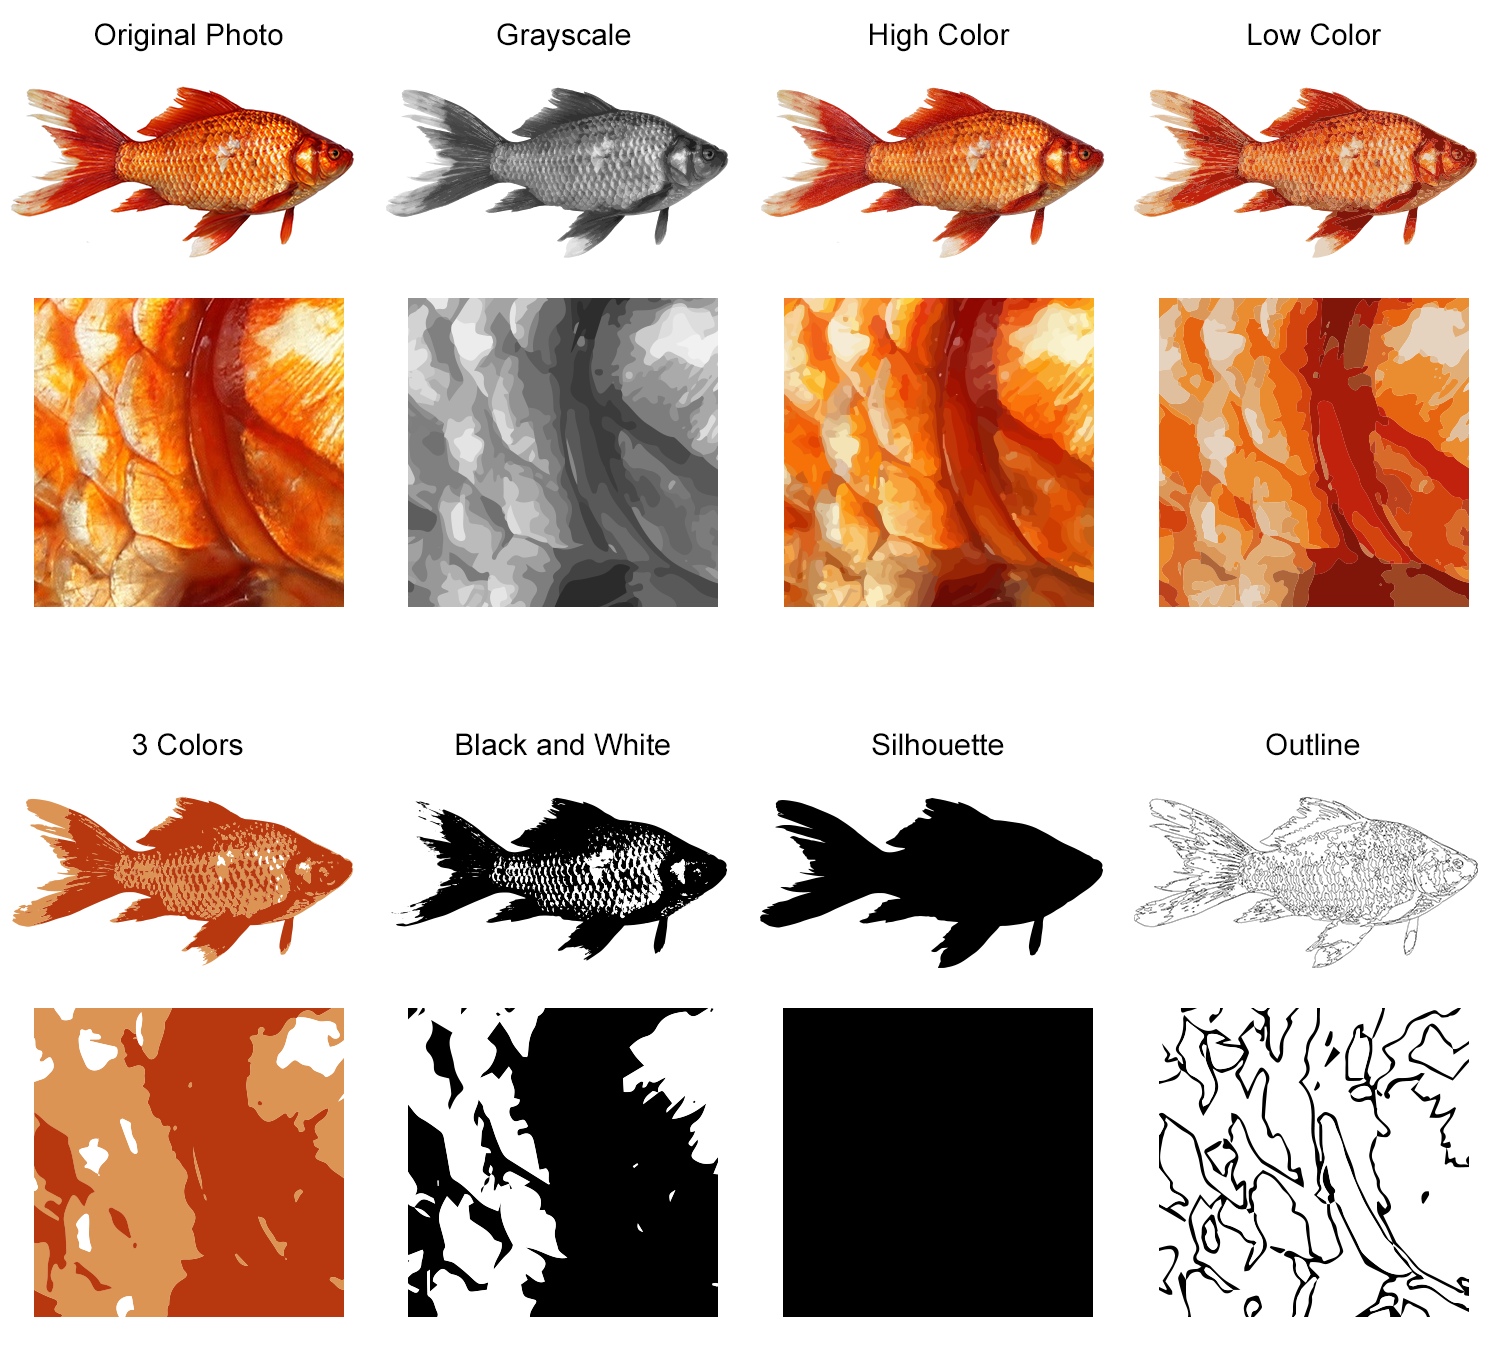
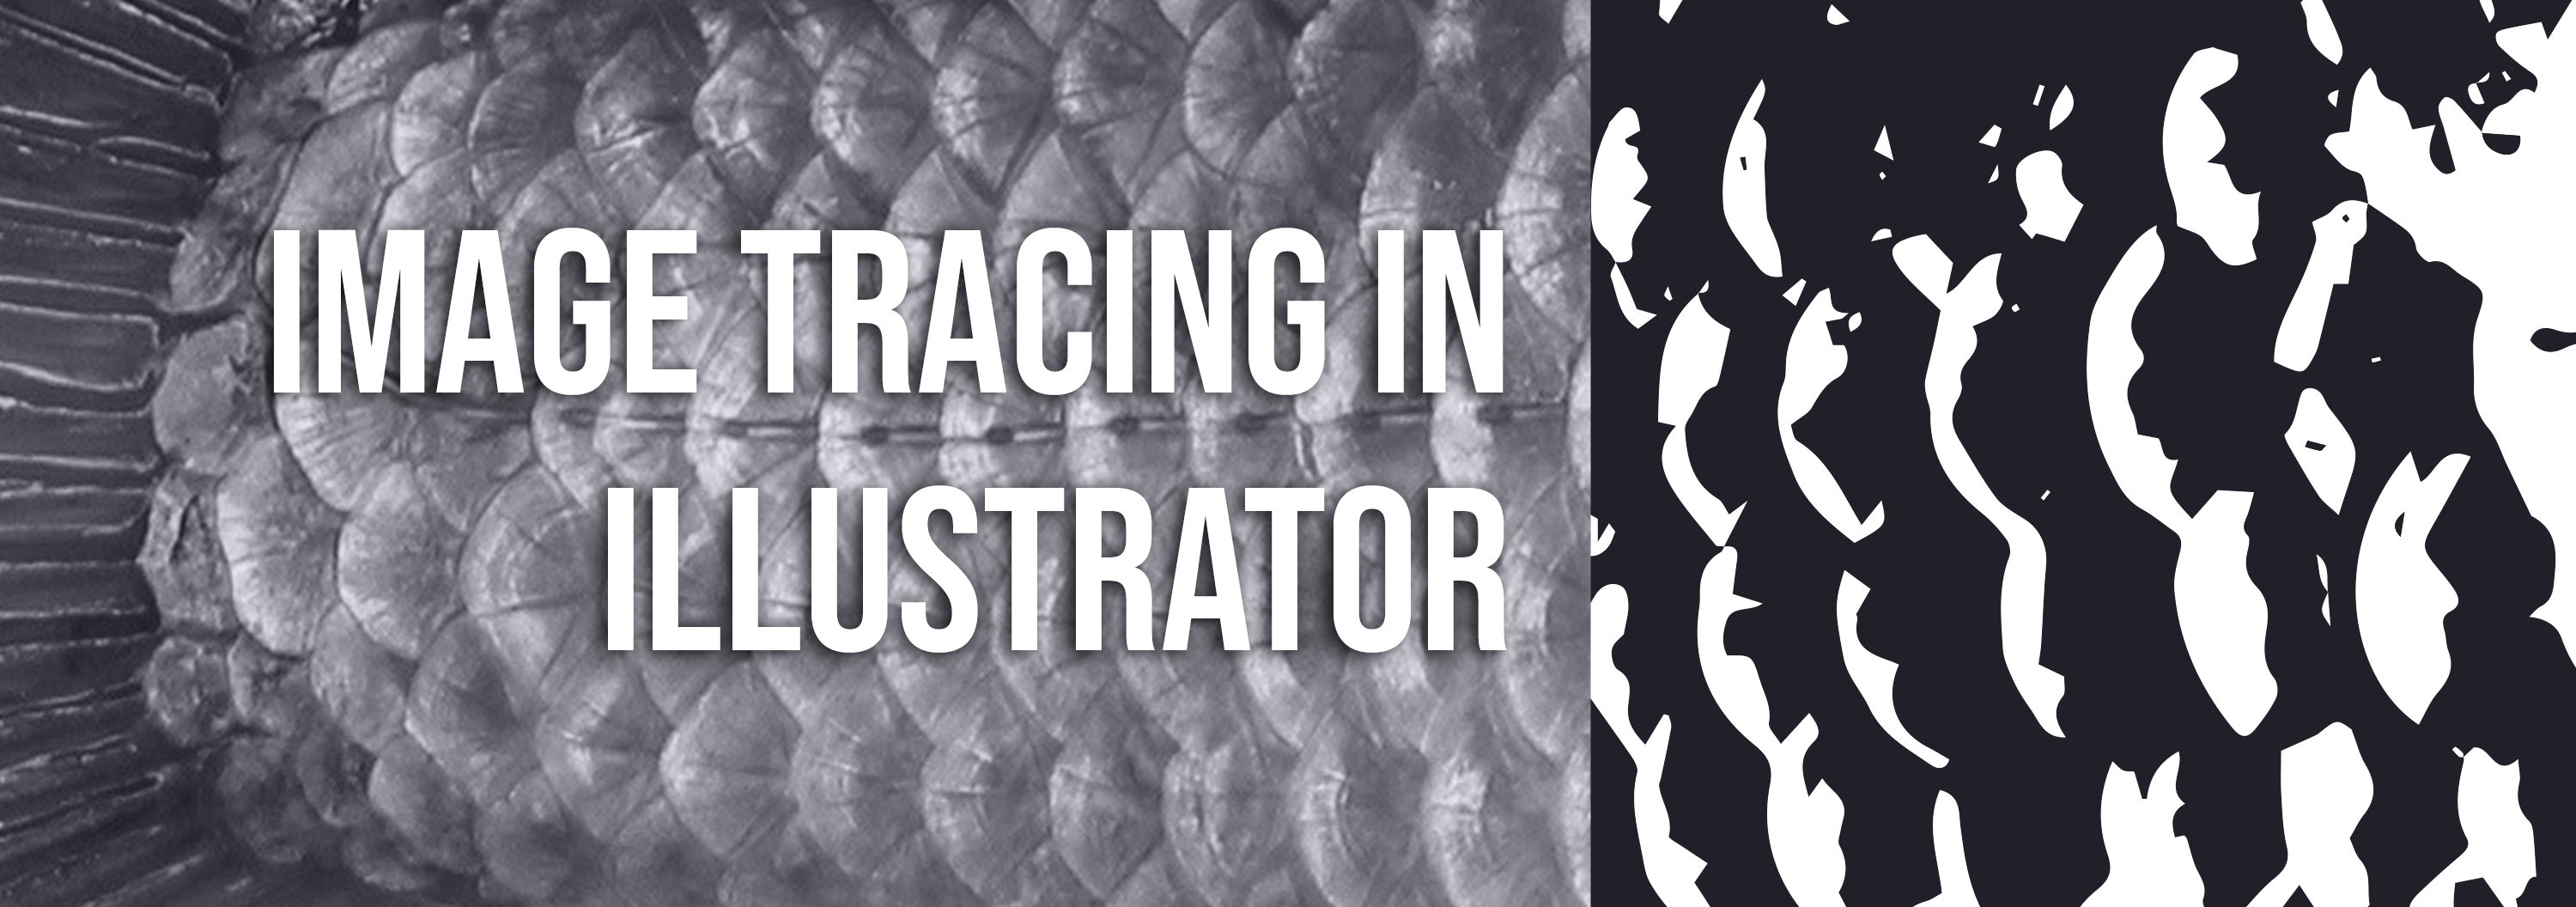
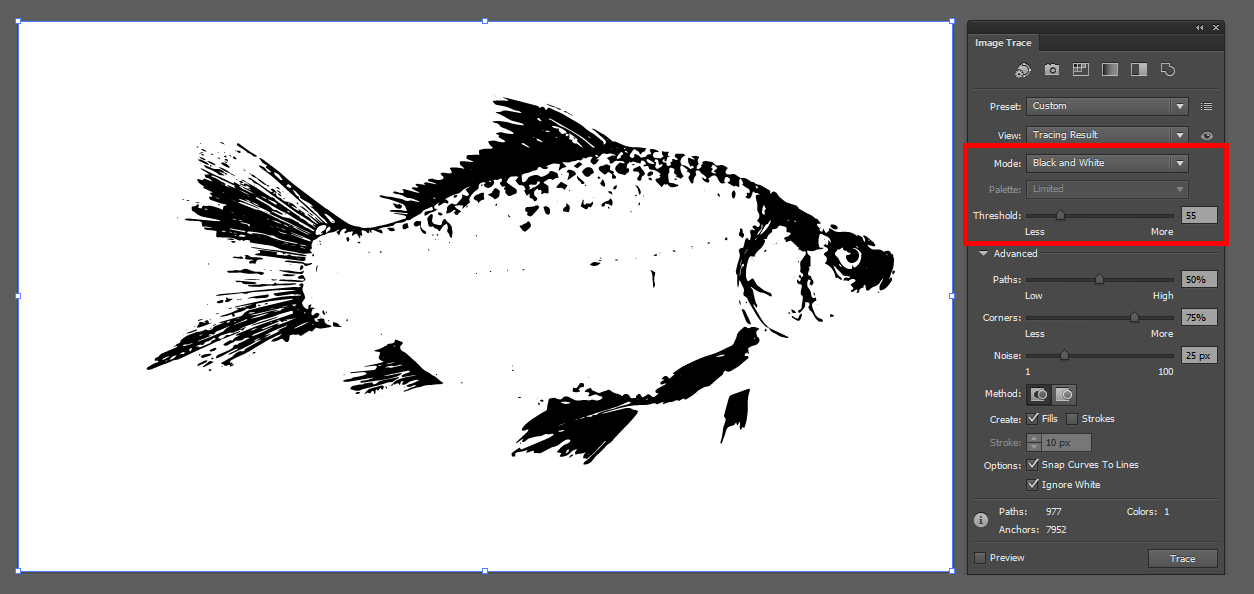
Step Seven: Adjust the Threshold
Depending on which mode you’ve selected (color, grayscale, black and white), you’ll be able to adjust the amount of detail included in the tracing result.
When you’re in the Black and White Mode, you’ll be able to adjust the threshold value of your image by moving the slider. A lower value will result in more white area, while a higher value will result in more black area.
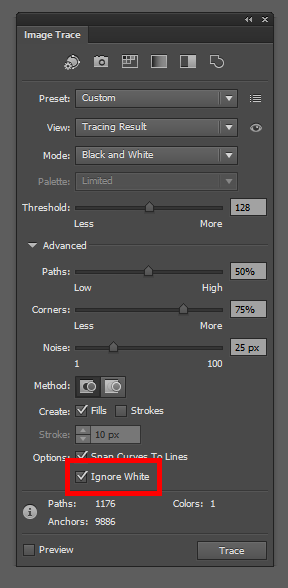
Step Eight: Check ‘Ignore White’
Under advanced options, make sure to check the box that says “Ignore White” before saving, exporting, or copying your image. This will replace all the white areas with no fill.
Step Nine: Add a Vector Mask
At this point, you can either keep editing your image in Illustrator, or export and edit it in Photoshop (depending on which program you’re more comfortable with and what you want to use your image for).
One method is to use Photoshop vector masks to control the amount of detail in your image. You can create copies of your tracing at different threshold levels in Illustrator, paste them into Photoshop so they overlap, and use a vector mask (or layer mask, which functions the same way) to hide or reveal certain areas. Learn how to do this by following the steps below.
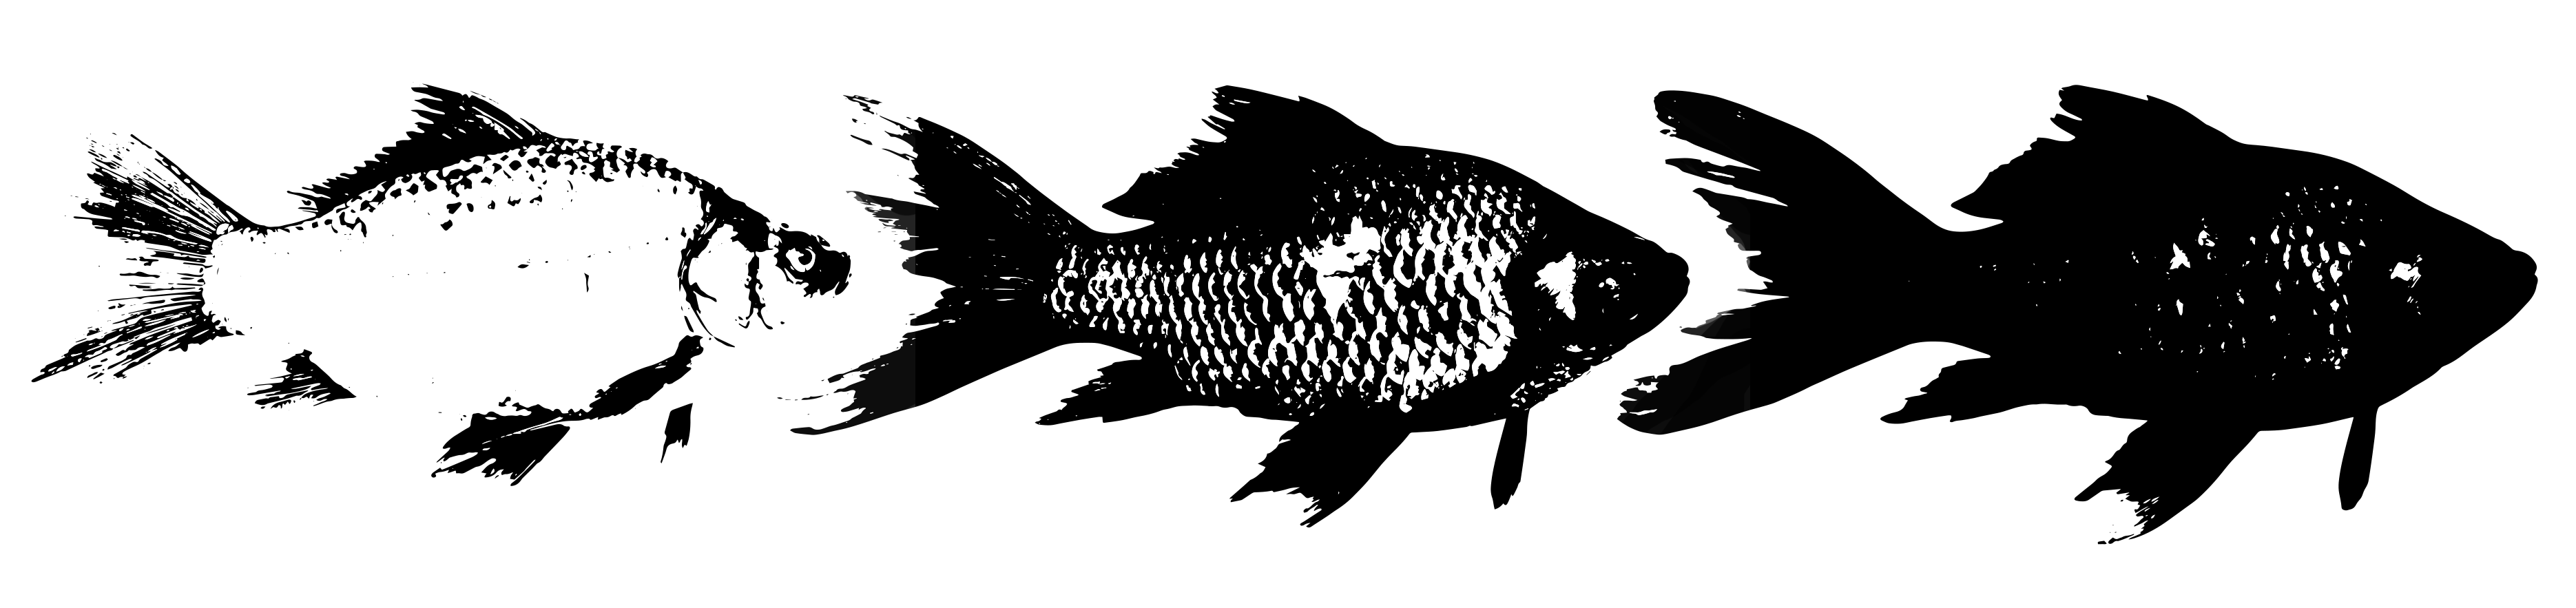
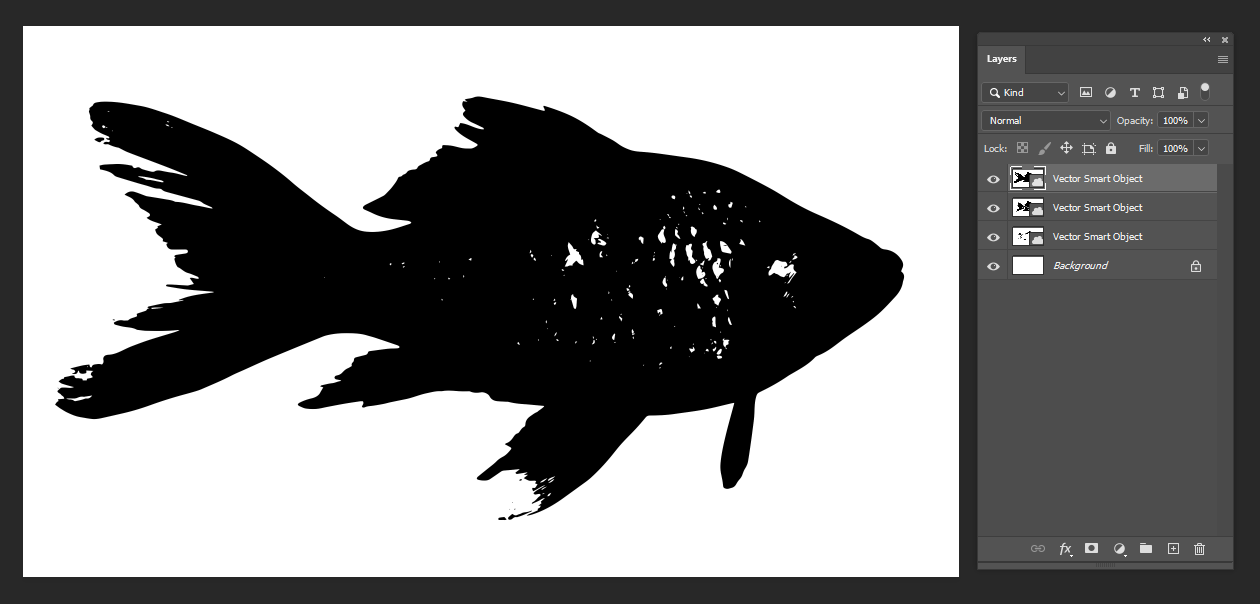
First, set your threshold to a low value (e.g. 55). Then select the entire layer (ctrl + a or command + a) and copy it (ctrl + c or command + c).
Paste it into Photoshop as a Smart Object (this means the vector artwork will remain intact).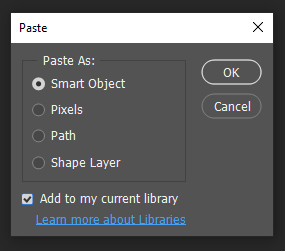
Then do the same thing with a medium value (e.g, 128) and a high value (e.g. 200). By the end you should have three overlapping layers in Photoshop.
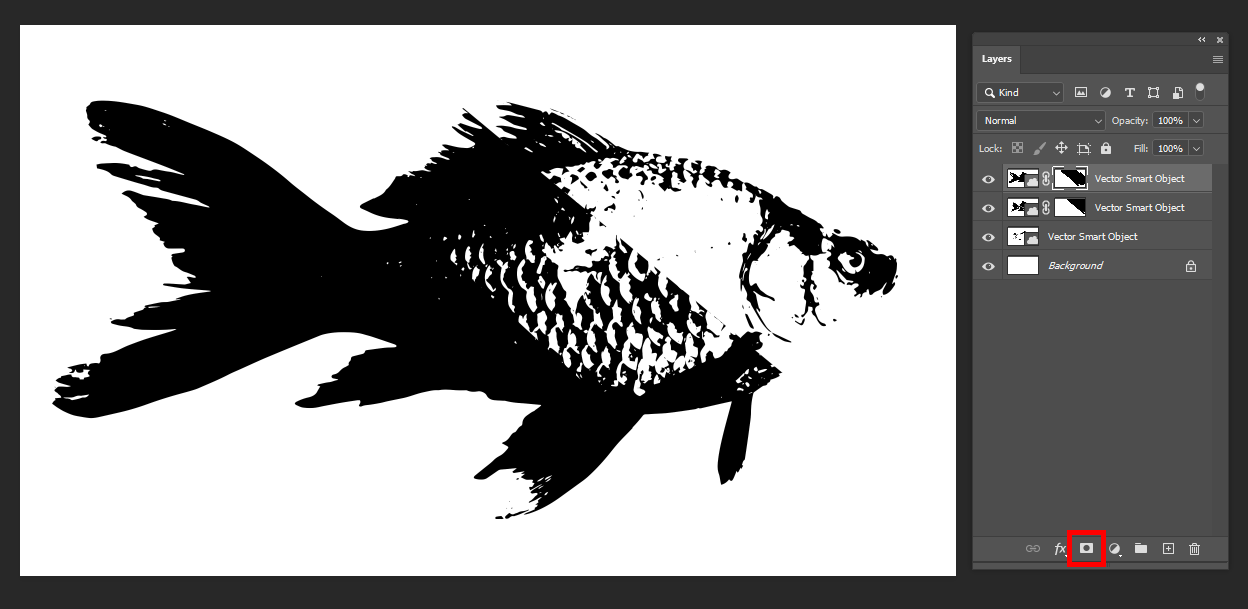
Finally, add a vector mask to selectively hide parts of any layer, which will reveal the layers below. Masks are a good way to clean up your image by hiding stray marks around the edges.
Click on the mask icon (bottom of the layers panel) to add a vector mask to a layer.
You’ll see a white box appear next to your layer—this is your vector mask. It will be attached to your layer, but you can disable or delete it anytime. Select it to start editing it.
Use the pen tool to start painting with black over the areas you want to hide. Any part of your image that is masked with black will be set to 0% opacity (i.e. invisible); any parts that are masked with white will be set at 100% opacity (i.e. fully visible). Grays are used for any opacity in between.
Step Ten: Create a Work Path
When you’re happy with the shape created by your combined layers, you can save the path and add it to your shape library in Photoshop, which will let you access it anytime in the future.
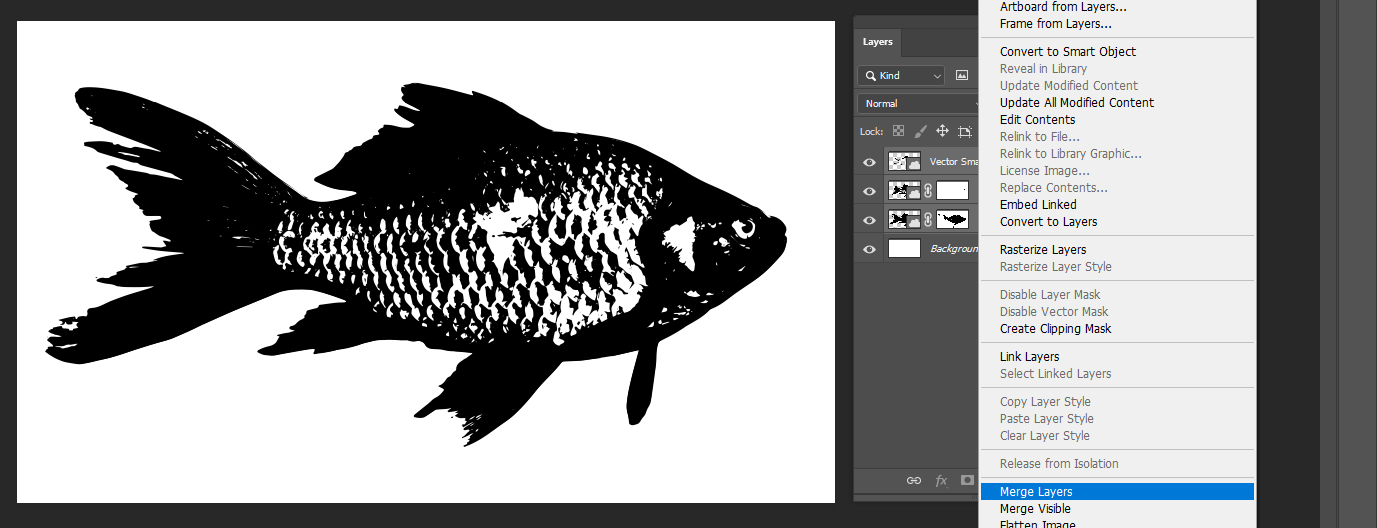
First, highlight all of the layers that are part of your final image, right-click, and press Merge Layers.
Then press command or ctrl while left-clicking on the new merged layer. Make sure to click on the layer thumbnail—this will select just the pixels on that layer.

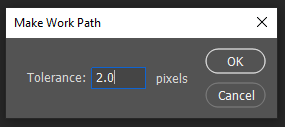
Go to Window > Paths to open the paths window. Then, with your image selected, click on the menu button and select Make Work Path.
In the box that appears, you can choose a tolerance between .5 and 10 pixels. Tolerance refers to the number of anchor points that will be used to make the path; a higher tolerance means smoother lines, but less detail. For now you can use the default tolerance, which is 2 pixels.
Step Eleven: Turn Your Path Into a Custom Shape
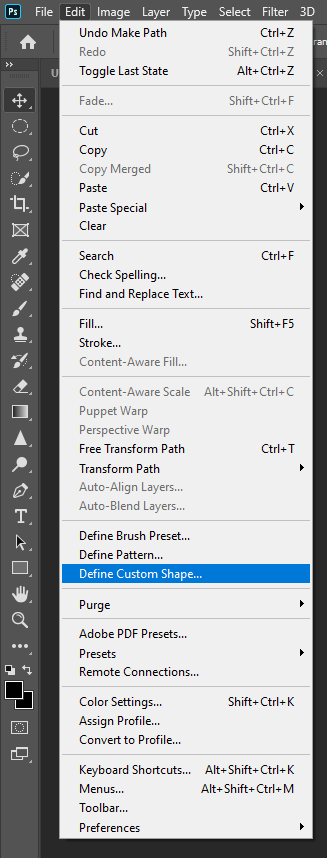
Select the work path you just created. Then go to Edit > Define Custom Shape to create a new shape from that path.
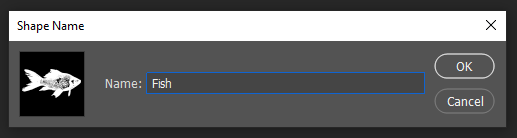
A box will appear to name your shape so you can find it later. The shape will be added to a library of pre-made shapes in your toolbar.
Whenever you want to access the shape again, open the shapes panel by going to Window > Shapes. Then just drag and drop your shape into your document.
Because the custom shape is a saved path, it will remain a vector shape that you can scale up or down (just hold down shift while you’re scaling it to keep the proportions). You can also edit it like you would any other shape—add a fill or stroke color, rotate it, add a clipping mask, etc.
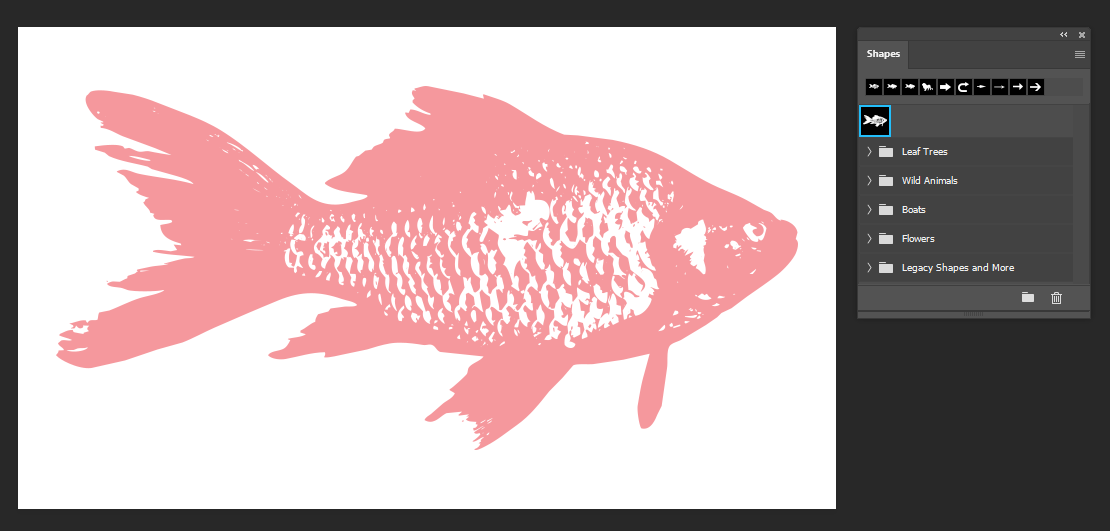
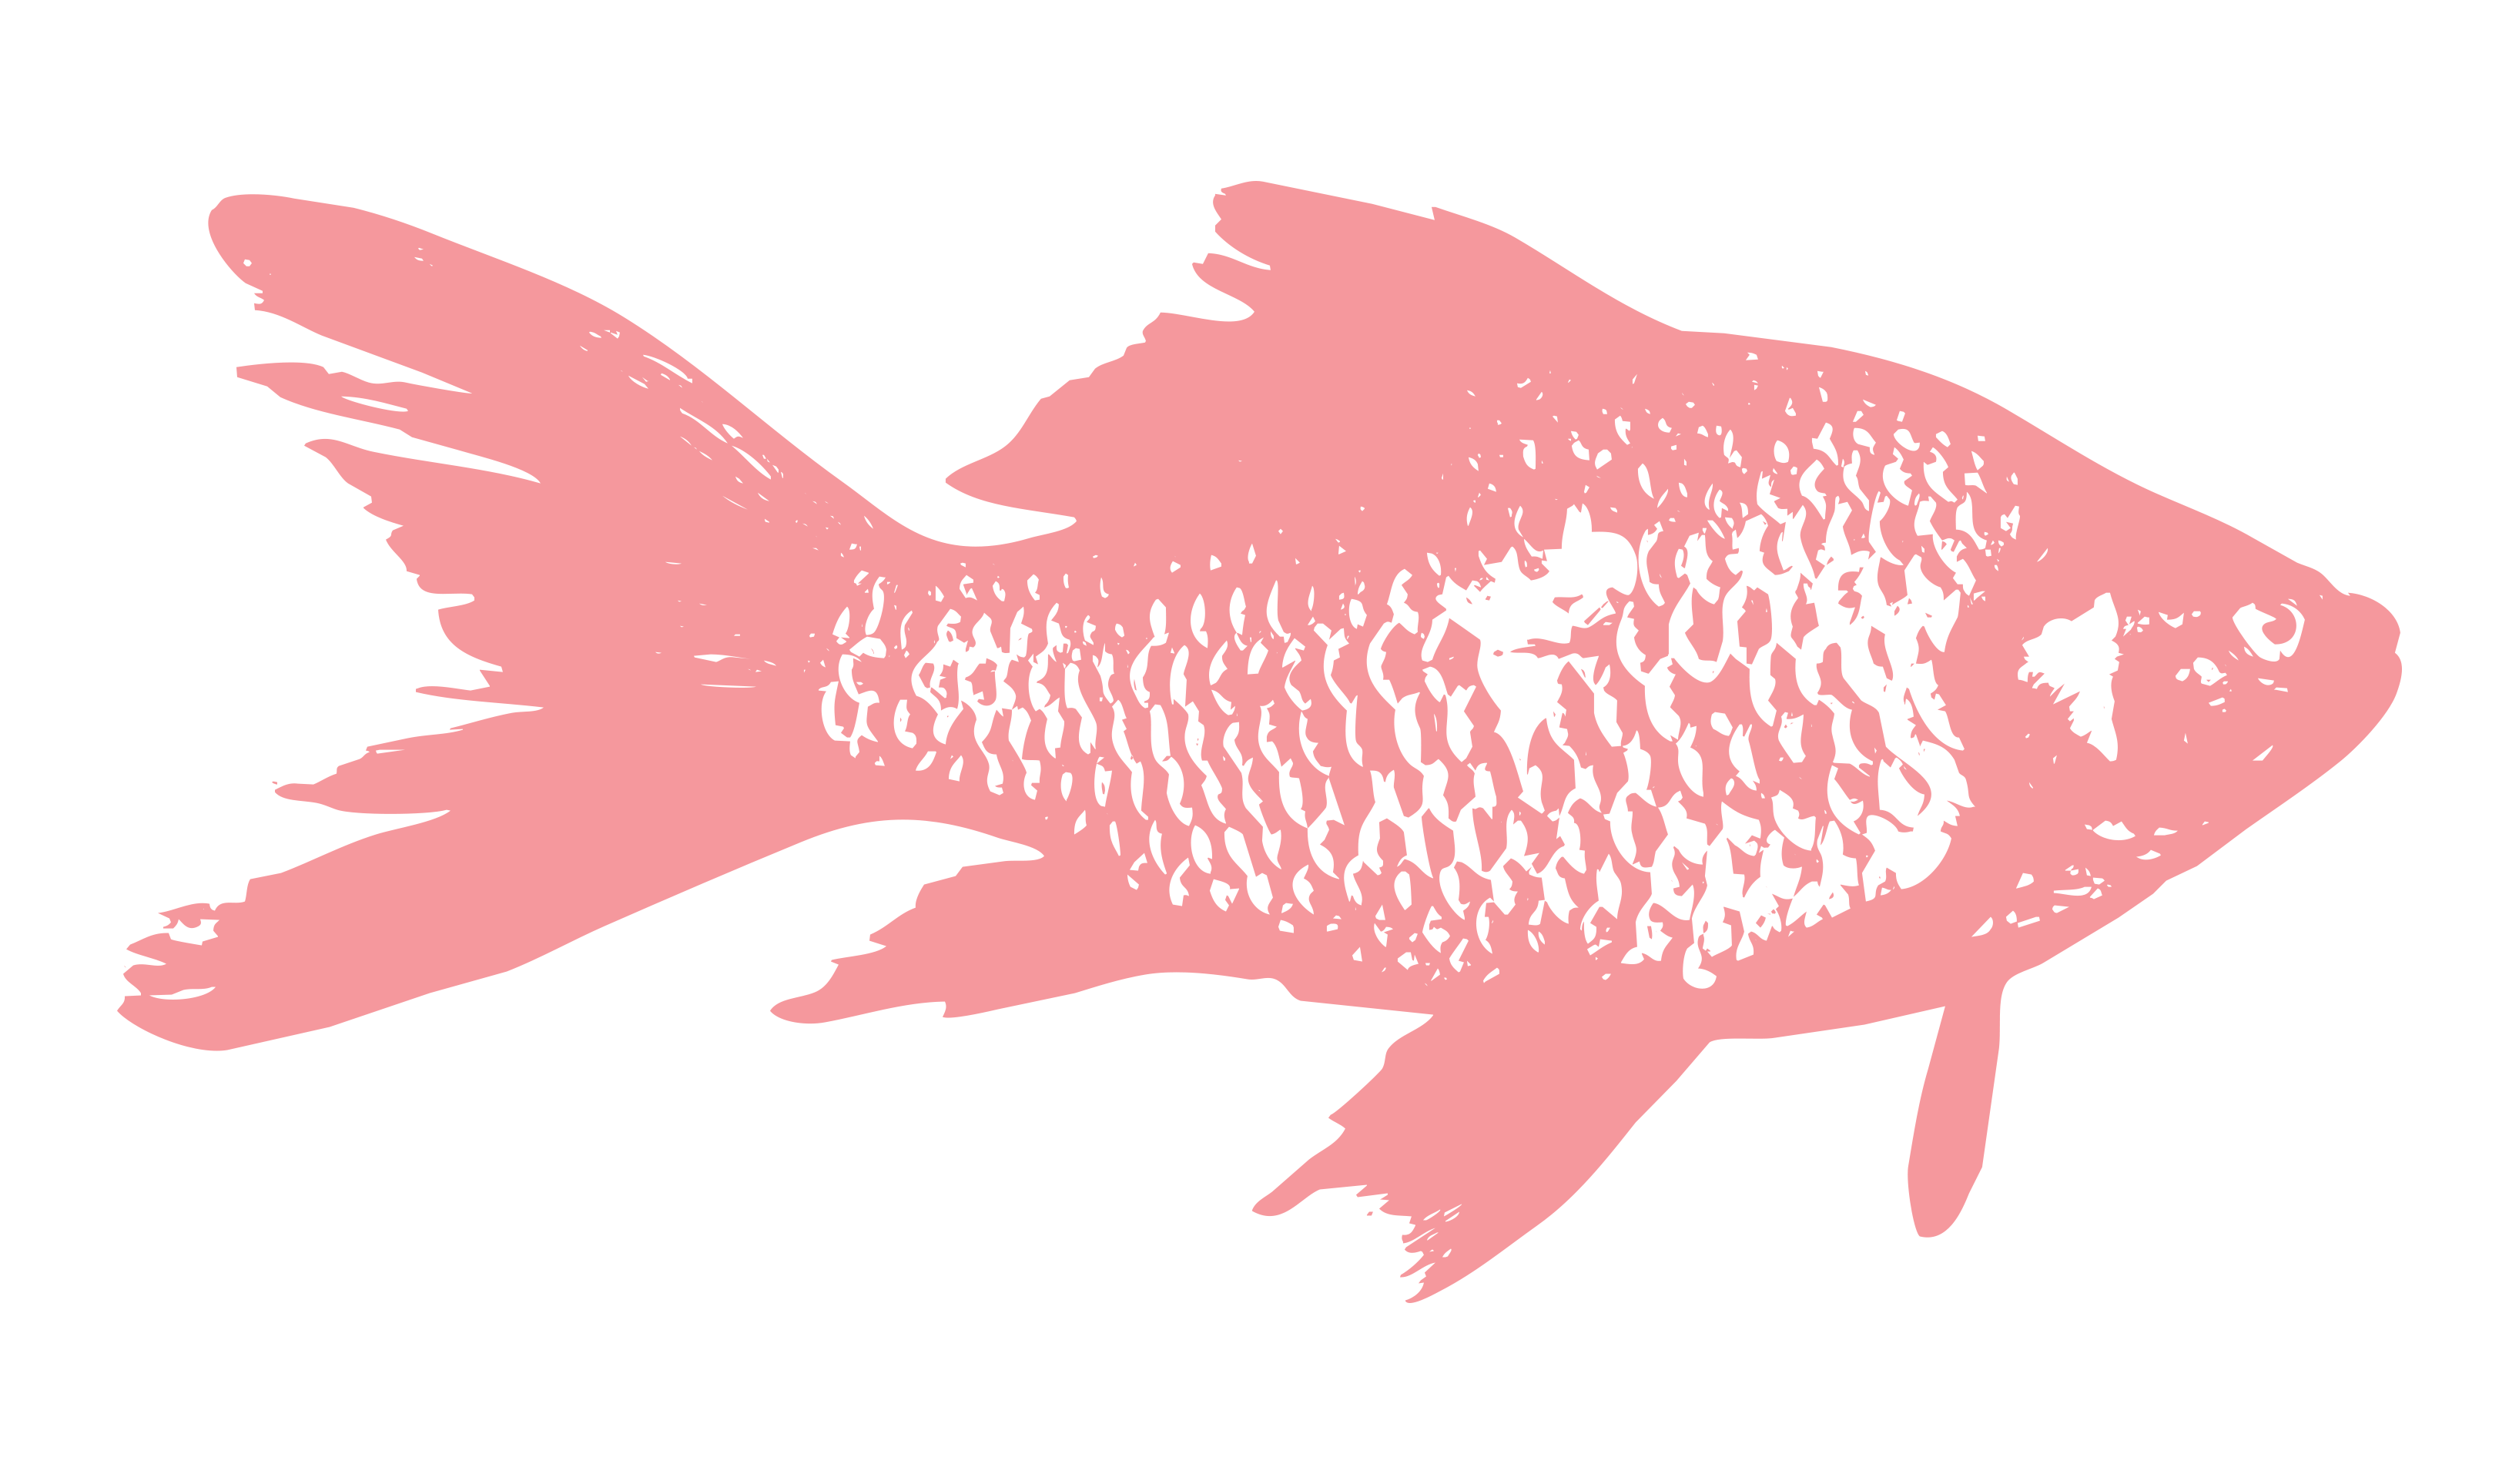
Step Twelve: Change the Fill Color
Change the the fill color of your shape by either…
- Double-clicking on the layer to add a color overlay.
- Or clicking on the custom shape tool in the tools panel to change the fill color.
Pick any color you want. Finally, save the color version as a PNG, and you’re done!