

Shape is a formative element in design. Movements you have learned about like Art Deco and Bauhaus put major emphasis on shape and form, which inform how we use shape today. Although it often goes unnoticed, shape is everywhere, from your artboard to the basic shapes you start with in any design. While other vital elements such as color and typography might “prettify” a design and make it instantly recognizable, shapes serve less as attractive outcroppings than a bedrock of modern design.
Shapes are so universal in our lives that they seem intuitive, but as a budding designer it’s useful to understand how they shape the way an audience interprets any design.
By the end of this training you will:
- Learn about different types of basic shapes
- Gain an introduction to basic shape psychology and its use in logos
- Gain hands-on practice using shapes as a foundation of visual hierarchy
- Attain familiarity with elements of Adobe Illustrator
2D vs 3D Shapes
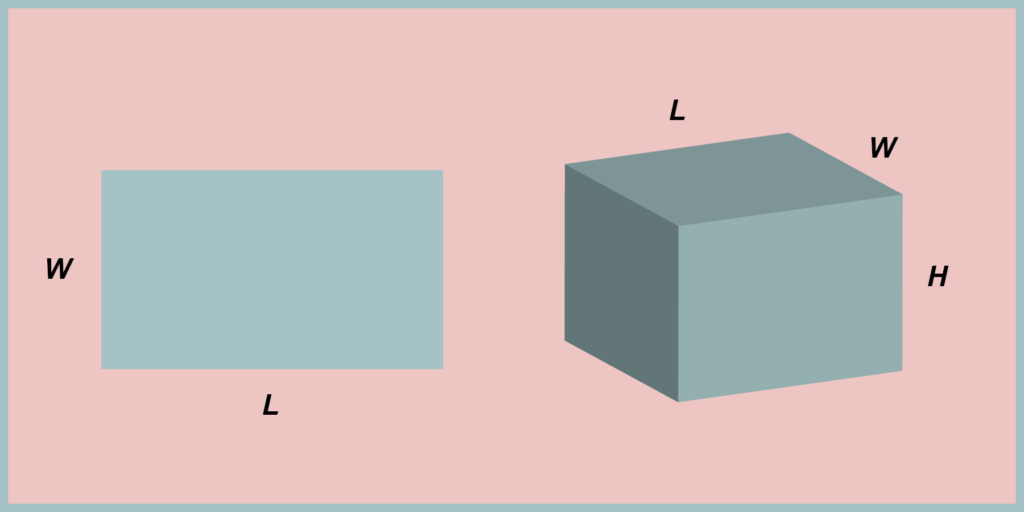
As designers, with few exceptions we are usually only working with 2D shapes; however, we might choose to mimic 3D shapes sometimes. Nevertheless, it is important to know the differences and aspects of both kinds of shapes.
- A 2D shape is flat and only has 2 dimensions: height and width. These are what you will use in industry standard software like Adobe Photoshop and Illustrator.
3D shapes have 3 (!) dimensions, height, width, and length. 3D shapes are most things we see in real life. In design, 3D is often used for illustrative purposes in programs like Adobe Illustrator, though 3D modeling programs like Blender are also useful.
Organic vs Geometric Shapes
Another way to categorize shapes is into organic vs geometric shapes.
Geometric:
- Shapes you see in geometry class such as circles, triangles, squares, and so on. Basically, an imaginative ideal of shapes in that only tools like PS and AI can create such perfect shapes. That is to say, generally all geometric shapes are “man-made” (manufactured or designed) with the exception of crystals.

Organic:
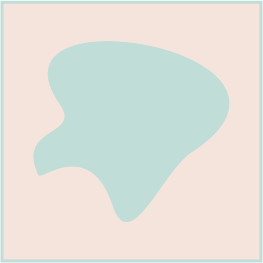
- “Natural” shapes with a flowing and curving appearance.
- Typically irregular and asymmetrical, blob-like.
- Associated with “natural” items but still appear in design
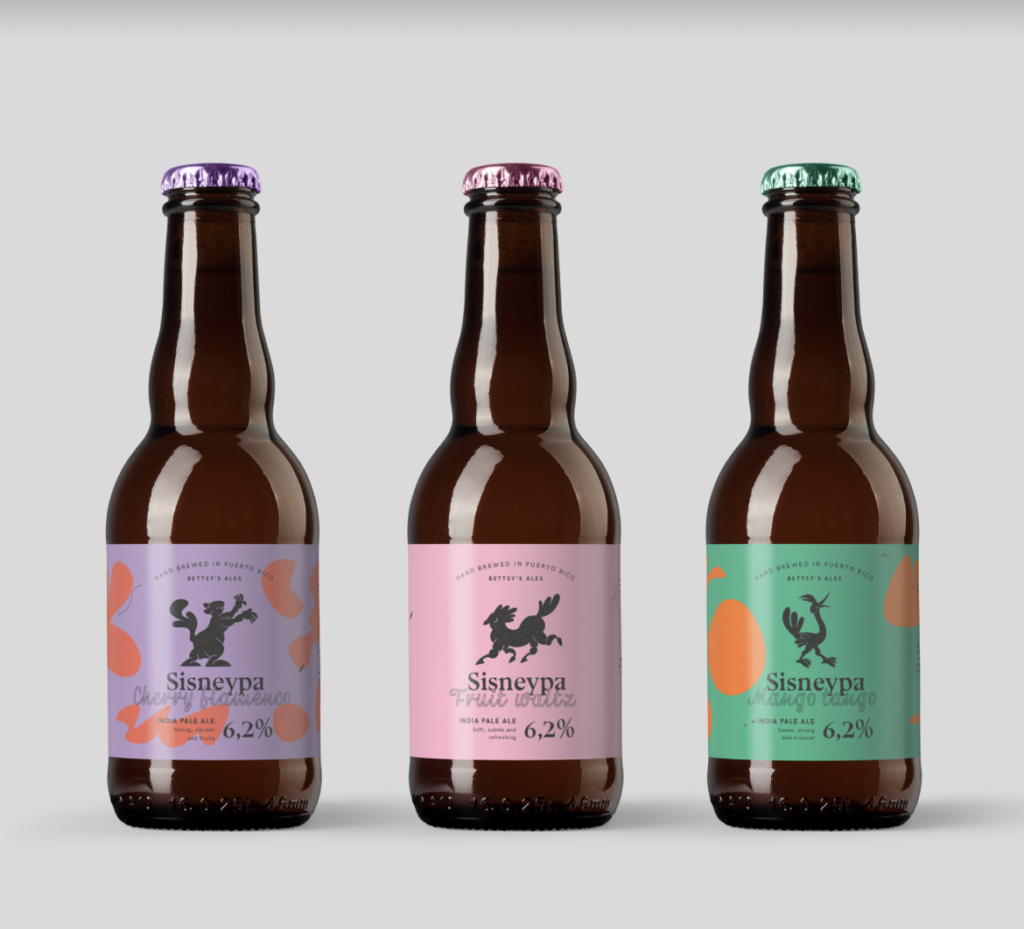
Natalia Pawlak’s branding for Sisneypa ales

Spotify.design features organic shapes on its landing page and throughout the site.
Shape Psychology
Organic shapes | Organic shapes create a feeling of calm and natural flow. In defying perfect proportions, they also can have infinite meanings depending on their form. | |
Geometric shapes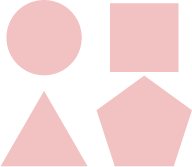 | Geometric shapes are rigid and are also useful in creating specific abstract representations of ideas. | |
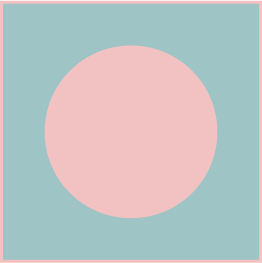
Squares/rectangles | Most common shape in design. Generally suggests a contained composition and consequently, reliability, safety, security | |
Circles | Very popular for icons. softer, milder, friendlier, inviting, relaxing, childlike, feminine | |
Polygons | Not very often used in design but familiar in everyday life, complex | |
Triangles | Idea of direction & power | |
Abstract shapes  | (Combination of any of the above shapes): infinite possibilities. Ex: circle + square = a stable and friendly shape 🙂 |
Remember:
According to the tenets of Gestalt (German for “shape”!) theory, humans naturally perceive things as part of a whole. For example, if you use multiple similarly shaped elements in one design, the viewer will interpret them as part of a unified pattern or group. The more commonality a set of elements possess, the greater the degree of coherence & unity in a given design.
This is important to understand because the human eye works very hard to look for elements that point to an element being part of a group, such as similarities, continuation, proximity, and symmetry. With this, you can guide the viewer’s eye around your composition in a certain order.
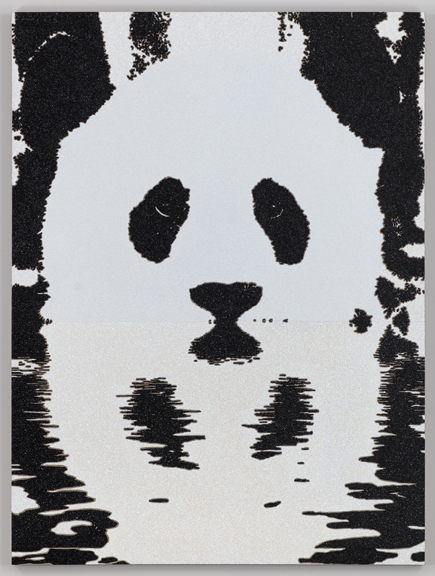
One good example of the human eye working hard to see continuity can be seen in this logo that utilizes negative space. Almost like an inkblot, the shapes of the panda symbol are not enclosed as a ‘single shape’ yet in accordance with the Gestalt principle of continuity, we still perceive it as one discrete whole, filling in what is missing.
Rob Pruitt, Wild Thing, 2011.
Another good example comes from modern abstract art, which manipulates our instinctual search for similarity. Notice how the first thing you see in this painting below is the sharp angles of the yellow triangles. Their dissimilarity to neighboring shapes overwhelms the composition and thus, your eye is drawn to them first. The yellow triangles are an anomaly, breaking the pattern of soft, flowing, cool colored shapes:
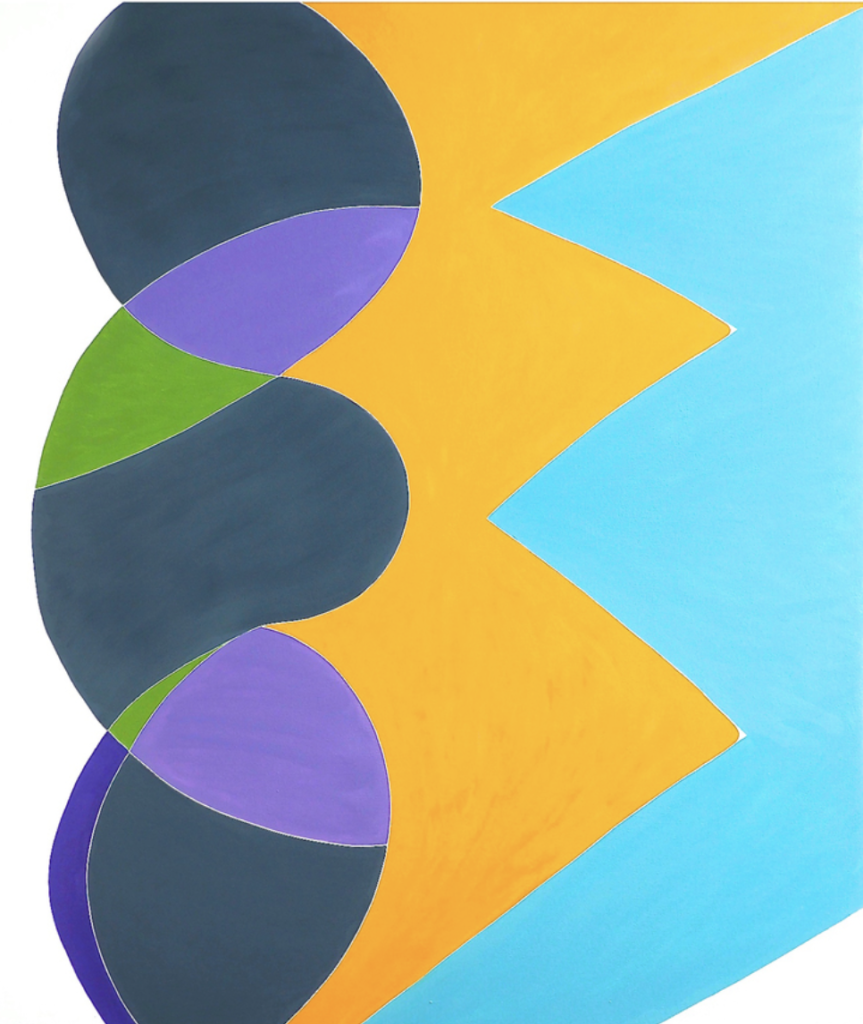
Jessica Snow, Worlds Rush In, 2014
Logos
Shape psychology can be found in virtually all areas of graphic design, but one classic and useful example is logos. Logos regularly utilize shapes to represent abstract versions of things, ideas, and brands. Shapes in logos can be used to:
- Symbolize different ideas.
- Create visual hierarchy (lead the eye around)
- Convey emotion and mood
- Create trust and professionalism
- Deliver a sense of depth in a 2D composition
Squares & Rectangles:
- Extremely common, familiar; usually associated with stability, structure, and rationality. May give the impression of trust and authority.
- Sensibly, most banks and insurance companies use squares or rectangles in their logos.


Circles
- Welcoming, positive (‘feminine connotations’)
- Sense of community or collaboration — representing the globe
- Sense of infinity

Triangles
- Power, direction, purpose
- See: shipping or transportation companies
- Often seem edgy
- Simultaneously strong & dynamic


Combinations of Shapes in Logo
Some logos are more illustrative, or only type. Still, these elements together create an overall shape that lends itself to the brand’s identity. A couple of examples:
Louis Vuitton = The triangular shapes of “L” and “V” create an edgy and energetic look that a luxury fashion house embodies. Yet, the overall composition fills a rectangular container – this gives the logo a classic, long-standing appeal.

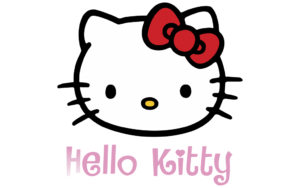
Hello Kitty = uses lots of different shapes, but overall has an oval shape that lends itself to a friendly, feminine, and approachable interpretation. The abundance of soft, round shapes helps to establish the iconic cute image of the brand.
Shapes & Visual Hierarchy
Shapes can also help with visual hierarchy!
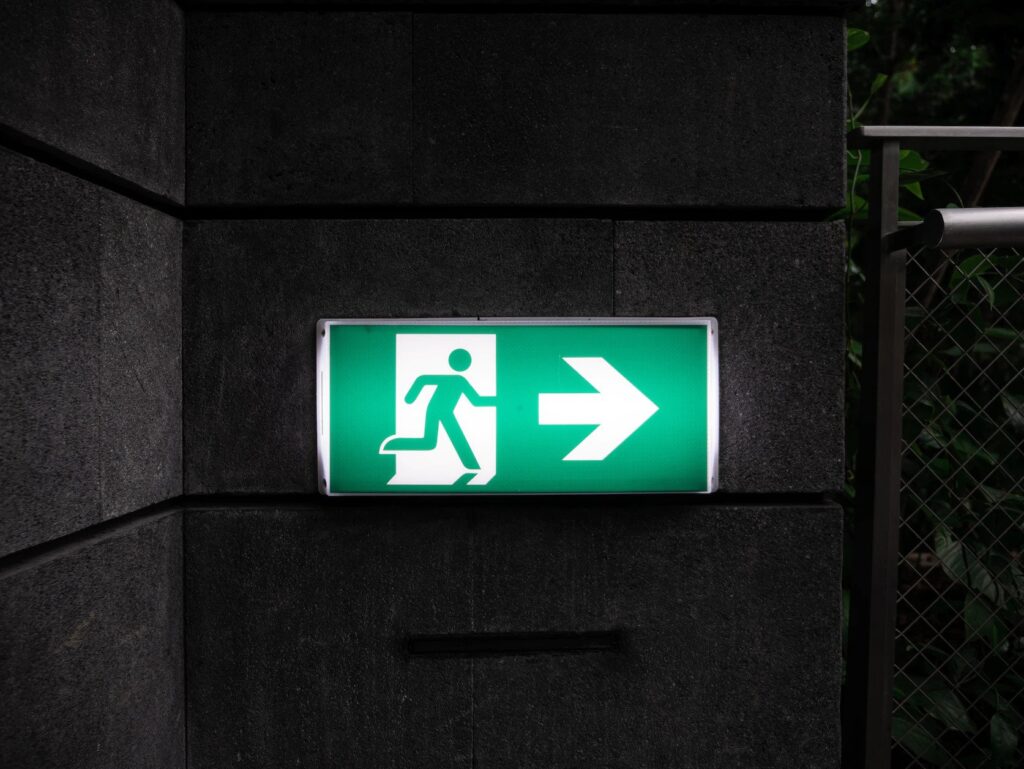
For example, triangles (arrows) create a sense of direction thanks to their conventional use in graphic and product design.
Other shapes are primarily associated with certain purposes because of their conventional use in UI, like circles for buttons, and lines for closing or minimizing windows. Other shapes are hard to separate from their usage in everyday life such as hexagons and stop signs and should be used carefully.
Another, less obvious way that shapes can shape visual hierarchy is when they contrast one another (such as in Jessica Snow’s painting earlier in this KB). Going back to Gestalt theory, imagine a group of rectangles broken up by a triangle: the contrast will draw your eye in and you’re more likely to look at the triangle first. Similarities and differences among design elements can be heightened or underlined by the strategic use of shapes.
Some tips:
- Be strategic with your use of shapes!
- Geometric shapes are very very widespread and often have popular meanings associated with them. This is not bad, especially in web design/UX where users rely on familiar shapes as signposts, but keep this in mind, especially in print design. For example, a triangle pointing to the right might suggest progression, such as turning to the next page.
- Organic shapes are currently trending and can generate interest in a design
Check Your Understanding
Now that you have learned about different kinds of shapes, shape psychology, and their role in visual hierarchy, you’re now ready to move on to demonstrating your knowledge!
Level 1: Shapes & Emotions
Using pencil and paper or a program of your choice, sketch / construct 3 basic shapes for the following 3 moods. Please avoid drawing shapes with common symbolic meaning (e.g. a peace sign for the first bullet point). There’s no one way to do this, but refer to the basics above for some guidance:
- Free and at peace. This shape has just come back from vacation.
- Powerful and confident. This shape has just been promoted.
- Energetic and active. This shape just wants to go to the gym.
Post your shapes on Basecamp for some quick feedback!
Level 2: Patterns and Shapes Practice
Shapes don’t always need to be the focus of a design! Sometimes they can be part of a dynamic background. Regardless, this part of the tutorial will teach you how to make a basic, modern pattern in AI as well as some basic kinds of shapes that you learned about earlier in this KB.
Step 1:
First, let’s set up your Adobe Illustrator workspace. This may seem like a tedious or unnecessary step, but even if you’re familiar with AI you’ll thank yourself later for having everything within easy reach.
For this activity, we’re primarily going to be using a few different panels. Go to Windows and then one by one, select properties, pathfinder, swatches, and pattern options. Then click and drag these windows to the right side of your workspace. Although this step is technically optional, it’ll afford you easy access to the settings we need.
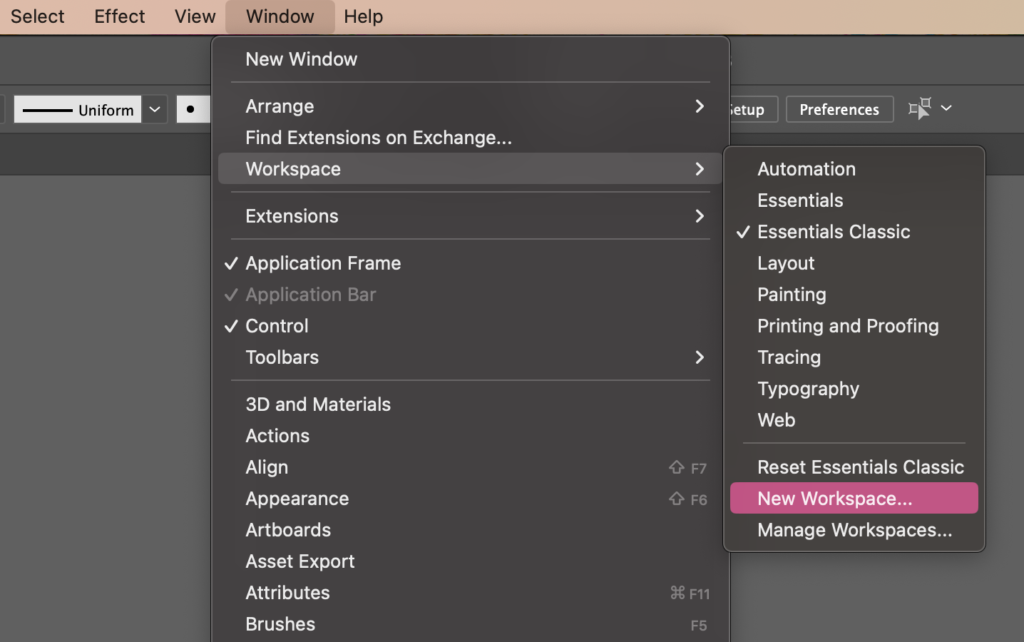
(If you like the workspace, you can save it under Window > Workspaces > New Workspace … > OK)
Step 2:
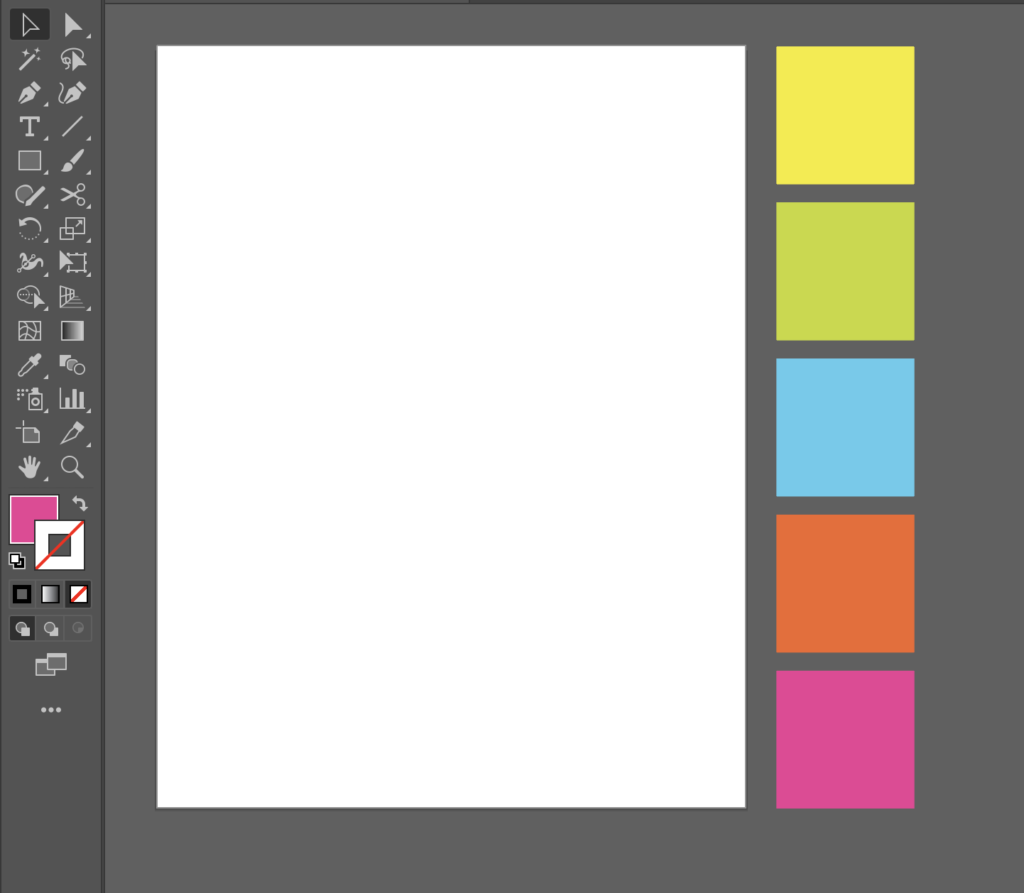
Next, let’s set up your swatches. Swatches let you save your favorite colors and access them quickly while working. Pick four to five colors of your choice. ( If creating a color palette seems daunting, there are a number of online resources to help you with this, such as Coolors.)
When you are satisfied with your color picks, return to your artboard and create a square by using the rectangle tool (M) on the main left panel and copy/paste as many rectangles as you have color swatches (select rectangle with Direct Selection tool, ctrl+C/ctrl+P).
Now, select each square one by one and change the fill in the properties or swatches panel for each one of your squares to your palette colors. You can also give them a stroke; however, this color will also be added to the swatches. When you’ve assigned each fill to each square, use the select tool to select all of the swatches at once and click on the tiny folder icon near the bottom of the swatches panel to use them in a new color group.
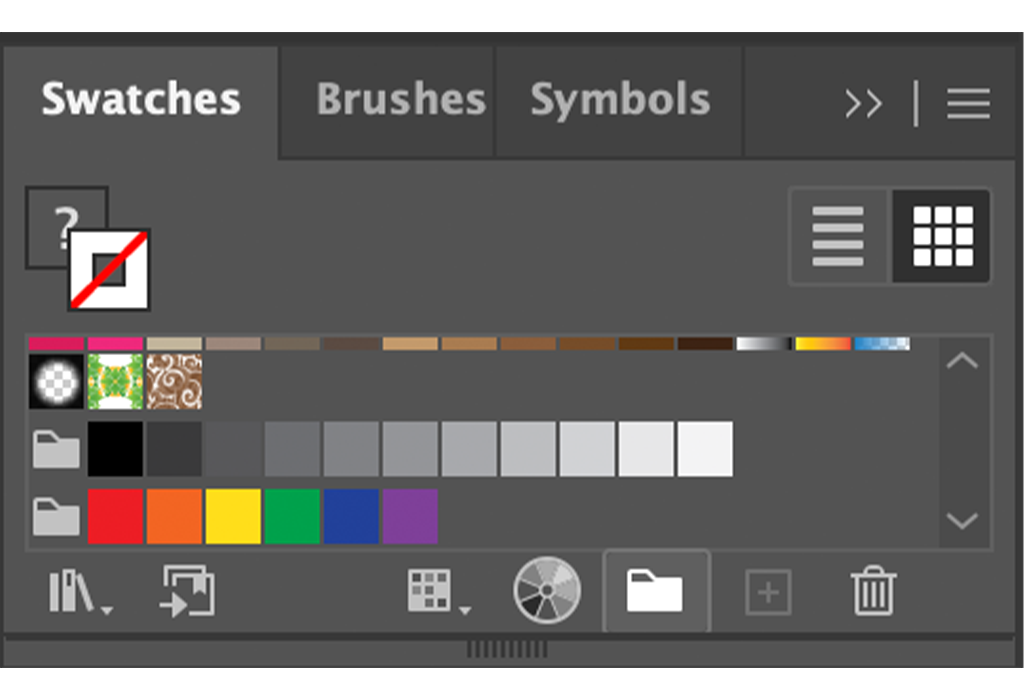
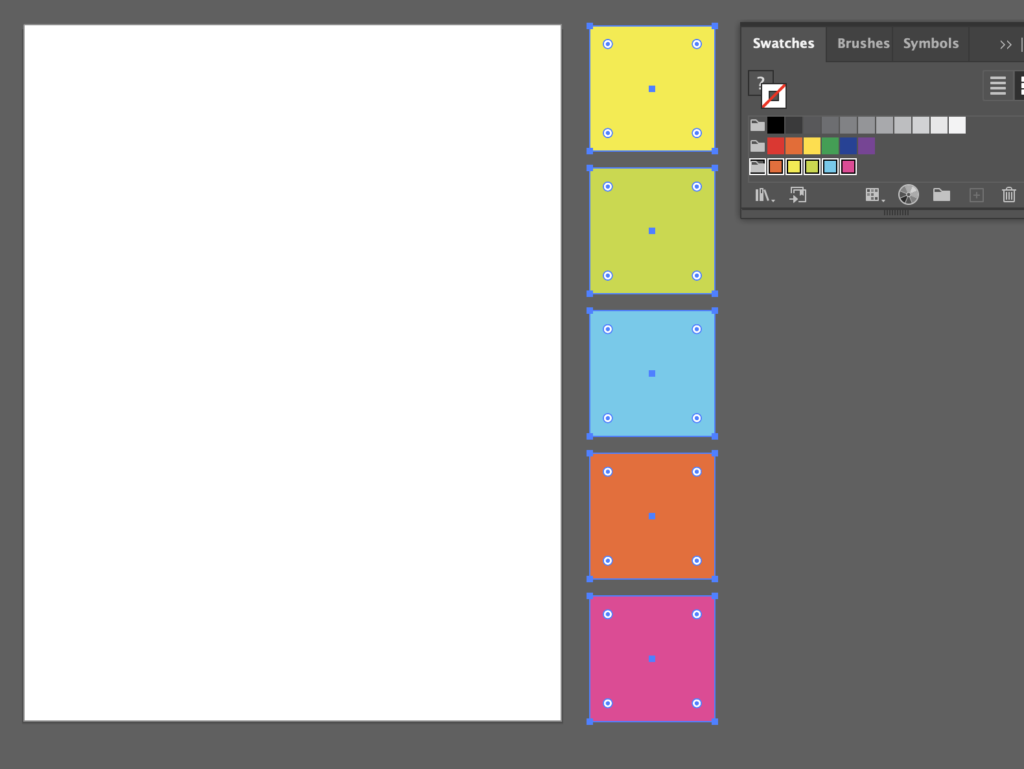
You should now be able to see these swatches as part of a color group in your swatches panel. Feel free to edit these swatches at any time.
Step 3:
Now that you have set everything up, it’s time to start making shapes and patterns!
Let’s start with creating a quick grid. You’ve already created squares, so start your grid by creating a new square, this time inside your artboard with a transparent fill and a stroke color from your new swatch panel. Size and stroke are arbitrary right now.

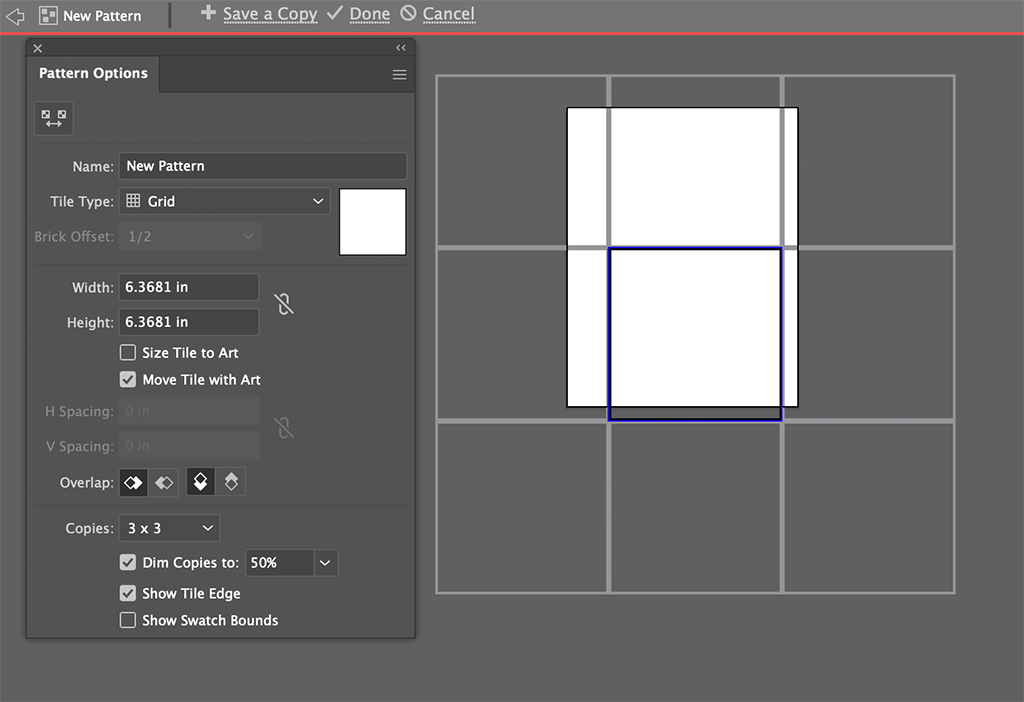
Selecting the square, pull up your pattern options window from your workspace, and click the three lines in the upper right, select “make pattern”.
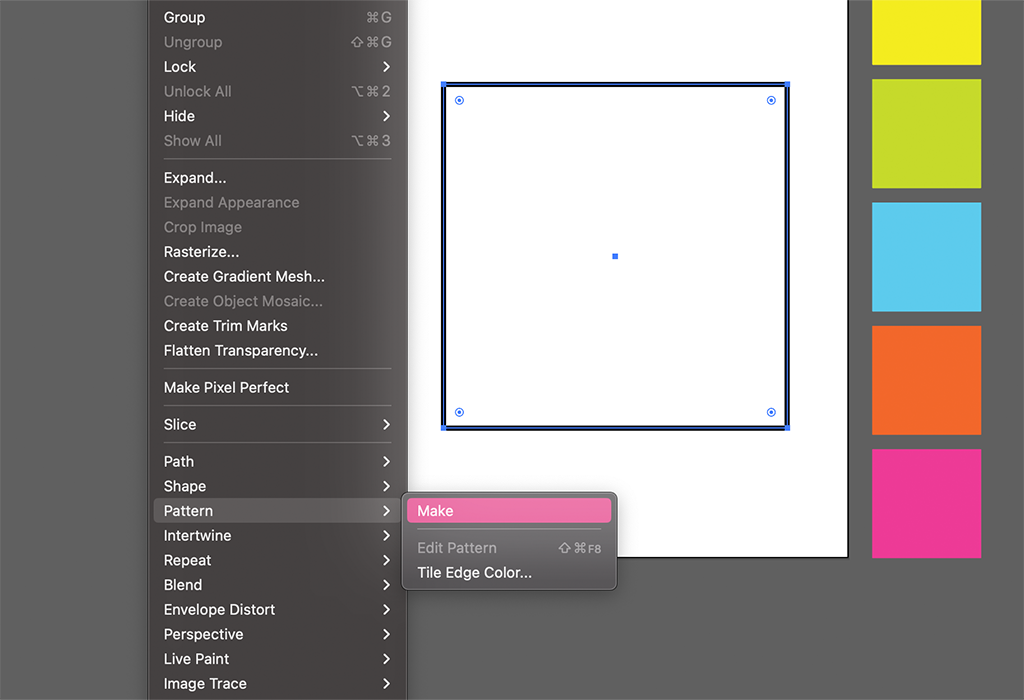
This will bring you into pattern editing mode. Here you can edit stroke width and other settings as you see fit. You can also give this pattern a name of your choosing. When you’re done, click “done” next to the checkmark in the gray bar. This will automatically add this pattern to your swatches panel.
To add this pattern somewhere in your artboard, select the pattern in your swatches and create a rectangle. Your grid should be the fill for your rectangle. It may look a bit funky, though, so select your pattern and go to Object > Transform > Scale to scale it. This will bring up the scaling window. Feel free to experiment with percentages with the preview box checked, but make sure first that “transform objects” is unchecked.
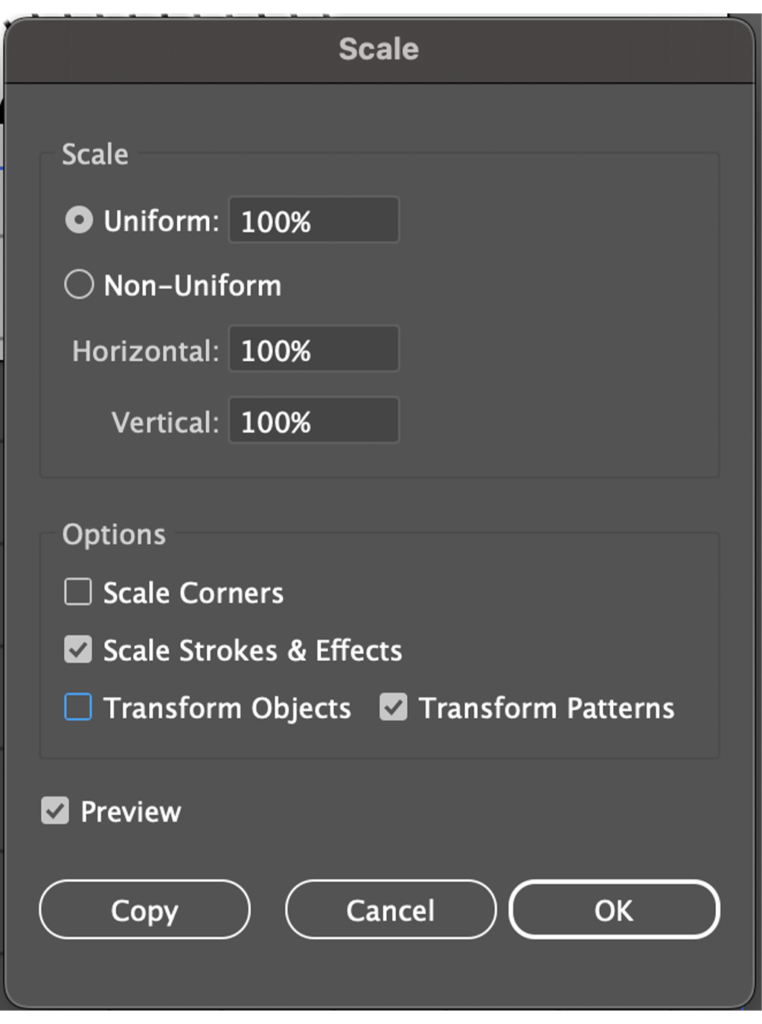
When you’re satisfied with how your pattern looks, click “ok” to apply the changes. Ta-da, now you have your very own grid!
Step 4:
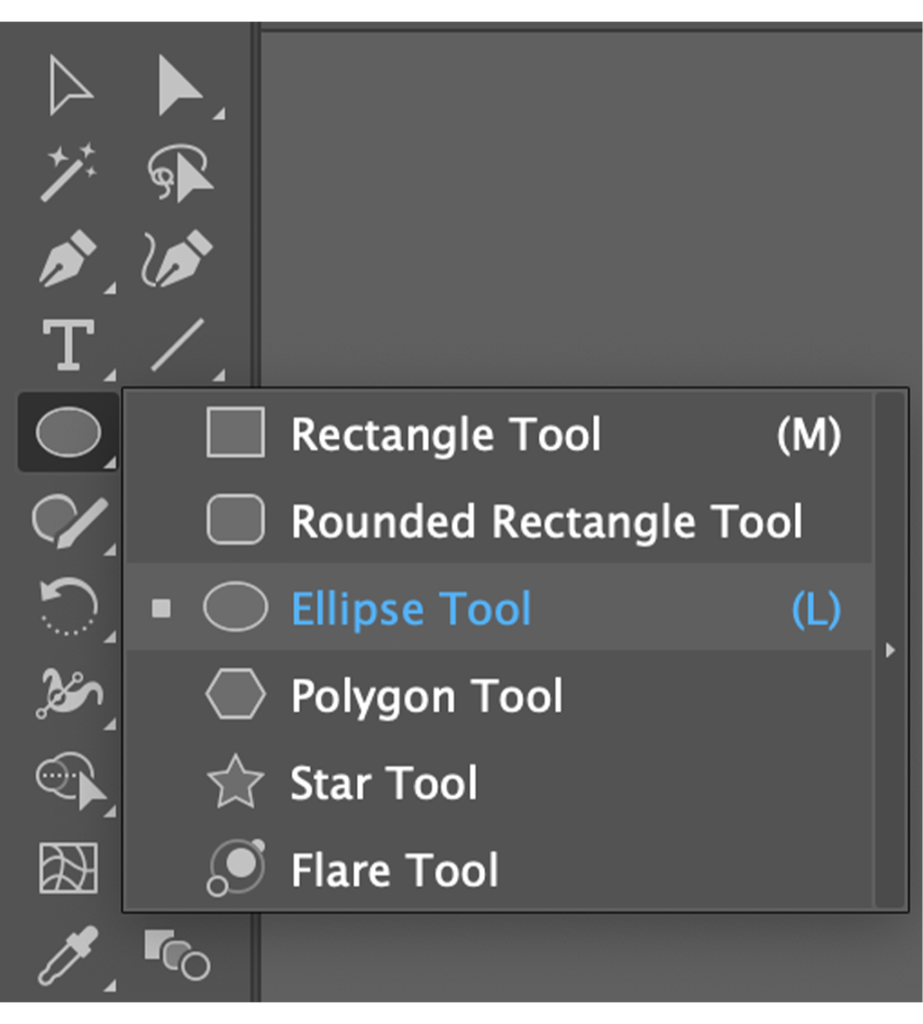
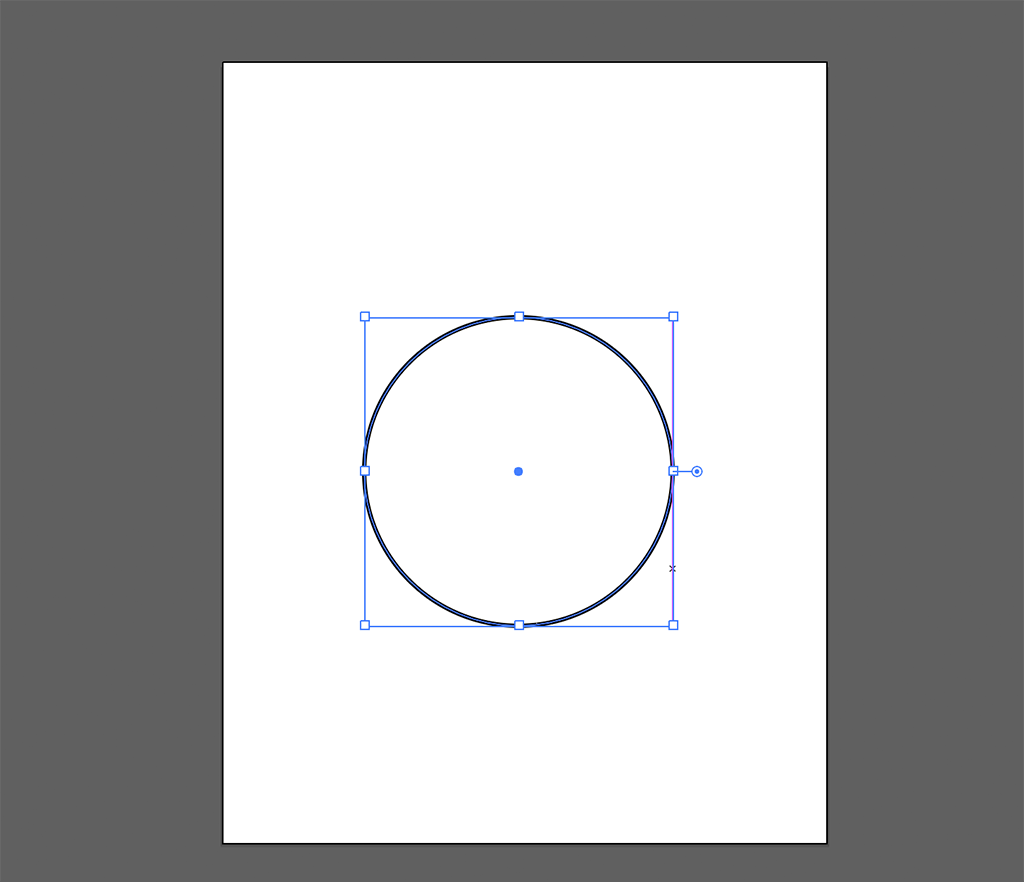
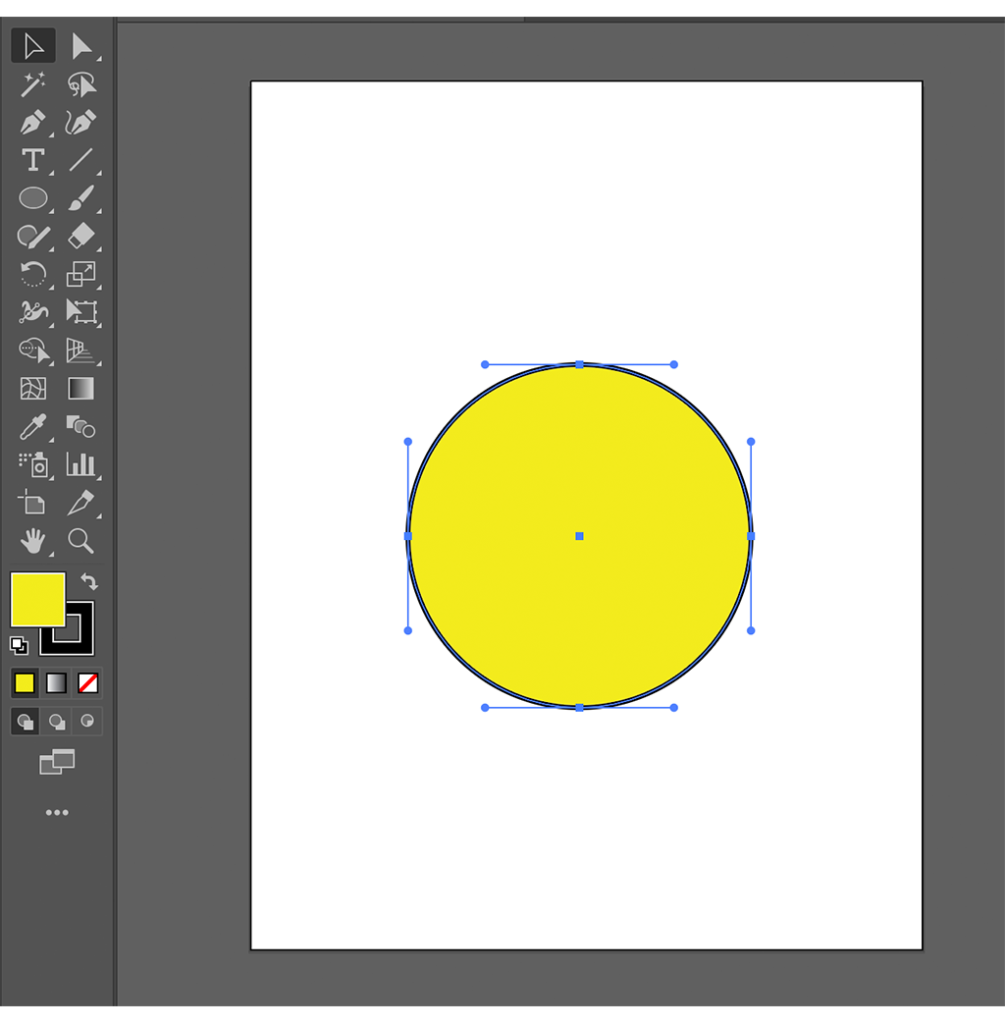
Next, let’s create some dots. Start by creating an ellipse by right-clicking on the rectangle option in the toolbar. As you drag creating the circle, hold shift to create a perfect circle. Fill it with a palette color of your choice.
Now, just like before, go to pattern options and the three lines to click “make pattern”. In this live preview mode, remember that changing width and height adjusts the space between the shapes. Again, when you’re satisfied with how your pattern looks, click “done” for it to appear in your swatches panel.
Like before, create a rectangle and select the pattern swatch to fill it. Remember to scale the pattern again as you see fit.
Optional: If you’d like to make the pattern less square and more dynamic, go to Object → Transform → Rotate and first, making sure that “transform objects” is unchecked.
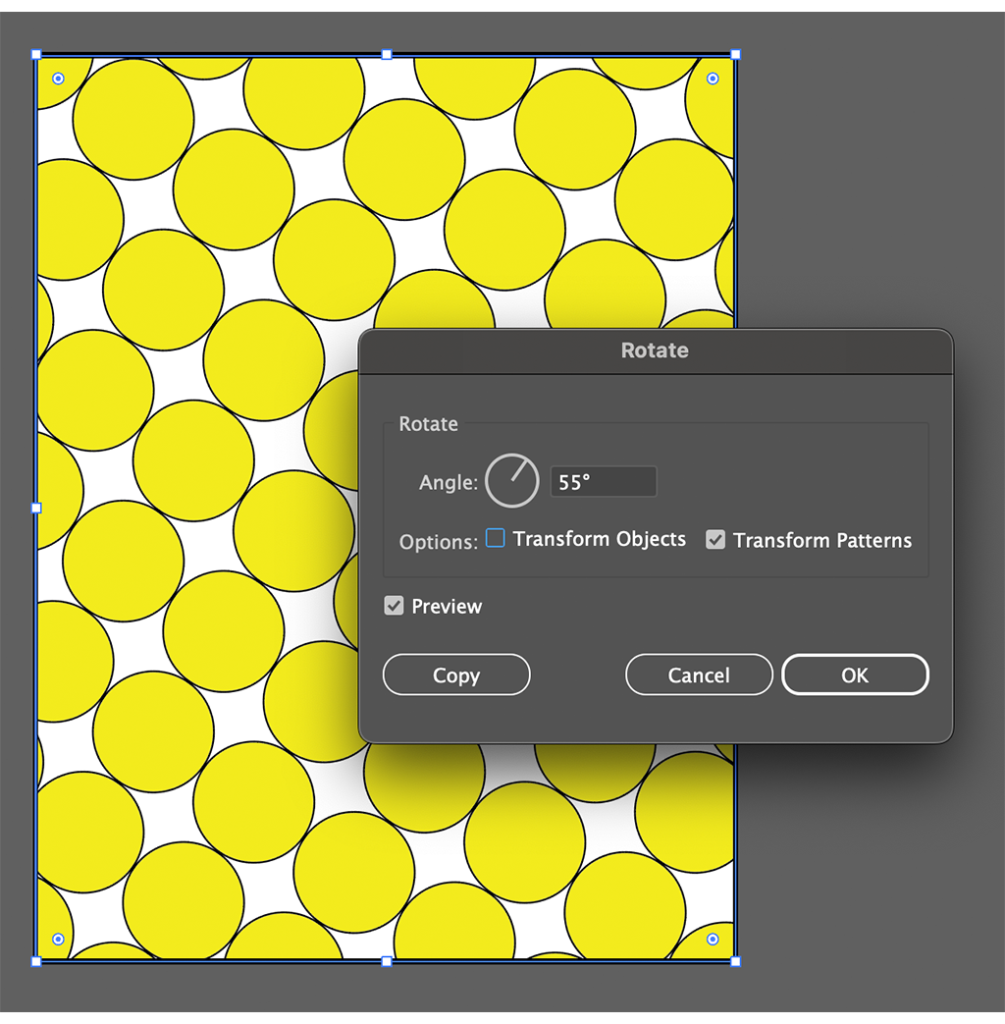
I chose this rotation degree rather arbitrarily, but it ended up giving the pattern a lot more texture:
Nice! You have created two stunning patterns, now what? By now, you might have guessed it — you can create a pattern with any shape.
Step 5
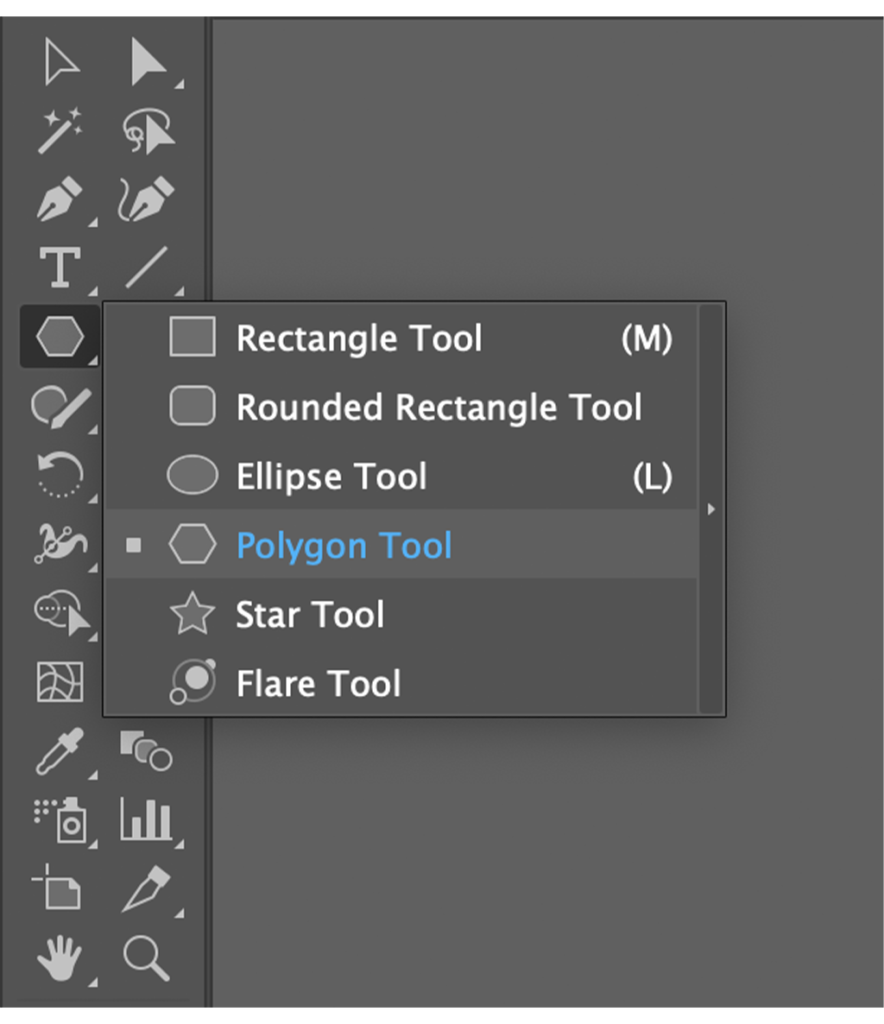
Aside from patterns, let’s run through some other basic shapes in AI. You know how to create rectangles and ellipses, but what about a triangle, a zig-zag, or a donut?
To create a triangle, use the polygon tool (by right-clicking on the same shape tool used to make a rectangle or ellipse) and going to the transform panel, change the number of sides to 3.
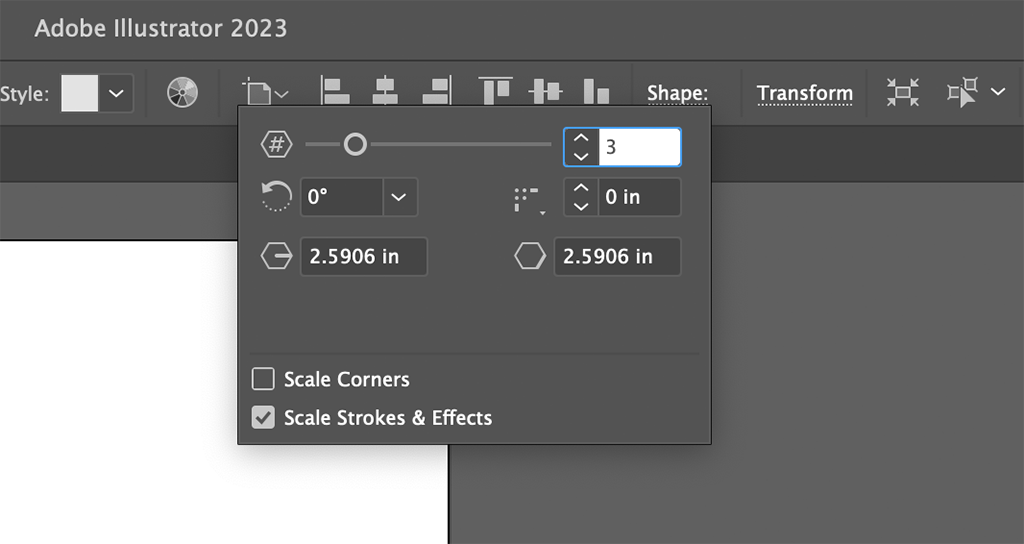
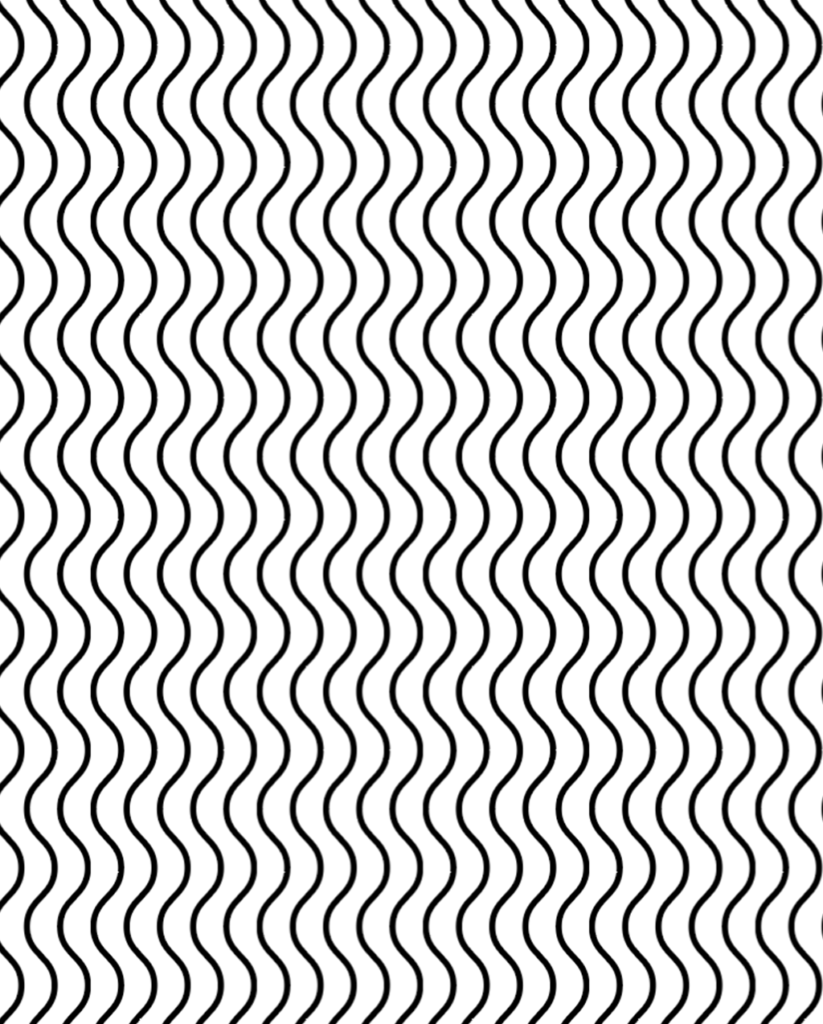
For a zig-zag, first, use the line tool on the left panel to create a straight line. Select it, and go to Effect → Distort & Transform → Zig-zag. In the zig-zag panel, feel free to play around with different options. Selecting “smooth” will yield more of a squiggle, whereas selecting “corner” will yield more of a traditional zig-zag.
Furthermore, adjusting the ridges per segment will affect how concentrated the zig-zags are.
If you’re feeling particularly zesty, you can even create a pattern from your zig-zag (!), using the same process as before. Voila!
Lastly, let’s employ the pathfinder tool to help us create a donut shape. Create a circle using a fill from your color palette. Copy it and paste it over your first circle in a different color. Resize it so that it is slightly smaller than your original circle. To center the circles, select both and use the alignment tools on the top of your screen to adjust.
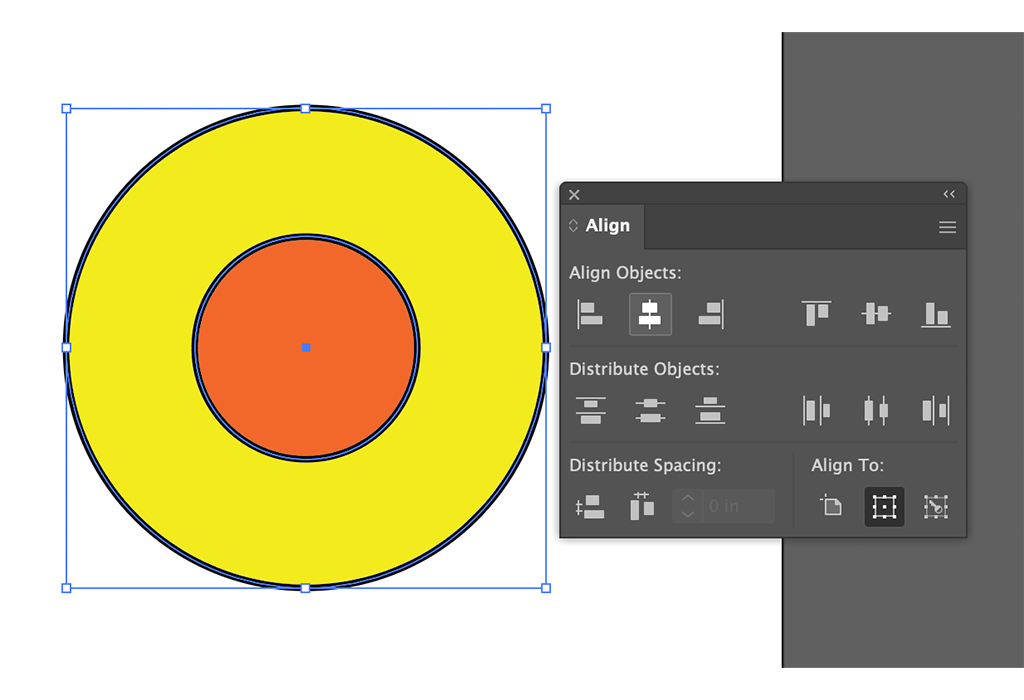
Now, with both circles still selected, go to Window > Pathfinder and under shape modes, click on the second icon, “minus front”.
You now have a donut! Yay!

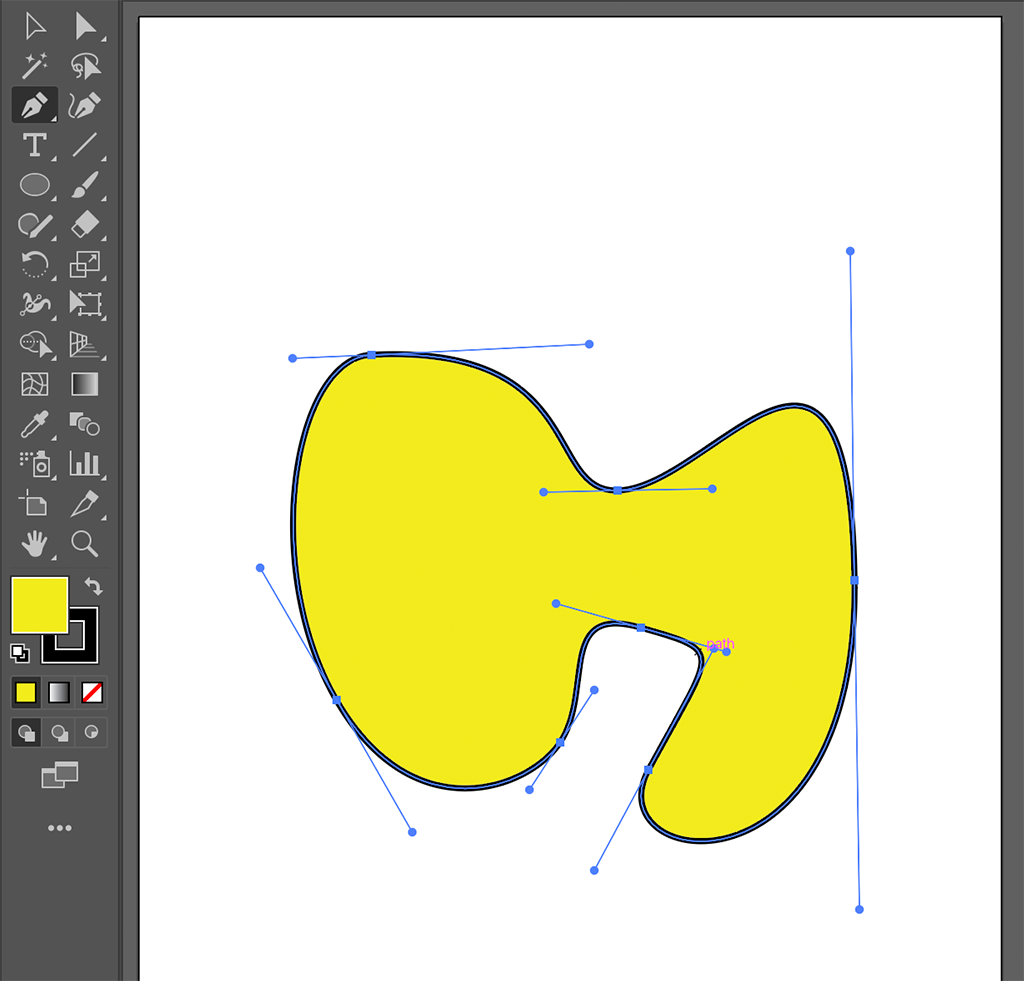
Lastly, you can make organic shapes yourself using the Pen Tool or Curvature Tool (pen tool but flows smoother).
Post screenshots on Basecamp for everyone to see!
Level 3: Shape Hierarchy
Download and open this AI starter file.
Organize the text into a coherent visual hierarchy using tips above using basic shapes. Aside from shapes, you are allowed to use the colors you selected for your palette in Level 2 and adjust text size. However, please do not use any other design elements such as font/typography, more advanced shape manipulation, or inclusion of any other design assets. This design can be as simple or as complex as you like.
Please export your result as a JPG and post it to Basecamp for feedback!
