In this training, you will understand how to use Inspect Element and test out style modifications in the browser. This training will introduce the components of Inspect Element and provide a brief training for using the tool.
What is Inspect Element?
Inspect Element is a tool that can be used to inspect and modify the front end of a website by modifying the HTML/CSS files. Understanding the inspect tool is a practical aspect of web development as it allows you to test changes to your HTML/CSS and temporarily visualize how it will affect your webpage without permanently altering the web page itself. This can make the editing process more efficient and less risky, provide an environment for efficiently debugging any issues, and be a good resource for understanding how other web developers have gone about constructing their webpages.
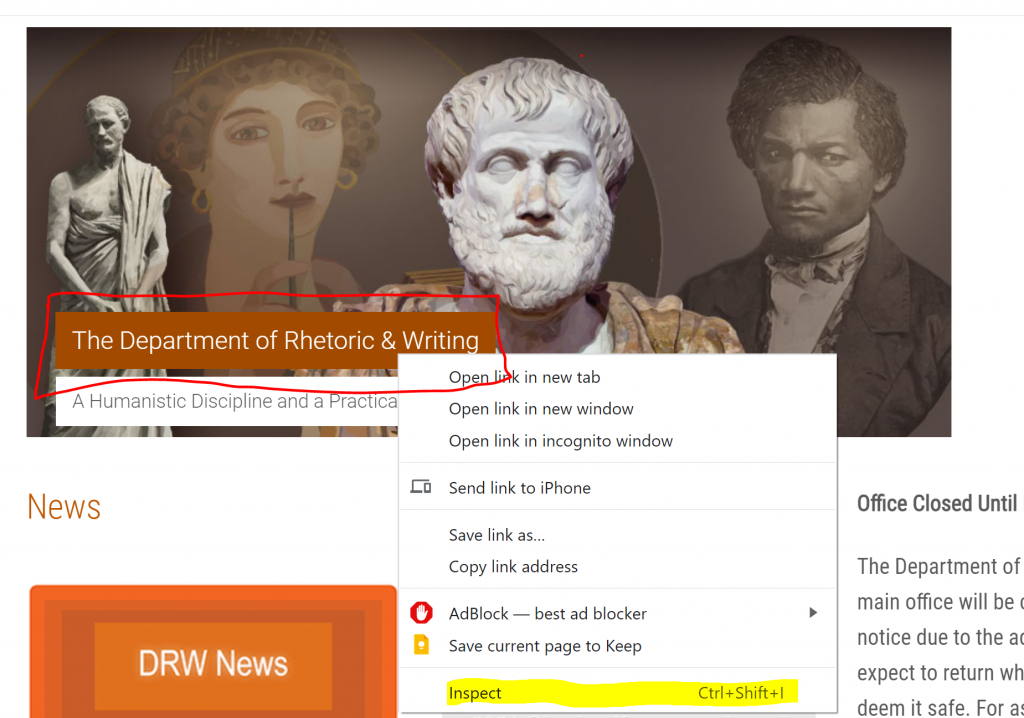
The easiest way to access the Inspect Element is by right-clicking anywhere on the web page or on the specific element and clicking “Inspect.” You can also type Ctrl + Shift + I, Command + Shift + I to access the same panel. Once Inspect Element is open, you will see three different panels.

- The DOM panel can be used to modify HTML files and alter the page layout.
- The CSS panel can be used to modify CSS styling of the page, including elements like fonts, sizes, and colors.
- The Console panel is at the bottom of the Element screen, and it will display information about updates to Inspect Element.
Once you have tested any prospective alterations in the Inspect Element and have found them to be up to your standards, you can copy and paste the same code to the actual web editor to implement the actual changes and repeat the process as needed. Here are a couple exercises for practice using the Inspect tool.
Exercise 1: Changing the Banner with the DOM Panel
Visit this website → https://liberalarts.utexas.edu/rhetoric/

1) Start by inspecting the page or the specific element you would like to work with. In this exercise, we will be using the Inspect Element to test out a different banner image, so right click on the banner image and click ‘Inspect’.
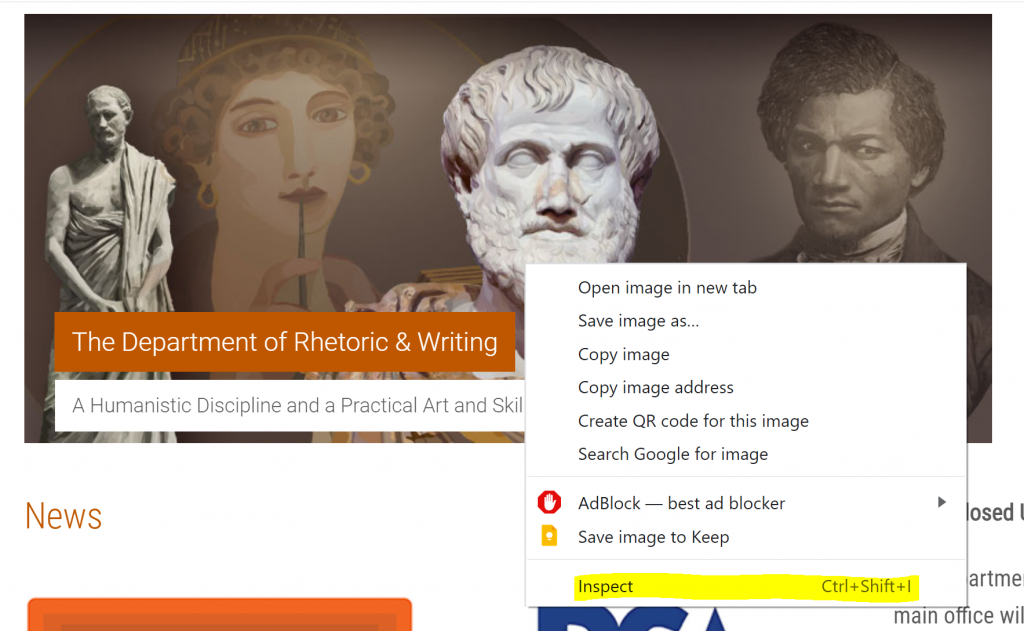
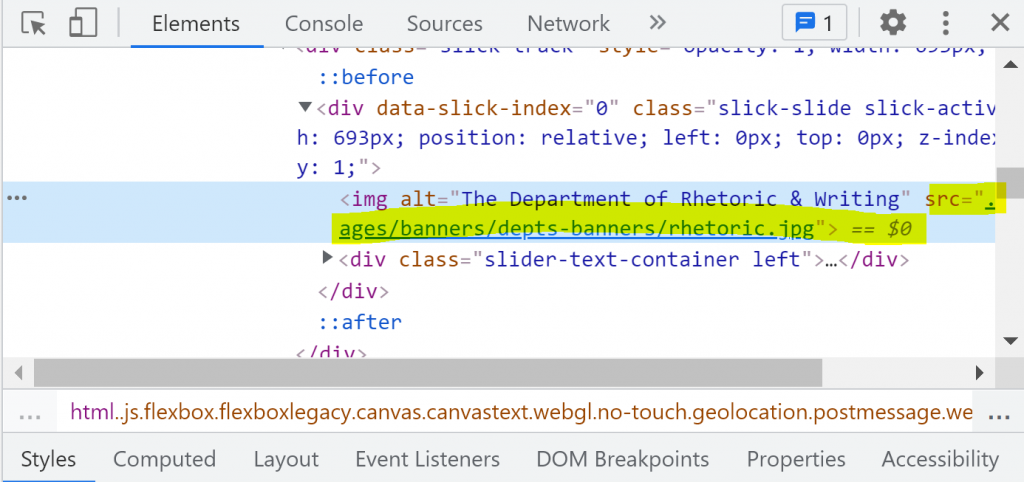
2) After doing so, the Inspect Element should appear on the right side of the screen. In the DOM panel, the image properties should be highlighted automatically. Remove the original source image URL (highlighted in the following image) and paste this new URL in its place: https://newswhistle.com/wp-content/uploads/2016/02/winterfeature.jpg
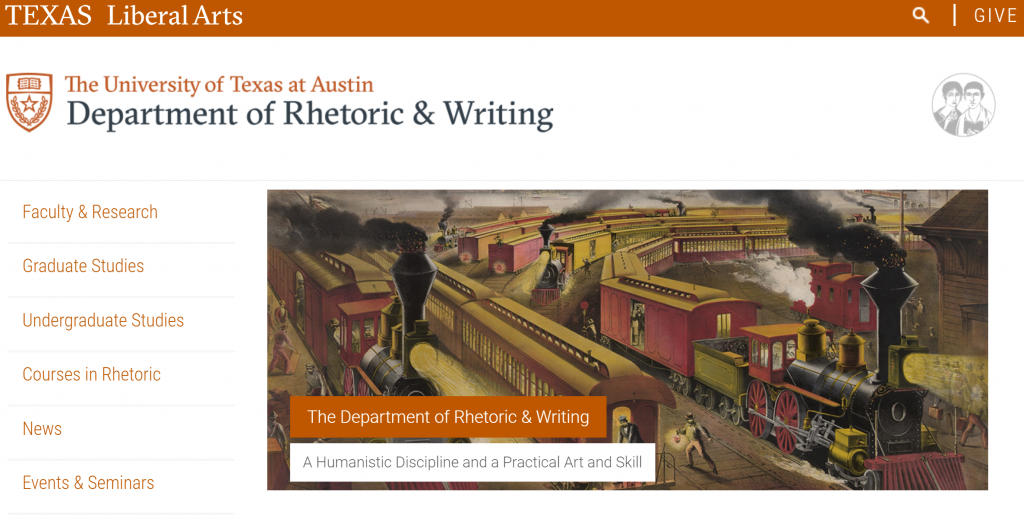
The page should look like the following image if completed successfully.
3) Refresh the page and make note of what happens to the new banner. It should have returned back to the original image, and all original properties should be restored.
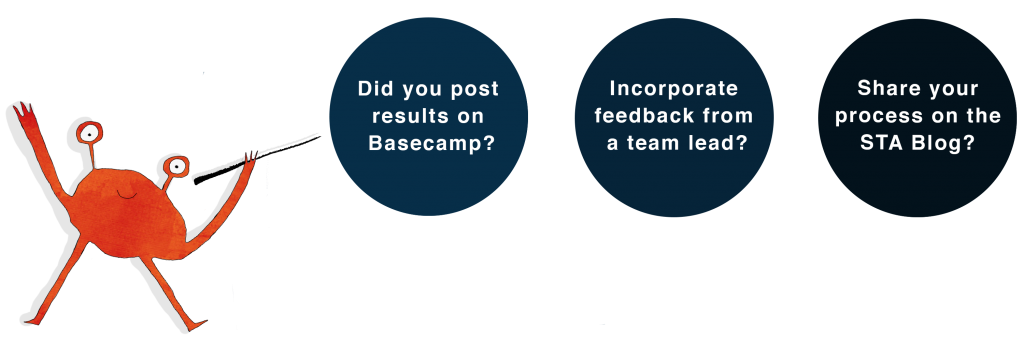
4) Now, inspect the banner once more and hover over the source image URL in the DOM panel. Make note of the image dimensions, find a similarly-sized photo on Google, copy the image URL, and repeat the process again by pasting in the new URL in place of the old. Take a screenshot of the results and post them as a comment on Basecamp.
Exercise 2: Changing the Color of a Popup with the CSS Panel
1) Start by inspecting the burnt orange Popup that appears as an overlay on the banner image. Make sure you are right-clicking on the padding of the button and not the link itself.
2) In the CSS panel, you should see a section for a CSS class titled “.slider-unit .slider-text-container h2.orange.”
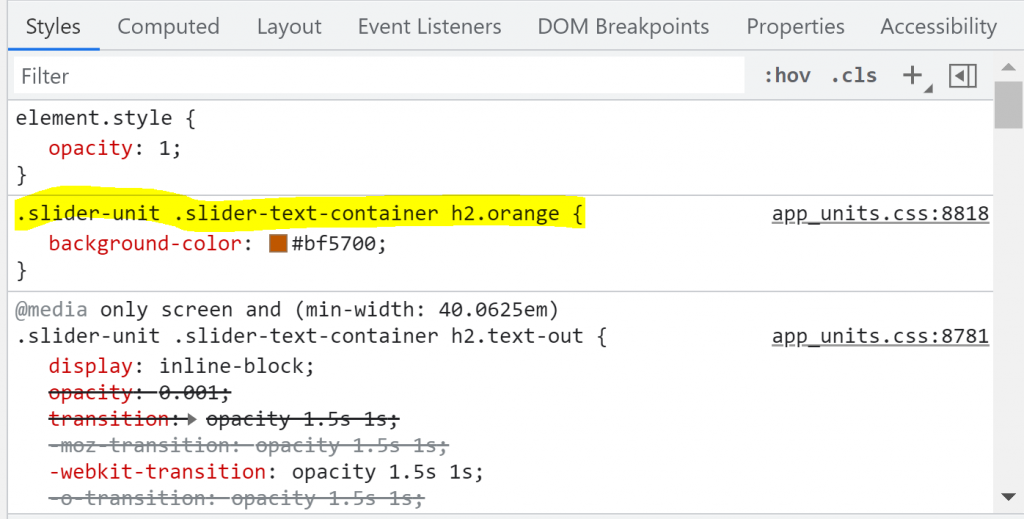
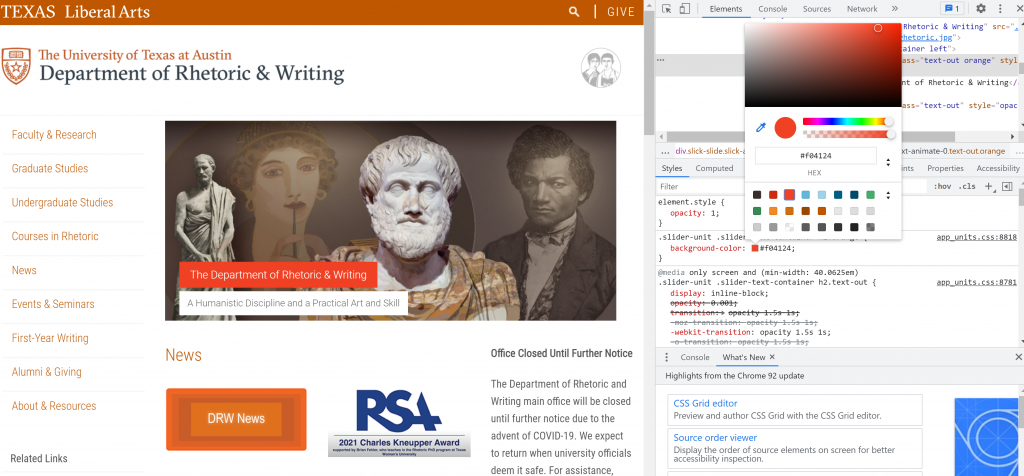
3) Click on the burnt orange square in the “background-color” CSS styling to open a color properties popup. Click on various colors to see how the popup changes.
4) Now that you understand the basic ways you can alter a page’s CSS using the CSS panel, practice again on your own. Try changing the font family, font weight, and font size of the left side navigation. When done, post a screenshot of the results on Basecamp and explain your editing process with a few sentences.