

Use command + f to search this page for quick information, or look
through the STA Training Table of Contents to find specific guides
on how to use Cascade.
Users, Groups, Roles
- Users
- Find a user:
- Administration > Users
- or
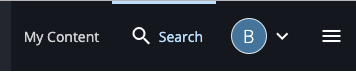
- Search for a person’s EID in upper-right:
- Find a user:
- Add New Users
- Add a New STA to Cascade
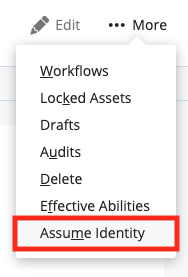
- Assume a User’s Identity:
- Search for the user, click on their profile, click the …More button, select Assume Identity
- Groups
- Groups allow you to assign the same permissions to multiple users. The roles associated with a group will be applied to every member of the group. Every Cascade user must belong to at least one group. Administrators can create groups and assign people to them.
- Create Groups
- Administration > Groups > Add Group
- Add Users to a Group
- Administration > Groups > Edit > Choose Users
- or
- Administration > Users > Edit > Membership and Roles > Choose Groups
- Create Groups
- Groups allow you to assign the same permissions to multiple users. The roles associated with a group will be applied to every member of the group. Every Cascade user must belong to at least one group. Administrators can create groups and assign people to them.
- Roles
- Roles can be assigned directly to a user, group, or site. System roles are applied to users and groups; site roles are applied to sites.
- Site Roles
- Manage Site > Site Settings > Roles > Office Site Role > Choose Users and Groups
- System Roles
- Administration > Users > Edit > Membership and Roles > Choose Roles
- or
- Administration > Groups > Edit > Choose Roles
- Site Roles
- Roles can be assigned directly to a user, group, or site. System roles are applied to users and groups; site roles are applied to sites.
Site Content
- Unit_Info_Laits_Only
- Site Lockup (official logo in the upper-left, usually two lines; make sure it is sized correctly, look at existing lockups for reference)

-
- Informal Logo (upper-right)
- Unit_Information
- Office Web Administrator Contact Info
- Custom Donations Link
- Left Sidebar Content
- Related (External) Links
- Social Media
- Dept. Address
- Chair or Head

- Site Navigation
- Add, Delete, and Edit Folders/Pages to show up in the navigation bar of a site. Change the display name to update the navigation bar name. Include when indexing and publishing.
- Publish Folders to Navigation:
- Edit > Properties > “Include when indexing”; “include when publishing”
- Naming folders
- Publish Pages to the Navigation:
- Edit > Configure > “Include when indexing”; “include when publishing”
- Naming Pages
- Publish Folders to Navigation:
- Add, Delete, and Edit Folders/Pages to show up in the navigation bar of a site. Change the display name to update the navigation bar name. Include when indexing and publishing.
- Homepage Content
- Index page (homepage)
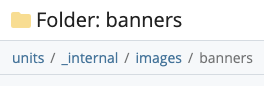
- main-image (homepage banner)
- Homepage banner images are stored in their respective banner folders in the units folder. Go to units > _internal > images > banners, select the type of banner (dept., center, etc), then click Add Content to upload the file.
- main-image (homepage banner)
- Index page (homepage)
-
-
-
- body-content
- news (*CLA feed)
- events (*CLA feed)
- content
- right-sidebar
- video box
- content
- color bar links
- body-content
-
-
- Assets
- Add media
- Restore Deleted Assets
- Click on the trash button on the left side of your screen to access recently deleted content, select the content you want to restore, then click the gray restore button
- Add media

![]()

*CLA feed: These areas will be populated with content from the COLA Web Editor. Go there to edit content like news, events, profiles, and faculty/graduate/staff lists.