
This training is for Style A & B online course requests, there is a separate tutorial for custom course package requests.
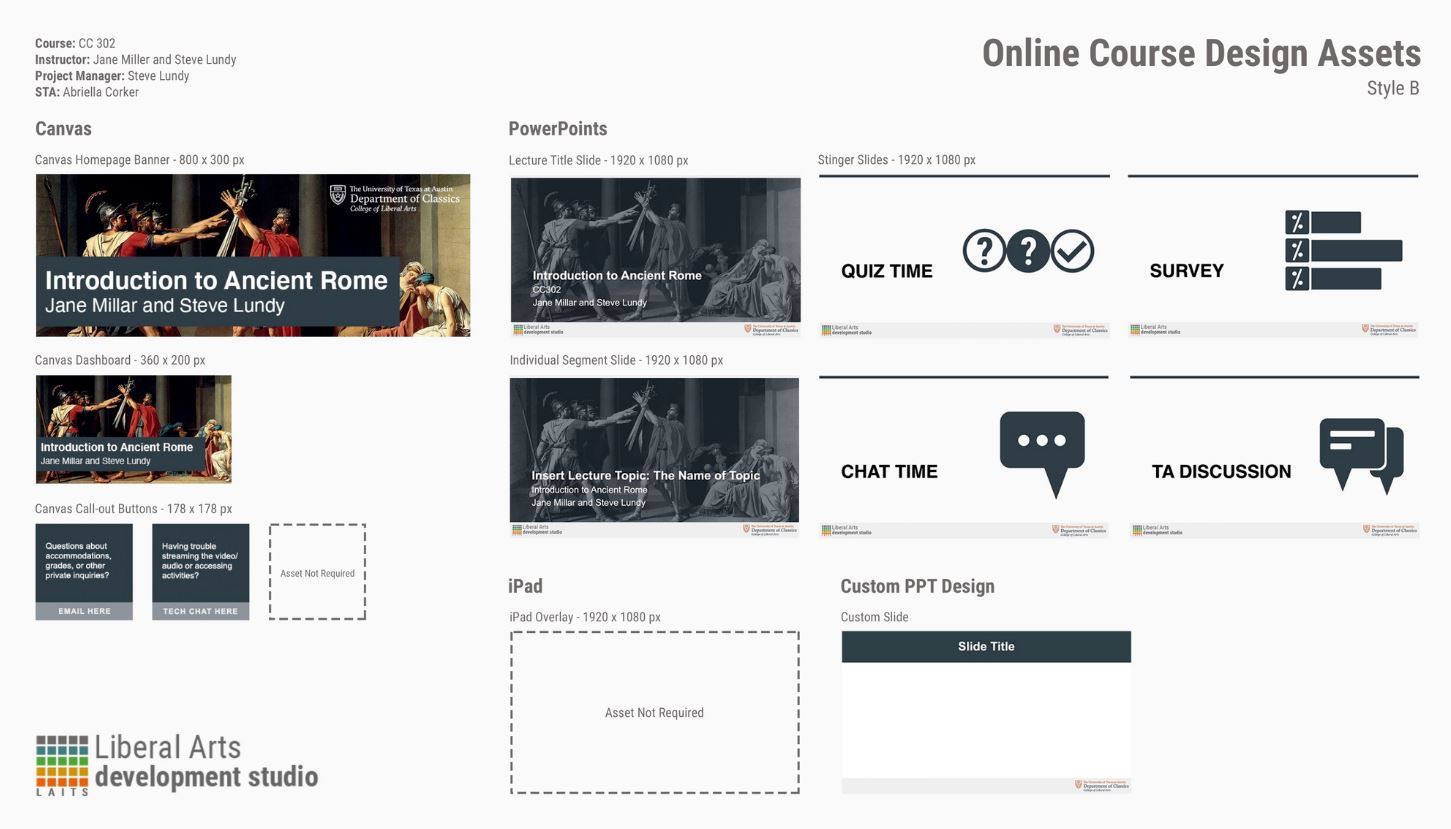
This tutorial will cover the 2 style menus for remote online course graphics and how to use the templates to create:
- Canvas homepage banner
- Canvas dashboard graphic
- Canvas buttons
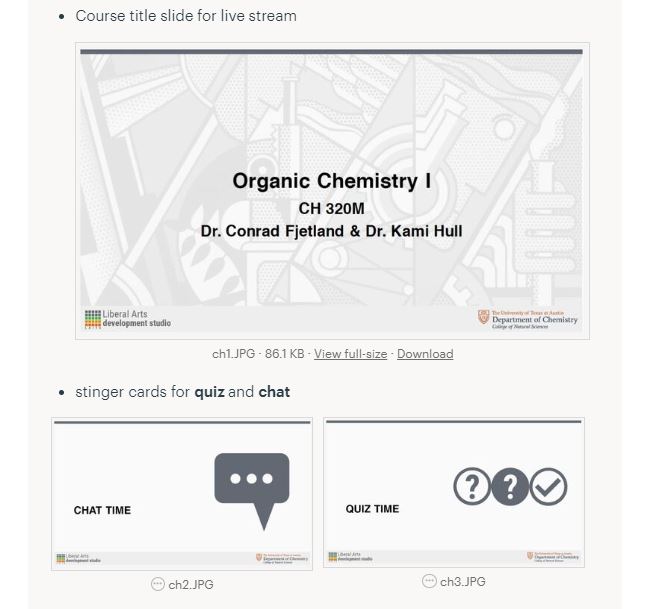
- lecture title slide
- individual lecture segment slide
- stinger slides
- iPad overlay
Style A Templates folder
Style B Templates folder
Preparation: Choosing a style
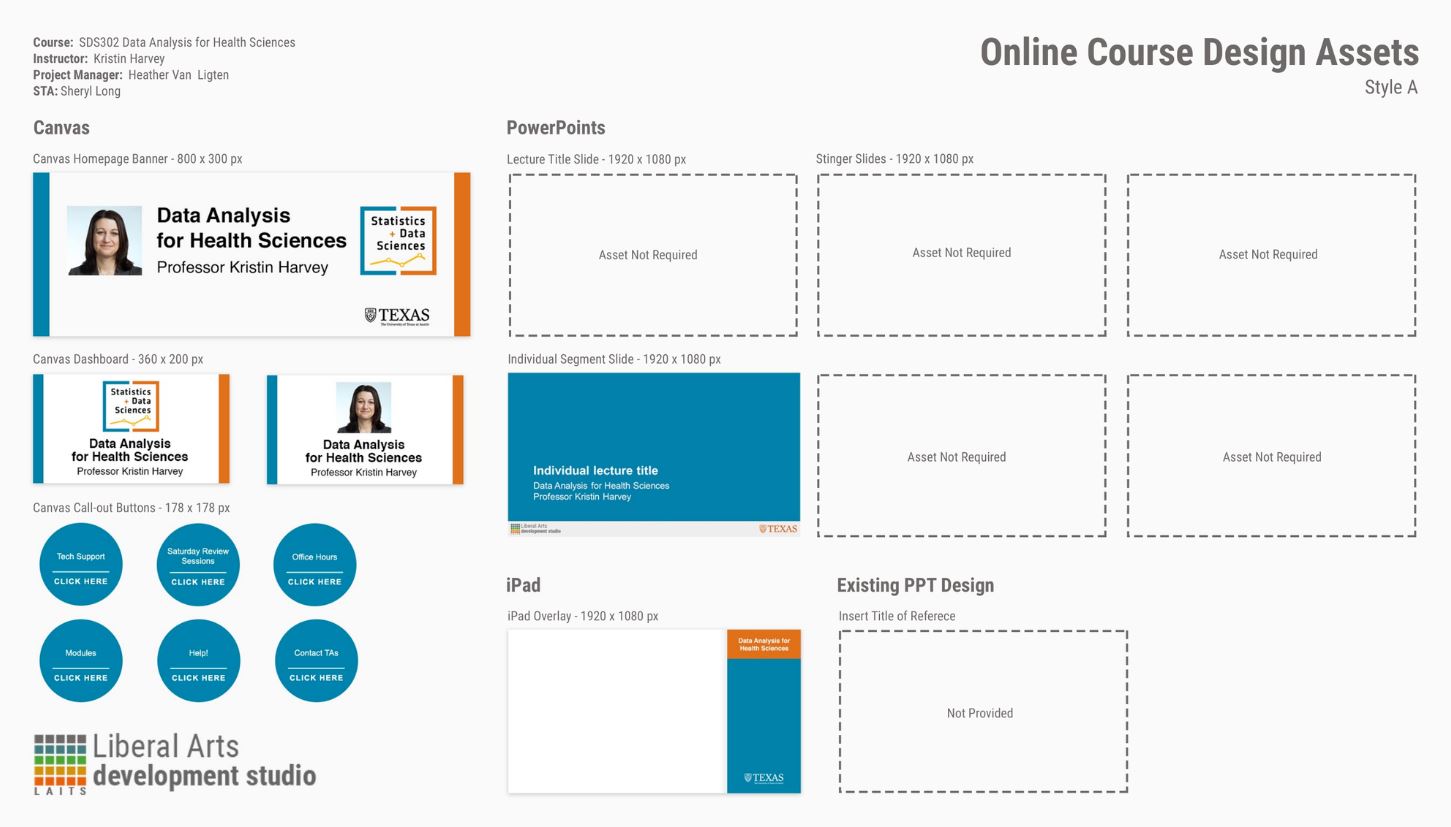
For remote online course graphics, LAITS offers 2 general style menus: Style A and Style B
Please read through the style menus linked above.
Below is a quick summary for the main differences between style A & B:
Style A:
– Uses the professor’s photo
– Monochromatic color scheme
– Round canvas buttons 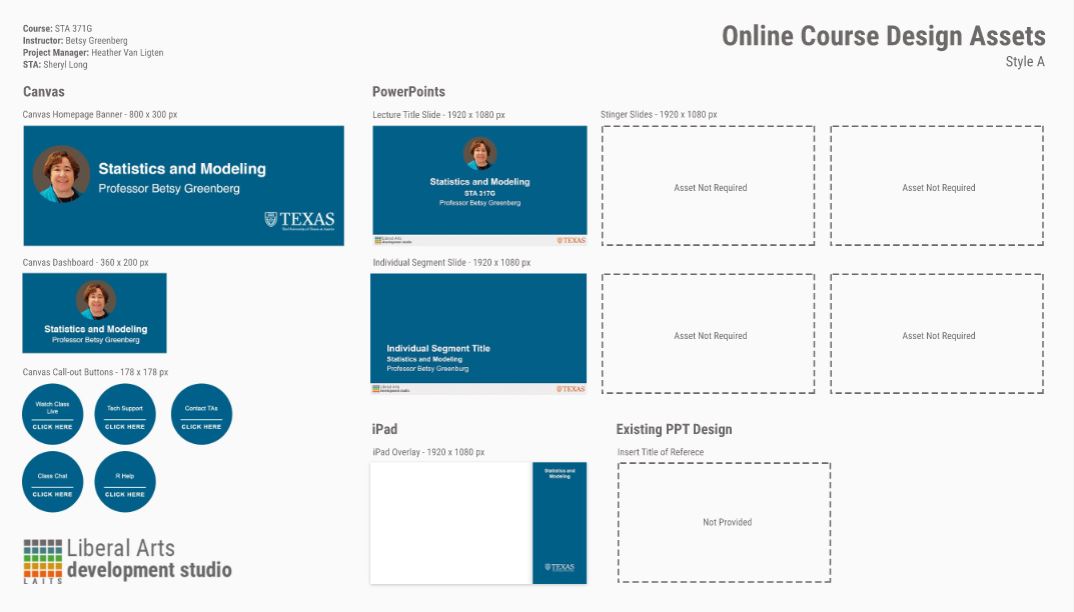
Style B:
– Uses an image/graphic
– Color scheme depends on the image/graphic
– Square canvas buttons 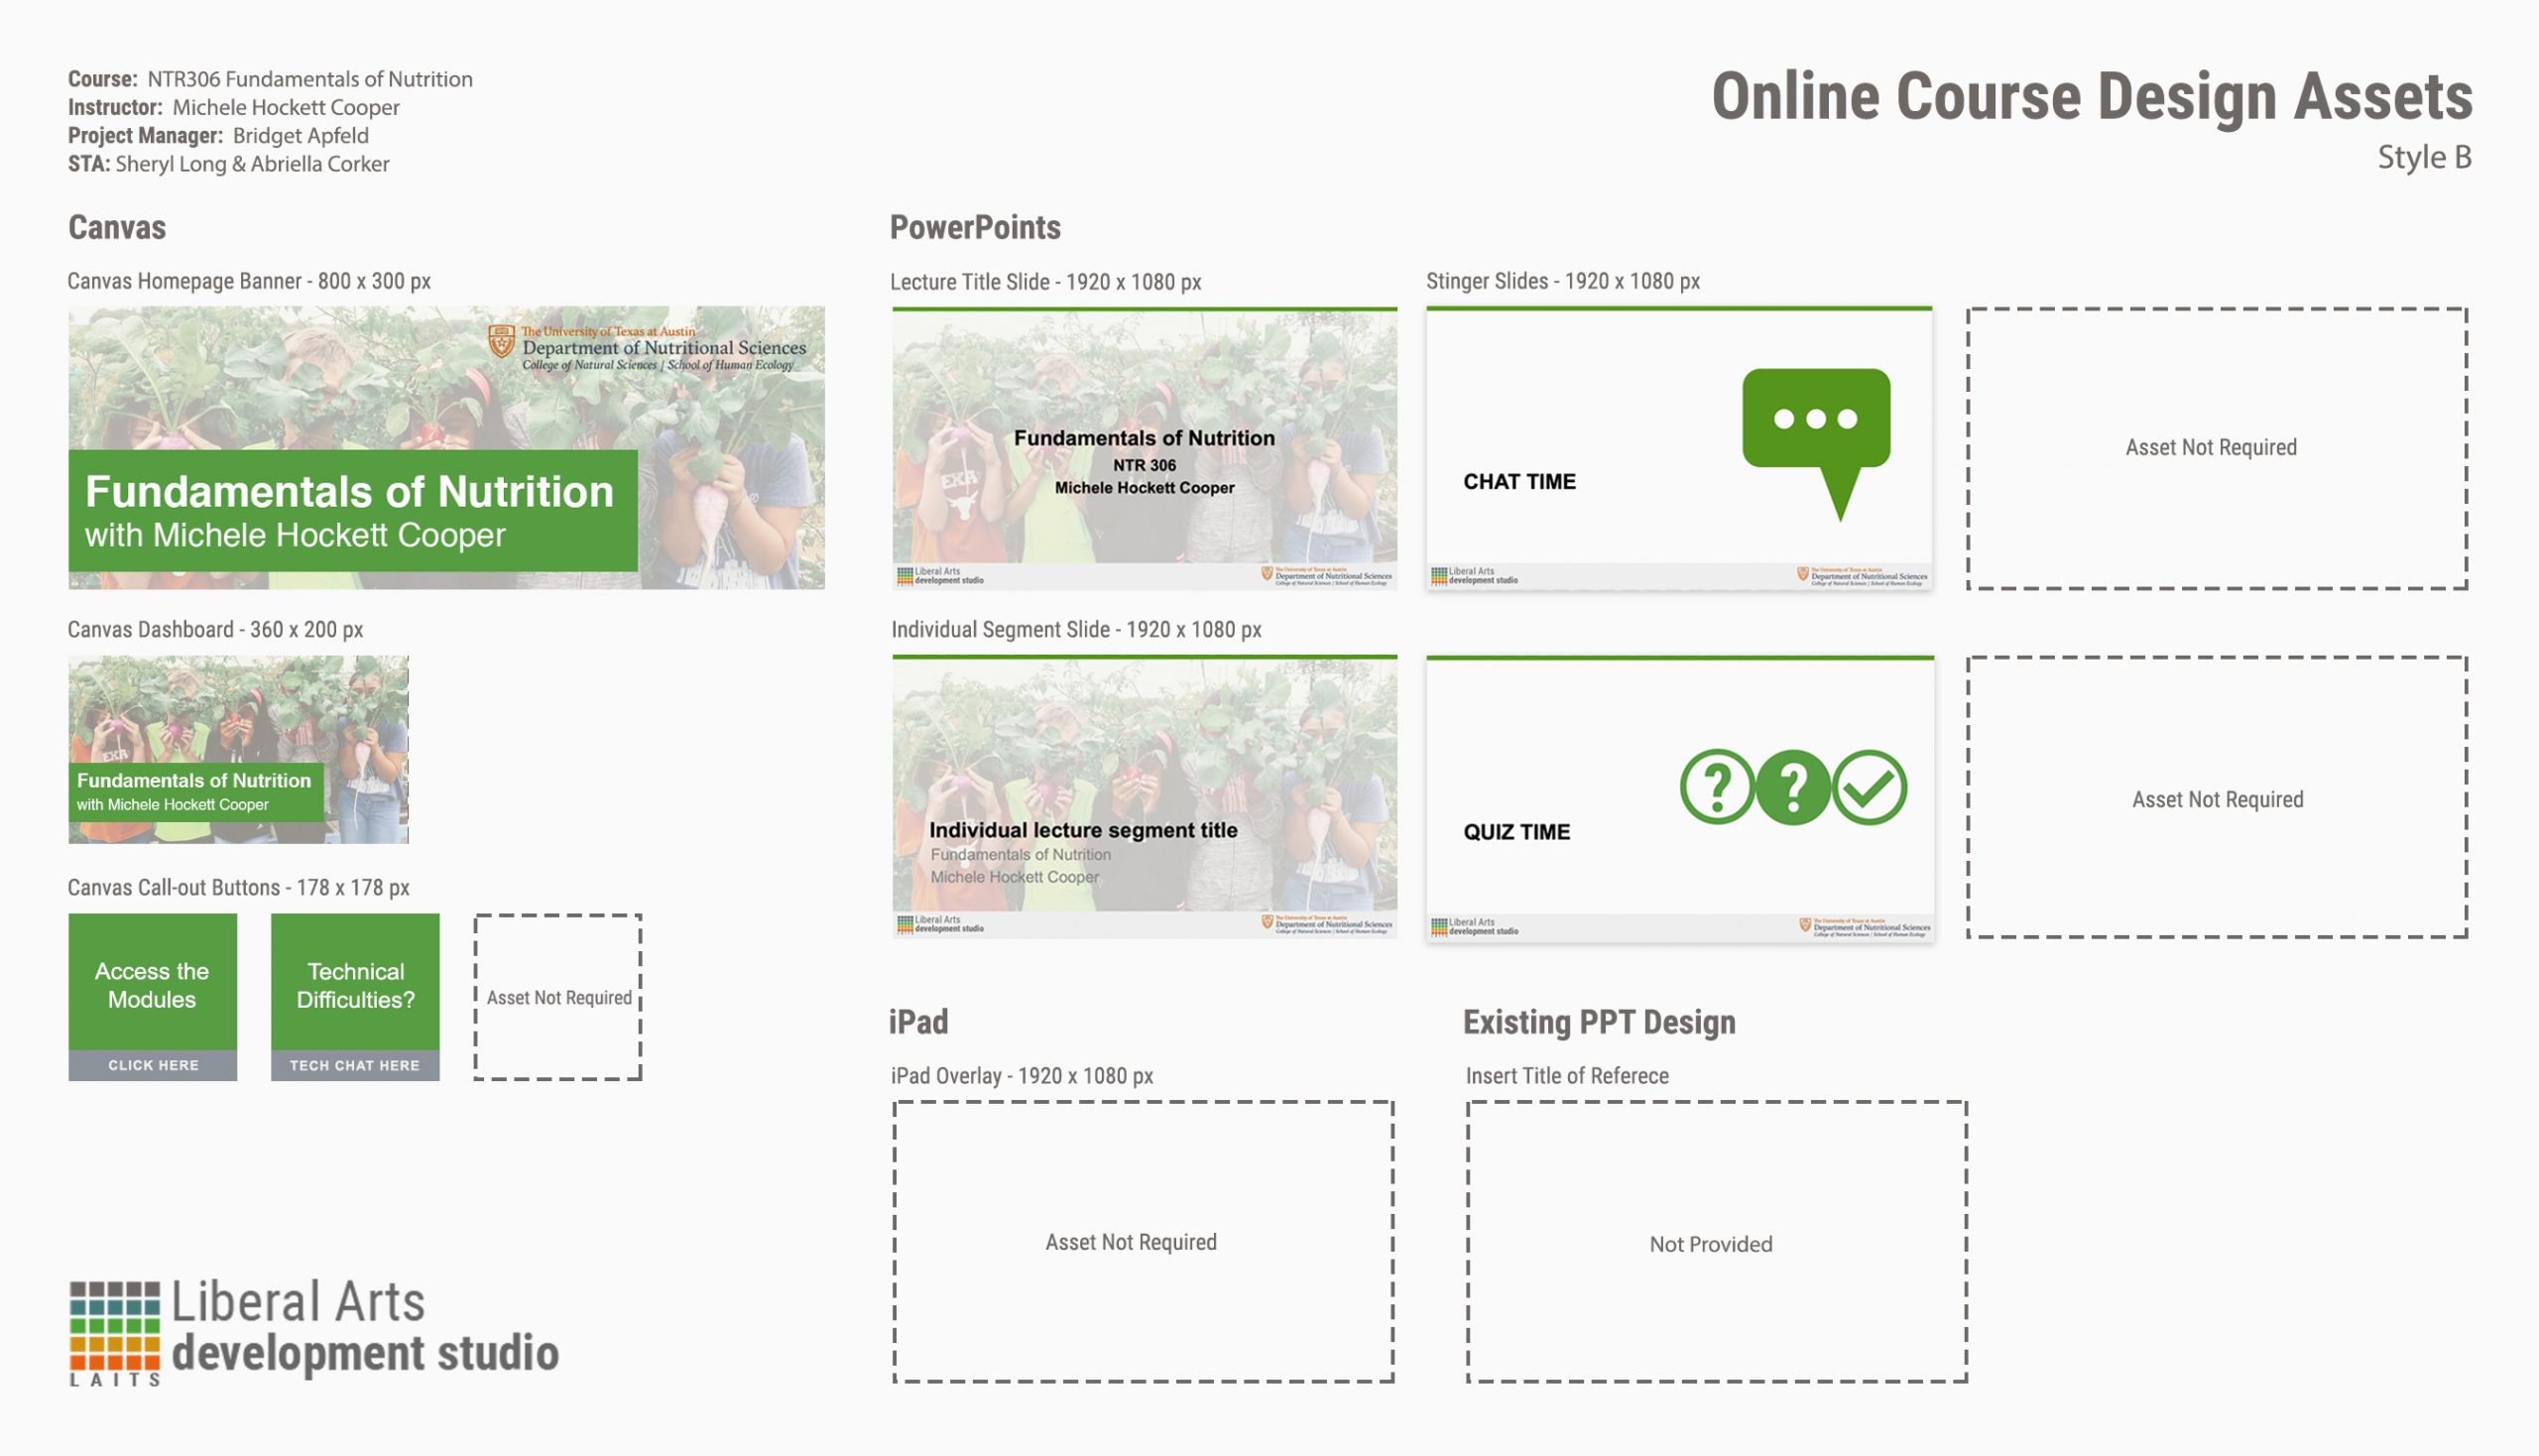
Before you start a course, you will gather the following information and assets from your client or project manager: (these should all be in the assignment’s description part on BC)
- Which style does the professor prefer? (A or B)
- List of requested graphics (ex: canvas graphics + title slide + stingers)
- Professor’s photo for style A or preferred image/graphic for style B
- Preferred branding for the course (ex: departmental or university-level)
- Preferred title for the professor (ex: Dr., Lecturer, Professor, etc)
- Preferred color scheme (if none, use your design eye)
For this training, you should make Style A and Style B sets of graphics for:
a) your favorite course you’ve taken at UT,
b) a course you’re excited to take in the future, or
c) your dream imaginary course.
After you have read through the style menus and collected all necessary info and assets, create a folder for your course in your personal Box folder. ex: ADV319 Psychology of Advertising (For a real course, you would create the folder in this semester’s Final Designs folder).
Inside your course folder, create 3 sub folders:
- ADV319 PSD Templates (upload your PSD files to this folder)
- ADV319 JPGs – for project manager (upload your approved graphics to this folder)
- ADV319 Assets (upload your original assets like photos to this folder)

You are all prepped!
Canvas Graphics: Homepage Banner
Style A Templates folder / Style B Templates folder
Go to the folder for your requested style, find the banner template by going to PSD MASTER template > MASTER-TEMPLATE-styleA/B-canvashomepage-banner.psd
Download and open the template in Photoshop. (scroll down for style B)
Style A (3 versions)
Step 1
Choose the version that best fits your course.
– One line title 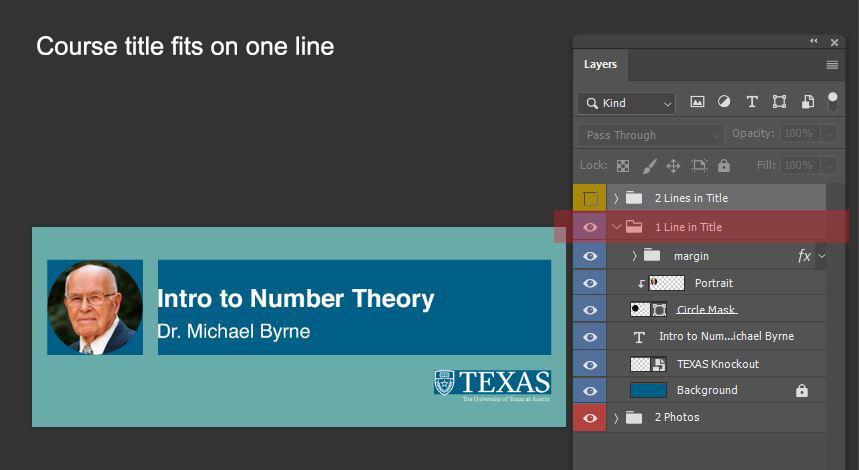
– Two lines title 
– Two images 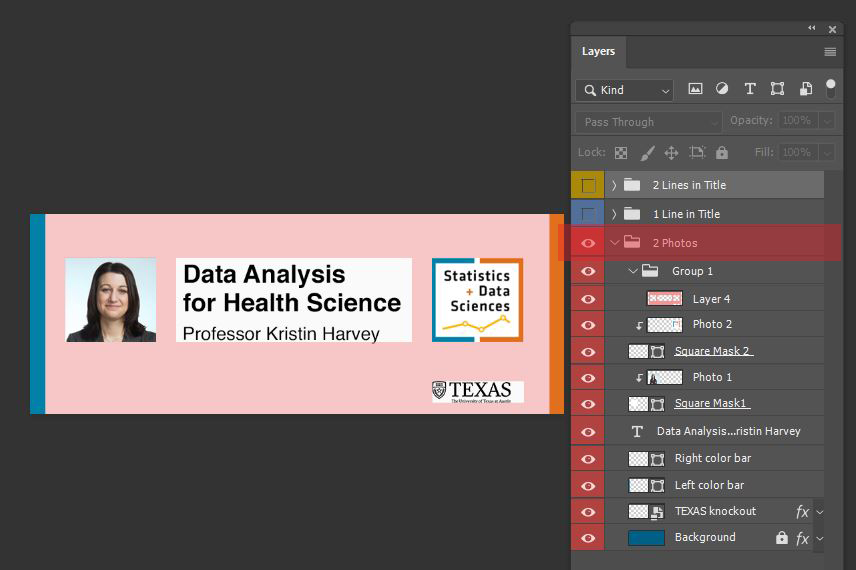
Step 2
Replace photo.
Place the photo in this exact order so as to still utilize the pre-made circular clipping mask.

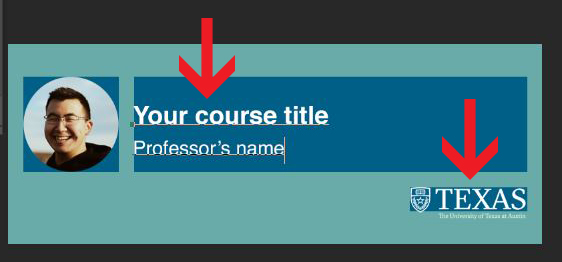
Step 3
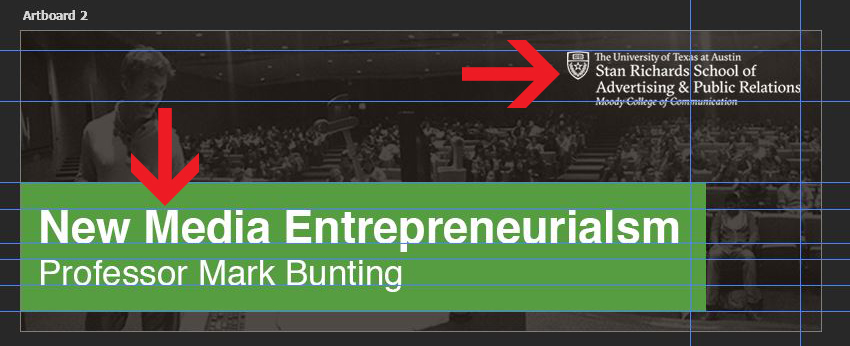
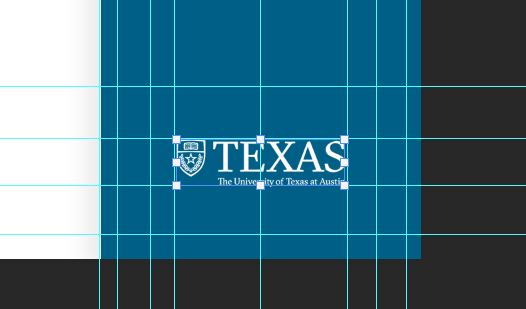
Replace course information. If your course requests “university” branding, keep the TEXAS logo. If your course requests “departmental” branding, download & insert the correct COLA Department logo.
Download COLA Department logos or Texas logos.
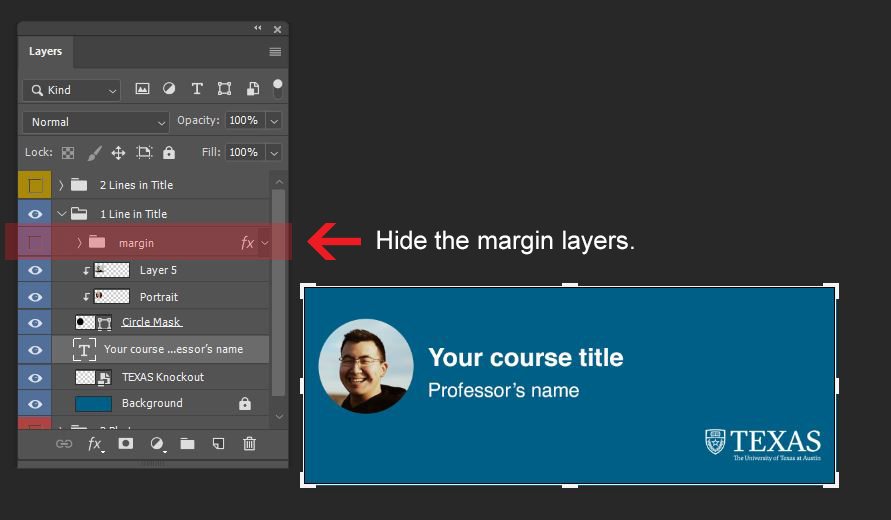
Step 4
Hide the margins then export the banner as JPG.
Step 5
Save and upload the PSD file to the PSD templates folder on Box.
Step 6
Post exported JPG on BC for feedback.
Step 7
Upload JPG to the JPGs folder on Box when your banner is approved.
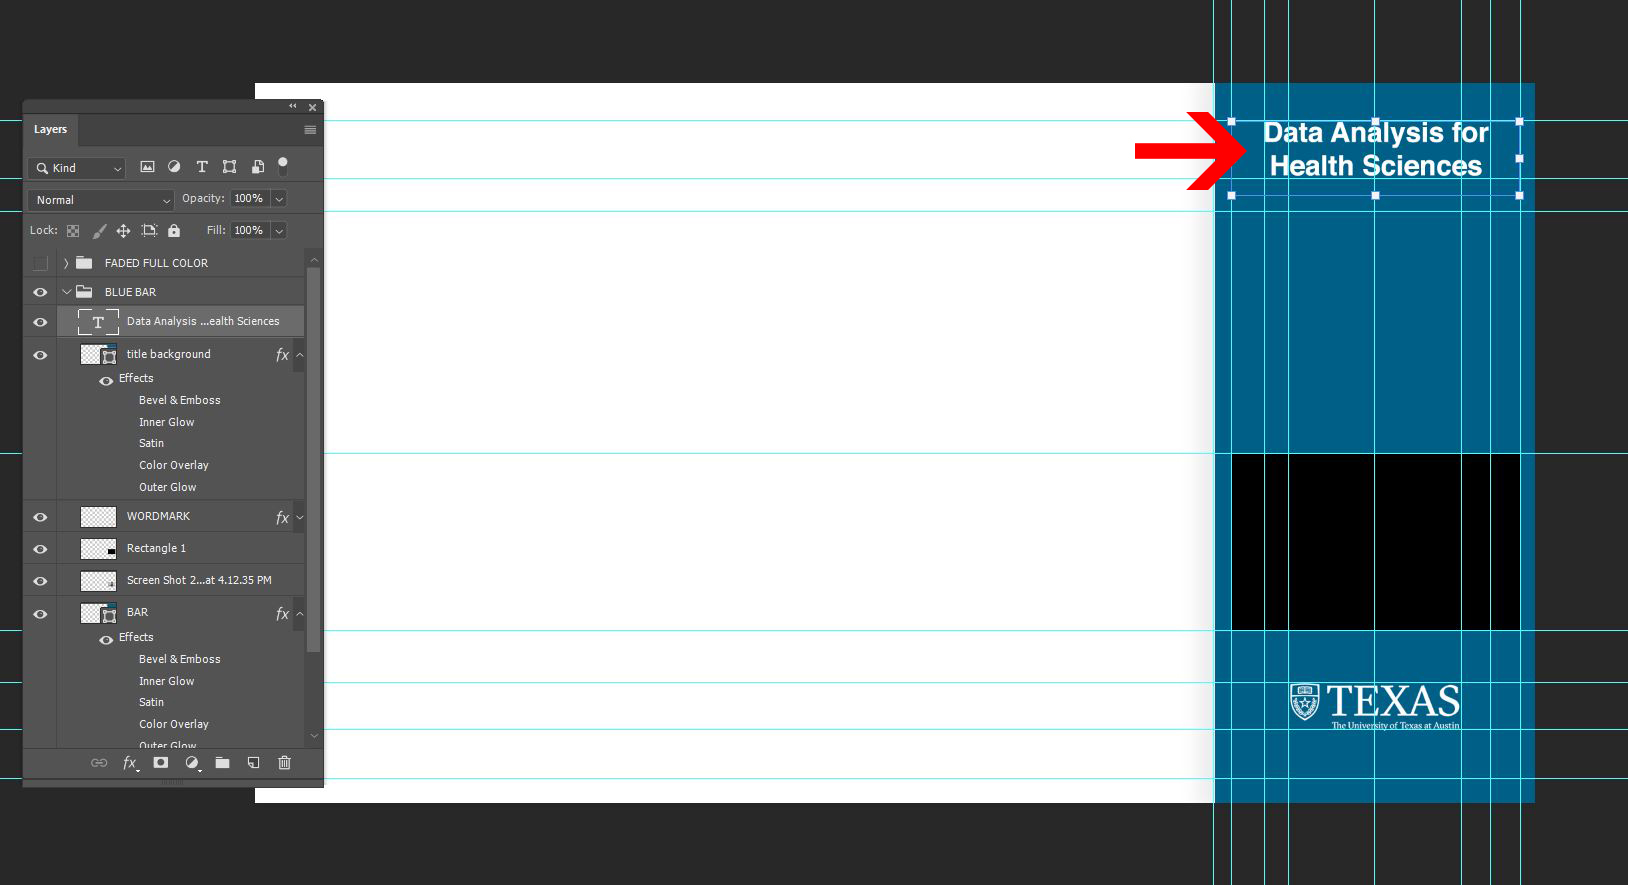
Style B (2 versions)
Step 1
Choose which version best fits your course title.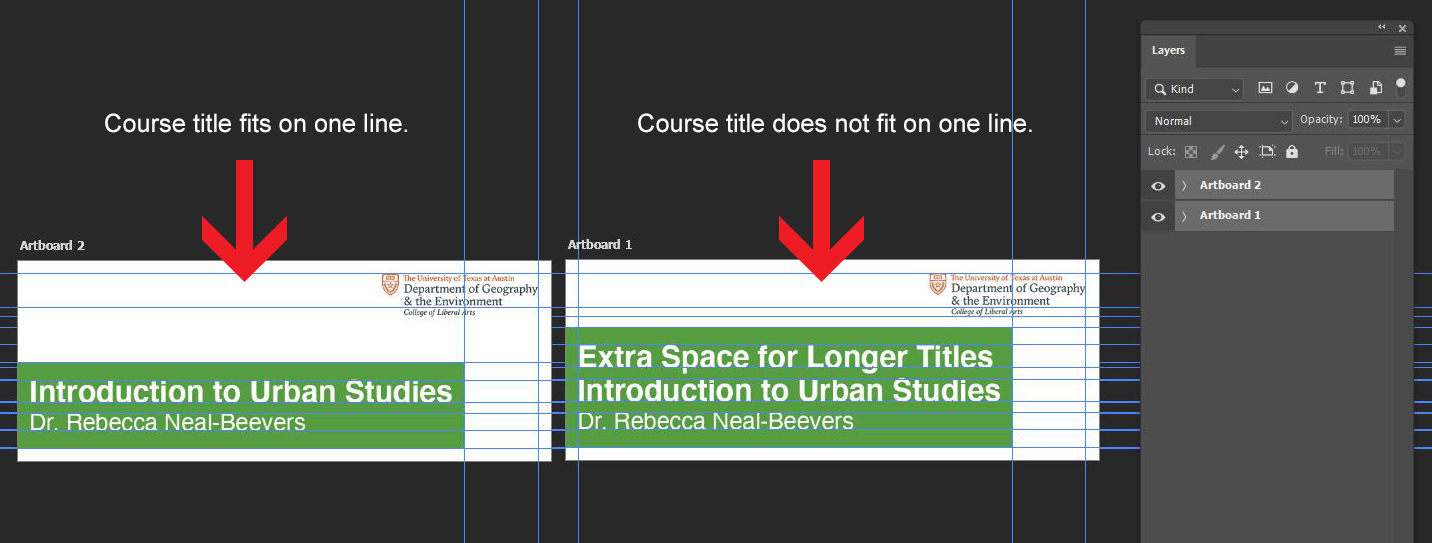
Step 2
Place the course image/graphic in the background. Make proper edits such as darken image, add overlay, reduce length of color bar, etc.

Step 3
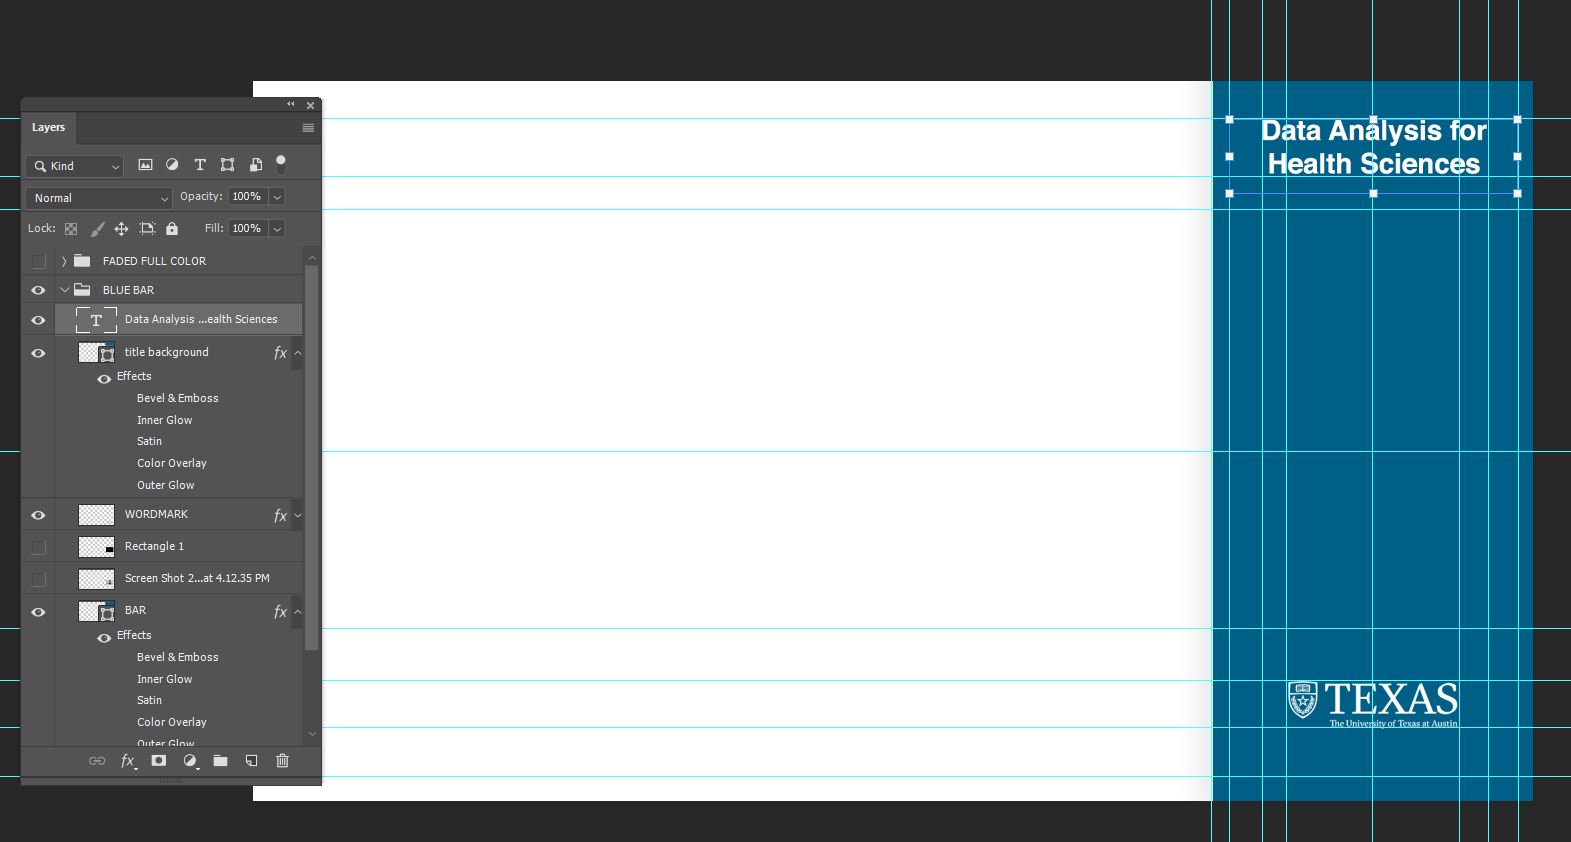
Replace course information and branding.
Adjust logo with “Color Overlay” layer style to the best legible option: burnt orange #bf5700, white, or black color overlay.
Step 4
Edit the color of the text block. Select the text block, go to fx -> Color Overlay. Choose a color and click OK. Note: You can shorten the length of the block if your course name is shorter than the template’s.

Step 5
Export as JPG. Save and upload the PSD file to the PSD templates folder on Box.
Step 6
Post exported JPG on BC for feedback.
Step 7
Upload JPG to the JPGs folder on Box when your banner is approved.
Canvas Graphics: Dashboard Graphic
Dashboard graphic should look like a simplified version of the homepage banner.
Style A Templates folder / Style B Templates folder
Go to the folder for your requested style, find the dashboard graphic template by going to PSD MASTER template > MASTER-TEMPLATE-styleA/B-canvaDashboard.psd
Download and open the template in Photoshop. (scroll down for style B)
Style A (4 versions)
Step 1
Choose the version that best fits your course.
– One line title with photo on the left. 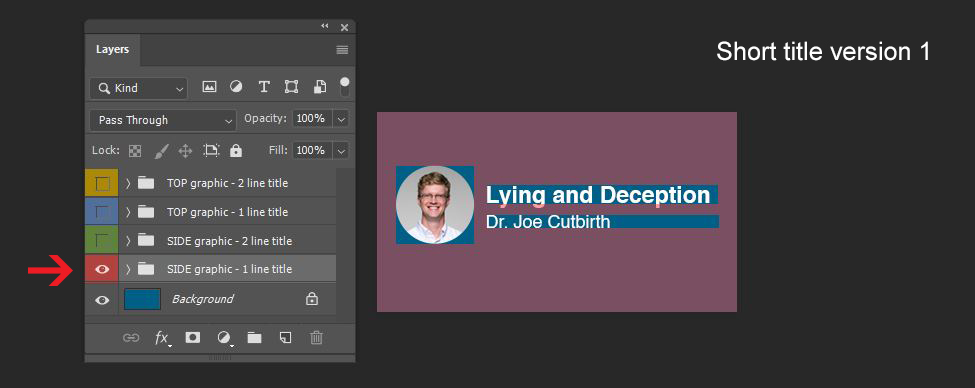
– One line title with photo on top. 
– Two lines title with photo on the left. 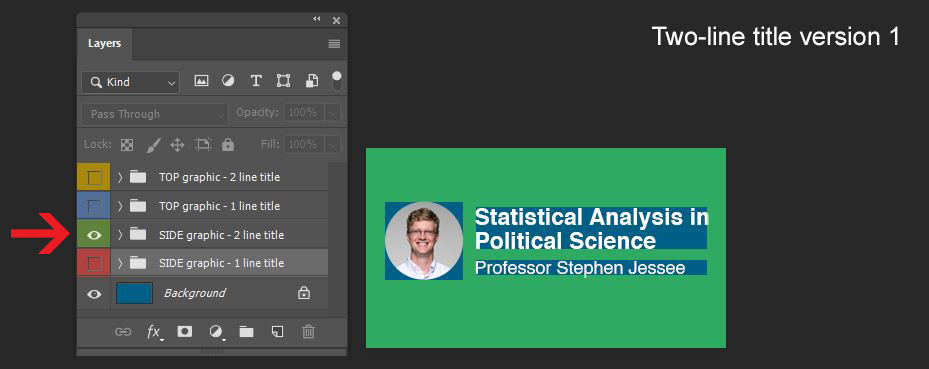
– Two lines title with photo on top. 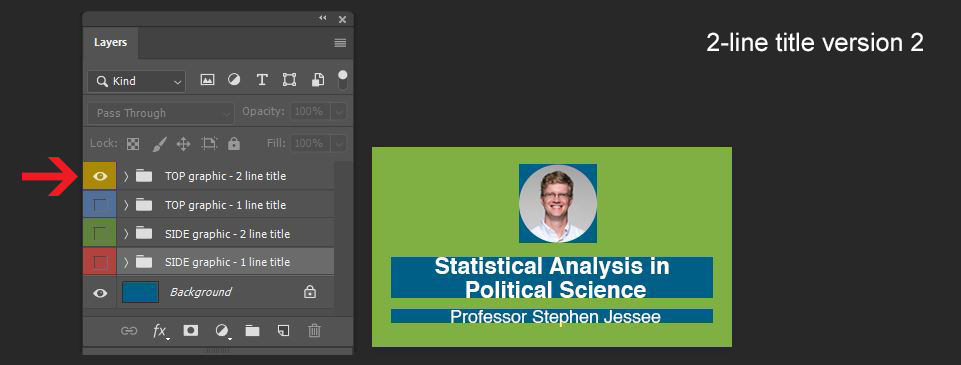
Step 2
Reuse the photo that was used in the Homepage banner. Place professor photo on top of the template photo layer. 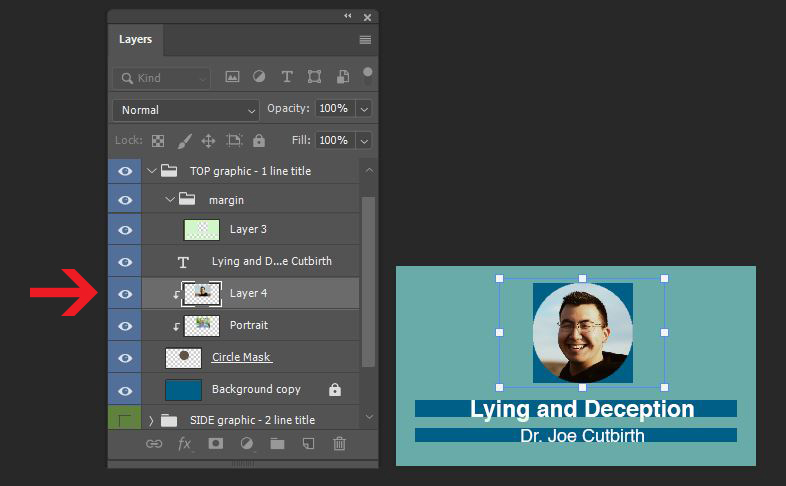
Step 3
Replace course information.
Step 4
Export as JPG. Save and upload the PSD file to the PSD templates folder on Box.
Step 5
Post exported JPG on BC for feedback.
Step 6
Upload JPG to the JPGs folder on Box when your dashboard graphic is approved.
Style B (2 versions)
Step 1
Choose the version that best fits your course.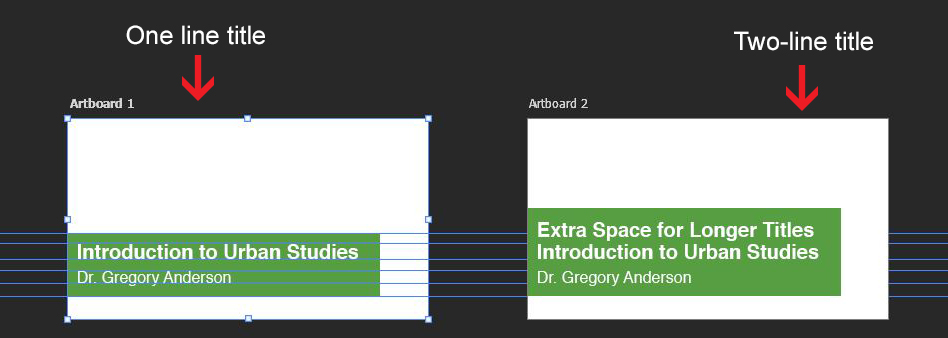
Step 2
Reuse the image/graphic that was used in the homepage banner as background. 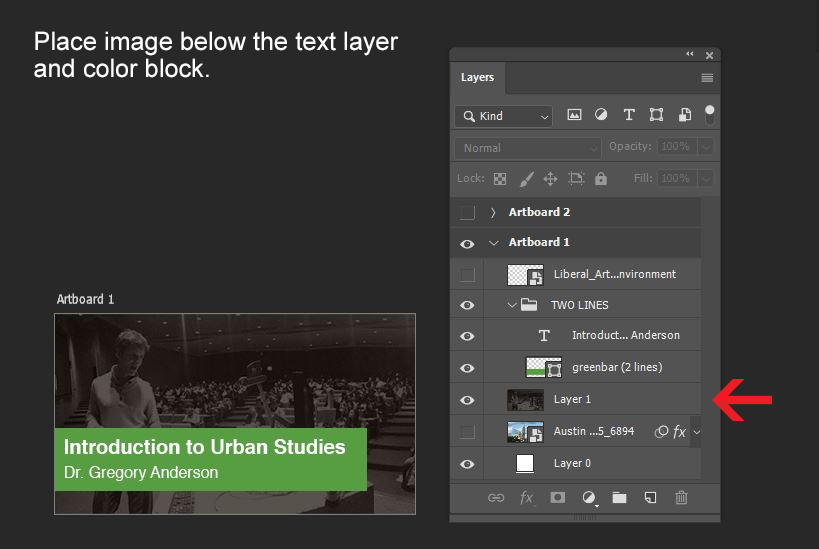
Step 3
Replace course information
Step 4
Change text block color. Select the text block layer, go to fx -> Color Overlay. Choose a color and click OK. Again, you can shorten length of color block if necessary. 
Step 5
Export artboard as JPG. Save and upload the PSD file to the PSD templates folder on Box.
Step 6
Post exported JPG on BC for feedback.
Step 7
Upload JPG to the JPGs folder on Box when your dashboard graphic is approved.
Canvas Graphics: Canvas Buttons
Style A Templates folder / Style B Templates folder
Go to the folder for your requested style, find the dashboard graphic template by going to PSD MASTER template > MASTER-TEMPLATE-styleA/B-canvasbutton.psd
Download and open the template in Photoshop.
This session will quickly go over how to edit the button templates, here is a more detailed tutorial on Canvas buttons: Basic Training: How to Create Canvas Buttons
Style A Buttons
Standard wording options
Center text.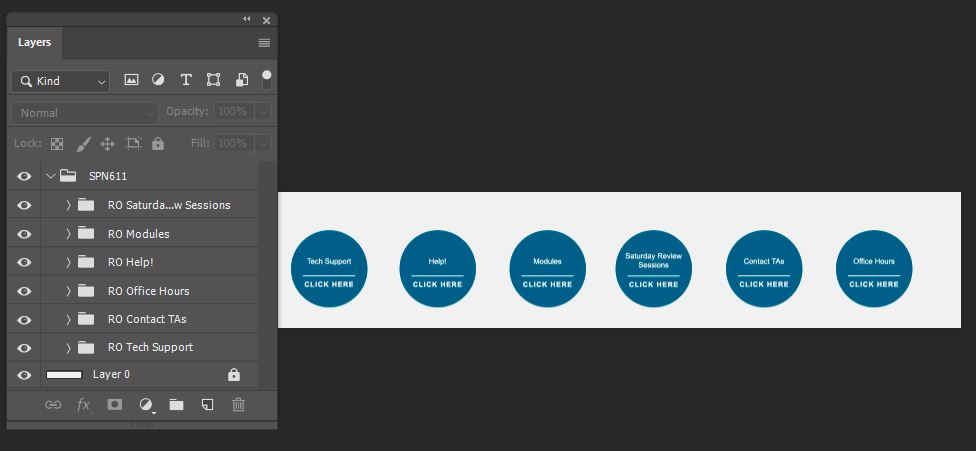
Style B Buttons
Standard wording options
Left-align text longer than 2 lines.
Center text 1-2 lines.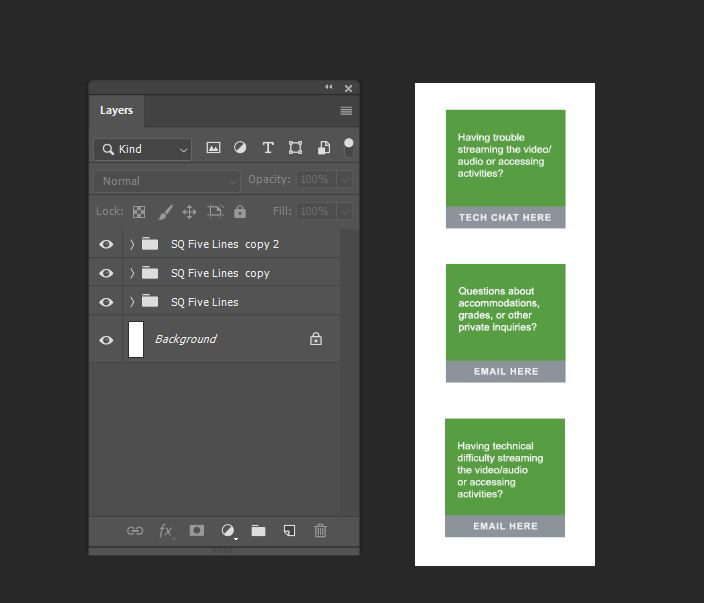
Step 1
Replace the text if the professor requested button with custom wording
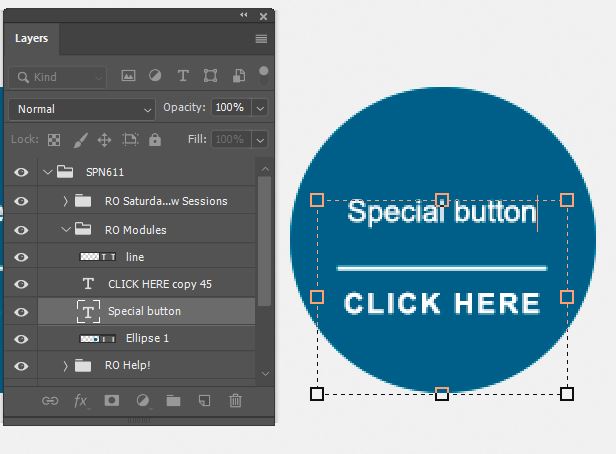
Step 2
Change the color if needed. To add a color overlay, select the shape, go to fx -> Color Overlay. Choose a color and click OK.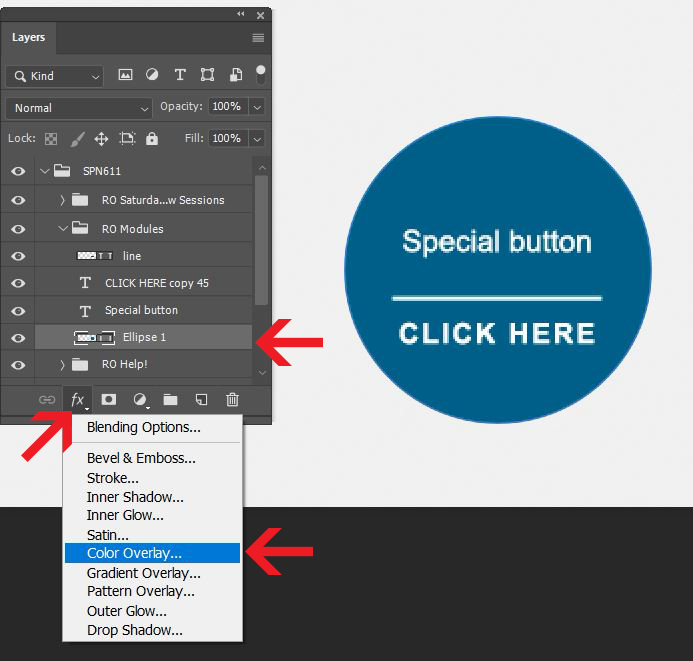
Step 4
When your button is ready, right click on the folder of your edited button, select Export as…, then export your button as PNG.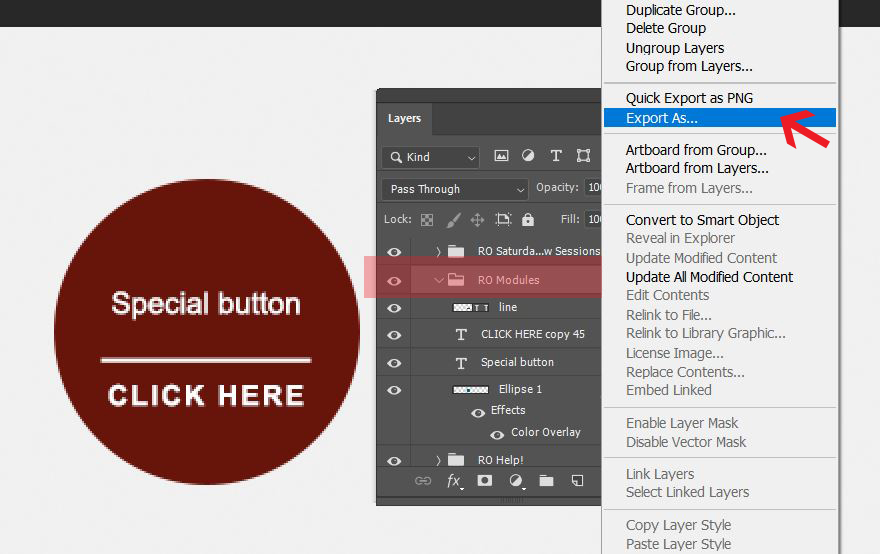
Step 4 – Save and upload the PSD file to the PSD templates folder on Box, then post exported PNGs on BC for feedback.
Step 5 – Upload PNG to the JPGs folder on Box when your buttons are approved.
- Each Button should be exported in its own PNG file (5 buttons = 5 PNG buttons + 1 PSD)
PPT Template: Lecture Title Slide Background
Style A Templates folder / Style B Templates folder
Go to the folder for your requested style, find the dashboard graphic template by going to PSD MASTER template > MASTER-TEMPLATE-styleA/B-titleslide.psd
Download and open the template in Photoshop. (scroll down for style B)
Style A
Step 1
Place professor’s photo on top of the circle mask. 
Step 2
Replace the branding if the course has requested “departmental” branding.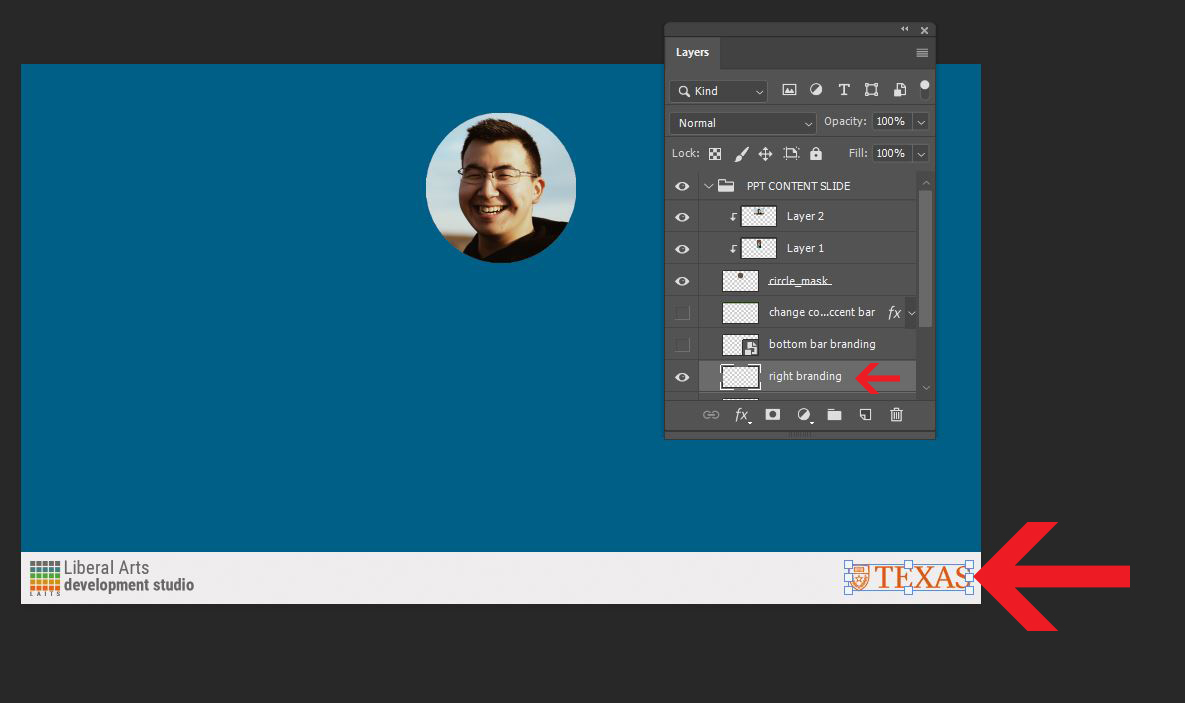
Step 3
Change the background color if the professor chose a custom color scheme. 
Step 4
Export as JPG. Save and upload the PSD file to the PSD templates folder on Box.
Step 5
Refer to PPT Template: Formatting Slide Template session below for instruction on how create the title slide.
Style B (2 versions)
Make sure you download the correct template: monochromatic (the green one below) or faded full color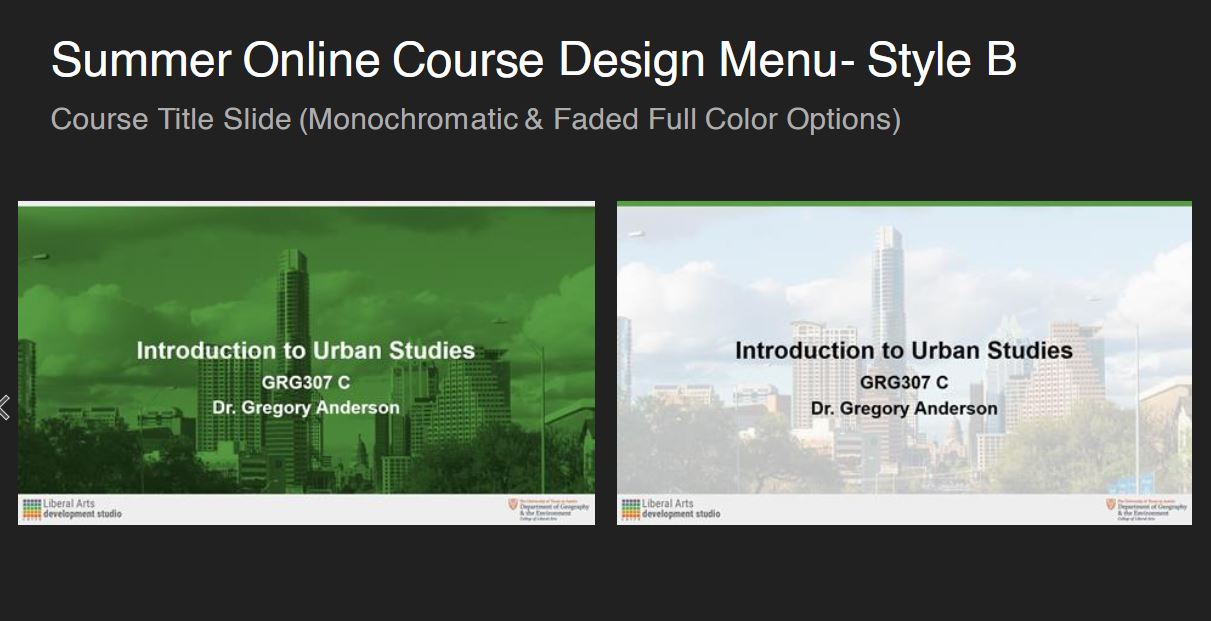
Monochromatic version:
Step 1
Place your course image on top of the template image layer 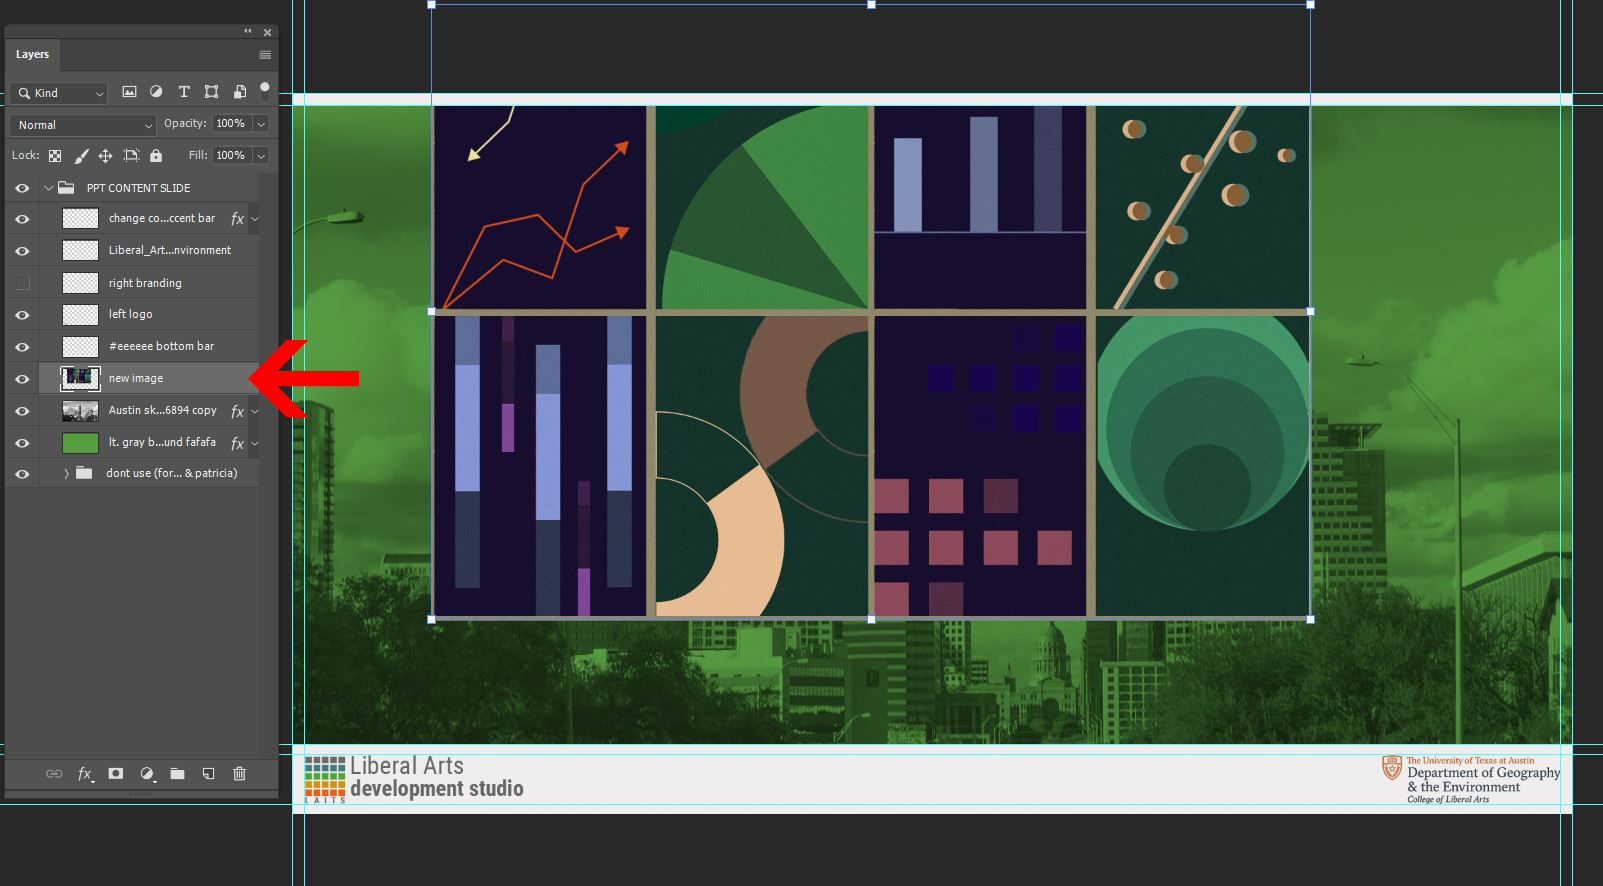
Step 2
Convert your image to grayscale by going to Image -> Adjustment -> Desaturate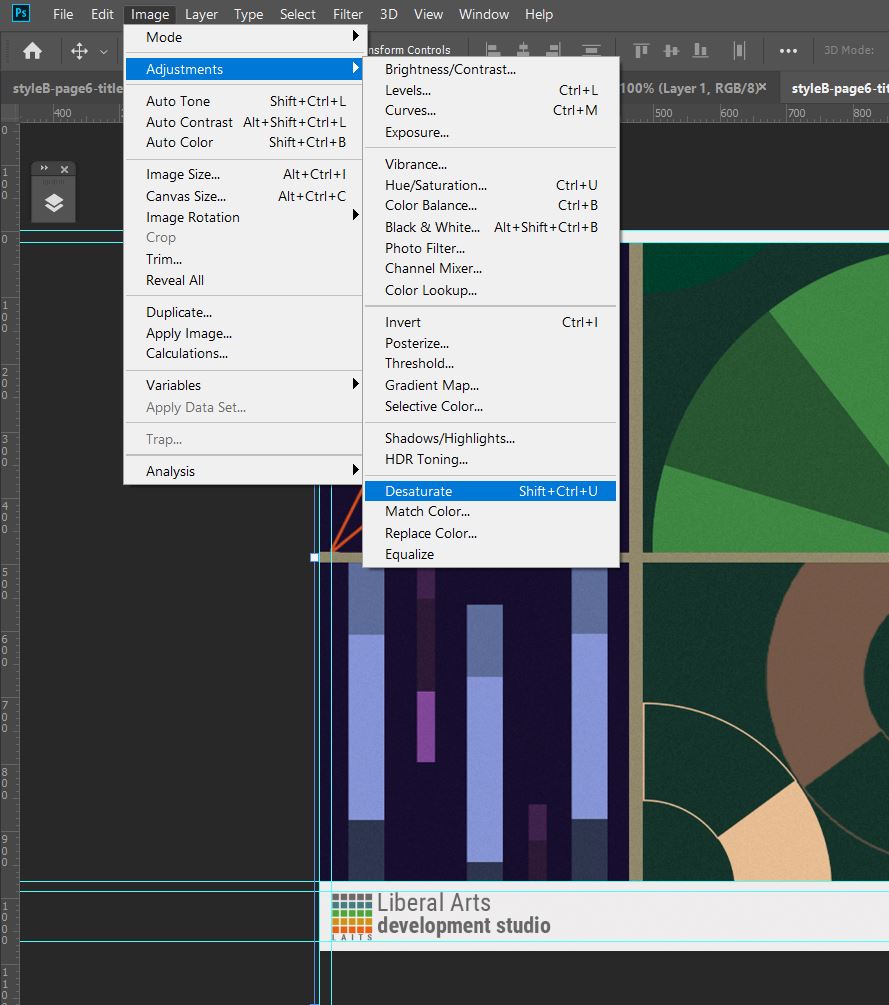
Step 3
Hide the template image layer. Change the layer mode for your image to Multiply and adjust opacity as needed. 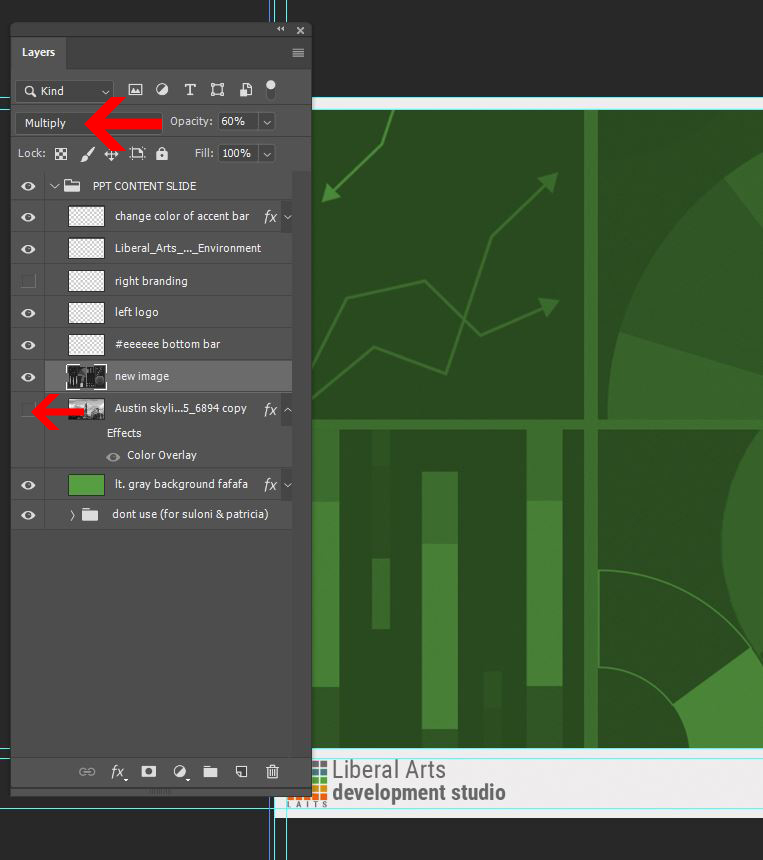
Step 4
Change the undertone color if the professor specified a color scheme for the course. 
Step 5
Export as JPG. Save and upload the PSD file to the PSD templates folder on Box.
Step 6
Refer to PPT Template: Formatting Slide Template session below for instruction on how to input this background into the PPT template.
Faded full color version:
Step 1
Place your course image on top of the template image layer 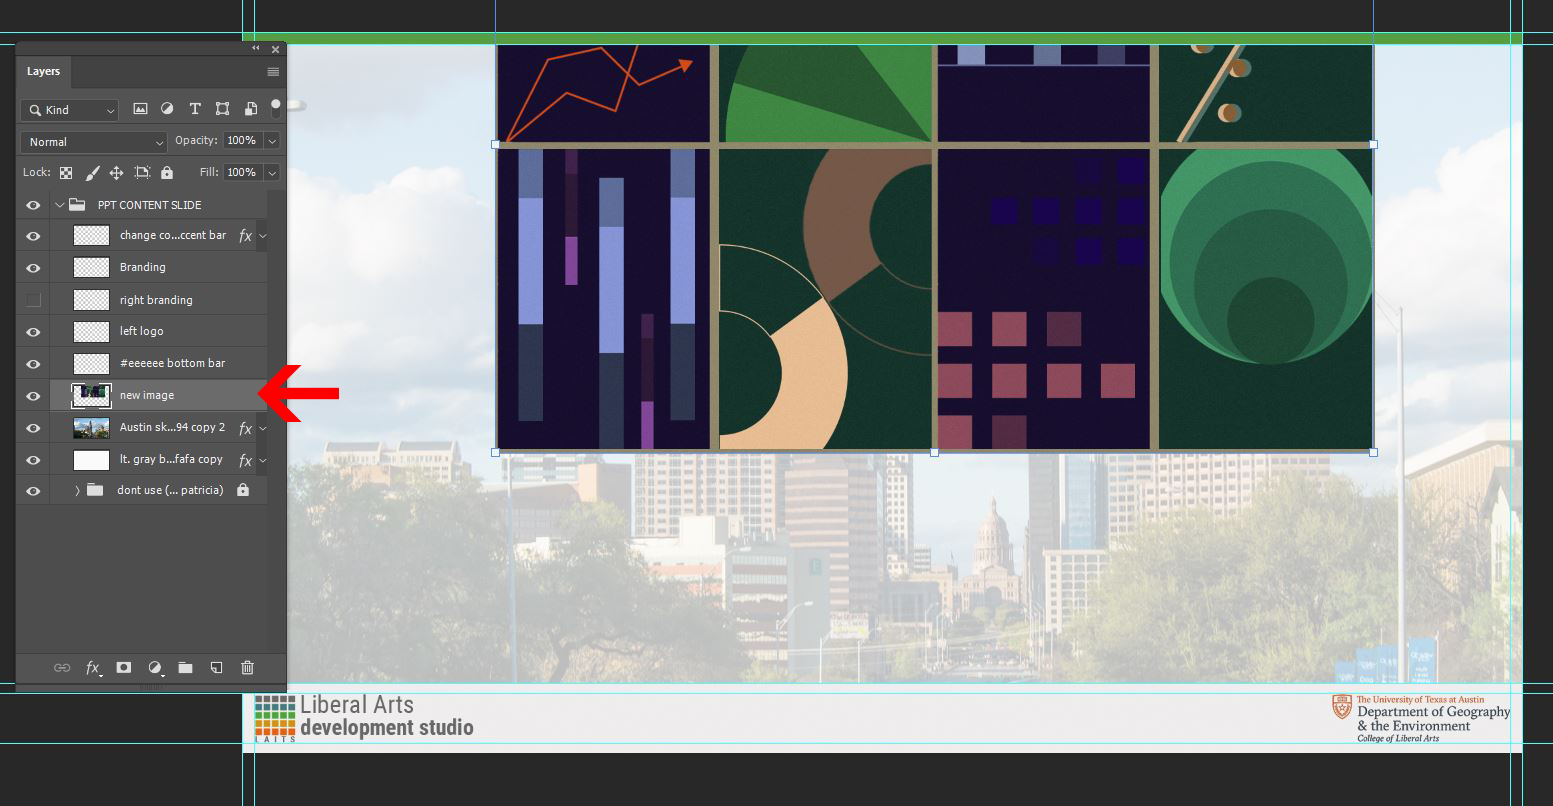
Step 2
Lower the opacity for your course image to 25% and hide the template image layer. (Adjust the opacity as needed) 
Step 3
Replace the branding if the course specifies Departmental branding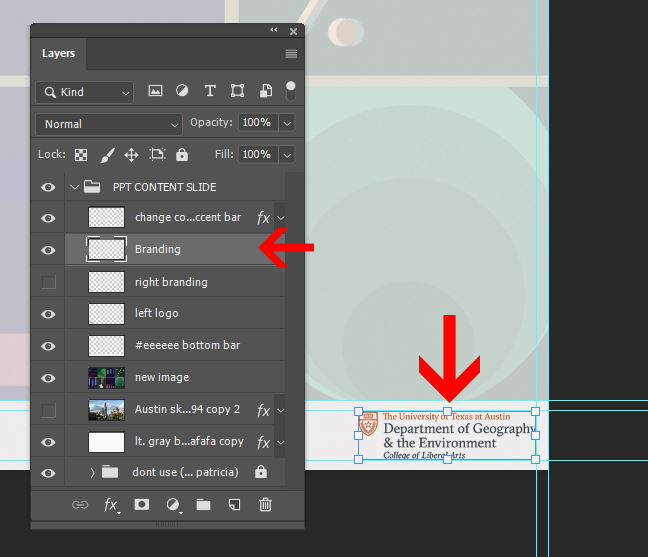
Step 4
Change the top accent bar color if the professor specified a color scheme for the course. 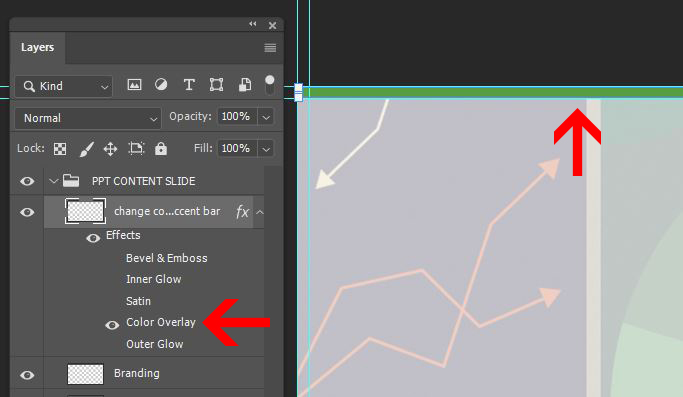
Step 5
Export as JPG. Save and upload the PSD file to the PSD templates folder on Box.
Step 6
Refer to PPT Template: Formatting Slide Template session below for instruction on how to input this background into the PPT template.
PPT Template: Lecture Segment Slide
Style A Templates folder / Style B Templates folder
Individual lecture segment slide uses the same PSD template as the Lecture title slide. Style A requires a new export, Style B can omit this step and move on to PPT Template: Formatting Slide Template.
Style A:
Step 1
Open your title slide PSD file 
Step 2
Hide professor’s picture 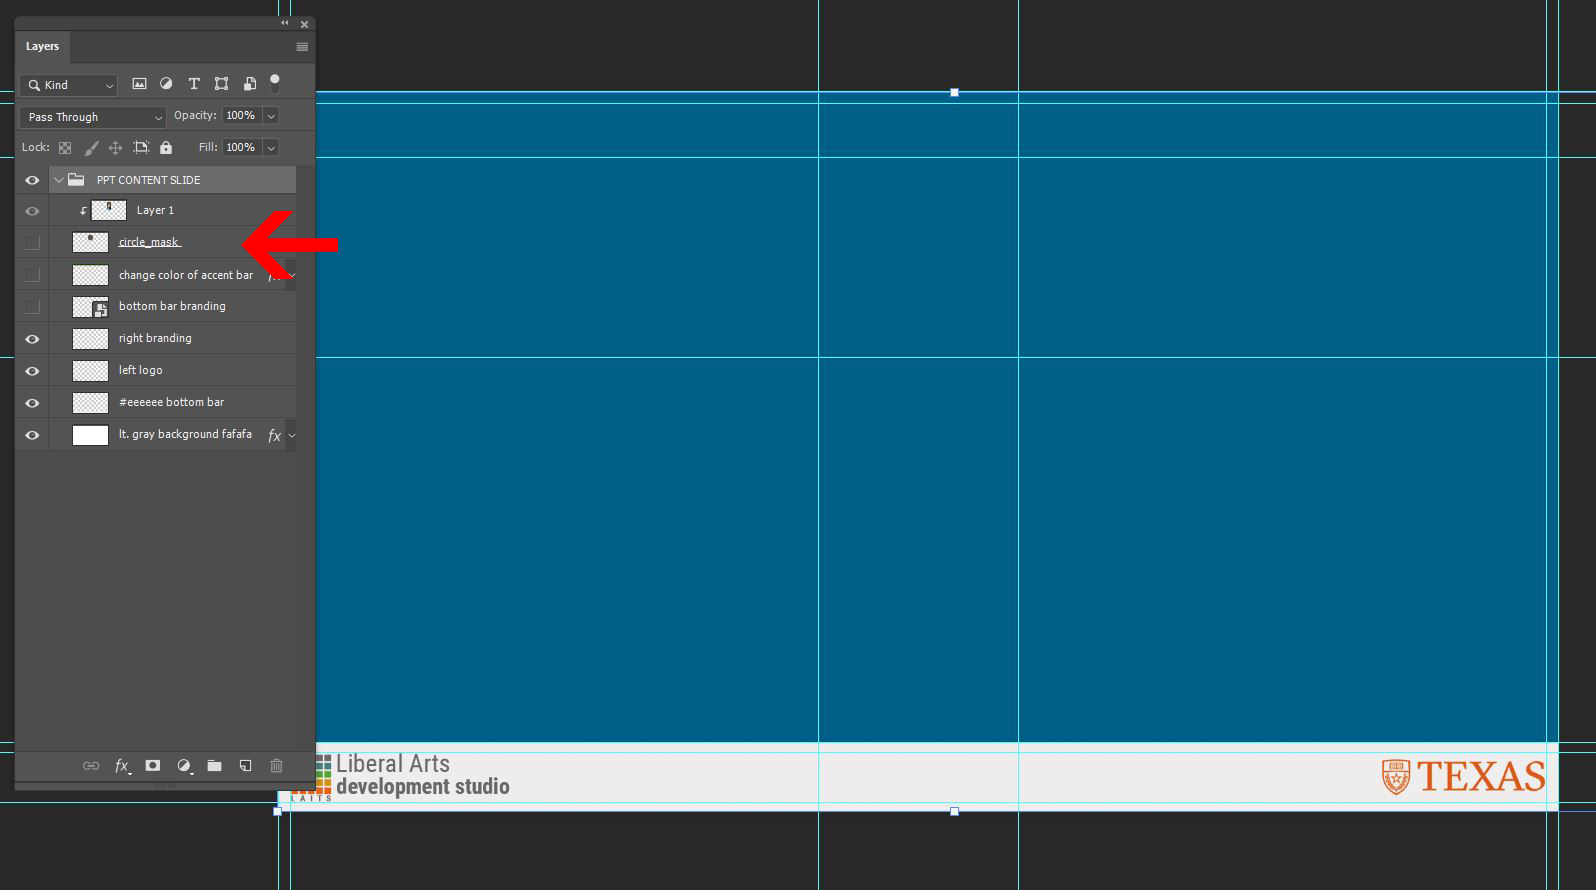
Step 3
Export as JPG. Move on to PPT Template: Formatting Slide Template.
PPT Template: Formatting Powerpoint Template
Style A Templates folder / Style B Templates folder
Go to the folder for your requested style, find the banner template by going to PSD MASTER template > TEMPLATE-styleA-PPTSlides.pptx
Step 1
Open the Template Powerpoint style
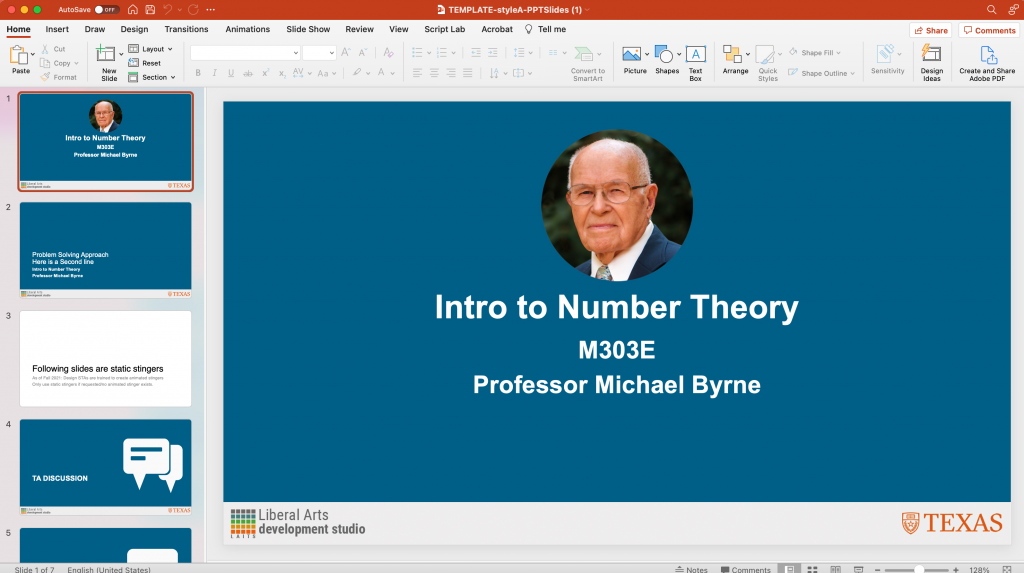
Step 2
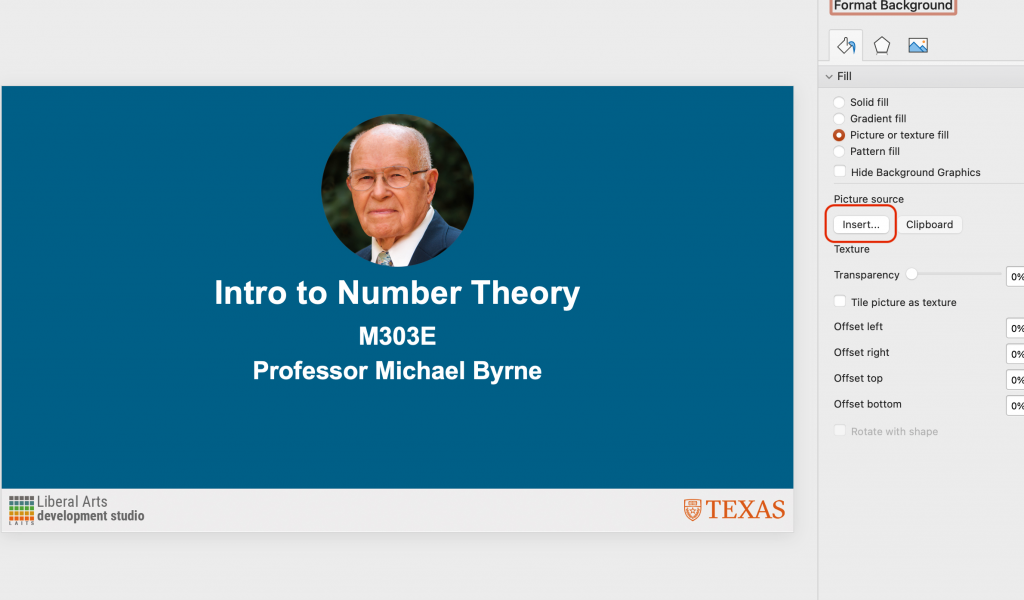
Upload your new Lecture Title Slide background by right clicking anywhere on the slide > “Format Background…”
A sidebar will appear. Select Picture Source > Insert… and upload your JPG background.
Step 3
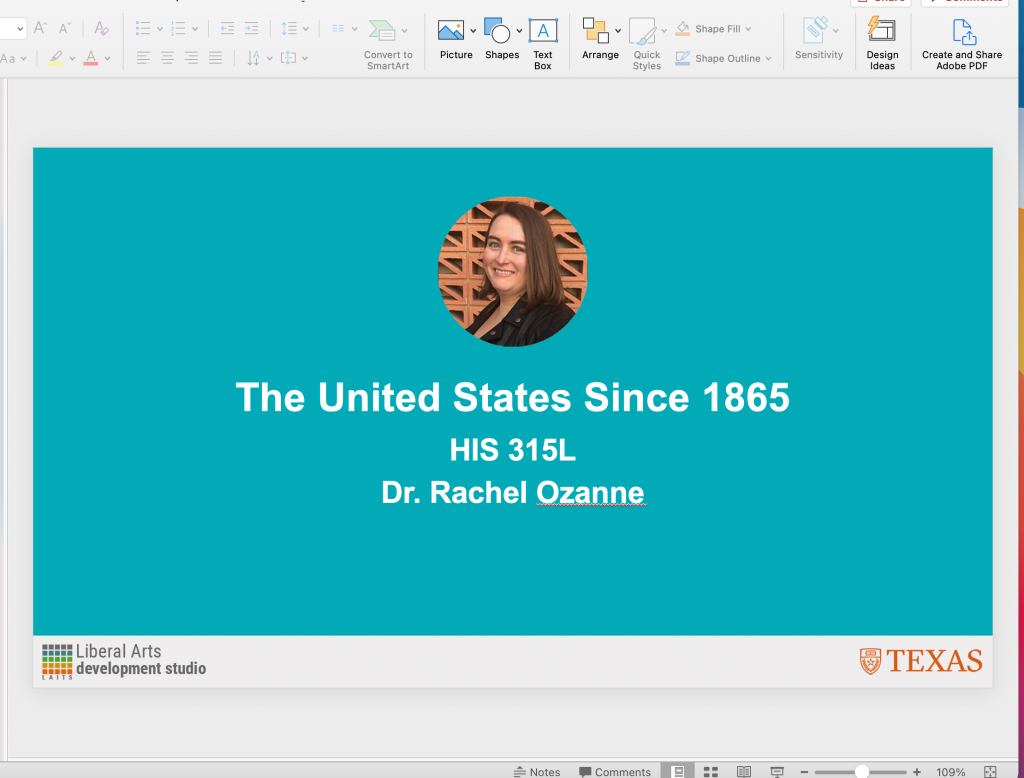
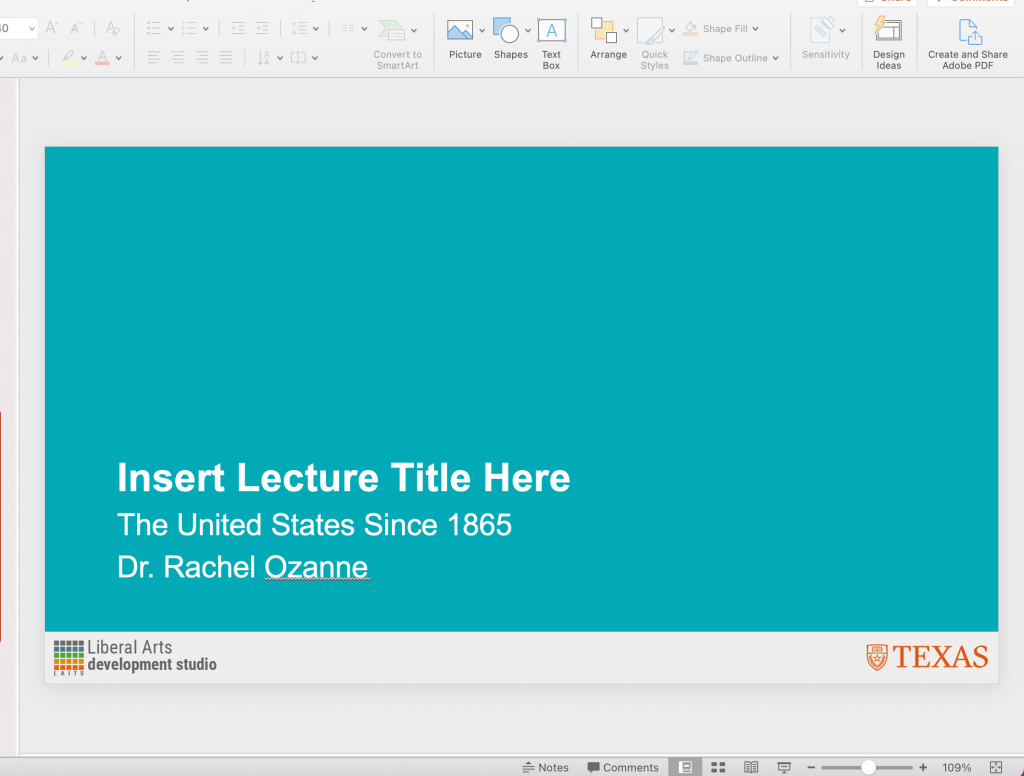
Edit the text to match your course.
Be mindful of how the professor has requested to be referred to (Dr., Profesor, just their name…). It will be noted in your BC to-do.
Step 4
Do the same for your Lecture Segment Slide.
Step 4.5
You will notice your PPT template has slides at the end for static stingers.
As of Fall 2021, most course stingers are now animated and you will export them via an After Effects template in the next step of this KB.
For this training, you may delete these stinger slides and save your pptx file here with only 2 slides.
For actual courses, discuss with your team lead how to proceed. It may be OK to delete & only provide animated versions, or it may be necessary to restyle these static stingers. Steps on how to restyle static stingers are at the BOTTOM of this KB.
Step 5: Export JPGs for internal design menu use
File > Export slides to JPGs and post exported JPGs on BC for feedback. You will also use these JPGs in your final design menu.
Step 6
Save out your entire Powerpoint as a .pptx file.
Upload the PowerPoint file to the “JPGs – for project manager ” folder on Box.
Project Managers will use this PPTX file to edit the “Insert Lecture Title Here” space for each week’s lectures.
iPad Overlay
Style A Templates folder / Style B Templates folder
Go to the folder for your requested style, find the banner template by going to PSD MASTER template > MASTER-TEMPLATE-styleA/B-iPadOverlay.
It is important your iPad overlay background you design here is VERY subtle so as to not distract students from the lecturer’s livestream & powerpoint notes.
Step 1
Change the course title.
Step 2
Change the color if the professor choose a different color scheme for the course. (Style B: replace the image & match to monochromatic or full color faded styling — you might need to reduce opacity of these to keep the design subtle enough.)
Step 3
Replace the branding if the course requested Departmental branding.
Step 4
Hide the black box then Export as JPGs. Save and upload the PSD file to the PSD templates folder on Box.
Step 5
Post exported JPG on BC for feedback.
Step 6
Upload JPG to the JPGs folder on Box when approved.
How-to Edit the Animated Stingers
Style A Templates folder / Style B Templates folder
After you have created all of the course graphics for the course, it is now time to create the stinger animations.
First, it is important to make a list of all of the stinger animations that you will need for that course.
For this training, pleas export 2 stinger animations for Style A and B: Chat and Quiz. (export 4 total stingers)
Step 1
Open the AE file in the folder StingerAnimation_MasterTemplate > “Stinger-Animation.aep”
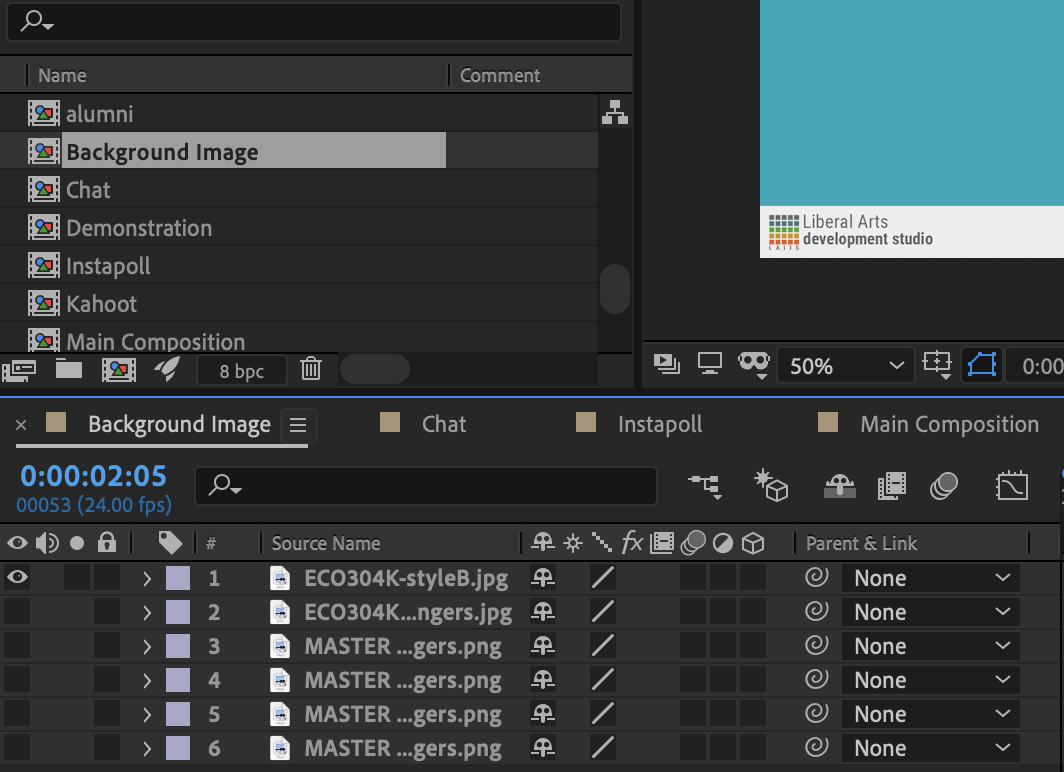
Step 2: Background
Drag in the blank powerpoint background that was created for the course.
For Style B courses, you will need to make a new background that is solid colored.

In AE, locate and open the “Background Image” Composition and add the new background image into the composition. Make sure the one you added is the only one visible.
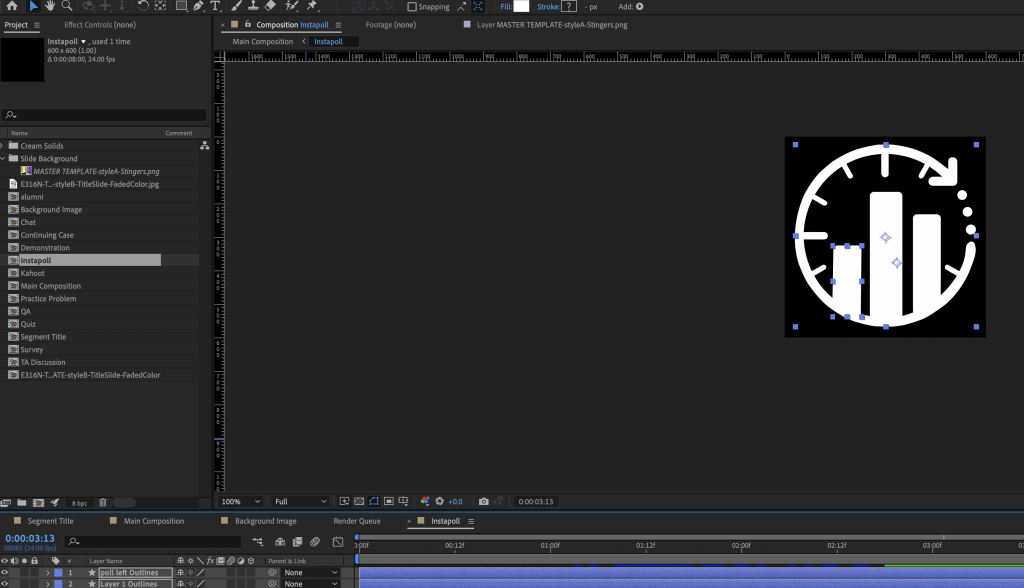
Step 4: Main Composition
The Main Composition is where the entire animation is created. Based on the stinger animations that you will need, there are labeled compositions for each stinger available. Make “visible” the stinger animation you would like to use.
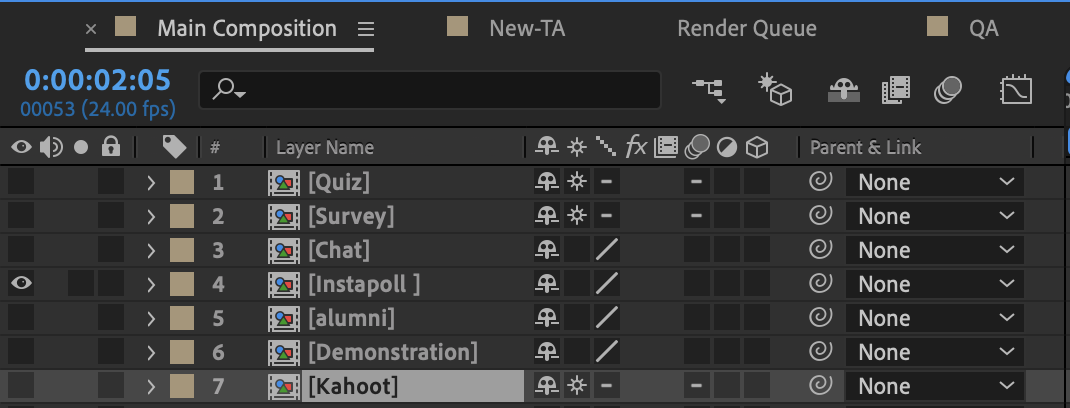
If you don’t see the animation you need for a course, please let your Team Lead or Manager know.
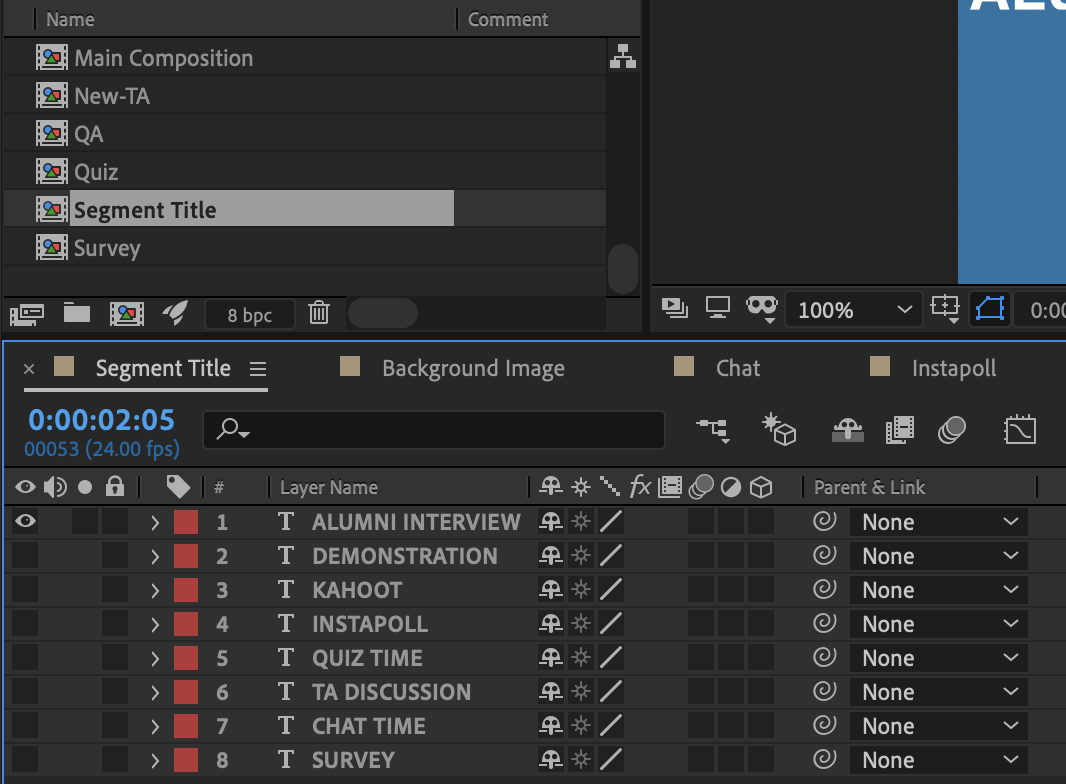
Step 4: Segment Title
Based on the animation stinger you have selected, now you want to open the “Segment Title” composition. Within this composition, you want to make “visible” the corresponding stinger title.
Step 5: Render Animation
Return to the main composition. Play through the animation to make sure the video plays smoothly. Now it is time to render, aka export, the animation.
While still in the main composition, select File > Export > Add to Render Queue.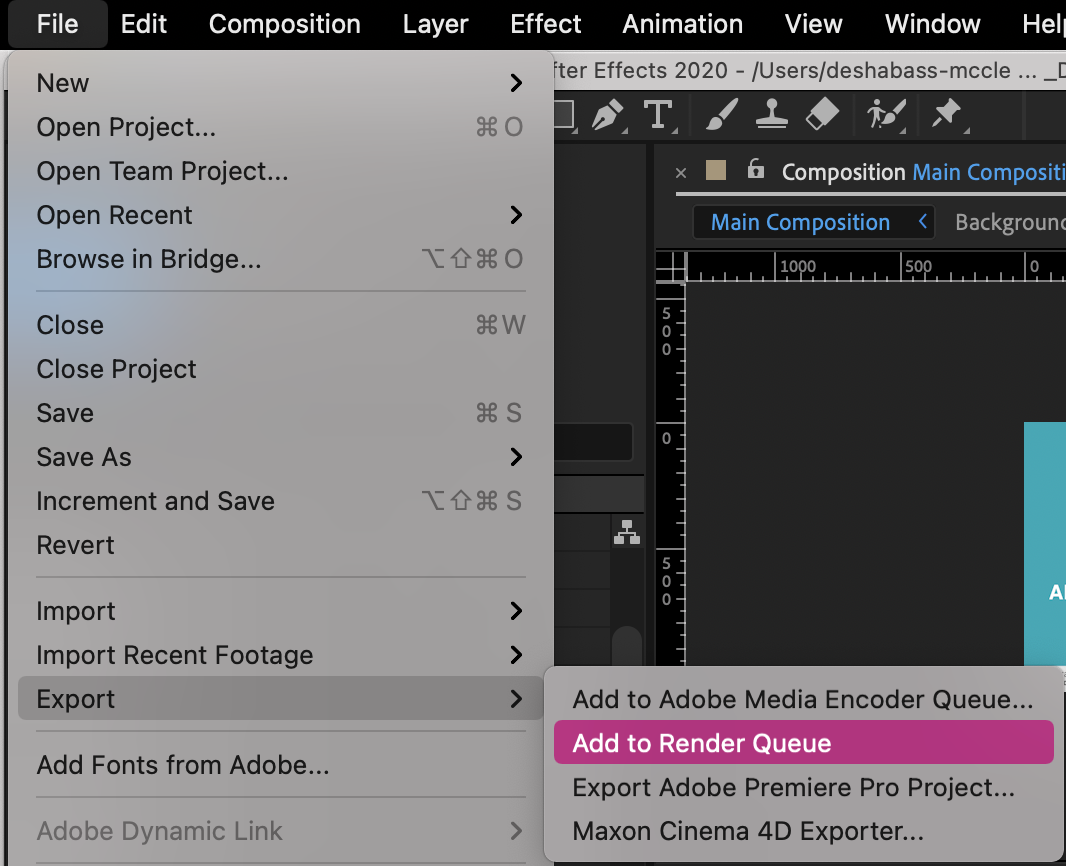
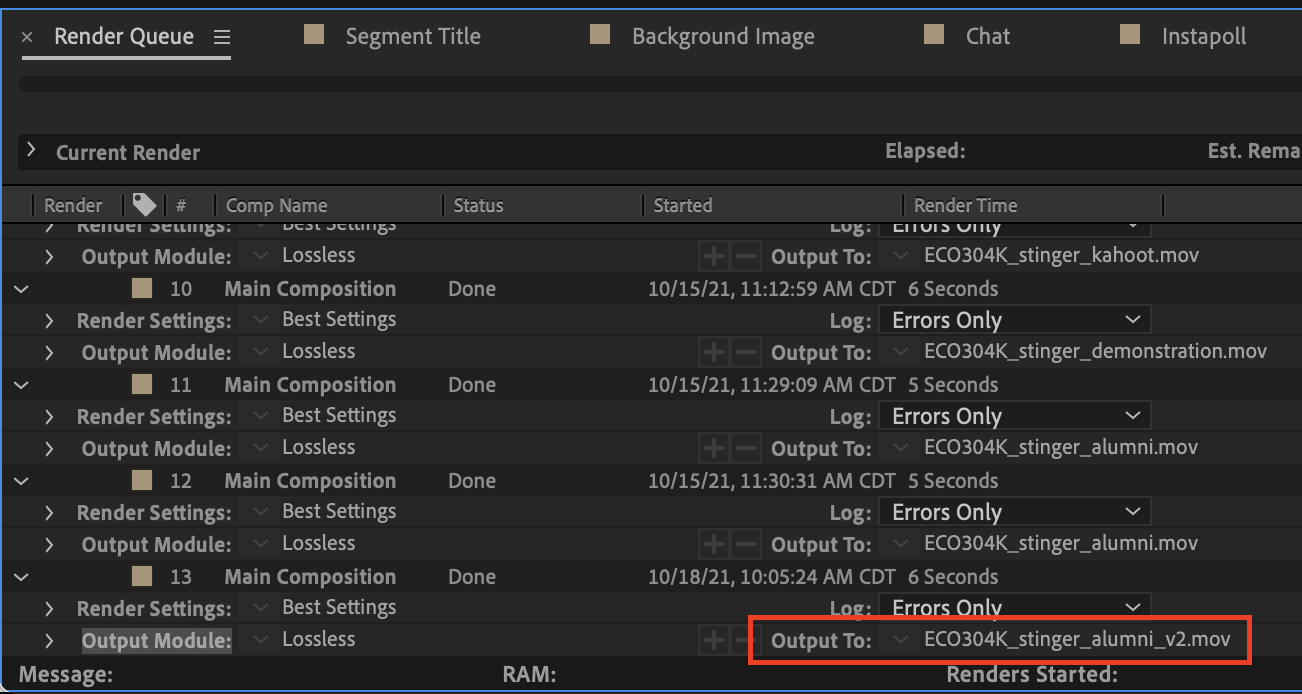
Now go to the render queue tab. Your new render should appear at the bottom of the file. Make sure that you change the “Output To” the right file naming conventions and the place you want to rendered video to go.
Step 6: Export as a .mp4
The video is now in a .mov file, but we want it to be a .mp4. Open up the “Media Encoder” Application on your computer.
Drag and drop the .mov file into the Media Encoder.
Make sure it is set to H.264 and High bitrate. In addition, make sure it will go to the desired folder.
Press the green play button to render the animation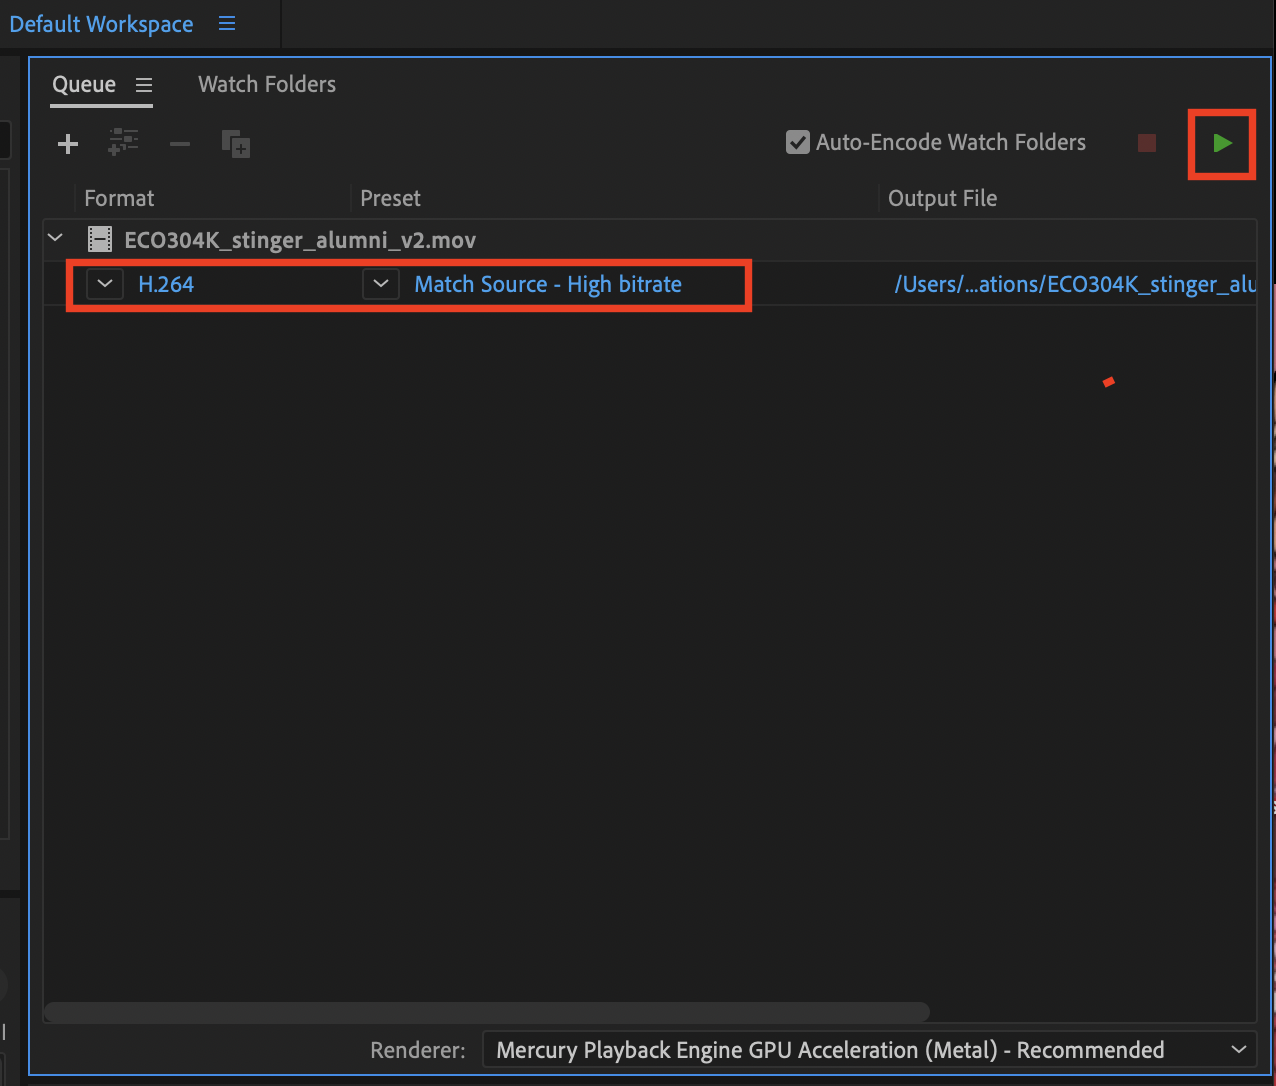
Addendum: Changing Fill Colors of Text and/or Icon
When you are using a light background, you might want to change the icon and text to black or another color to ensure contrast. In order to do this in Aftereffects, first click on the icon (e.g. Instapoll). This should bring you to a separate window. Use your mouse to select all of the icon and navigate to the fill icon on the top bar to change it.
For text, the process is more straightforward. Just double click on the text in the main composition to bring up the segment title window. From there, you may highlight the text and pick a new color.
Step 8: Final
The animation is now ready to be shared. Make sure that you have used the correct filing conventions. If you are unsure, ask you manager or project lead.
Upload the 4 total mp4’s (2 for Style A, 2 for Style B) onto Basecamp for approval.
Use a screenshot of your stinger animations

SUPPLEMENTARY (not training)
PPT Template: Stinger Slides
Style A Templates folder / Style B Templates folder
As of Fall 2021 most course stingers are animated & created through the AE template process outlined above. In the case your course requires a static stinger, follow below steps:
Go to the folder for your requested style, find the banner template by going to PSD MASTER template > MASTER-TEMPLATE-styleA/B-4Stingers.psd
Step 1
Replace the branding if the course requested Departmental branding
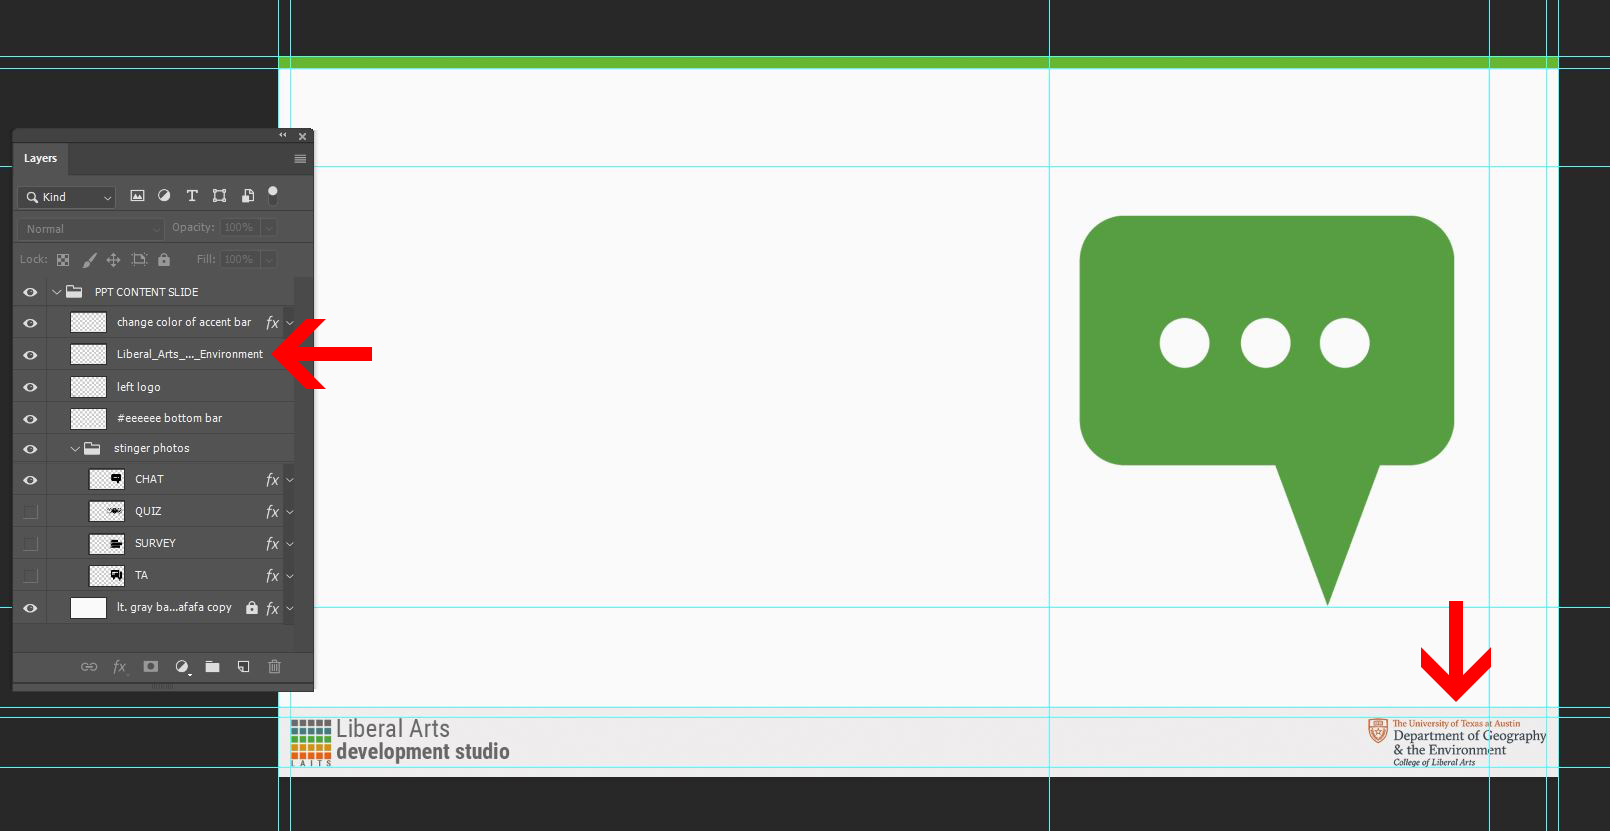
Step 2
Change the top accent bar color and icon color if the professor specified a color scheme for the course. (Change background color for Style A stingers)
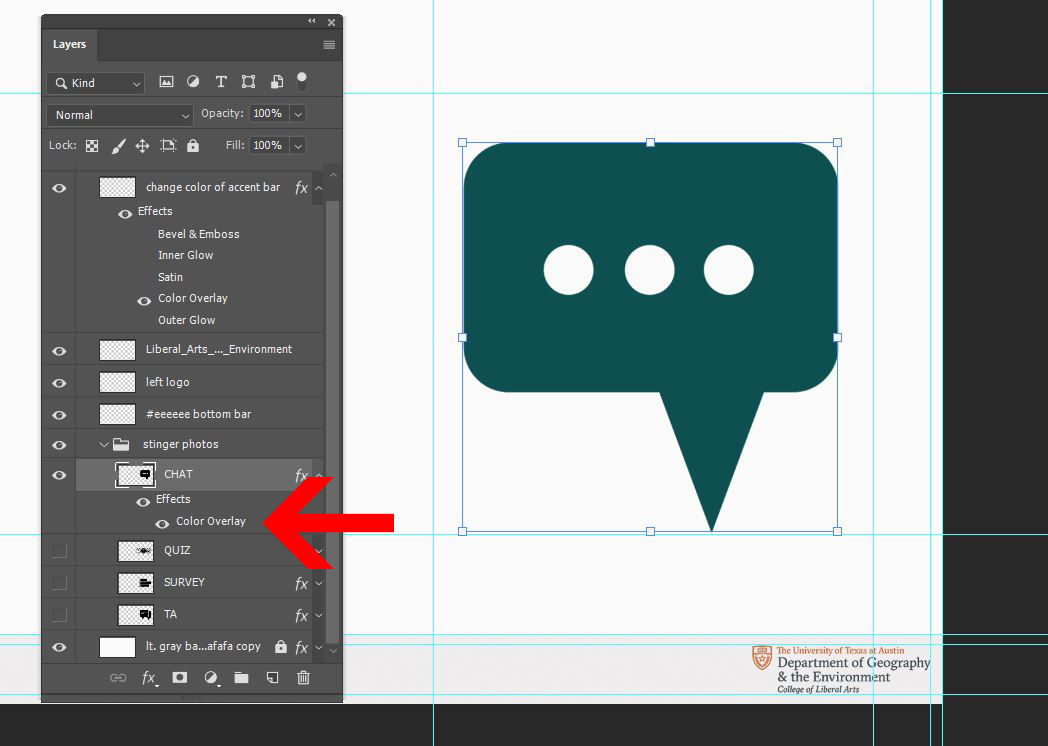
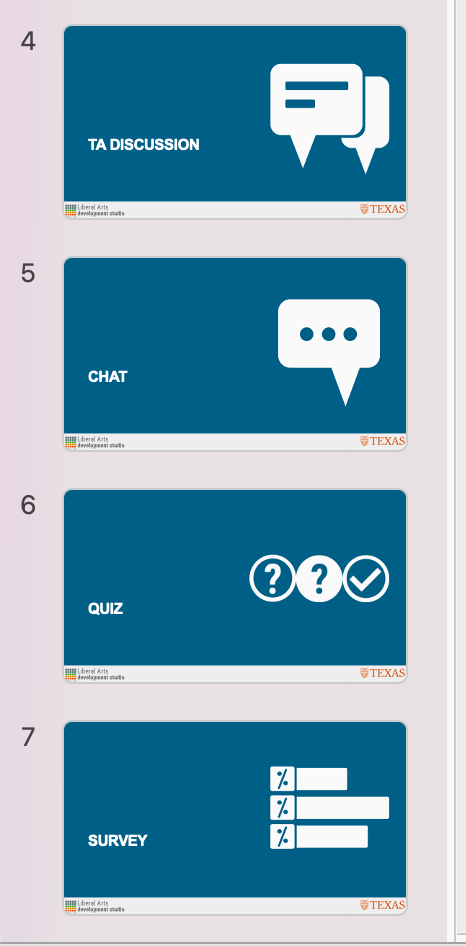
Step 3
Export each stinger with a different icon as JPG. Save and upload the PSD file to the PSD templates folder on Box.
Step 4
Use these JPGs as background for the stinger slides in your PPT template. Refer to PPT Template: Formatting Slide Template.